For 1990-2009 cars only
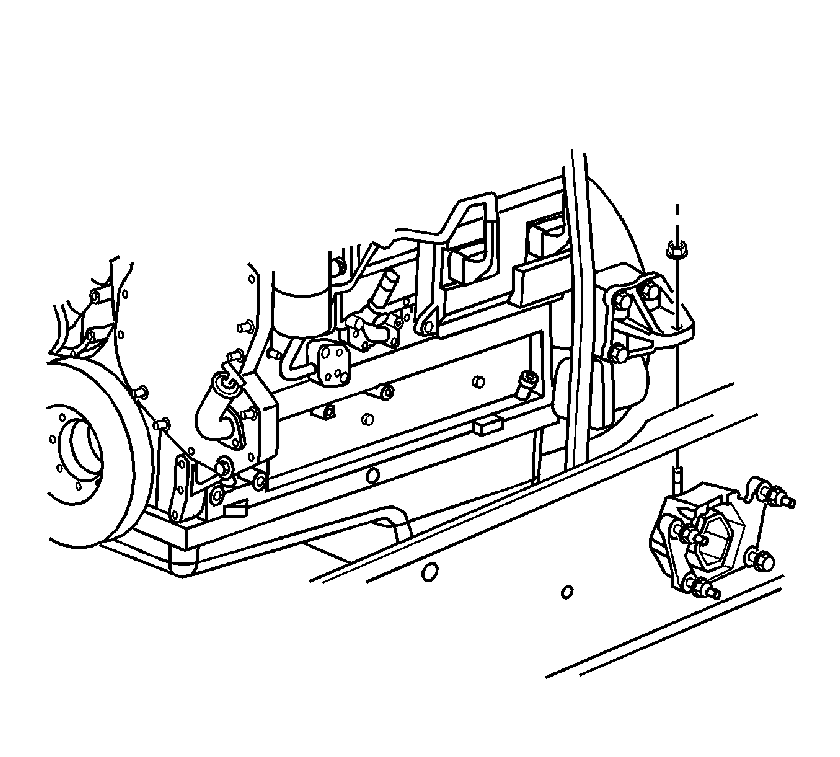
Removal Procedure
- Raise and suitably support the vehicle with safety stands. Refer to Lifting and Jacking the Vehicle .
- Remove engine cover to gain access to rear mounts. Refer to Engine Cover Replacement .
- Support the engine using suitable safety stands.
- Disconnect any engine harness clips or line routing on the engine mount bracket.
- Use a suitable engine hoist to lift weight off the engine mounts.
- Remove the engine rear mount bracket to engine mount.
- Remove the rear engine mount bracket. Refer to Engine Rear Mount Bracket Replacement .
- If the body mount is supported by the engine mount fasteners support the body with a jack or stand.
- Remove the engine mount to frame bolts/nuts.
- Remove the rear engine mount assembly.
Installation Procedure
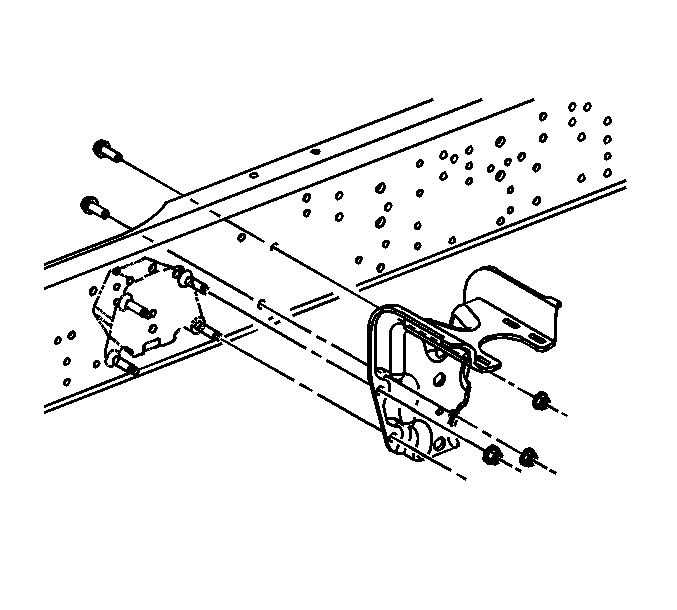
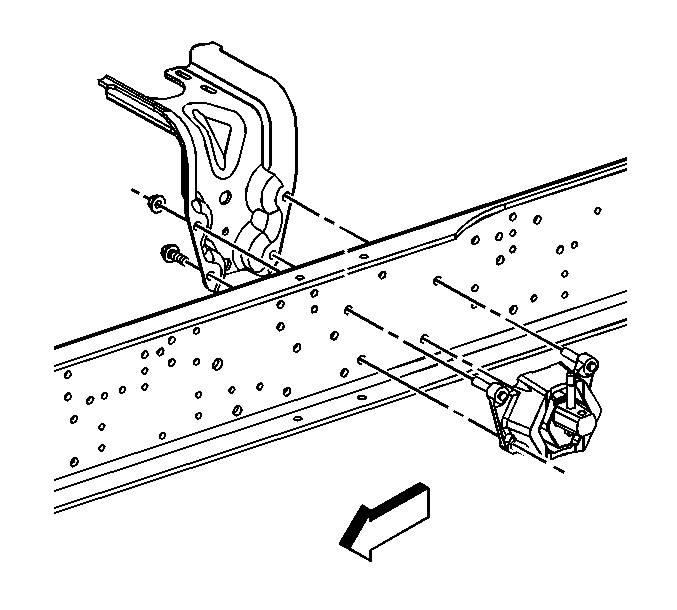
- Install the rear engine mount assembly .
- Install the rear engine mount to frame nuts.
- Install the engine mount to frame nuts.
- Install the rear engine mount bracket. Refer to Engine Rear Mount Bracket Replacement .
- Remove jacks or stands supporting the body if used.
- Lower the rear engine mount bracket on to the engine mount.
- Install the rear engine mount bracket to engine mount nut.
- Install any engine harness clips or lines routing on the engine mounts.
- Remove the engine safety stands and engine hoist.
- Install engine cover. Refer to Engine Cover Replacement .
- Lower the vehicle.
Notice: Refer to Fastener Notice in the Preface section.
Tighten
Tighten the rear engine mount to frame nuts to 160 N·m (118 lb ft).
Tighten
Tighten the rear engine mount bracket to the engine mount nut to 195 N·m (144 lb ft).
