Exhaust Manifold Pipe Replacement 6.6L and 8.1L
Removal Procedure
Caution: In order to avoid being burned, do not service the exhaust system while
it is still hot. Service the system when it is cool.
Caution: Always wear protective goggles and gloves when removing exhaust parts
as falling rust and sharp edges from worn exhaust components could result
in serious personal injury.
- Raise and suitably support the vehicle. Refer to
Lifting and Jacking the Vehicle
in General Information.
- If equipped with the 8.1L engine, remove the exhaust muffler. Refer to
Muffler Replacement
.
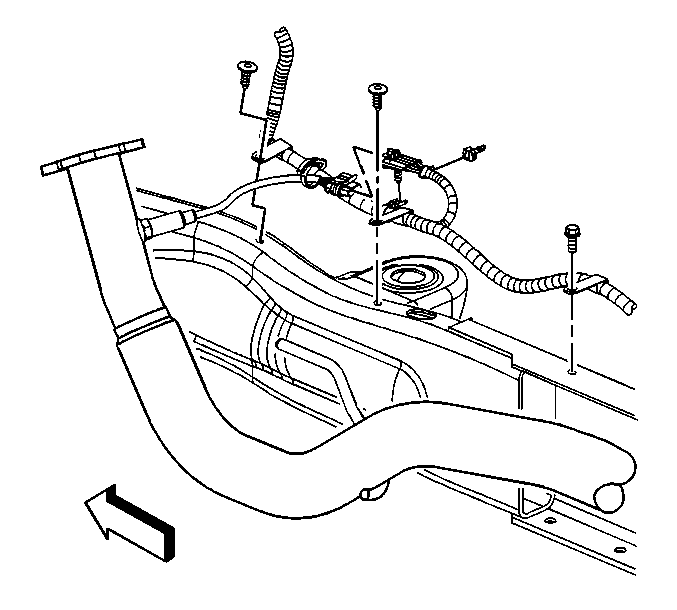
- If equipped with a 8.1L engine, perform
the following:
| 3.1. | Remove the clip around the engine harness and the oxygen sensors pigtail. |
| 3.2. | Disconnect the connector position assurance (CPA) retainers. |
| 3.3. | Disconnect the oxygen sensors electrical connector. |
| 3.4. | If replacing the exhaust manifold pipe, remove the oxygen sensors. |
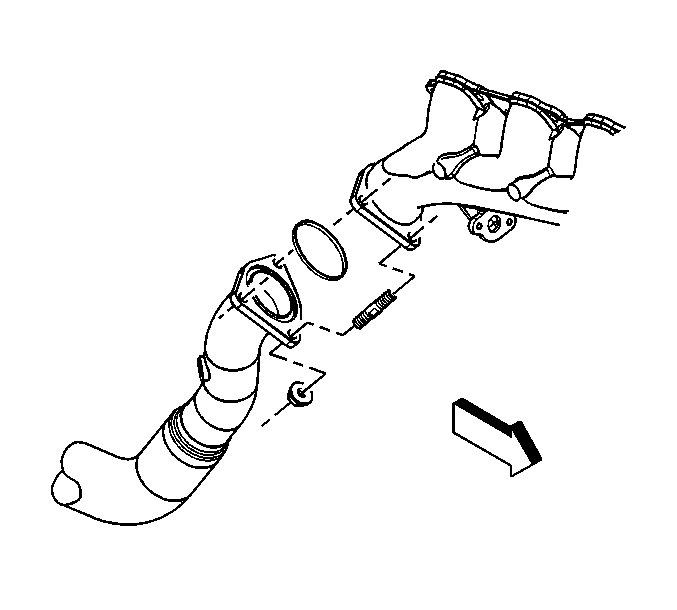
- if equipped with a 8.1L engine, remove the
exhaust manifold pipe nuts.
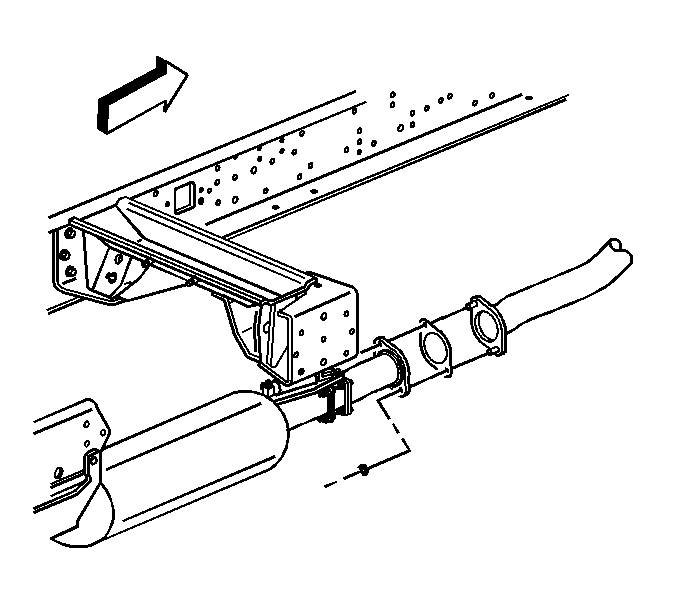
- If
equipped with the 6.6L engine, remove the exhaust.
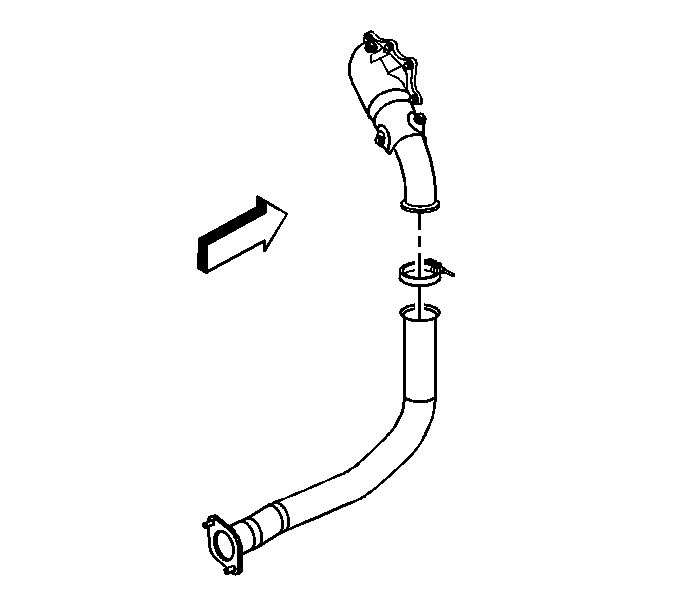
- If equipped with a 6.6L engine, loosen the exhaust pipe clamp.
- Slide the exhaust pipe clamp up onto the exhaust pipe adapter.
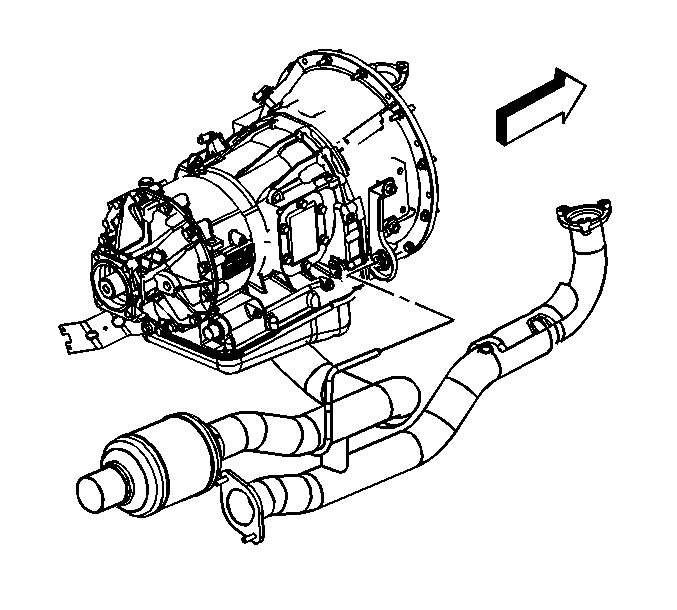
- If equipped with a 8.1L engine, remove the exhaust manifold pipe.
- Slide the exhaust manifold pipe hanger out of the exhaust pipe hanger
bracket.
- Discard the exhaust manifold pipe seal.

- If
equipped with a 6.6L engine, remove the exhaust manifold pipe.
- Slide the exhaust manifold pipe hanger out of the exhaust pipe hanger
bracket, discard gasket.
Installation Procedure
Notice: When inspecting or replacing exhaust system components, make sure there
is adequate clearance from all points on the underbody to prevent overheating
of the floor pan and possible damage to the passenger compartment insulation
and trim materials.
- If equipped with a 6.6L engine, install the exhaust manifold pipe.
- Apply water based lubricant to the exhaust pipe hanger bracket, in order
to aid in installation.
- Slide the exhaust manifold pipe hanger into the exhaust pipe hanger bracket.

- If equipped with a 8.1L engine, install a new exhaust manifold pipe seal to
the exhaust manifold pipe.
- Install the exhaust manifold pipe.
- Apply lubricant to the exhaust pipe hanger bracket, in order to aid in
installation.
- Slide the exhaust manifold pipe hanger into the exhaust pipe hanger bracket.
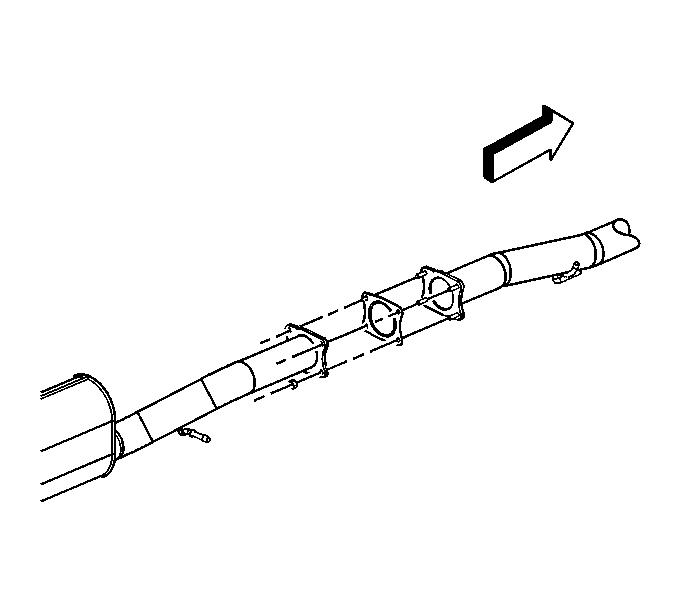
- If equipped with the 6.6L engine, install
the exhaust .

Important: Ensure that the manifold pipe is square to
the exhaust pipe adapter.
- If equipped with a 6.6L engine, slide the exhaust pipe clamp down and around
the pipe connection.
Notice: Refer to Fastener Notice in the Preface section.
- Tighten the exhaust pipe clamp and muffler nuts.
Tighten
| • | Tighten the exhaust pipe clamp to 40 N·m (30 lb ft). |
| • | Tighten the exhaust muffler nuts to 40 N·m (30 lb ft). |

- If equipped with a 8.1L engine, install
the exhaust manifold pipe nuts.
Tighten
Tighten the exhaust manifold pipe nuts to 50 N·m
(39 lb ft).

- If equipped with a 8.1L engine, and the
exhaust manifold pipe was replaced perform the following:
| 12.1. | Apply anti-seize compound GM P/N 12377953 or equivalent
to the threads of the old oxygen sensor. |
| 12.2. | Install the old oxygen sensor. |
Tighten
Tighten the oxygen sensor to 42 N·m
(31 lb ft).
- If equipped with a 8.1L engine, and the exhaust manifold pipe was not
replaced perform the following:
| 13.1. | Connect the oxygen sensor electrical connector. |
| 13.2. | Connect the CPA retainer. |
| 13.3. | Install the clip around the engine harness and the oxygen sensor pigtail. |
- If equipped with the 8.1L engines, install the exhaust muffler. Refer
to
Muffler Replacement
.
- Lower the vehicle.
Exhaust Manifold Pipe Replacement 7.8L and 7.2L CAT
Removal Procedure
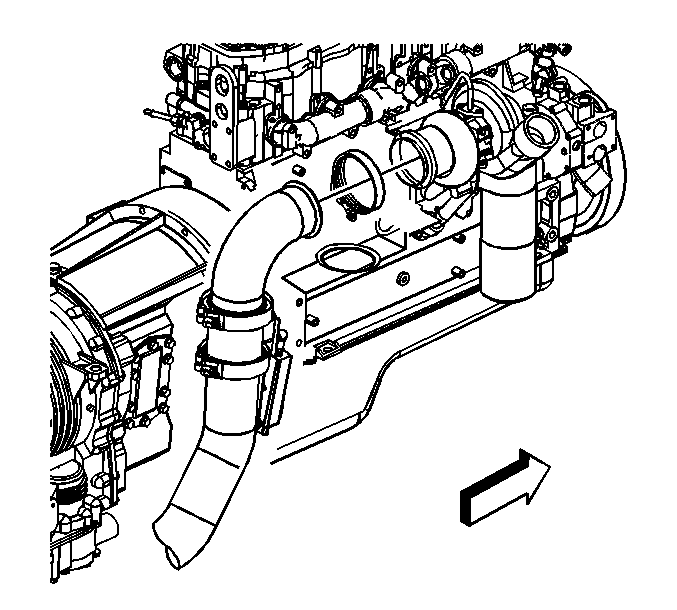
- Remove the clamp from the turbocharger/exhaust brake.
- Remove the clamp from the exhaust pipe bracket.
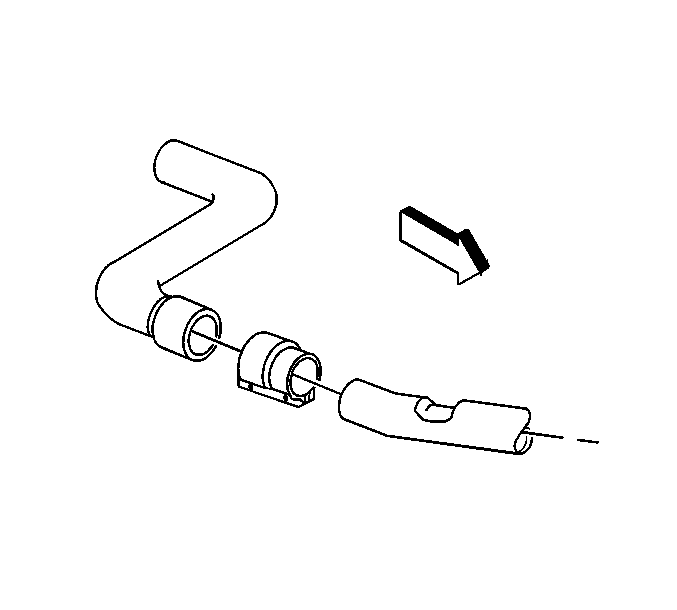
- Remove the band clamp from the flex pipe.
- Remove the front exhaust pipe.
- Inspect all of the components for the following conditions:
- Replace the above components as necessary.
Installation Procedure

- Install the front exhaust pipe.
Notice: Use the correct fastener in the correct location. Replacement fasteners
must be the correct part number for that application. Fasteners requiring
replacement or fasteners requiring the use of thread locking compound or sealant
are identified in the service procedure. Do not use paints, lubricants, or
corrosion inhibitors on fasteners or fastener joint surfaces unless specified.
These coatings affect fastener torque and joint clamping force and may damage
the fastener. Use the correct tightening sequence and specifications when
installing fasteners in order to avoid damage to parts and systems.
- Install the band clamp to flex pipe.
Tighten
Tighten the clamp to 24 N·m (18 lb ft).

- Install the clamps on the front exhaust pipe.
Tighten
- Tighten the turbocharger/exhaust brake clamp assembly to 10 N·m (89 lb in).
- Tighten the exhaust pipe bracket clamp nut to 24 N·m (18 lb ft).


