DOOR OPENING EFFORTS (SERVICE PROCEDURE)

Model and Year: 1990 W CAR
THIS BULLETIN CANCELS AND SUPERSEDES BULLETIN 90-25-10, DATED JUNE 1989. THE MEASUREMENT IN ITEM #2 HAS BEEN CHANGED FROM 3.0 MM TO 2.0 MM. ALL COPIES OF 90-25-10 SHOULD BE DISCARDED.
1. FRONT DOORS RAMP OFF STRIKER
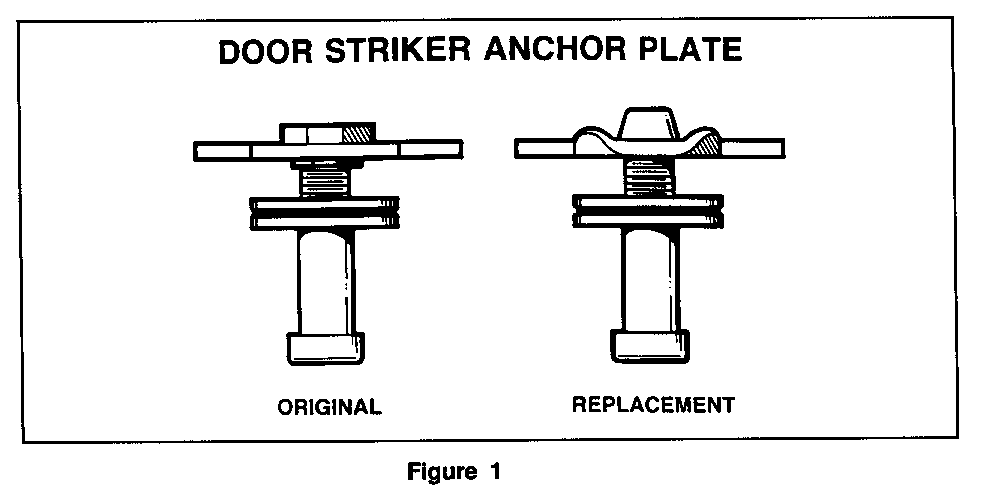
If customer comments about front door opening efforts, this condition may be caused by the location of the striker in relation to the latch assembly. If door alignment in opening looks good, this condition may be repaired by replacing the current striker anchor plate which is not adjustable with new anchor plate, P/N 20277001 which allows for approximately 3mm up and down and side to side adjustment. See Figure 1 for identification of striker anchor plates.
Procedure:
---------- A. Loosen striker three turns.
B. With suitable hammer drive the head of the striker rearward to release anchor plate from the body.
C. With center pillar inside garnish molding removed, grasp anchor plate and remove striker bolt, remove and discard old plate.
D. Install anchor plate, P/N 20277001 into center pillar and reinstall striker.
Part is currently available from GMSPO.
E. Adjust as necessary and torque to 39 ft. lbs.
Labor Operation Number: T1498 Right Side (Replace front door striker anchor plate) T1499 Left Side
Labor Time: .3 Hours
2. REAR DOOR LATCH RAMPS OFF STRIKER
If customer comments about rear door opening efforts, this condition may be caused by improper fore and aft adjustment of the door lock striker or a mislocated striker to latch assembly. Improper fore ahd aft adjustment may be determined and addressed by using the procedure listed in the 1990 Lumina Service Manual, Section 10-5-16. If the door latch assembly ramps off the striker this condition may be repaired by a slight bend of no more than +/- 3.0mm to the striker in desired direction. Use a 3/4 inch I.D. pipe fit over the end of the striker to bend.
IMPORTANT: The striker does not actually bend, but the sheet metal at the striker mounting area will deform slightly. Adjustment must not exceed +/- 2.0mm. If necessary adjustment can not be accomplished with that amount of adjustment, complete alignment by standard door alignment procedures.
Labor Operation Number: 4400 Right Side (Door Assembly, Rear Align)
4401 Left Side
Labor Time: .3
3. FRONT/REAR DOORS BIND WHEN OPENING
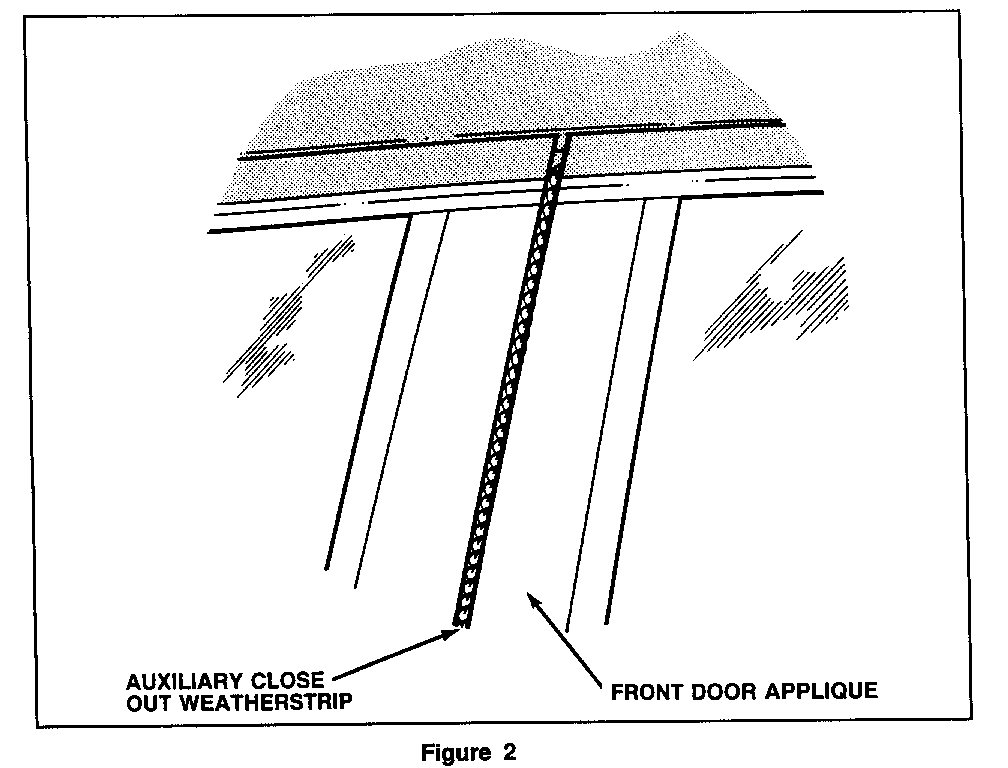
If customer comments about initial front or rear door opening efforts, this condition may be caused by interference of the door upper frame to the auxiliary seal strip along the roof.
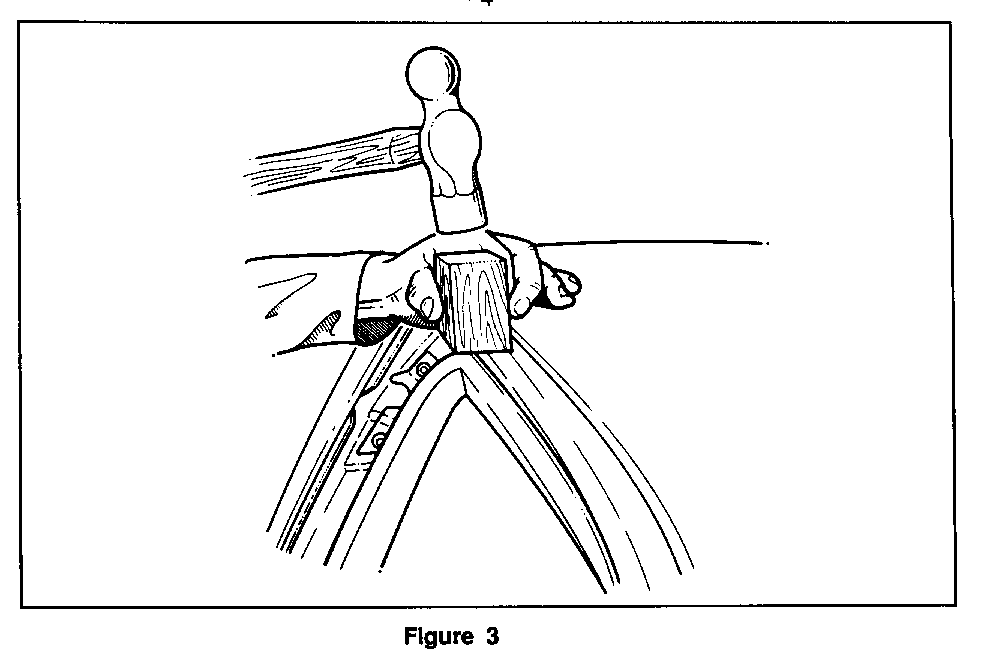
This condition may be addressed by using a hammer and a block of wood, bend the auxiliary seal strip mounting flange slightly downward to relieve the interference in affected area. It is not necessary to remove the seal strip from the flange for this repair. See Figure 2.
Labor Operation Number: T1500 Right Side (Auxiliary Weatherstrip Adjust) T1501 Left Side
Labor Time: .3
FRONT DOOR BIND WHEN OPENING AFTER REAR DOOR IS OPENED AND CLOSED AND THEN FRONT DOOR IS OPENED.
If customer comments about a front door bind when opening after the rear door is opened and closed, this condition may be caused by the auxiliary close out weatherstrip attached to the front of the rear door catching on the front door frame applique as the front door is opened. (See Figure 3)
This condition may be repaired by opening the front door, loosening the rear door upper door to hinge nuts and adjusting the door inboard at the hinge NO MORE THAN 1.5mm. After necessary adjustment has been made, make sure that the top of the door frame has sufficient clearance to the roof and does not come in contact when closing.
Labor Operation Number: 4400 Right Side (Door Assembly, Rear - Align) 4401 Left Side
Labor Time: .3


General Motors bulletins are intended for use by professional technicians, not a "do-it-yourselfer". They are written to inform those technicians of conditions that may occur on some vehicles, or to provide information that could assist in the proper service of a vehicle. Properly trained technicians have the equipment, tools, safety instructions and know-how to do a job properly and safely. If a condition is described, do not assume that the bulletin applies to your vehicle, or that your vehicle will have that condition. See a General Motors dealer servicing your brand of General Motors vehicle for information on whether your vehicle may benefit from the information.
