WINDNOISE DIAGNOSIS/CORRECTION SERVICE INFORMATION

SUBJECT: WIND NOISE DIAGNOSIS AND CORRECTION
VEHICLES AFFECTED: 1988 - 1991 'W' CAR
INTRODUCTION:
------------- Drivers don't give much thought to how quiet it is inside their car - unless they're troubled by a wind noise.
Minimizing wind noise is one of the most important challenges facing design engineers. If customers feel their car has too much of it, it's up to you, the service technician, to investigate their concern.
Most wind noises are caused by either leaking seals or misaligned body surfaces. The result is air, or wind, going where it shouldn't.
There are three basic types of wind noise: o Whistle o Roar o Rush
WIND WHISTLE:
When moving at highway speeds, air pressure inside a vehicle becomes significantly greater than the air pressure outside, as shown in Figure 1. If there's a leak, the escaping air causes a hiss or whistle.
You don't have to look any further than a tire for an example of a similar condition. The air pressure inside the tire is more than the air pressure outside the tire.
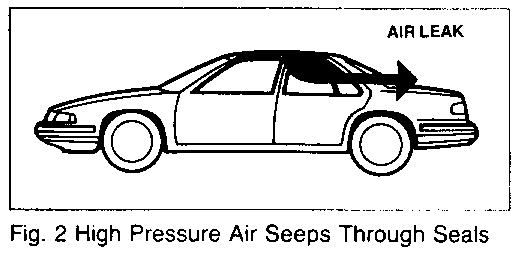
If the tire is punctured, the high pressure air inside the tire leaks out. A wind whistle is similar to the hiss of a leaky tire. High pressure air inside the car seeps out if all of the seals aren't tight. Refer.to Figure 2.
WIND ROAR:
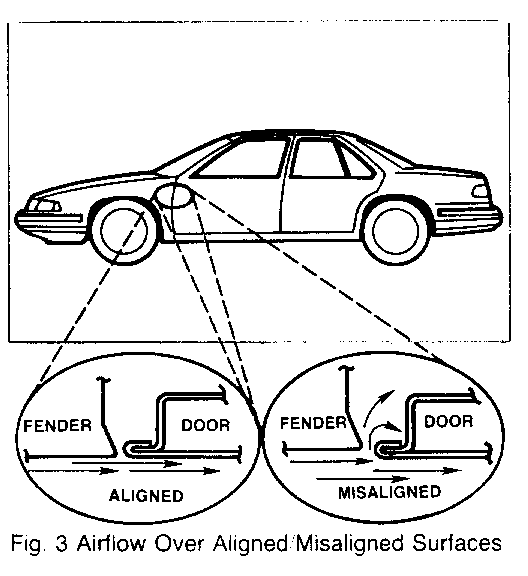
Wind roar is caused by air passing over or through an opening between two body surfaces.
The sound made by blowing across the top of an open bottle is similar to a wind roar. Air flowing across the top is interrupted or redirected by the bottle.
Vehicles are carefully engineered so openings between body surfaces don't interfere with airflow.
If body surfaces aren't aligned properly, they can cause wind roar, as shown in Figure 3. You'll want to make adjustments so wind passes over these openings quietly.
WIND RUSH:
Wind rush is usually less irritating than wind roar or whistle.
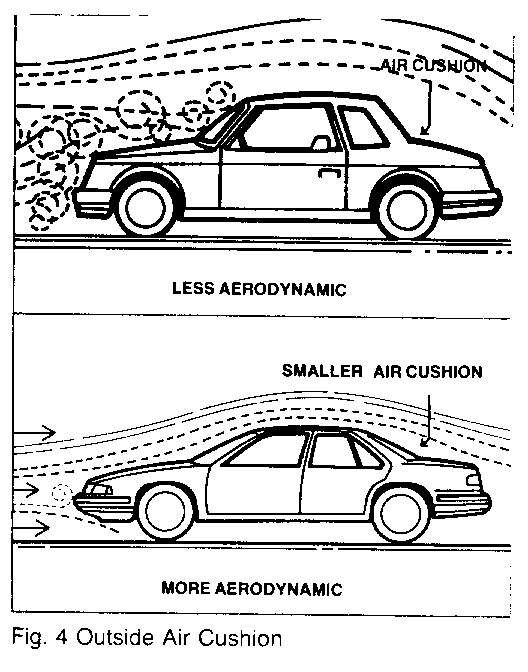
As a vehicle moves, a cushion of air moves along with it. This cushion does a good job of insulating the inside of a car from the noise caused by air rushing over it.
The more aerodynamic a vehicle is, the less air is disrupted, and the smaller the cushion is. Refer to Figure 4.
Most drivers won't notice wind rush, but some do - especially if you've already repaired a whistle or roar condition, and they're listening for wind noise.
You may have done all you can short of changing the shape of the vehicle, and the customer still isn't satisfied. In this case, you or the service advisor may want to explain to the customer what's causing the noise and how you determined the cause.
However, before you tell your customer it's a wind rush problem, you should be confident it's not a whistle or roar that can be repaired.
DIAGNOSIS:
----------- Diagnosing wind noise conditions is basically a three-step process:
1. Customer Comments. 2. Road Test. 3. Shop Tests.
CUSTOMER COMMENTS:
The service advisor should get as many details about the problem as possible by asking a few basic but important questions.
First, where does the customer think the noise is coming from, and where is it loudest?
When does the noise occur? At what speed is it noticeable? Is the interior fan on HIGH, LOW or OFF? Are the windows UP or DOWN?
The customer should also be asked what the noise sounds like.
If the service advisor has obtained good information from the customer concerning the nature of the problem, verifying the condition should be easy.
ROAD TEST:
The next step in diagnosing a wind noise condition is to road test the vehicle to experience the customer complaint, and begin to pinpoint the noise area.
VISUAL INSPECTION:
Before going on the road test, give the vehicle a quick visual inspection. Look for obvious things such as misaligned components, loose fasteners, broken weld joints and sealer or adhesive skips. Weatherstrips may be torn, or trapped under garnish mouldings or the passive restraint clevis.
If you find any of these conditions, don't make a repair yet - just note them, then listen for any noise they may be causing on the road test.
Bring masking tape, a screwdriver and a china marking or grease pencil on the road test.
RECREATE AND IDENTIFY THE CONDITION:
On the road test, use customer comments to recreate the conditions when the noise occurs.
The next step, is to identify the noise, is it internal or external? If you open a window and the noise gets louder, it's probably an external noise, caused by air passing over body panels, seams or openings.
If the wind noise can't be heard with a window lowered, the noise is internal. It's most likely a whistle caused by air leaving the inside of the vehicle through a seal or seam.
PINPOINTING EXTERNAL NOISES:
You can further pinpoint external wind noise by lowering one window at a time. If the noise is louder at a particular window, you can start pinpointing your diagnosis at that section of the car.
If an external wind noise location corresponds with a condition you noticed during your visual inspection, pull the vehicle over and make a temporary repair with the masking tape or the screwdriver.
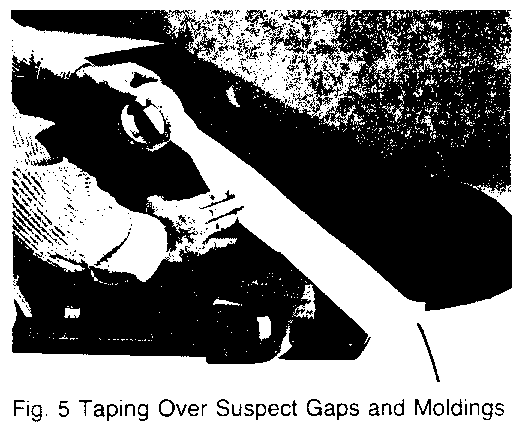
Tape over gaps and mouldings one at a time, starting with those that look suspect, and are in the area the noise is coming from, refer to Figure 5. When you tape over the area needing repair, the noise will go away.
PINPOINTING INTERNAL NOISES:
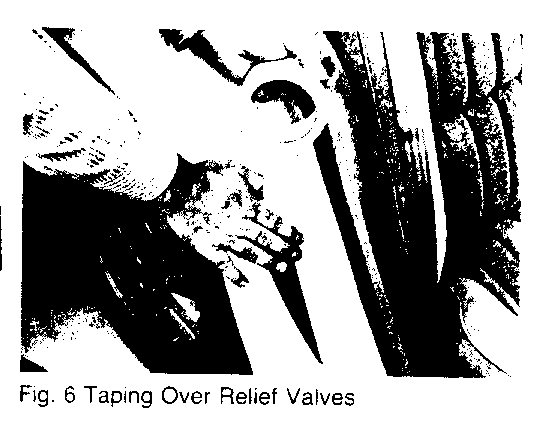
To help locate the source of internal wind noise, tape over the relief valves. Refer to Figure 6. This airflow restriction will cause additional air pressure to build up inside the vehicle.
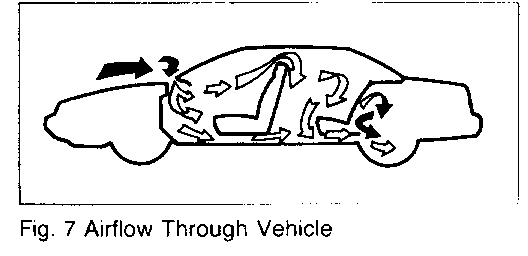
Air leaves the interior through these valves, as shown in Figure 7. By blocking them off, air pressure will build up and help reveal any weak spots in the seams or seals. The added pressure should make wind whistle leaks easier to hear.
If you suspect a whistle is coming from a particular seal, pull over and tape over that seal from the outside. If you taped over the leaking seal, the noise will be gone when you try to recreate it again.
Once you make a temporary repair which eliminates a wind noise, you may make a second noise more noticeable.
SHOP TESTS:
If you have completed the road test, and haven't been able to pinpoint the source of an internal wind noise, there are several additional diagnostic tests you can perform in the shop.
TRACING POWDER/CHALK: ---------------------- One of the simplest and most effective checks for weatherstrip leaks is the tracing powder or chalk test.
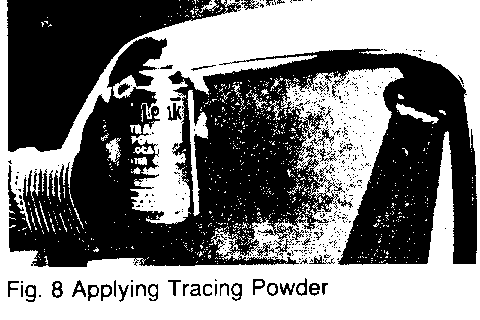
First, clean the weatherstrip with solvent cleaner. Next, apply the powder or chalk to the weatherstrip's mating surface, as shown in Figure 8.
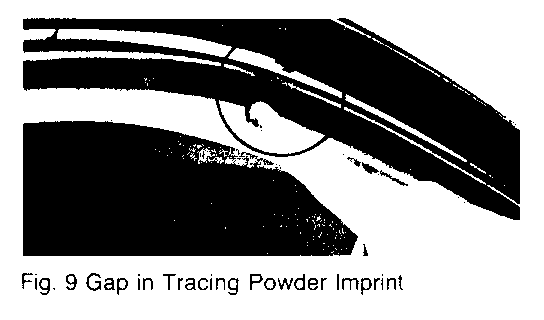
Press the panel against its mating surface firmly, without slamming, closing it completely. When you reopen it, there will be an imprint left whenever the weatherstrip made good contact with the mating surface. Gaps in the imprint indicate a poor seal. Refer to Fig.9.
SOAP BUBBLE:
On the road test, you taped the pressure relief valves and shut the doors and windows to create higher pressure inside the vehicle. By turning the interior fan on HIGH, you can create a similar condition in the shop.
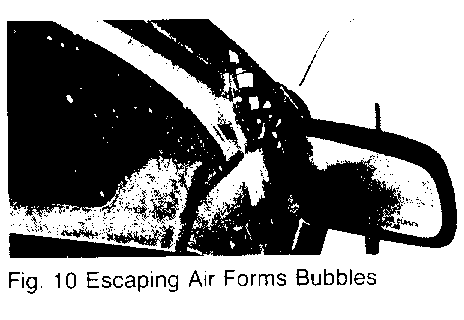
You can then spray a soapy solution along the outside of the suspected area. If air is escaping from an area, bubbles will form, as shown in Figure 10.
SONIC DETECTOR:
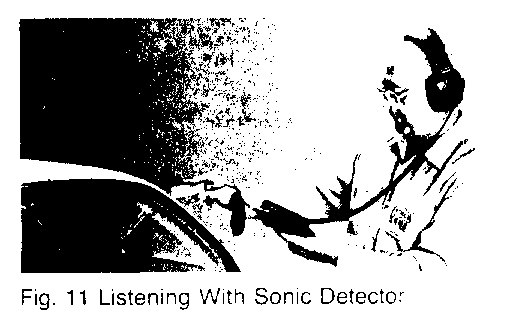
Another method which doesn't involve taping the relief valves and turning on the fan uses a sonic detector to pinpoint leaks.
Place the tone generator inside the vehicle and listen with the detector along the door and window seals, as shown in Figure 11.
REPAIRS:
-------- Repairs associated with external wind noise are usually straight forward. If panels are misaligned, or mouldings, trim or other components are loose, just make the repair according to the shop manual procedure.
Repairing internal wind noise is also usually straightforward. After you've found the location of the leak, the appropriate repair should be apparent.
Check the appropriate service manual for the proper procedure if you're not sure how to adjust a component.
When adjusting a door, be sure not to create any gaps that may cause a new wind noise.
Some conditions can't be fixed by realigning components. If seals or weatherstripping need to be repaired, there are a variety of adhesive sealers and related products available. A convenient chart in the back of this bulletin lists some of the materials.
You should also be aware of any service bulletins or training materials that may be out on a vehicle you are working on. They can save you valuable time.
1990 LUMINA SEDAN:
If you diagnose a 1990 Lumina Sedan as having a wind whistle condition at any door area, the following procedures will allow you to correct it.
To perform the repairs, you'll need:
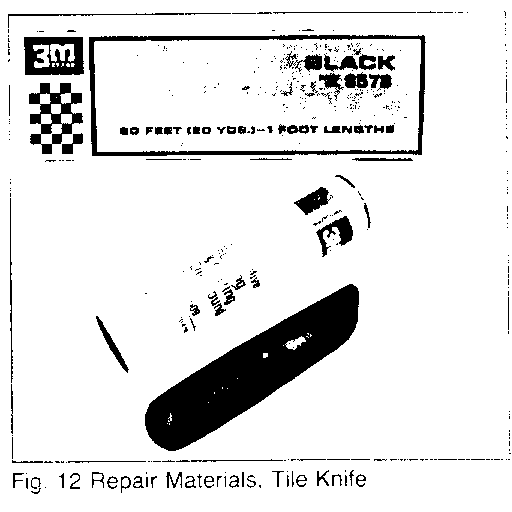
o Thumb-grade sealer/strip caulk (3M #8578 or equivalent) o Pumpable bedding and glazing compound (3M #08509 or equivalent) o Hook-end linoleum or tile knife. Refer to Figure 12.
CAUTION:
Dull the knife edge before using it in this procedure be careful not to cut yourself.
These sealers are non-curing and remain soft and pliable.
You'll also need a putty knife, plus all tools for disassembling the door trim panel, mouldings and run channel, as described in the Service Manual.
FRONT DOOR WIND WHISTLE:
DISASSEMBLY:
------------ Begin by lowering the windows. This is necessary particularly with power windows.
Remove the door trim panel according to shop manual procedure. You'll need trim panel prying tool J-24595-C.
Remove the power door lock and window control panels and the trim plate from behind the door handle. Next, pull the trim off the door bottom, including the pocket, it's held by fasteners.
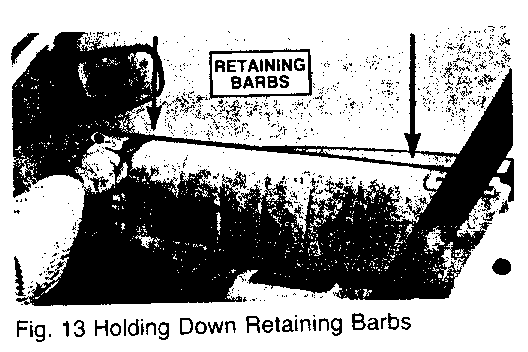
Next, using a putty knife to hold down the retaining barbs, as shown in Figure 13, pull off the top half of the trim. The putty knife will prevent the fabric from snagging.
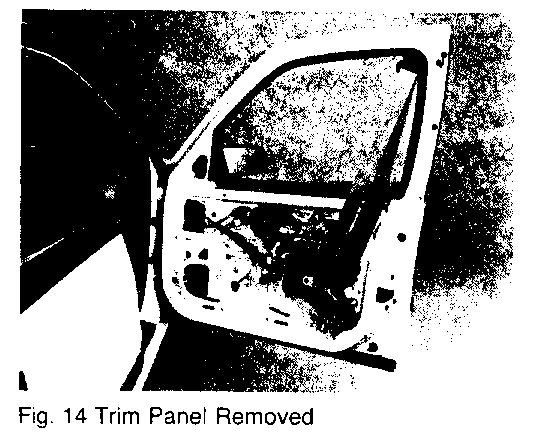
Disconnect the seat belt at the top of the window. Disconnect the remote control mirror cable, then remove the window switch and disconnect the harness. The door trim panel is now free. Refer to Figure 14.
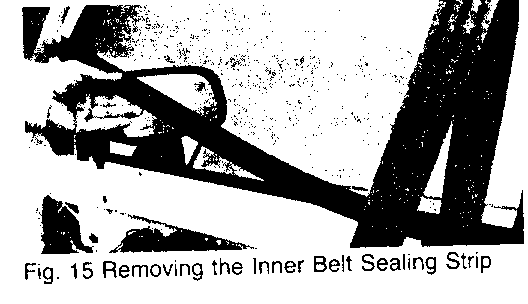
Remove the three screws holding the door trim retainer. Then remove the retainer. You can now pull up the inner belt sealing strip from the top of the door, as shown in Figure 15.
Next, remove the grommet (seal) from behind the mirror opening inside the door. Reach inside the exposed hole and remove the mirror retaining screws.
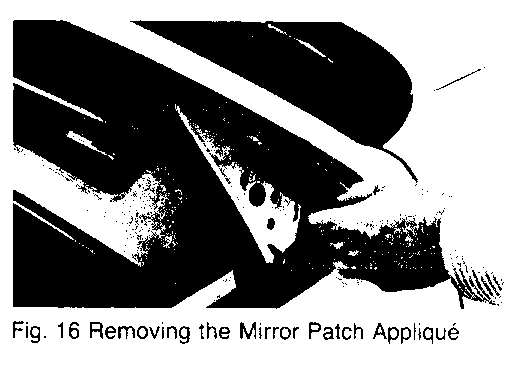
You can now pull the mirror off from the outside. Thread the remote control cable up through the door as you pull on the mirror. Next, pull off the mirror patch, applique from outside the door, as shown in Figure 16.
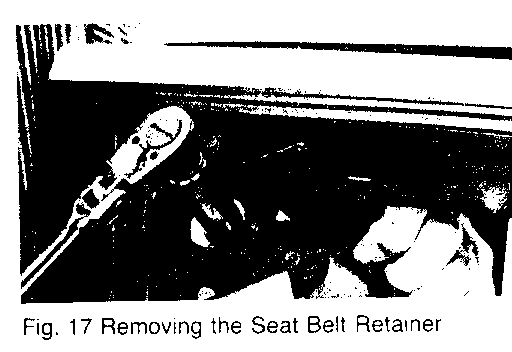
Remove the seat belt retainer from the rear upper corner of the door. Use the reverse side of the trim panel prying tool to prevent the loop from rotating as you remove the nut, as shown in Figure 17.
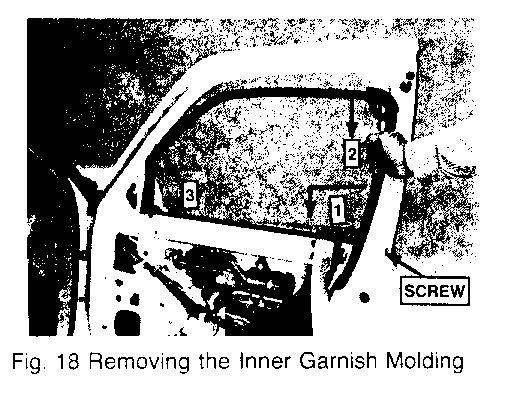
Remove the inner garnish moulding, as shown in Figure 18. There are clips holding this moulding on. Start at the rear of the door, and pull forward and down(l). Then go to the upper rear corner and pull downward(2). Continue around along the top and behind the mirror area(3).
Remove the screw located at the rear of the outer belt sealing strip, as shown in Figure 18.
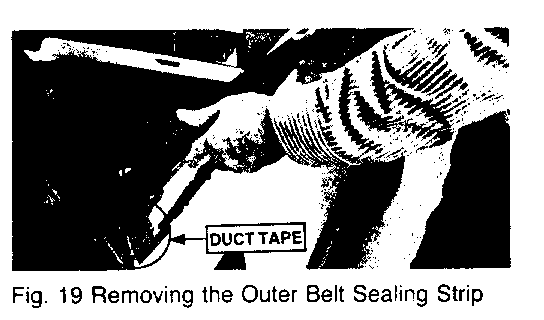
NOTICE: Apply a 10 cm(4") piece of duct tape to the bottom of the vertical door applique. This will prevent the stud on the back of the outer belt sealing strip from scratching the applique when the strip is removed. Refer to Figure 19.
Pull off the outer belt sealing strip, starting at the rear, as shown in Figure 19. It is attached to the outer top of the door by clips.
Next, remove the glass run channel from the top of the door by simply pulling forward and down.
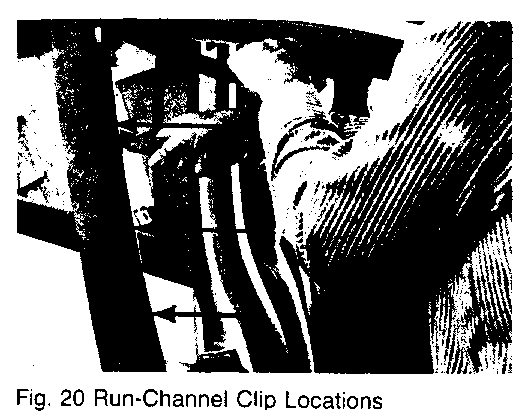
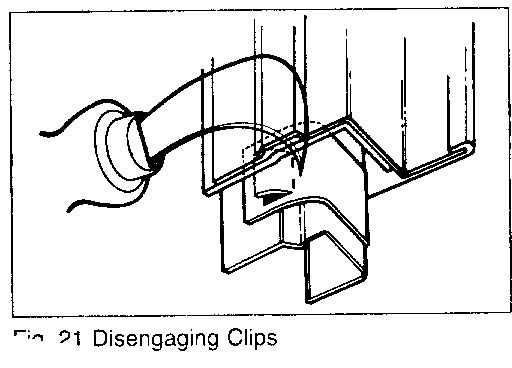
To disengage the clips retaining the back edge of the glass run channel, use a dull hook-end tile knife. There are three of these clips - near the top, middle and bottom, as shown in Figure 20.
NOTE: For the clips to disengage, position the hook behind the clip. When you pull forward, the blade should flatten the clip, freeing it. Refer to Figure 21.
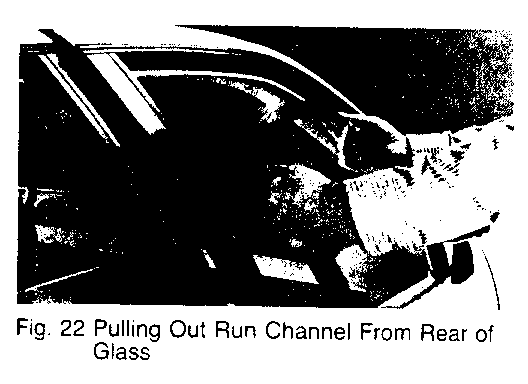
Once the run channel is unclipped at all three places, pull it upward and entirely out of the door at the rear of the window glass, as shown in Figure 22.
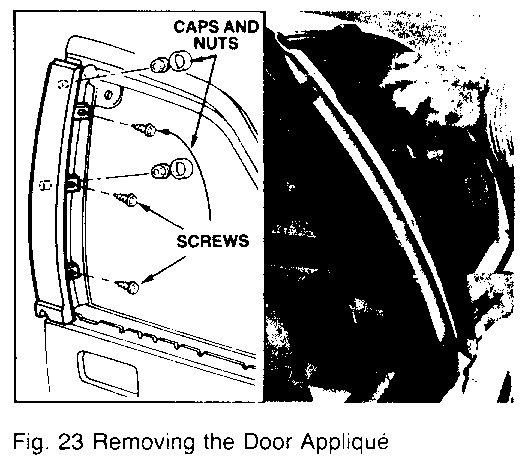
Pry the decorative caps off two nuts on the surface behind the vertical door applique, and remove the nuts. Next, remove the three screws from the front of the applique. Refer to Figure 23.
Then remove the door applique. There's a long strip of butyl tape along the back side you must pull loose. It's a good idea to do this when the applique is warm rather than cold.
SEALING:
--------- The next step is to apply sealant to the proper areas.
Seal the upper rear corner of the window frame with thumb grade sealant as shown in Figure 24.
Seal the lower rear corner of the window frame with thumb grade sealant. There are three cavities to fill on the lower side of the window frame, as shown in Figure 25. Push the sealant up from the bottom into the cavities.
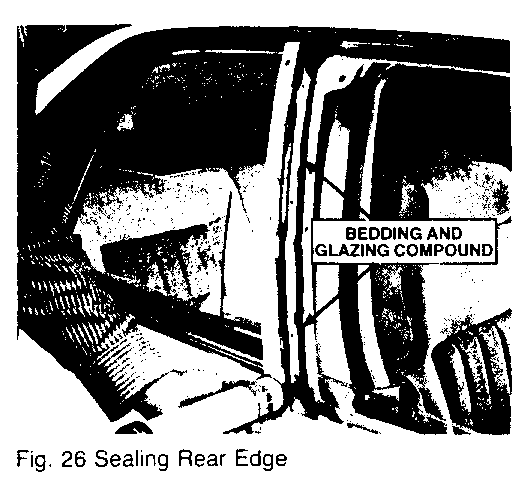
Next, apply a continuous bead of automotive bedding and glazing compound to the rear edge of the window frame, from the upper corner to the lower corner. Refer to Figure 26.
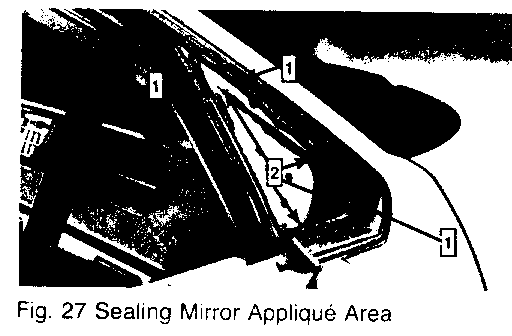
Apply bedding and glazing compound to the mirror applique area, as shown in Figure 27. Run one bead along the outside perimeter(l), then run a second bead, closer to the centre(2).
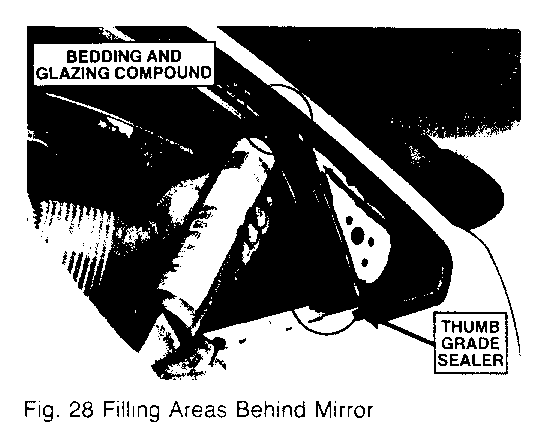
Fill a large pocket located above and behind the mirror area with bedding and glazing compound. Refer to Figure 28.
Apply thumb grade sealer behind the mirror at the front of the pinchweld flange, as shown in Figure 28.
ASSEMBLY:
--------- Assembly basically involves putting the parts back in reverse order. Following are highlights of the procedure.
o When installing the applique on the rear edge of the door, put the two nuts back on first, before driving the three screws in from the front.
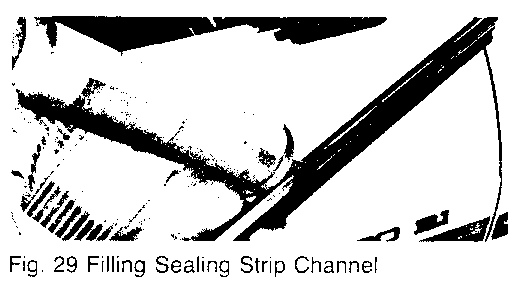
o The outer belt sealing strip has a U-shaped channel. Starting at the front, run a bead of bedding and glazing compound approximately 20cm-22cm (8-9") long inside it. Refer to Figure 29.
o When you install the outer belt sealing strip, be sure the duct tape is still on the applique. The strip is retained by clips on the door, and by one stud that goes through the door to the inside. To engage the clips simply tap the strip back in place. Also, reinstall the screw in the stud at the rear of the strip from inside the door.
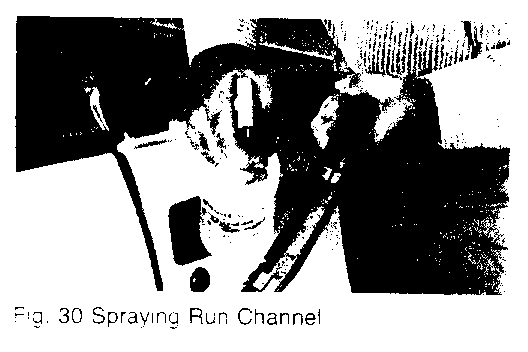
o Next, spray soapy water on the glass run channel to facilitate, as shown in Figure 30.
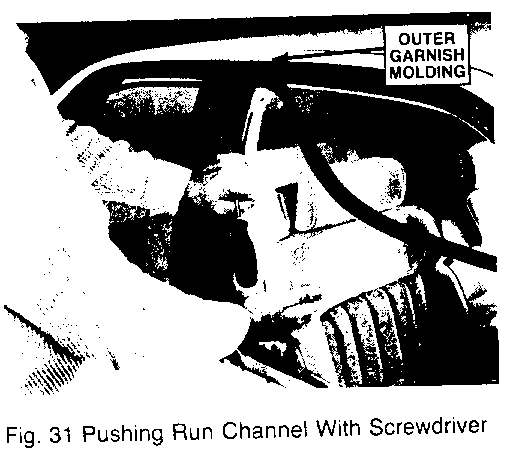
o Push the run channel into place. If necessary, carefully drive the run channel up with a screwdriver to seat it in the proper position The top edge of the run channel should be flush with the outer garnish moulding, as shown in Figure 31. Be sure the end of the screwdriver is bearing against the inner edge of the clip retainer and not on the rubber, or it will tear it up.
o Install the mirror patch applique from the outside, pressing it into the bedding compound. Press inward and forward.
o After you install the garnish moulding, attach the seat belt guide loop. Pull the nut on from the outside, then put the rubber grommet on from the inside. Put the bolt up in place, and have an assistant hold the clevis. Torque the nut to 28 N.m. (21 ft..lb.).
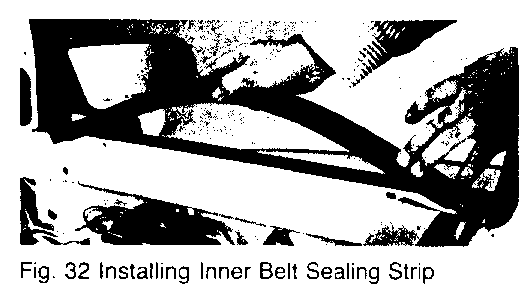
o The inner belt sealing strip has a little rubber nub on the back that slides into the cavity at the rear, as shown in Figure 32.
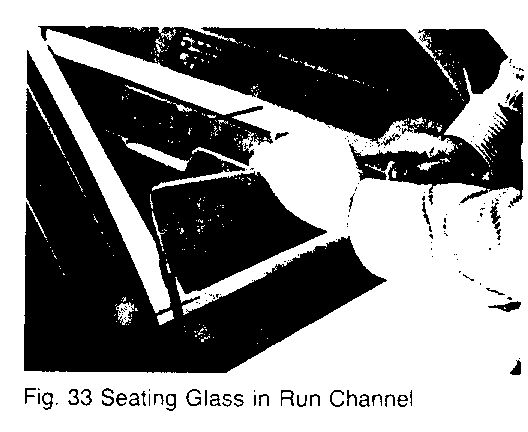
o Before reinstalling the trim panel, temporarily hook up the power window switch if equipped, and run the window up about 10 cm (4"). Pull the window back to seat it in the run channel, as shown in Figure 33. Run the window up and down to be sure it's sealed properly.
o Before you finish the job, be certain there's no excess sealer or bedding and glazing compound oozing out anywhere.
REAR DOOR WIND WHISTLE:
DISASSEMBLY:
------------- Begin by lowering the window. This is necessary particularly with power windows.
Remove the door trim panel according to shop manual procedure. You'll need trim panel prying tool J-24595-C.
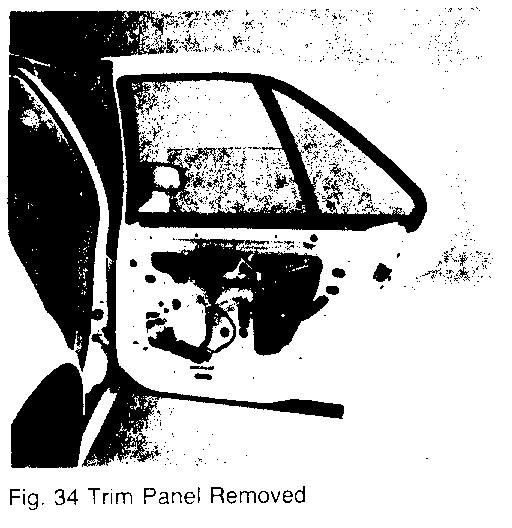
Pull the window switch out of the trim panel. You don't need to unplug it. Next, remove the trim panel, as shown in Figure 34.
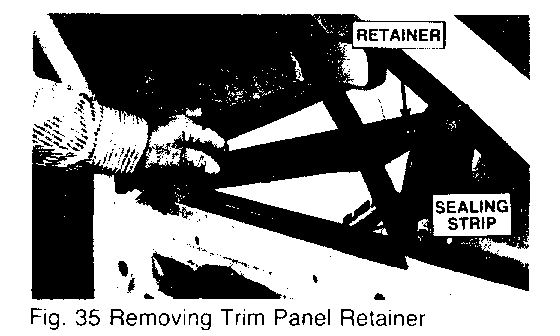
Remove the four screws holding the trim panel retainer, then remove the trim panel retainer, as shown in Figure 35, and the inner belt sealing strip.
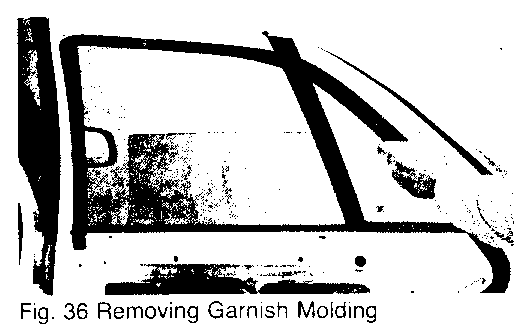
Remove the garnish moulding from the rear of the vent glass. It's clipped in place. Starting at the rear, pull toward and down. Refer to Figure 36.
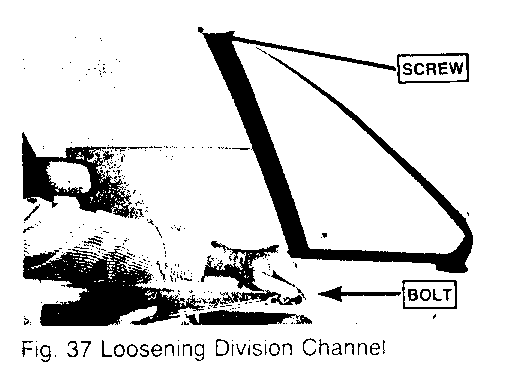
Next, loosen the division channel, it's held by a Phillips screw at the top and a bolt at the bottom, as shown in Figure 37. The division channel is the only thing that retains the vent glass.
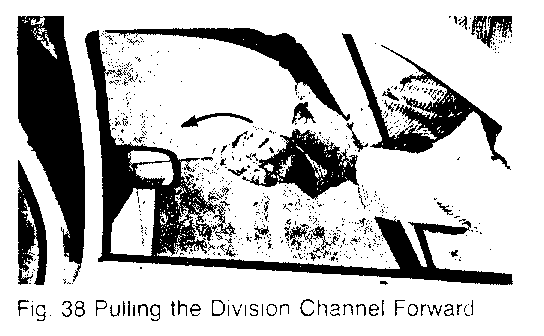
Simply pull the weatherstrip loose. It's pressed into the weatherstrip retainer. Next, carefully pull the division channel forward with the window glass, refer to Figure 38.
It's important to keep the glass in the run channel as you pull so you don't break the glass guide pin. Lower the division channel and glass into the door as far as they will go.
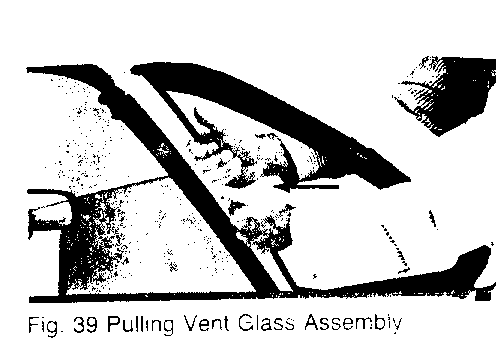
Grasp the vent glass with both hands and pull forward to disengage the rubber moulding at the rear of the glass from the door, as shown in Figure 39. Put the vent glass assembly aside.
SEALING:
--------- The next step is to apply sealant to the proper areas.
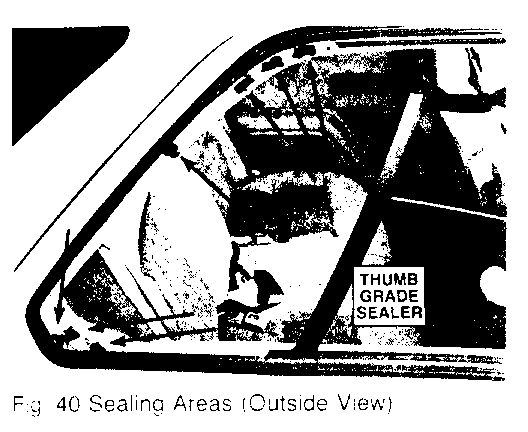
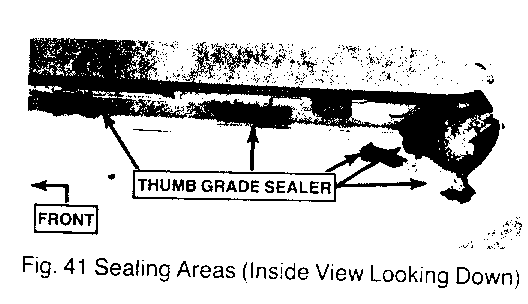
Press thumb grade sealant into the cavities in the upper and lower corners of the window frame, refer to Figures 40 and 41. This will supplement the foam sealant applied at the factory.
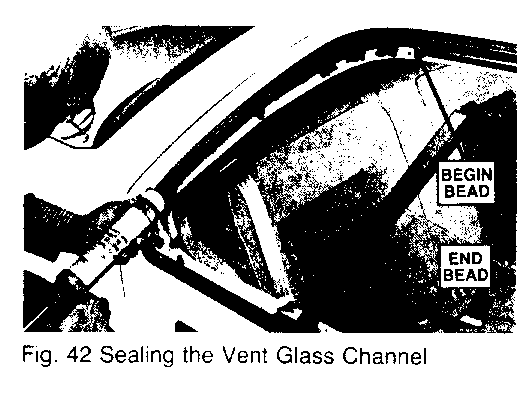
Next, apply a bead of bedding and glazing compound to the vent glass channel. The bead should be about the width of a pencil. Start the bead at the upper corner and run a continuous bead down to the bottom, stopping at the edge of the flange, as shown in Figure 42.
ASSEMBLY:
--------- Assembly basically involves putting the parts back in reverse order. Following are highlights of the procedure.
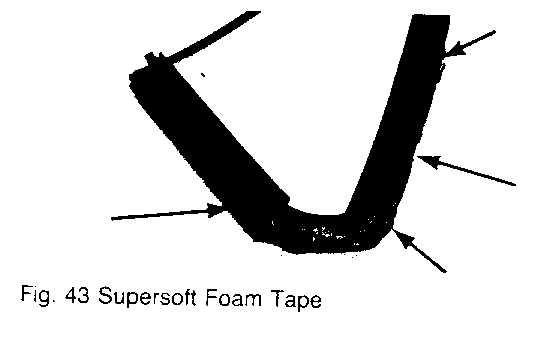
o Before reinstalling the vent glass assembly, inspect the supersoft foam tape, as shown in Figure 43. If the tape is wrapped around the side of the rubber vent glass retainer, carefully pull it loose and straighten.
o When you install the vent glass assembly into its channel, spray the rubber moulding with soapy water. Be sure not to smear the bedding and glazing compound.
o Before you pull the division channel in place, put a short bead of bedding and glazing compound at the upper rear of the door frame between the weatherstrip retainer and the vent glass assembly.
o Put the division channel in place. The division post must be all the way back to allow the window to go all the way up and seal properly.
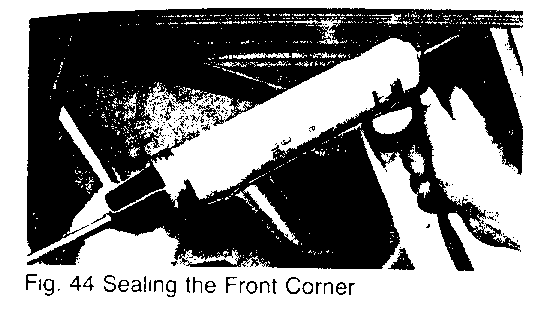
o Before you push the weatherstrip in place, fill the corner of the door frame with bedding and glazing compound, as shown in Figure 44 Then install the weatherstrip.
o Before you reassemble the door trim panel according to the shop manual procedure, visually check all of the sealing areas. Clean off any excess sealant, and run the window up and down to be sure nothing binds.



General Motors bulletins are intended for use by professional technicians, not a "do-it-yourselfer". They are written to inform those technicians of conditions that may occur on some vehicles, or to provide information that could assist in the proper service of a vehicle. Properly trained technicians have the equipment, tools, safety instructions and know-how to do a job properly and safely. If a condition is described, do not assume that the bulletin applies to your vehicle, or that your vehicle will have that condition. See a General Motors dealer servicing your brand of General Motors vehicle for information on whether your vehicle may benefit from the information.
