ERRATIC SHIFT, 2ND/3RD STARTS NO TCC OR SLIPPING CONDITION

Subject: ERRATIC SHIFT, 2ND/3RD STARTS, NO TCC OR SLIPPING CONDITION
Model and Year: 1992 LUMINA 1992 LUMINA APV
TRANSAXLE APPLICATIONS: SUBJECT: 1992 HYDRA-MATIC 4T60 (ME9) Erratic Shift, 2nd Gear Starts, 1992 HYDRA-MATIC 4T60-E (M13) 3rd Gear Starts, No TCC, or Slipping Condition (Plastic Shot Lodged in Spacer Plate Orifice)
TRANSAXLE MODELS: VEHICLE APPLICATIONS: All 1992 HYDRA-MATIC W-Car 4T60 (ME9) and 4T60-E (M13) U-Van
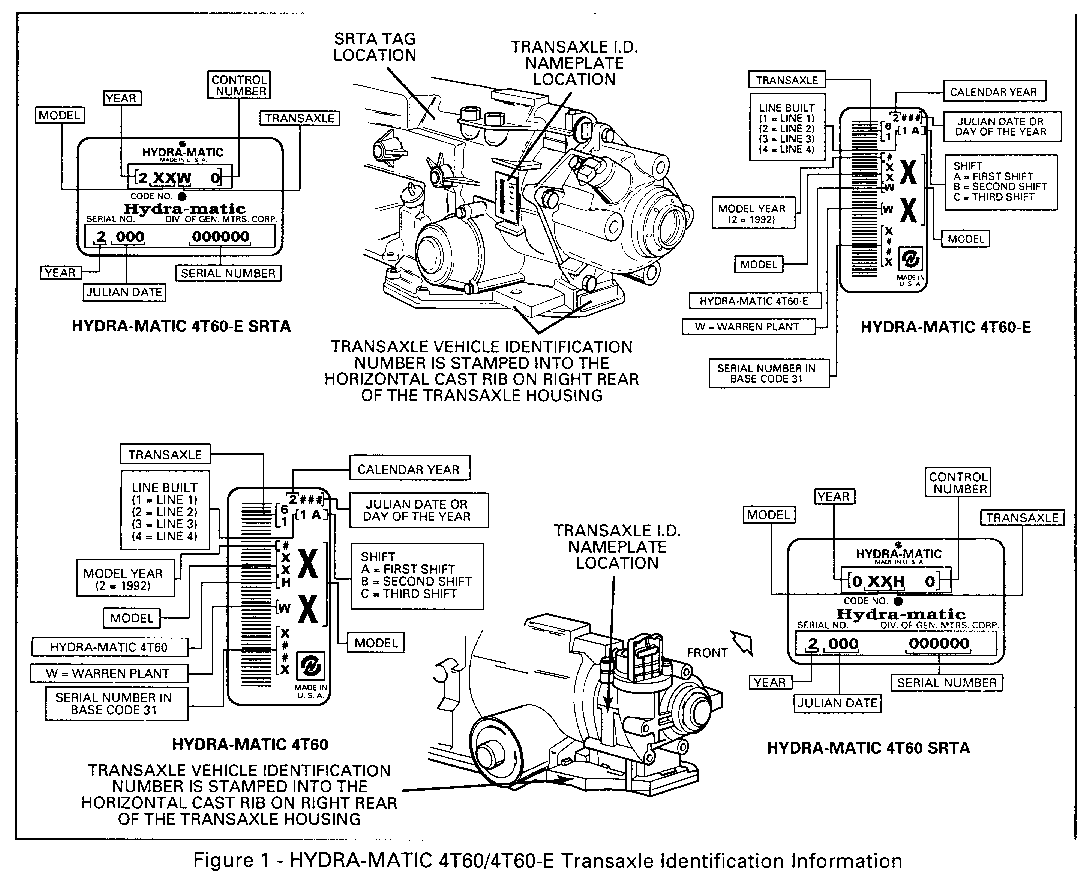
CONDITION: (Figure 1) -------------------- Some vehicles equipped with a 1992 HYDRA-MATIC 4T60 (RPO ME9) or 1992 HYDRA-MATIC 4T60-E (RPO M13) transaxle built on or before April 1, 1992 (Julian Date 092) may exhibit erratic shifts, 2nd gear starts, 3rd gear starts, no TCC, or a slipping condition.
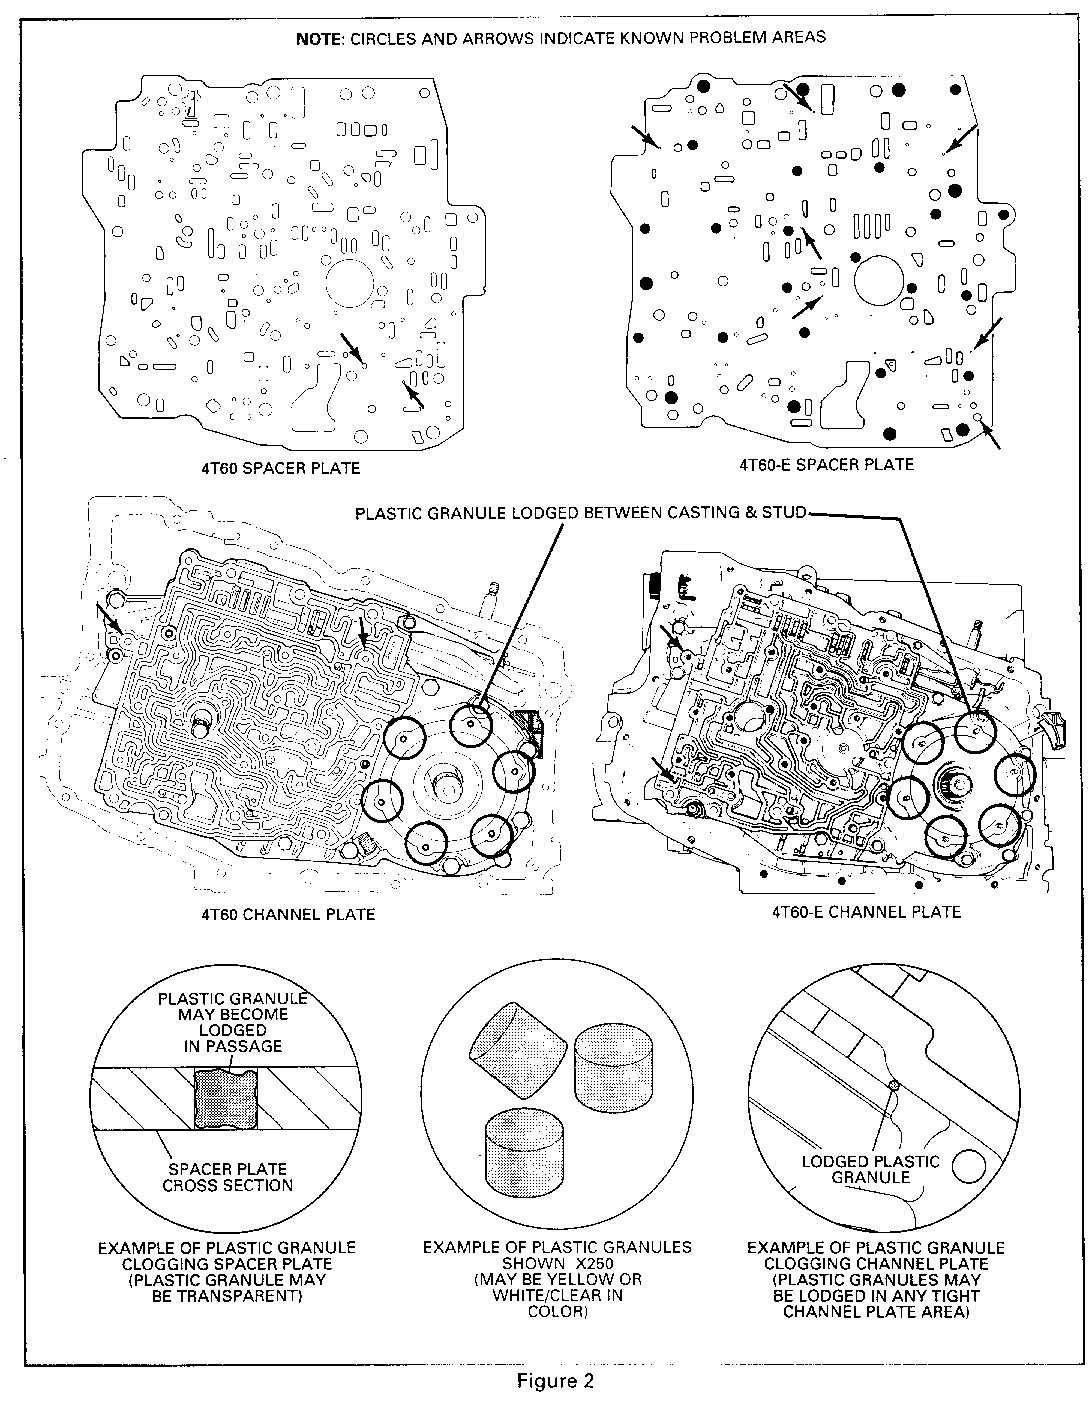
CAUSE: (Figure 2) ---------------- The above condition may be caused by plastic shot lodged in a spacer plate orifice causing a restriction to that passage. The condition is dependent on location and degree of shot entrapment. The transaxle may have been assembled with shot stuck between the casting walls or hub surface of the channel plate and eventually forced into the spacer plate. The shot is originally yellow or white in color but may become translucent when exposed to normal transaxle operating temperatures. The plastic shot may also become pliable and conform to the diameter of the orifice. These two factors make the condition very hard to identify, especially when inspecting the smaller orifice in the spacer plate.
CORRECTION:
---------- Begin with the "Quick Check Procedure" ("Automatic Transaxle Diagnosis" section of the 1992 Service Manual) which provides a general outline of how to properly diagnose a HYDRA-MATIC 4T60/4T60-E transaxle. This procedure will aid the technician in choosing the proper path to diagnose the symptom by describing the basic checks and then referencing the location of the specific diagnostic checks. This will ensure the vehicle has been properly diagnosed and no unnecessary repairs are performed.
If it is suspected the transaxle contains this concern, it is essential that the channel plate and spacer plate be inspected 100 percent. This can be accomplished by the following procedure: (NOTE: Make certain the work area is adequate and CLEAN for the layout and inspection of components.)
Spacer Plate Assembly Inspection
* Remove spacer plate assembly from transaxle (refer to 1992 Service Manual, Transaxle On-Vehicle Service Section 7A for proper on-vehicle service to remove and replace spacer plate assembly).
* Carefully remove spacer plate to channel plate gasket, and spacer plate to valve body gasket.
* Physically probe spacer plate orifices 1 00 percent with a pin or other gage to ensure orifice is not plugged with shot (smaller orifices are more likely to be contaminated and require special attention - refer to Figure 2 for spacer plate problem areas).
* Thoroughly wash spacer plate assembly and blow dry with an approved compressed air source.
Channel Plate Assembly Inspection
* Remove channel plate assembly from transaxle (refer to 1992 Service Manual, Transaxle On-Vehicle Service Section 7A for proper on-vehicle service to remove and replace channel plate assembly).
* Inspect channel plate assembly casting slots and hub surface 100 percent for contamination (see Figure 2 for channel plate problem areas).
* Thoroughly wash channel plate assembly and blow dry with an approved compressed air source (remove manual valve prior to wash to ensure bore is properly cleaned and manual valve moves freely in bore after procedure is completed).
LABOR TIME INFORMATION:
Labor time should be charged under Operation Number K-7461 "Channel Plate and/or Gasket - Replace."
INC: Cooler line flush, oil pressure test, setting TV cable, clean and inspect parts and all necessary measurements and adjustments.
NOTE: For check and adjust toe-in, refer to operation E2000 and add the applicable times to the regular hours column. Applies to W series only.
SERVICE MANUAL REFERENCE:
Refer to the 1992 Service Manual, Automatic Transaxle On-Vehicle Service Section 7A for proper on- vehicle service to remove and replace a channel plate assembly.


General Motors bulletins are intended for use by professional technicians, not a "do-it-yourselfer". They are written to inform those technicians of conditions that may occur on some vehicles, or to provide information that could assist in the proper service of a vehicle. Properly trained technicians have the equipment, tools, safety instructions and know-how to do a job properly and safely. If a condition is described, do not assume that the bulletin applies to your vehicle, or that your vehicle will have that condition. See a General Motors dealer servicing your brand of General Motors vehicle for information on whether your vehicle may benefit from the information.
