Tools Required
J 36660-A Torque Angle Meter
- Dip the bearing cap bolts in clean engine oil.
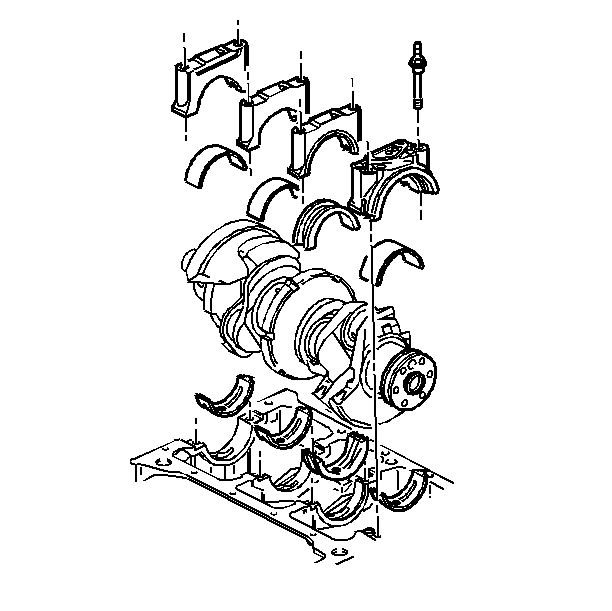
- Place the bearing inserts into the bearing cap and into the engine block.
- Coat the thrust surface with a GM E.O.S. P/N 1052368, or equivalent.
- Lubricate the bearing surface with clean engine oil.
- Install the crankshaft.
- Apply a small amount of GM P/N 1052942 sealer to the rear of the rear bearing cap sealing surface.
- Install the bearing cap.
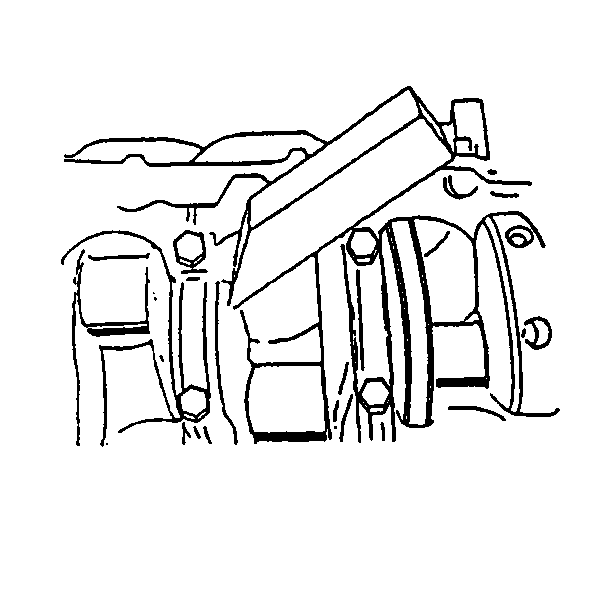
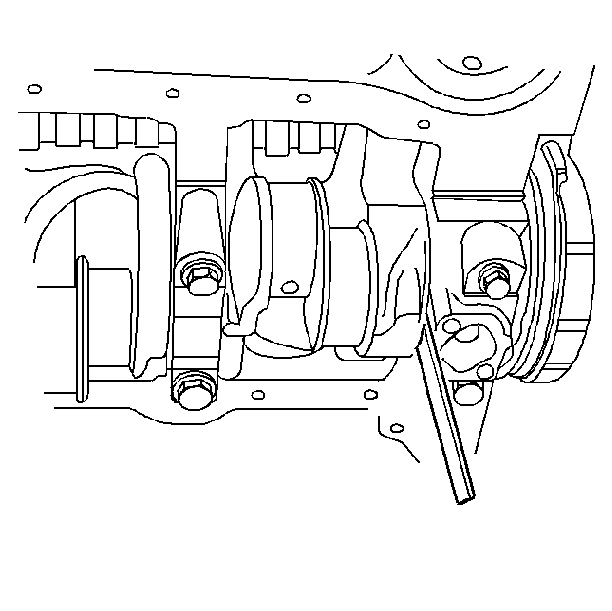
- With the crankshaft bearing and the bearing caps installed, thrust the crankshaft rearward in order to set and align the bearing caps.
- Thrust the crankshaft forward in order to align the rear face of the thrust main bearing.
- Install the main bearing cap bolts.
- Measure the amount of crankshaft end play.
Notice: Do not scrape, shim, or file bearing inserts. If the bearing surface of the insert is touched with bare fingers, the skin oil and acids will etch the bearing surface.
Important: Clean and dry all of the bearing cap bolt holes and the mating surfaces.

Important:
• Upper and lower inserts may be different. Do not obstruct any
oil passages. • Check to make sure that the bearing inserts project an equal distance
on both sides when placed into position. • Check to make sure that the insert tangs are engaged.
Notice: In order to prevent the possibility of cylinder block or crankshaft bearing cap damage, the crankshaft bearing caps are tapped into the cylinder block cavity using a brass, lead, or a leather mallet before the attaching bolts are installed. Do not use attaching bolts to pull the crankshaft bearing caps into the seats. Failure to use this process may damage a cylinder block or a bearing cap.
| • | Tap the bearing cap into place with a suitable tool. |
| • | Apply a small amount of sealer GM P/N 1052942, or equivalent, to the sealing surface of the rear bearing cap. |

Tighten
| • | Evenly tighten the main bearing cap bolts to 50 N·m (37 lb ft). |
| • | Evenly turn the main bearing cap bolts an additional 75°. Use the J 36660-A . |
Notice: Use the correct fastener in the correct location. Replacement fasteners must be the correct part number for that application. Fasteners requiring replacement or fasteners requiring the use of thread locking compound or sealant are identified in the service procedure. Do not use paints, lubricants, or corrosion inhibitors on fasteners or fastener joint surfaces unless specified. These coatings affect fastener torque and joint clamping force and may damage the fastener. Use the correct tightening sequence and specifications when installing fasteners in order to avoid damage to parts and systems.

