For 1990-2009 cars only
- Retract the timing belt tensioner actuator.
- Position the tensioner in a vertical position in the vise (rod tip down). Clamp the tensioner body in the vise lightly.
- Allow the oil to drain to the boot end for at least five minutes prior to refilling.
- Do not damage the pivot bushings when removing the tensioner assembly.
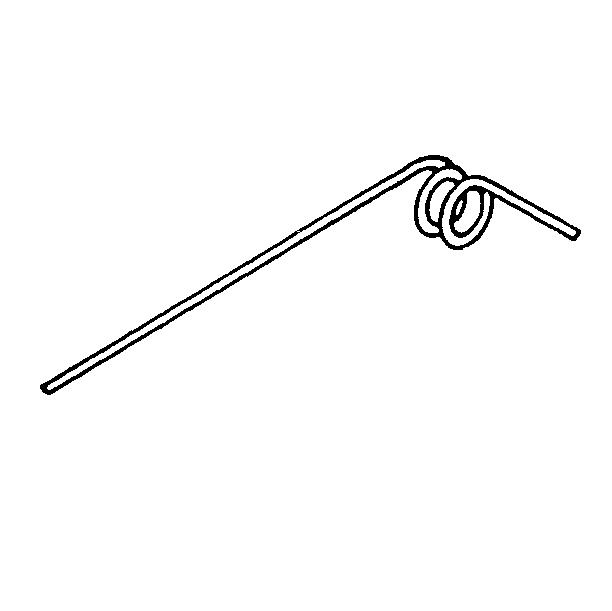
- Straighten out a standard paper clip (0.032 in diameter, no serrations) to a minimum straight length of 47 mm (1.85 in). Form a double loop in the remaining end of the paper clip.
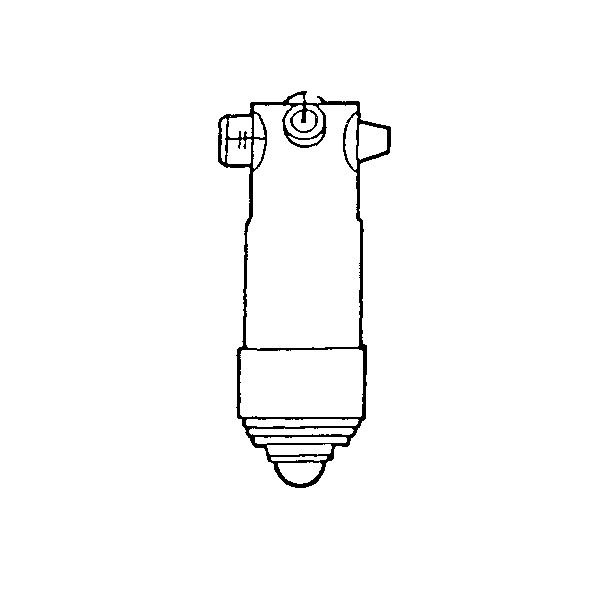
- Remove the rubber end plug from the rear of the tensioner assembly. The assembly is filled with oil and removeal of the plug may allow oil to escape. Do not remove the vent plug.
- Push the paper clip through the center hole in the vent plug and into the pilot hole.
- Insert a small screwdriver into the screw slot inside the tensioner, behind the rubber end plug.
- Retract the tensioner plunger by rotating the screw in a clockwise direction, until it is fully retracted. Push on the paper clip and slowly rotate the screw counterclockwise until the paper clip engages.
- If the tensioner oil has been lost, fill the tensioner with SAE 5W30 Mobil 1 (or equivalent) synthetic engine oil through the end hole. Fill to the bottom of the plug hole only when the tensioner is fully retracted and the pin is installed.
- Install the rubber end plug to the rear of the tensioner assembly. Ensure the end plug has sealed against the case.
- Install the tensioner bushing into the side plate.
- Ensure that the bushings and the appropriate holes are clean. Do not lubricate.
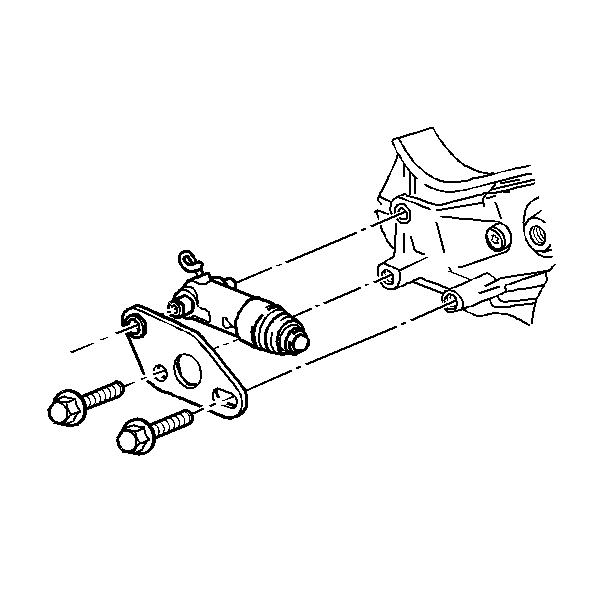
- Install the tensioner and the side plate.
- Ensure that the tensioner rod ball is seated in the tensioner pulley socket.
- Pull out paper clip and discard, allowing the tensioner to extend to its normal position.


Tighten
Tighten bolts to 27 N·m (20 lb ft).
Notice: Use the correct fastener in the correct location. Replacement fasteners must be the correct part number for that application. Fasteners requiring replacement or fasteners requiring the use of thread locking compound or sealant are identified in the service procedure. Do not use paints, lubricants, or corrosion inhibitors on fasteners or fastener joint surfaces unless specified. These coatings affect fastener torque and joint clamping force and may damage the fastener. Use the correct tightening sequence and specifications when installing fasteners in order to avoid damage to parts and systems.
