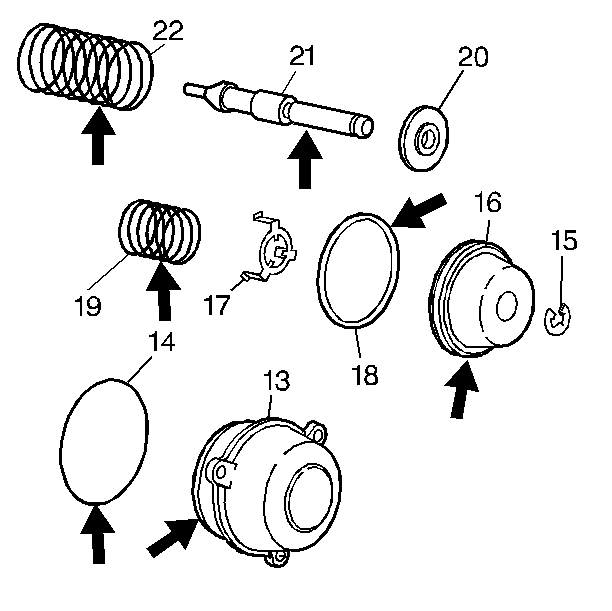
- Inspect the forward band servo components for the following conditions:
| • | A damaged, worn, or porous servo piston |
| • | A damaged servo piston seal |
| • | A damaged, worn, or porous servo cover |
| • | A damaged servo cover seal |
| • | A broken or collapsed servo piston spring |
| • | A broken or collapsed servo piston cushion spring |
| • | A damaged or worn servo piston pin |

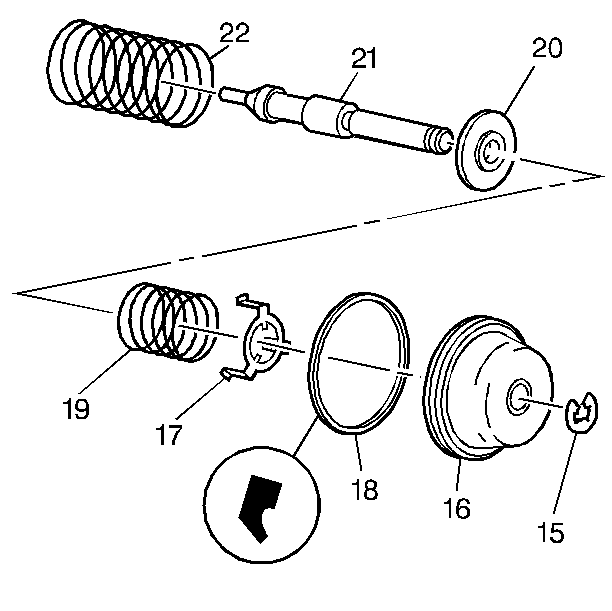
- Install the servo piston cushion spring retainer (17) into the servo
piston, if necessary.
- Assemble the servo piston (16), the servo piston cushion spring
(19), the cushion spring retainer (20), and the servo piston pin (21).
- Install the servo pin snap ring (15) into the servo piston pin
(21).
- Install the servo piston oil seal ring (18) into the servo piston
(16).
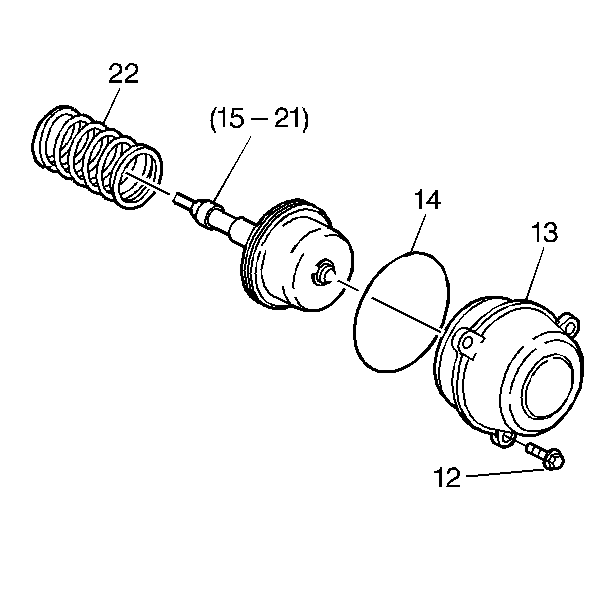
- Install the servo piston spring (22) into the servo assembly.

- Position the transmission
so that the oil pan is facing up.
- Affix the servo cover seal (14) onto the servo cover (13).
- Install the servo assembly (13-22) into the servo cover.
Pivot the servo into the cover in order to prevent the piston seal from
being damaged.
- Install the servo and the cover assembly (13-22) into the
case (3).

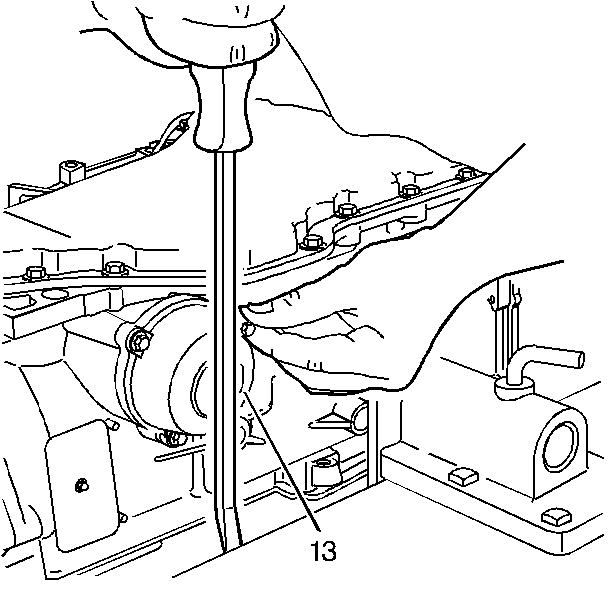
- Using a long screwdriver,
pry against the work bench in order to compress the forward band servo assembly
(13).
- Hold the servo assembly compressed.
Notice: Use the correct fastener in the correct location. Replacement fasteners
must be the correct part number for that application. Fasteners requiring
replacement or fasteners requiring the use of thread locking compound or sealant
are identified in the service procedure. Do not use paints, lubricants, or
corrosion inhibitors on fasteners or fastener joint surfaces unless specified.
These coatings affect fastener torque and joint clamping force and may damage
the fastener. Use the correct tightening sequence and specifications when
installing fasteners in order to avoid damage to parts and systems.
- Install the three
forward band servo cover bolts (12).
Tighten
Tighten the bolts to 12 N·m (106 lb in).
- Remove the long screwdriver.


