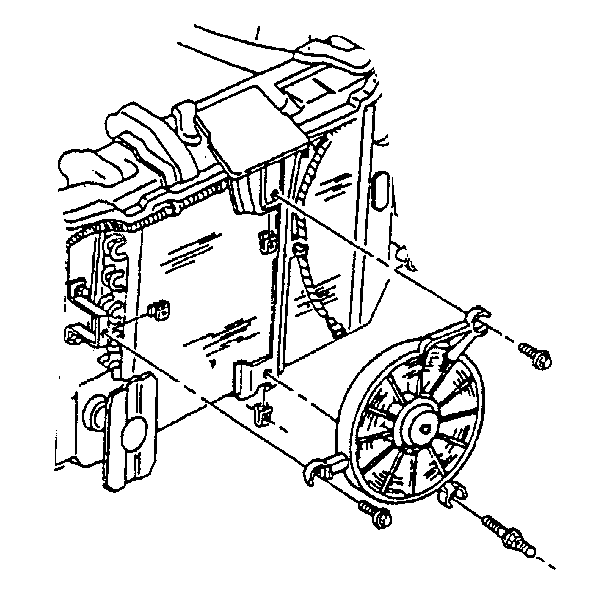
Removal Procedure
- Remove the upper mounting bolt.
- Support the vehicle. Raise the vehicle. Refer to General Information.
- Remove the lower air baffle. Refer to Cooling System .
- Remove the wiring harness to the fan motor (1).
- Remove the lower mounting bolts to the fan.
- Remove the auxiliary fan.
Caution: Keep hands, tools, and clothing away from the electric engine coolant fans in order to help prevent personal injury. These fans are electric and can turn on whether or not the engine is running. The fans can start automatically with the ignition in the ON position.
Caution: If a fan blade is bent or damaged in any way, do not repair or reuse the damaged part. Always replace a bent or damaged fan blade. Fan blades that have been damaged can not be assured of proper balance and could fail and fly apart during subsequent use. This creates an extremely dangerous situation.
The fan blades must remain in proper balance. You cannot assure fan blade balance once a fan blade has been bent or damaged. A fan blade that is not in proper balance could fail and fly apart during use, creating an extremely dangerous situation.
Installation Procedure
- Install the auxiliary fan.
- Install the lower mounting bolts to the fan.
- Reconnect the wiring harness to the fan motor.
- Install the lower air baffle. Refer to Cooling System .
- Lower the vehicle.
- Install the upper mounting bolt.
- Inspect for proper operation of the fan motor.

Tighten
Tighten the bolt to 10 N·m (89 lb in).
Notice: Use the correct fastener in the correct location. Replacement fasteners must be the correct part number for that application. Fasteners requiring replacement or fasteners requiring the use of thread locking compound or sealant are identified in the service procedure. Do not use paints, lubricants, or corrosion inhibitors on fasteners or fastener joint surfaces unless specified. These coatings affect fastener torque and joint clamping force and may damage the fastener. Use the correct tightening sequence and specifications when installing fasteners in order to avoid damage to parts and systems.
Tighten
Tighten the bolt to 10 N·m (89 lb in).
