Front Brake Rattle (Export Only)

| Subject: | Front Brake Rattle |
| Models: | 2007-2008 Chevrolet Caprice, Lumina |
| 2007-2008 Omega CD |
| Export Only |
Two conditions exist for rattle from the front brakes:
| • | Condition 1 -- A tinny, high-frequency rattle from the front brake calipers is evident and stops when the brakes are applied. |
| • | Condition 2 -- A metallic, dull, low-frequency rattle from the front brakes while traveling over small, sharp turns (e.g. running over road marking "cat's eyes" at 50-60 km/h), while the brakes are not applied. |
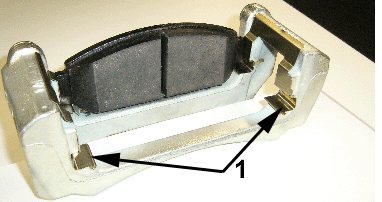
Condition 1 may be caused by the front brake pads rattling in the caliper due to insufficient abutment shim tension. Refer to Figure 3.
Condition 2 may be caused by movement between the brake caliper and the slide pins.
Note: Neither of the front brake rattle conditions affect the normal operation of the brakes.
Breakpoints for each of the conditions are as follows:
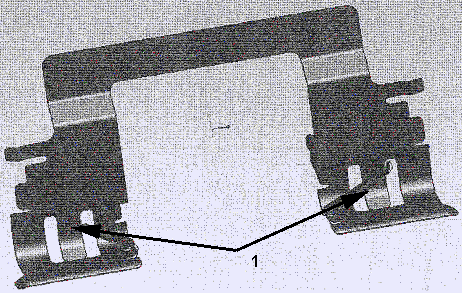
For condition 1, new revised "window" abutment shims (refer to Figure 2) have been installed on vehicles from:
ISOVIN | Build Date |
|---|---|
6GER57729L157320 | 11/03/08 |
For condition 2, calipers with reduced slide pin to bore clearance have been installed on vehicles from:
ISOVIN | Build Date |
|---|---|
6G1EK52B18L957383 | 25/5/07 |
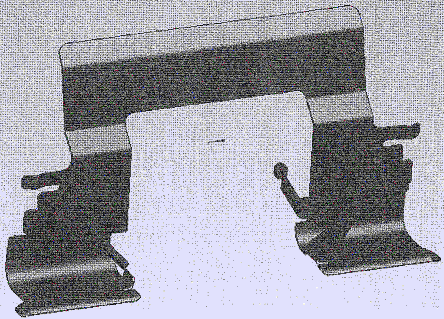
Figure 1 -- Original Abutment Shim

Figure 2 -- Revised Abutment "Window" Shim

Summary: After verifying that a customer complaint vehicle has either condition as described above, install new caliper slide pins and abutment shims to the front brake calipers on vehicles built before 25/5/07. Vehicles built between 25/5/07 and 11/3/08 will only require shims to be installed.
Caliper Guide Pin Replacement
To address the rattle between the calipers and the slide pins, replace the slide pins with new ones available in a kit. Only correct dimension pins are available for service. (Refer to Parts Information for part number.) Replace the relevant parts with the parts provided in the kit, paying particular attention to the following items:
- For caliper pin lubrication, use the grease provided in the kit.
- For ease of application, the grease is to be applied into the slider holes using a syringe.
- Approximately three cc's (3 mL) of grease is to be applied into each slider hole using a measuring syringe.
- Insert the pins into the slide holes slowly, with a twisting motion, allowing air bubbles to escape without squeezing ou the grease.
Abutment Shim Replacement
Remove the front brake caliper as you would to replace pads, i.e. remove the guide pin bolt and rotate the caliper anchor bracket away from the rotor.
A new guide pin bolt is contained in the shim kit for each caliper.
Remove the pads and replace the two abutment shims in the caliper anchor bracket. Refer to Figure 3.
Figure 3

