Rear Tire Wear (Export)

| Subject: | Rear Tire Wear |
| Models: | 2007-2008 Chevrolet Caprice, CSV, Lumina (Export) |
| 2007-2008 Vauxhall VXR8 (Export) |
| 2007-2008 Omega CD (Export) |
| Built Prior to VIN Breakpoint 8L118305, Build Date 1/11/07 |
Some vehicles may experience a higher than normal rate of rear tire wear. Worn tires may exhibit some feathering of the outboard edges, consistent with wear due to excessive toe in.
Aggressive rear bump/ride steer (toe change during suspension compression/rebound) has been found to increase the rate of rear tire wear. Cause has been found to be variation in the location of the rear suspension "P" brackets in production.
Improved location of the "P" bracket positions during rear module assembly, prior to vehicle assembly and wheel alignment have been introduced to reduce rear wheel bump/ride steering following the VIN breakpoint above.
On vehicles built prior to this VIN breakpoint, adjust the "P" brackets on the rear suspension and reset the rear toe.
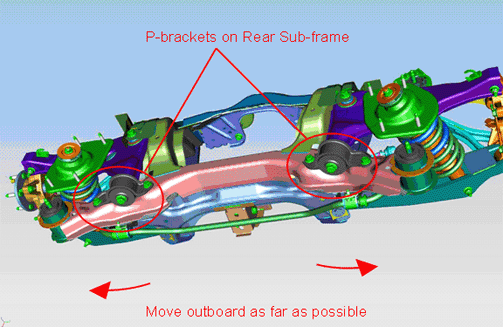
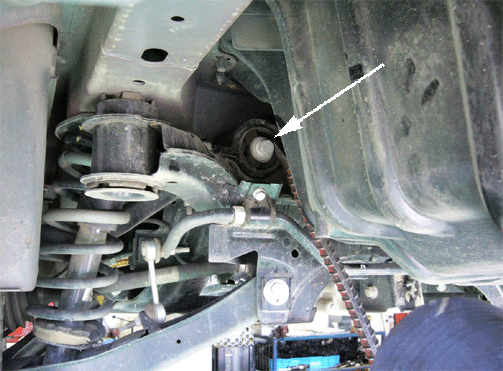
"P" Brackets
The location of the "P" brackets on the rear sub-frame controls the position of the upper control arm rearward mount, which has the largest effect on rear bump/ride steering.
In order to reduce the aggressive ride steering and, in turn, tire wear, the "P" brackets need to be set to an optimum position.
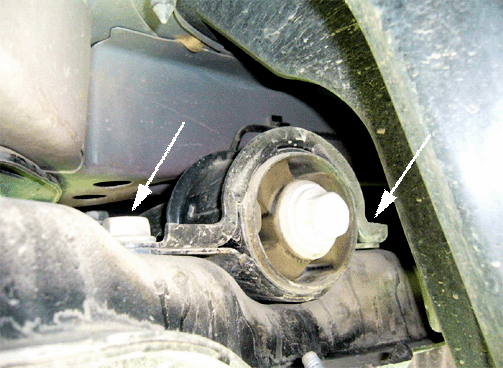
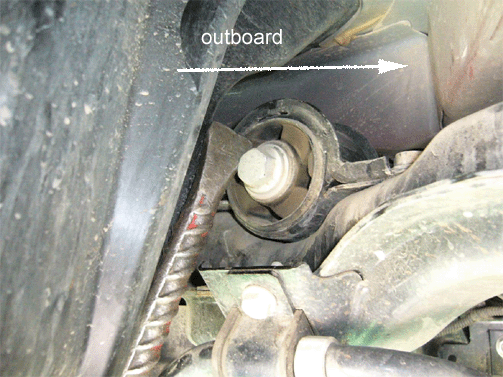
The optimum position of the "P" brackets is outward as far as possible. The "P" brackets can be moved on the bolts due to the bracket having a larger diameter hole than the bolt. The bracket can be moved up to 5 mm inboard or outboard.
Adjusting "P" Brackets
- "P" brackets can be adjusted without lowering the whole rear module. Place the vehicle on a hoist and locate the "P" brackets.
- Remove the complete exhaust assembly from the catalytic converters backward. The O2 sensors will need to be disconnected (V8 exhaust shown).
- Remove the muffler heat shield(s).
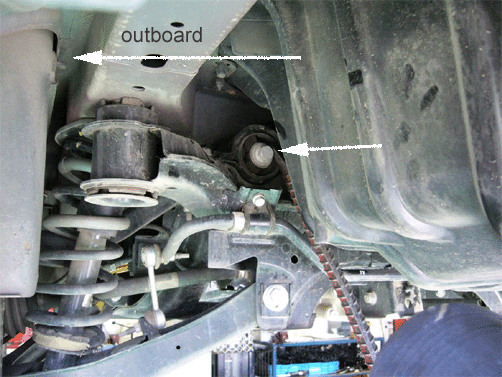
- With the muffler heat shield(s) removed, the "P" brackets should now be visible with access to the bolts. The inside bolt on the "P" brackets, while difficult to access, is best accessed from the front of the rear subframe.
- Loosen both RHR "P" bracket bolts one turn (DO NOT REMOVE THE BOLTS) and then, with a pry bar, move the "P" brackets outboard as far as possible.
- With the "P" bracket held in the outboard position, re-tighten the bolts with a torque wrench to 150 +/- 25 N·m.
- The same procedure as outlined in Steps 5 and 6 needs to be performed on the LHS "P" bracket.
- After both RHR and LHR "P" brackets have been adjusted, the exhaust can be reinstalled.
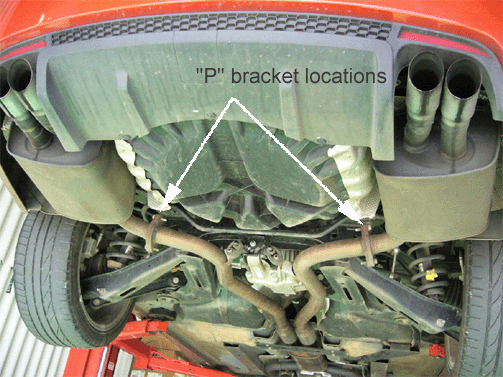
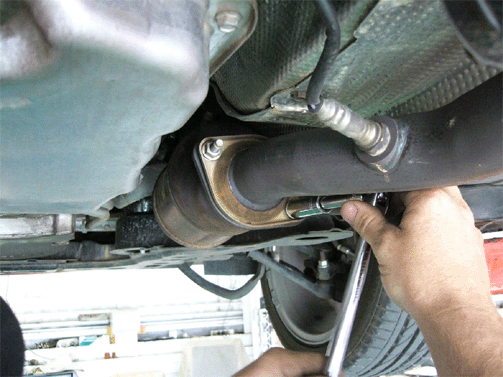
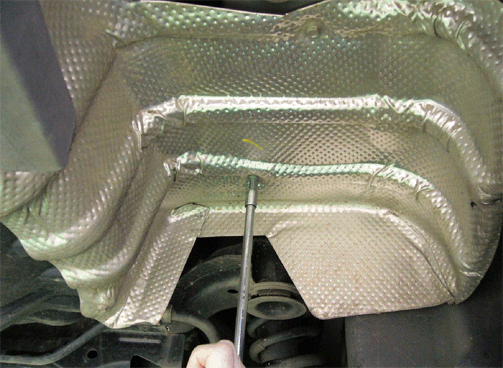
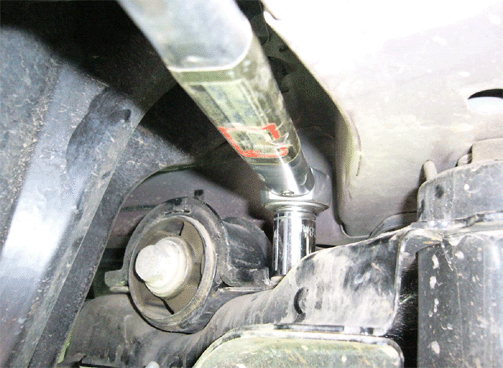
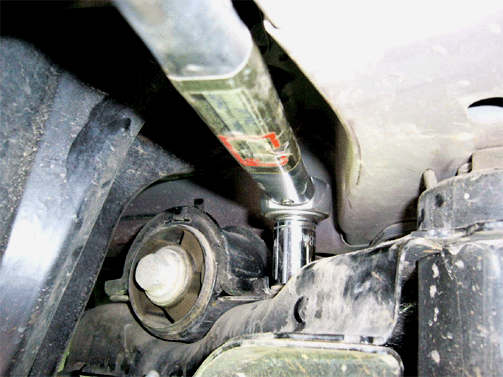
Warning: A torque wrench must be used to achieve the specified bolt torque which is necessary for ongoing retention of the "P" bracket in the set position.
Wheel Alignment
- Once the "P" brackets have been adjusted, the vehicle needs to be driven for approximately 2 km to allow the suspension to settle.
- Ensure that the vehicle has a full tank of fuel or is weighted to simulate a full tank of fuel.
- Conduct a rear wheel alignment and set the rear tow to between 0° and +0.05° toe in per wheel.
Warranty Information
For vehicles repaired under warranty, use:
Labor Operation | Description | Labor Time |
|---|---|---|
E5675 | "P" Bracket Adjust | 1.3 hrs* |
*Additional 0.6 hr for wheel alignment when conducted in-house. | ||
