Removal Procedure
- Remove the seats. Refer to Front Seat Replacement - Bucket.
- Remove the centre upper pillar trim. Refer to Center Pillar Upper Trim Panel Replacement.
- Remove the rear window shelf trim panel. Refer to Rear Window Shelf Trim Panel Replacement.
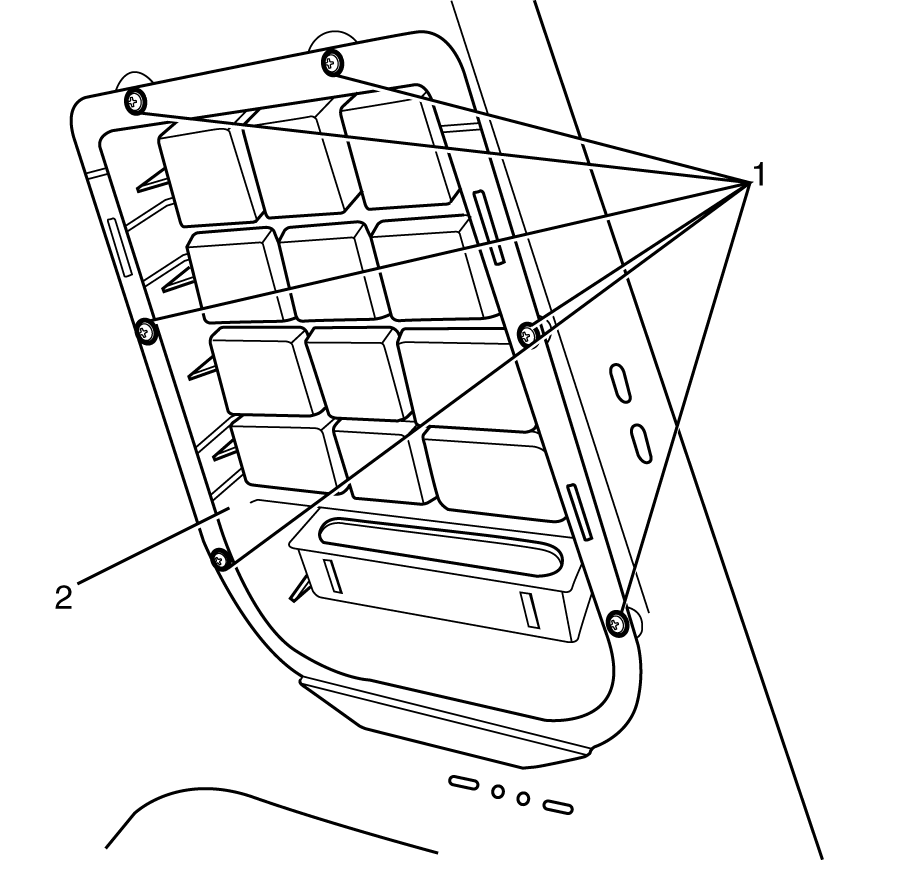
- Remove the pressure relief vent assembly retaining screws (1) from the body (2).
- Remove the pressure relief vent assembly (2) from the body.
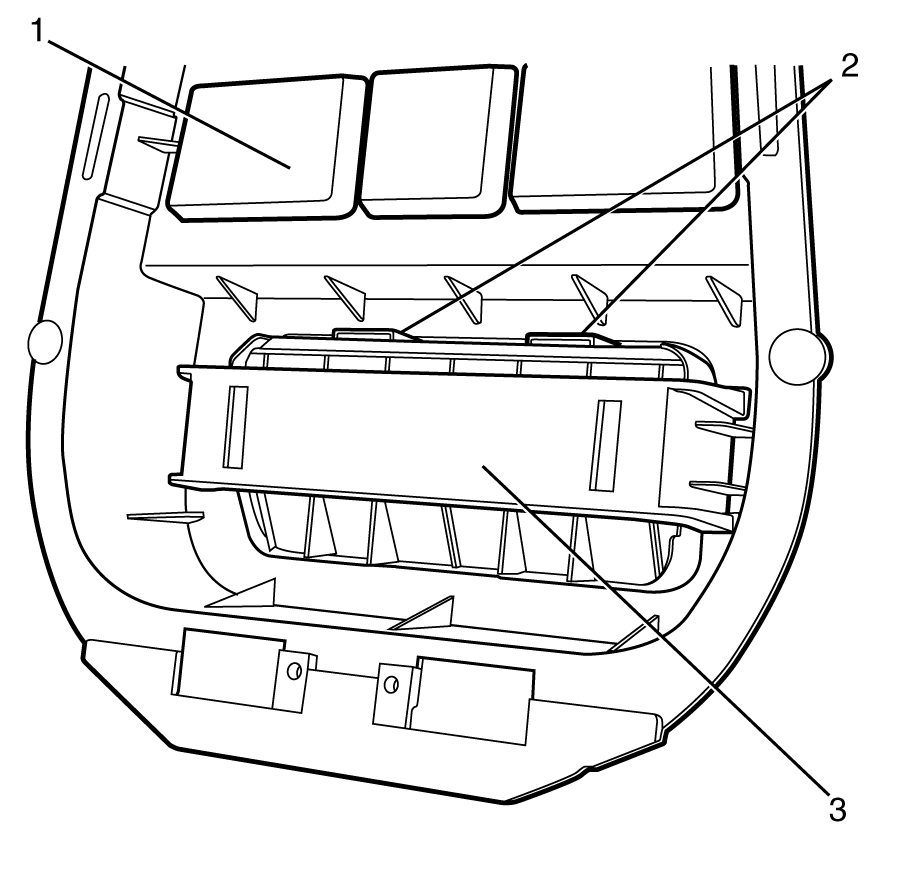
- Remove the pressure relief vent (3) from the pressure relief vent housing (1).

Important: To remove the pressure relief vent assembly from the body, apply pressure to the top of the assembly and lever the assembly outwards from the top and remove.

Important: Using a suitable tool, push down on the pressure relief valve retaining clips (2). Once the pressure relief valve retaining clips have been disengaged, the pressure relief vent can be removed by pushing rearwards.
Installation Procedure
- Install the pressure relief vent (3) into the pressure relief vent housing (1).
- Install the pressure relief vent assembly (2) to the body side panel.
- Install the pressure relief vent assembly to body retaining screws (1).
- Install the rear window shelf trim panel. Refer to Rear Window Shelf Trim Panel Replacement.
- Install the centre upper pillar trim. Refer to Center Pillar Upper Trim Panel Replacement.
- Install the seats. Refer to Front Seat Replacement - Bucket.

Important: Listen for an audible click to confirm that the retaining clips (2) engage correctly.

Important: To install the pressure relief vent assembly to the body, align the lower section of pressure relief vent assembly into the body side panel and apply pressure to the top of the assembly, rotating the top of the pressure relief vent assembly into the body side panel.
Notice: Refer to Fastener Notice in the Preface section.
Tighten
Tighten the screws to 2 N·m (18 lb ft).
