For 1990-2009 cars only
Instrument Panel Courtesy Lamp Bulb Replacement - Right Side RHD
Removal Procedure
- Disconnect the battery ground cable. Refer to Battery Negative Cable Disconnection and Connection .
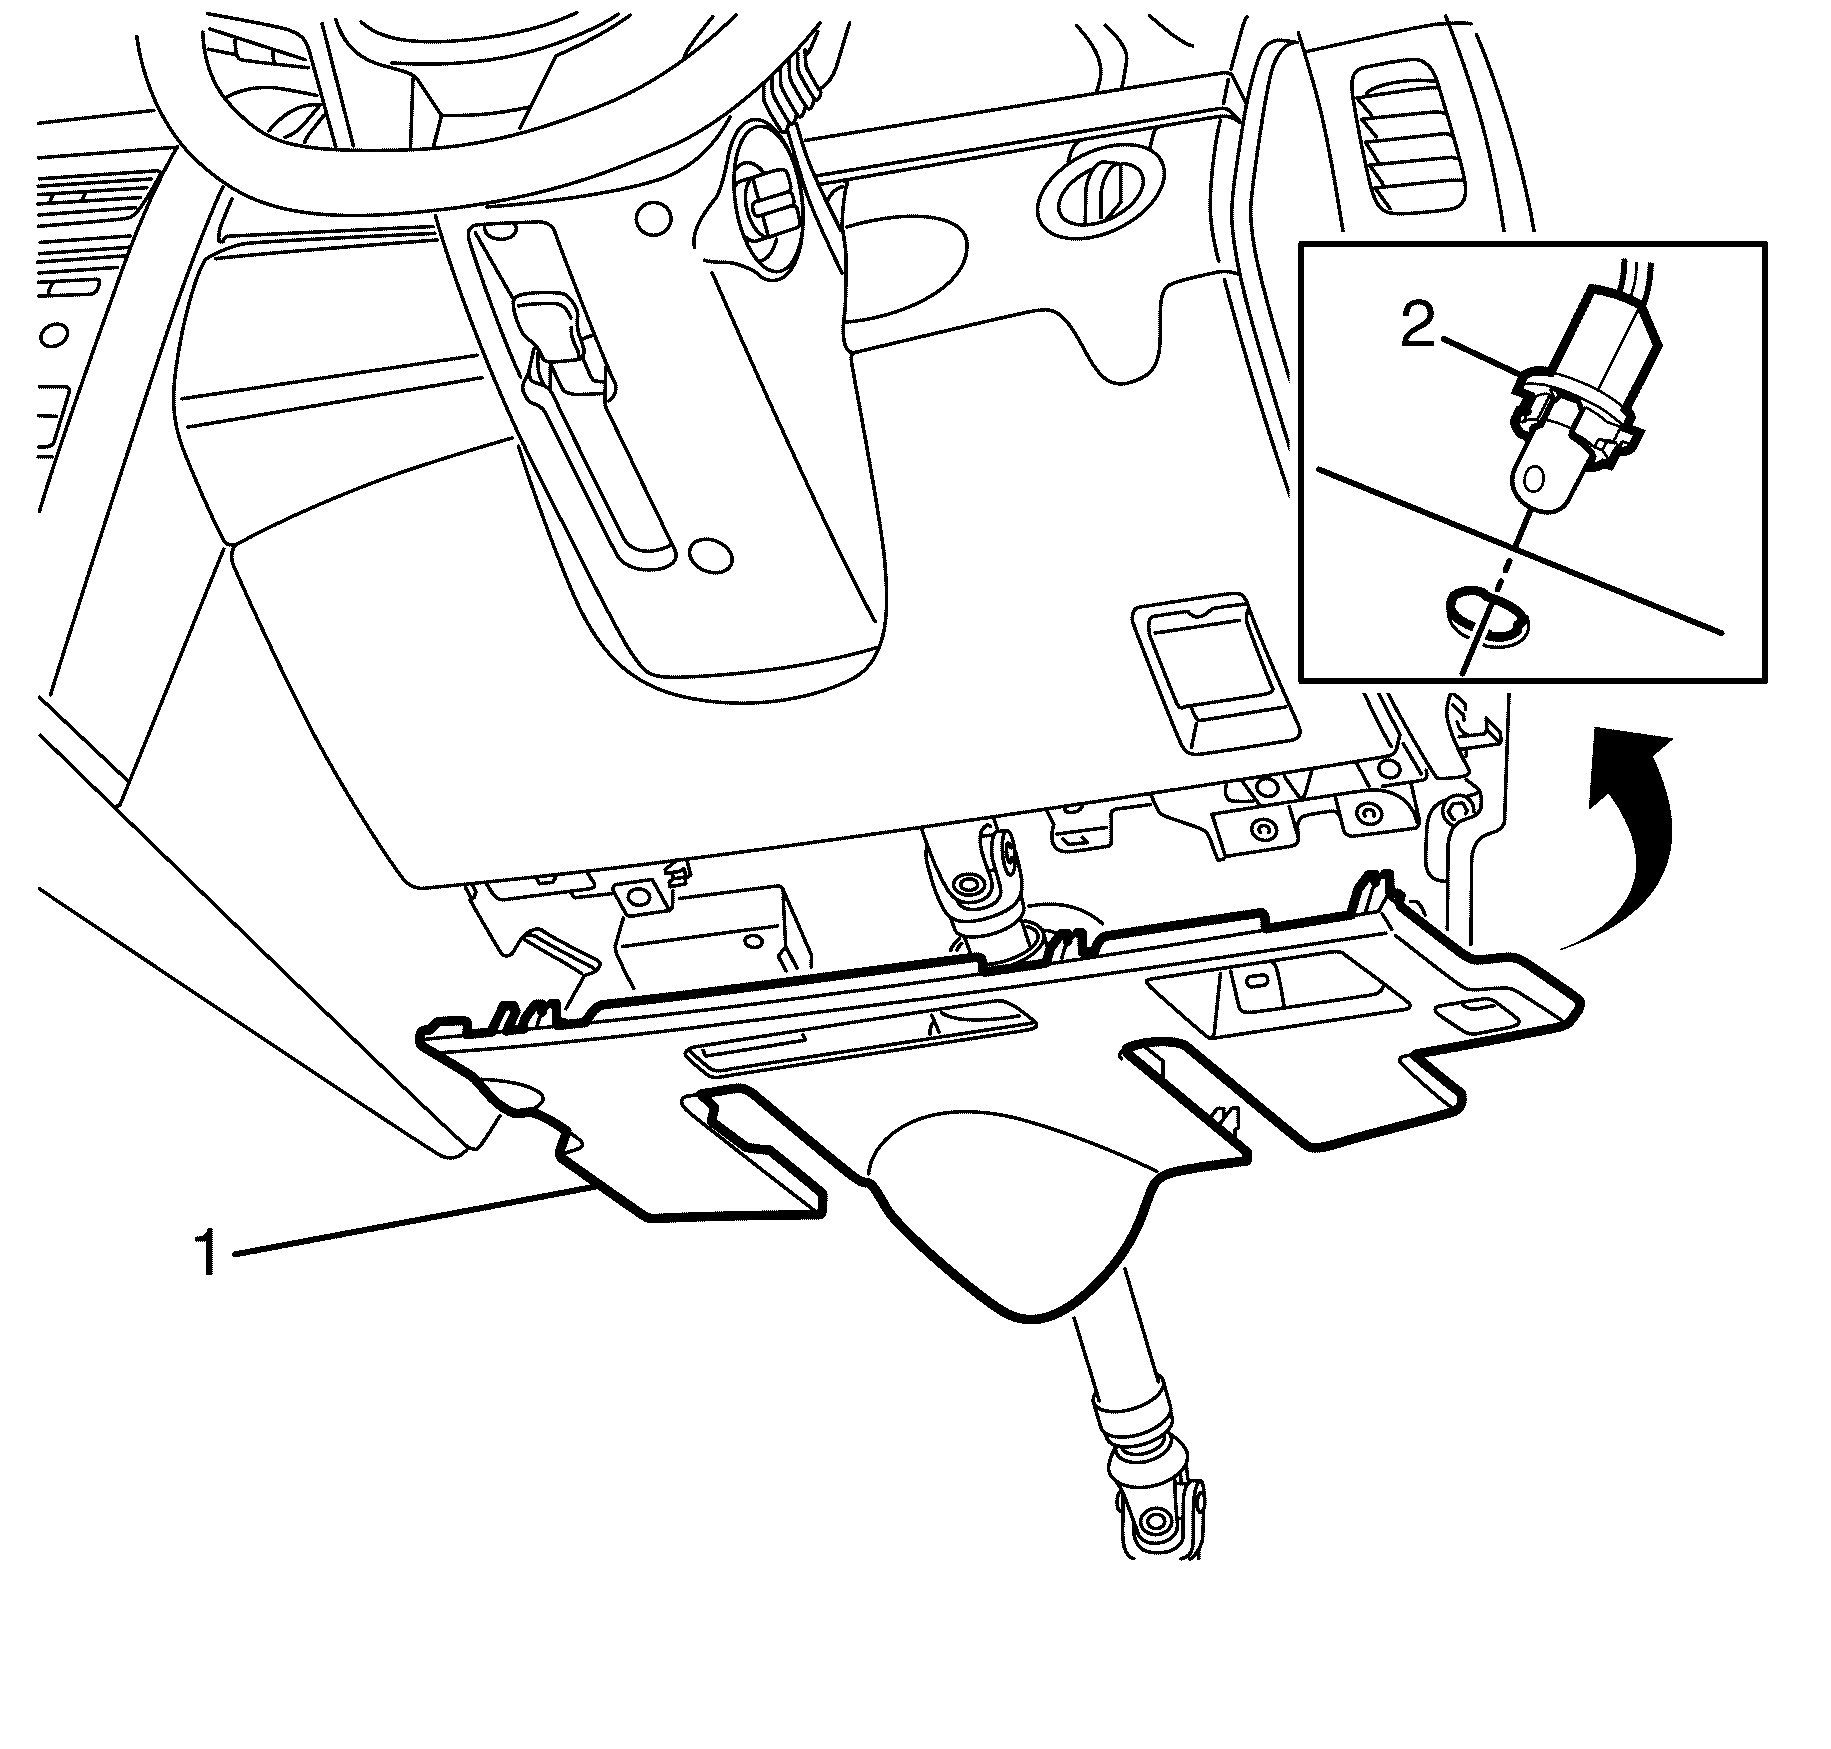
- Lower the right instrument panel lower trim plate (1) by pulling the panel down and away from the clips.
- Remove the courtesy lamp socket assembly (2) from the left lower trim plate by turning the socket counter clockwise.
- Pull and remove the courtesy light bulb (2) from the courtesy lamp socket.
Caution: Refer to Battery Disconnect Caution in the Preface section.

Installation Procedure
- Install a new bulb into the bulb socket assembly (2).
- Install a new courtesy light bulb assembly (2) to the right instrument panel lower trim plate (1) and turn the assembly clockwise to secure.
- Install the right instrument panel lower trim plate (1) and make sure the trim plate clips securely engage.
- Connect the battery ground cable. Refer to Battery Negative Cable Disconnection and Connection .
- Check all vehicle lights for correct operation.

Instrument Panel Courtesy Lamp Bulb Replacement - Right Side LHD
Removal Procedure
- Disconnect the battery ground cable. Refer to Battery Negative Cable Disconnection and Connection.
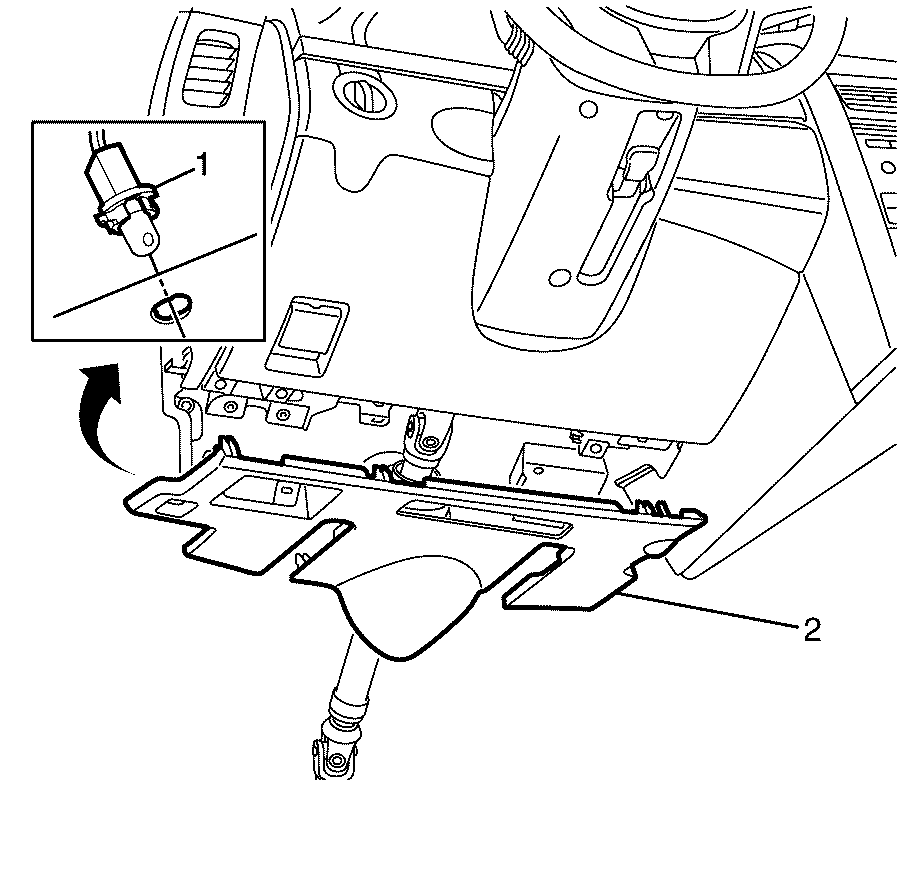
- Lower the right instrument panel lower trim plate (2) by pulling the panel down and away from the clips.
- Remove the courtesy lamp socket assembly (1) from the left lower trim plate by turning the socket counter clockwise.
- Pull and remove the courtesy light bulb (1) from the courtesy lamp socket.
Caution: Refer to Battery Disconnect Caution in the Preface section.

Installation Procedure
- Install a new bulb into the bulb socket assembly (1).
- Install a new courtesy light bulb assembly (1) to the right instrument panel lower trim plate (1) and turn the assembly clockwise to secure.
- Install the right instrument panel lower trim plate (2) and make sure the trim plate clips securely engage.
- Connect the battery ground cable. Refer to Battery Negative Cable Disconnection and Connection.
- Check all vehicle lights for correct operation.

