Horn Chirps When Locking Car, Door Ajar Light On, Interior Light On When Door Closed, Alarm Activates by Itself or Battery Discharged (Add Sealing Tape to Harness Grommet)

| Subject: | Horn Chirps When Locking Car, Door Ajar Light On, Interior Light On When Door Closed, Alarm Activates by Itself or Battery Discharged (Add Sealing Tape to Harness Grommet) |
| Models: | 2007-2008 Chevrolet Caprice, Lumina (Export) |
| Built Prior to VIN Breakpoint 8L969005 |
This bulletin is being updated to add VIN breakpoint information and additional symptoms that the customer may experience. Please discard Service Bulletin H07-08-14 (Section 8 - Electrical).
Condition
Some customers may comments on one or more of the following conditions:
| • | When the car is locked, the horn chirps to indicate a door has not locked correctly although all doors are locked. |
| • | The "door ajar" icon may be illuminated when all the doors are shut. |
| • | The interior light may remain on when all the doors are shut. |
| • | The alarm may activate by itself when no door is opened. |
| Important: There may be more than one cause for current draw or discharged batteries. Do not assume that this is the cause of a discharged battery condition. |
| • | The battery may discharge intermittently but when tested there may or may not be excessive current draw detected. |
Cause
This condition may be caused by water entry into the rear door harness connectors at the B pillars. This can result in a short circuit condition that makes the Body Control Module (BCM) believe that a door is not closed.
Correction
After confirming that the vehicle has the condition described above, follow the procedure below:
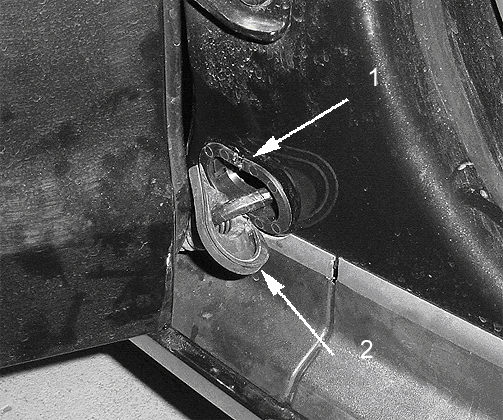
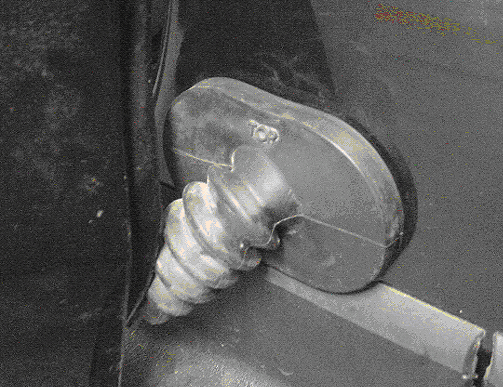
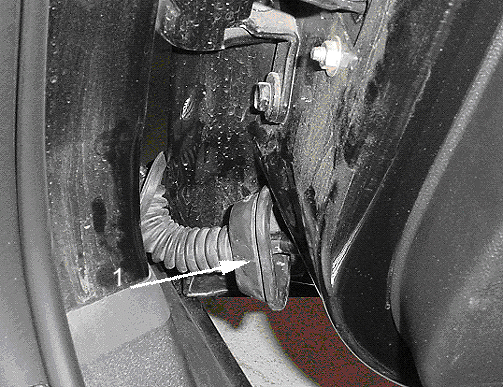
- Open the front and rear doors. Locate the grommet at the bottom of the B pillar. Remove the grommet (2) from the grommet retainer (1) by pealing the rubber grommet back from retainer.
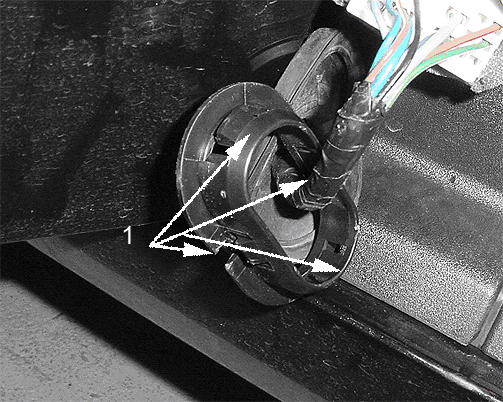
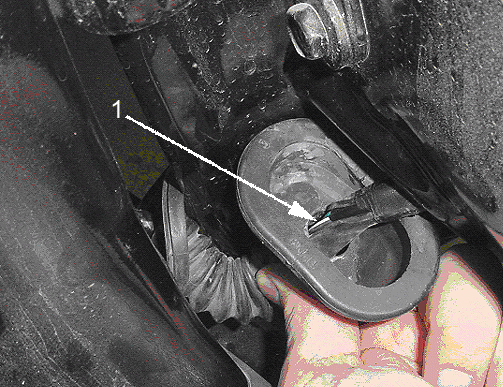
- Locate the retaining tangs (1) on the grommet retainer. There are two that are visible, one on top and the other on the bottom. There are another two at each end which are not visible but are accessible. Release the tangs with a flat bladed screwdriver and pull the grommet retainer out of the body opening.
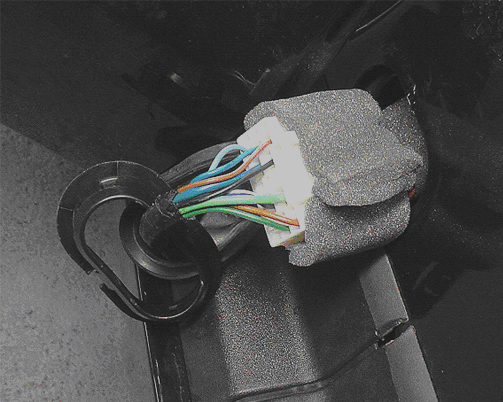
- Gently feed the wiring harness connector out through the body opening where the grommet was prior to removal.
- Disconnect the connector. Inspect and clean out any water or corrosion from the connector. Should corrosion be found, use contact cleaner and a suitably sized probe to scrape the terminals clean. Apply Nyogel connector grease to the terminals and reconnect and disconnect several times to work grease into the terminals. (If corrosion is found to be excessive and cannot be removed, replace the affected harnesses).
- Push the connector back through body opening. Prior to reinstalling the grommet retainer to the body, install the rubber grommet to the retainer (1).
- Reinstall the grommet and retainer assembly to body
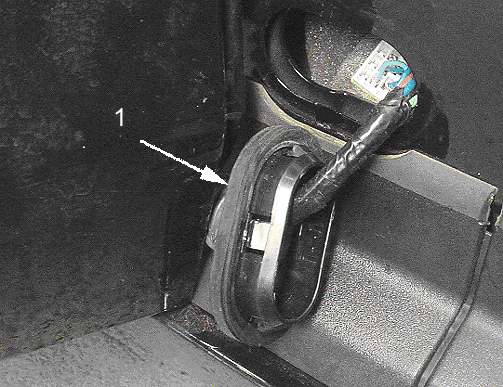
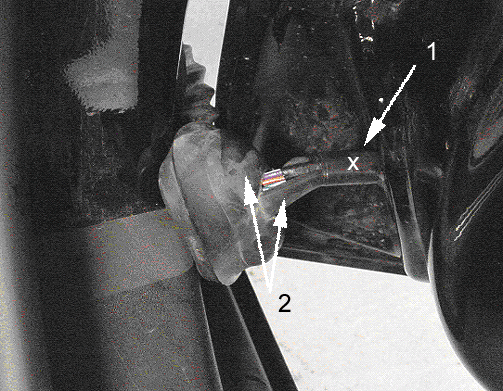
- Locate where the grommet enters the door (1) and pull the grommet out of door.
- Looking into the grommet, locate the unsealed area (1) between the wiring harness and the grommet.
Parts Information
Part Number | Description | Qty |
|---|---|---|
92205137 | Permacel Sealing Tape | 1 |
92146329 | Nyogel Grease | 1 |
Warranty Information
For vehicles repaired under warranty, use:
Labor Operation | Description | Labor Time |
|---|---|---|
N6634 | Add sealing tape to harness grommet - both rear doors | 0.4 hr |
