For 1990-2009 cars only
Fuel Tank Filler Door Lock Actuator Replacement Sedan
Removal Procedure
- Remove the rear compartment side trim (right) panel. Refer to Rear Compartment Side Trim Panel Replacement
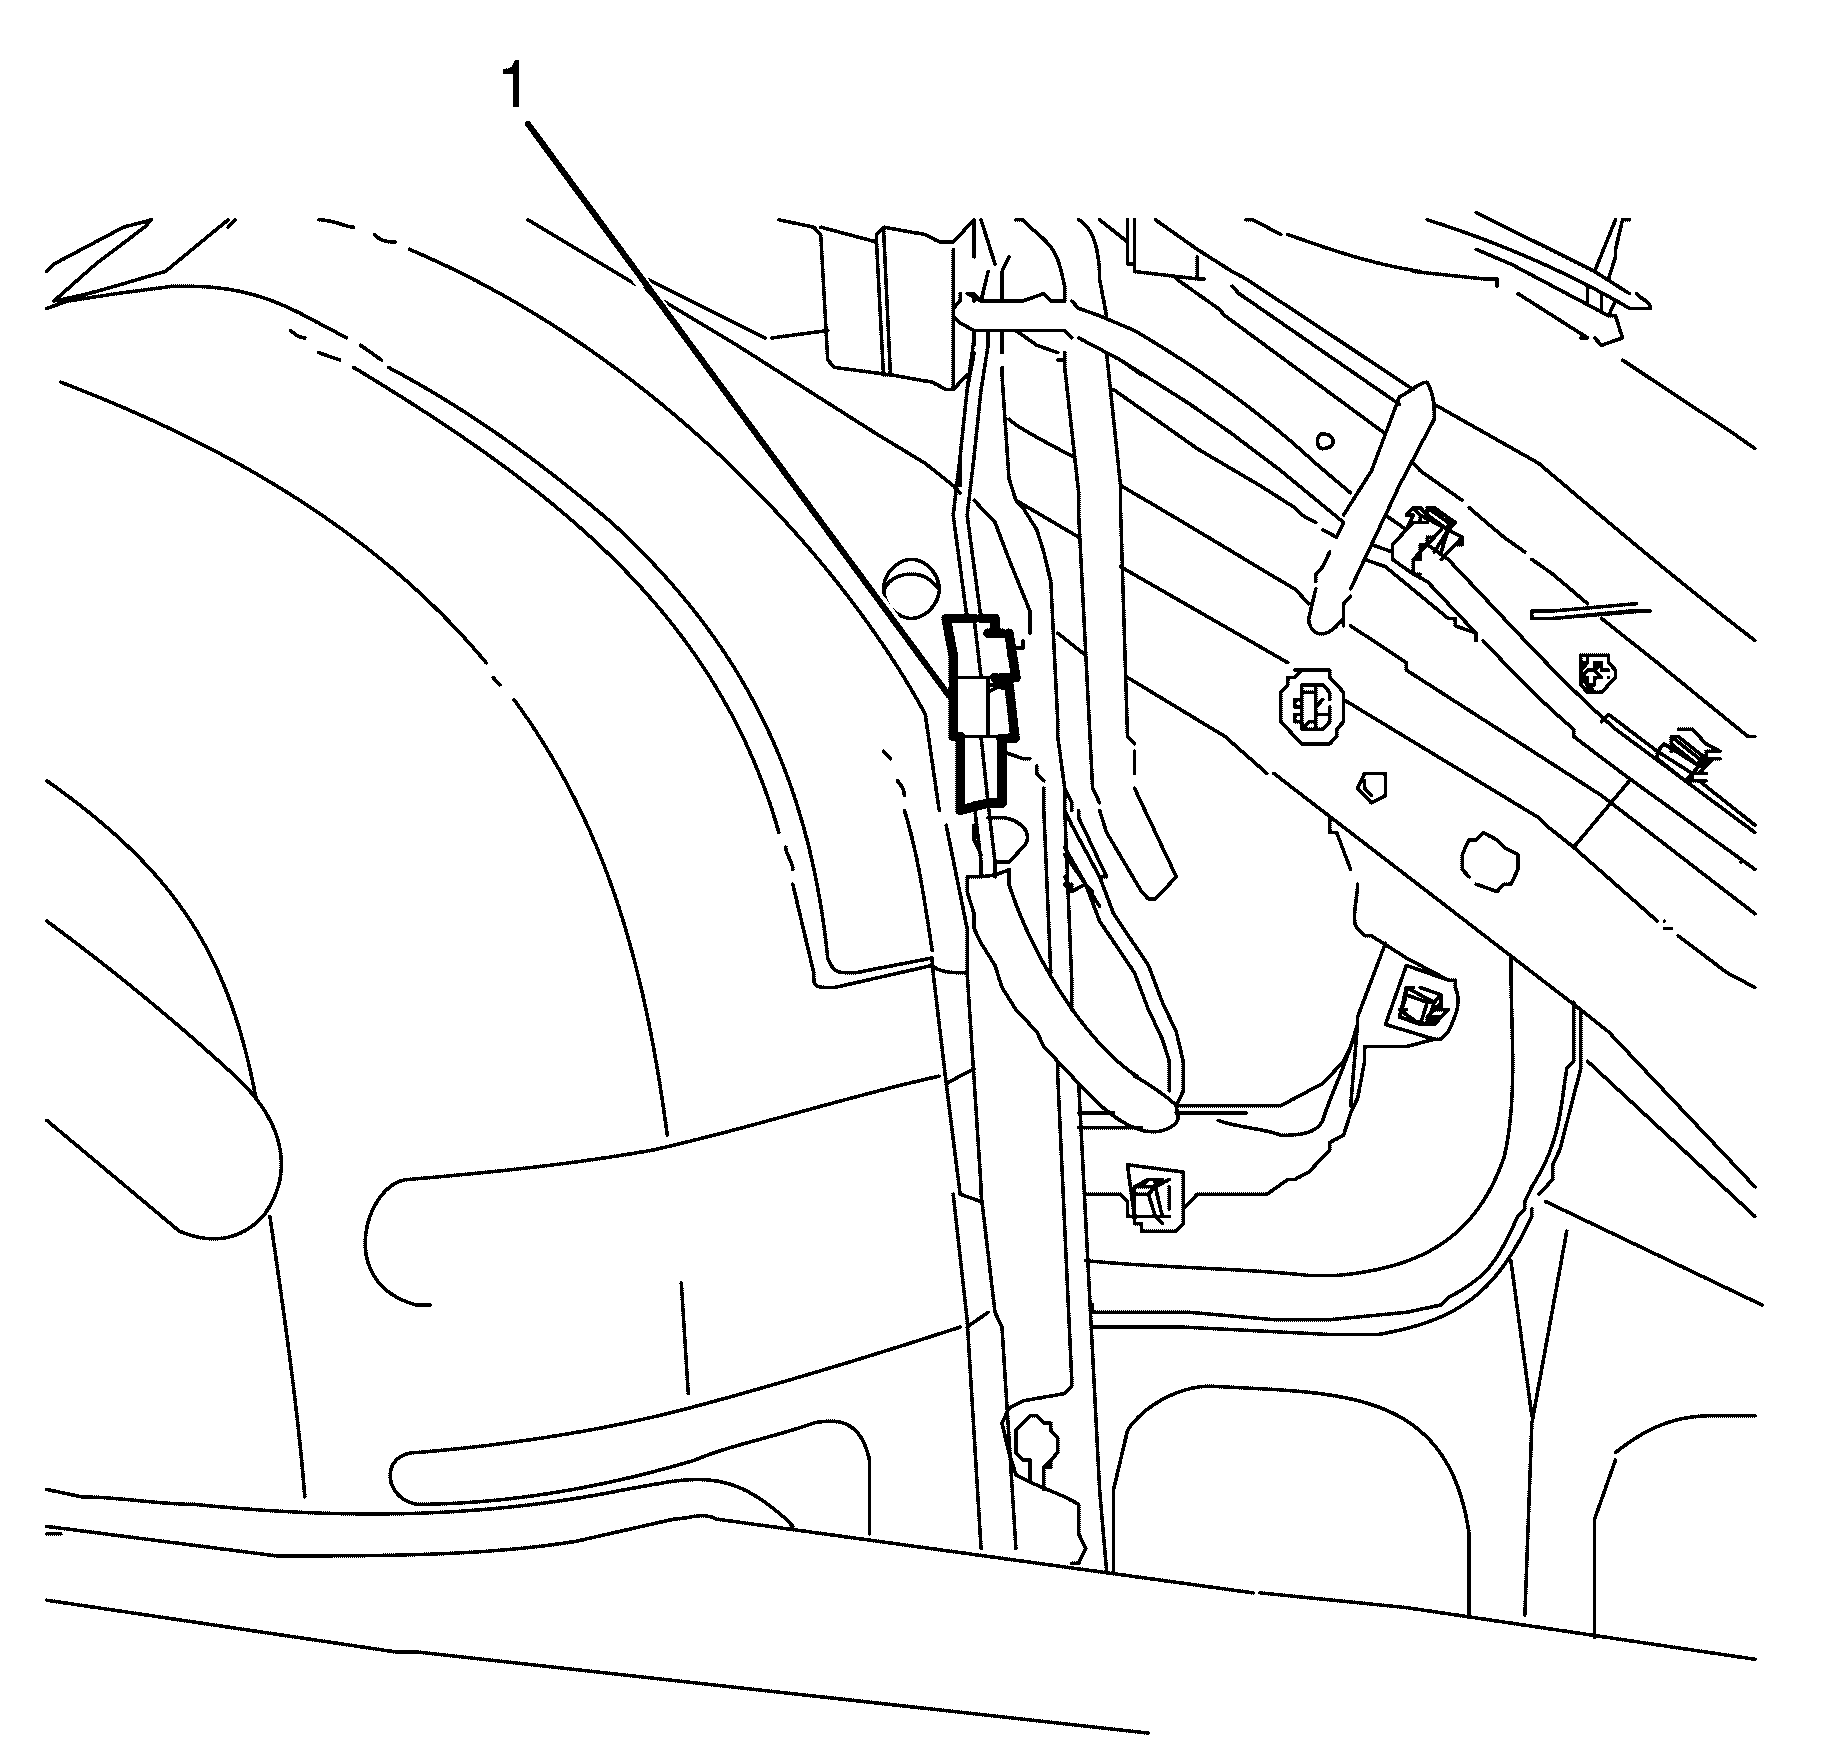
- Disconnect the electrical connector (1) to the fuel filler door release actuator.
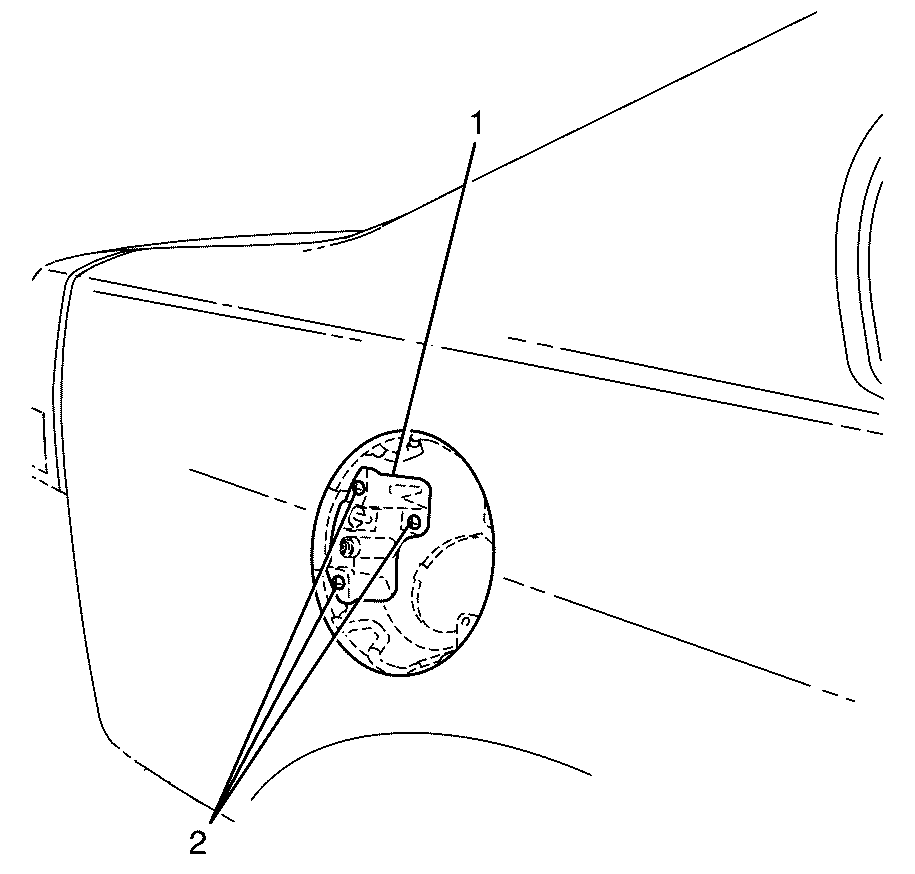
- Remove the fuel filler door release actuator to fuel filler neck retaining screws (2).
- Remove the fuel filler door release actuator (1) from the upper fuel filler neck.


Installation Procedure
- Install the fuel filler door release actuator (1) to the upper fuel filler neck.
- Install the fuel filler door release actuator to upper fuel filler neck retaining screws (2).
- Connect the electrical connector (1) to the fuel filler door release actuator.
- Install the rear compartment side trim (right) panel. Refer to Rear Compartment Side Trim Panel Replacement

Notice: Refer to Fastener Notice in the Preface section.
Tighten
Tighten the screws to 2 N·m (18 lb in).

Fuel Tank Filler Door Lock Actuator Replacement Sportwagon
Removal Procedure
- Install a suitable liftgate brace to the vehicle.
- Remove the rear end trim finish panel. Refer to Rear End Trim Finish Panel Replacement.
- Remove the luggage shade. Refer to Luggage Shade Replacement.
- Remove the rear compartment floor panel carpet. Refer to Rear Compartment Floor Panel Carpet Replacement.
- Remove the right hand side load floor stationary panel carpet. Refer to Load Floor Stationary Panel Carpet Replacement.
- Remove the load floor front panel carpet. Refer to Load Floor Front Panel Carpet Replacement.
- Remove the right hand side quarter inner trim finish panel. Refer to Quarter Inner Trim Finish Panel Replacement.
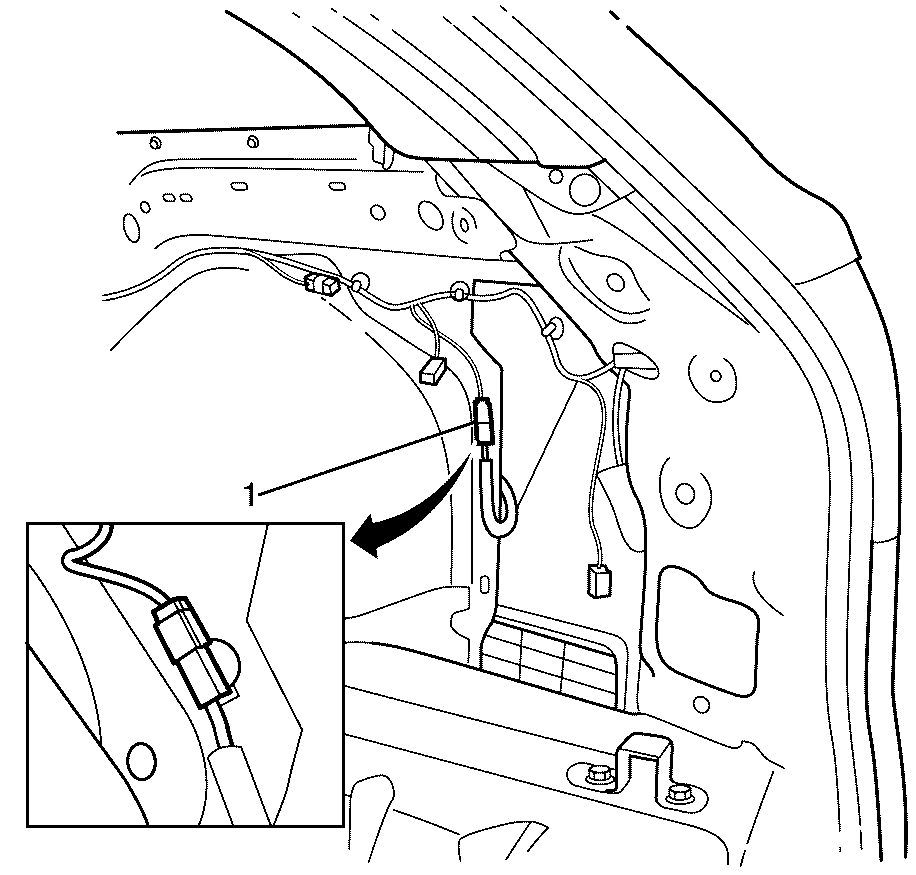
- Disconnect the electrical connector (1) from the fuel filler door release actuator.
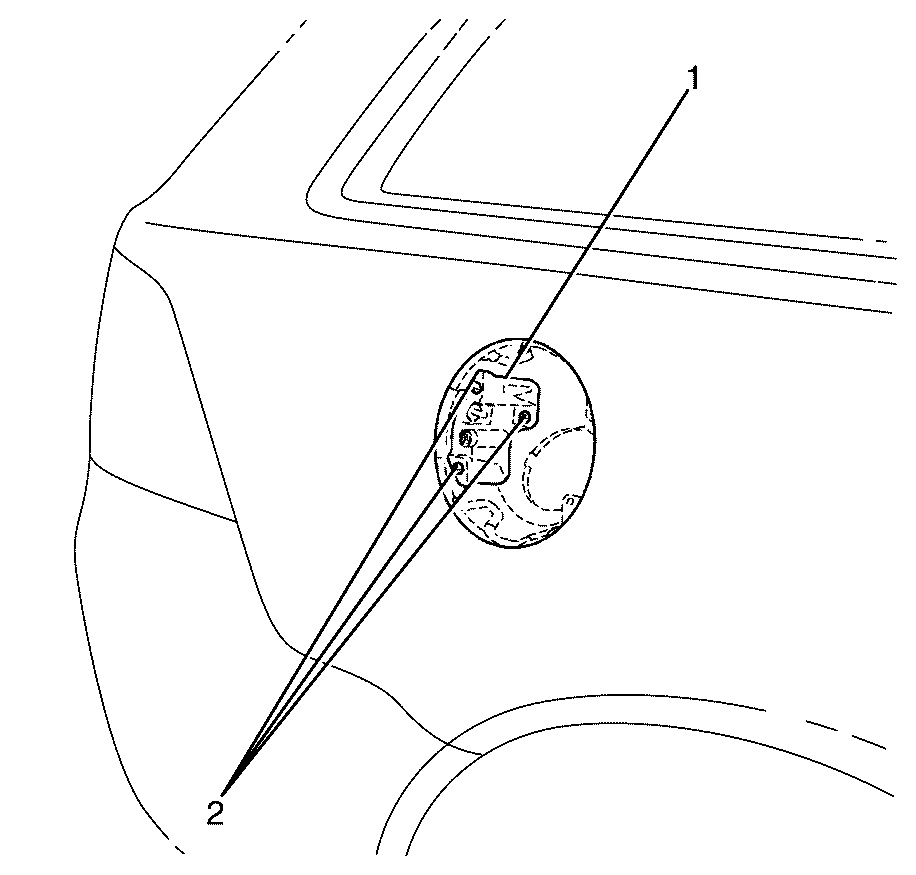
- Remove the fuel filler door release actuator to upper fuel filler neck retaining screws (2).
- Remove the fuel filler door release actuator (1) from the upper fuel filler neck.
Important: When a suitable hold open device is being removed or installed, provide alternate support to avoid the possibility of damage to the vehicle or personal injury.


Installation Procedure
- Install the fuel filler door release actuator (1) to the upper fuel filler neck.
- Install the fuel filler door release actuator to upper fuel filler neck retaining screws (2).
- Connect the electrical connector (1) to the fuel filler door release actuator.
- Install the quarter inner trim finish panel. Refer to Quarter Inner Trim Finish Panel Replacement.
- Install the load floor front panel carpet. Refer to Load Floor Front Panel Carpet Replacement.
- Install the right hand side load floor stationary panel carpet. Refer to Load Floor Stationary Panel Carpet Replacement.
- Install the rear compartment floor panel carpet. Refer to Rear Compartment Floor Panel Carpet Replacement.
- Install the luggage shade. Refer to Luggage Shade Replacement.
- Install the rear end trim finish panel. Refer to Rear End Trim Finish Panel Replacement.
- Remove the suitable liftgate brace from the vehicle.

Notice: Refer to Fastener Notice in the Preface section.
Tighten
Tighten the screws to 2 N·m (18 lb in).

Important: When a suitable hold open device is being removed or installed, provide alternate support to avoid the possibility of damage to the vehicle or personal injury.
