For 1990-2009 cars only
Removal Procedure
- Open the liftgate.
- Install a suitable liftgate brace to the vehicle.
- Remove the liftgate strut. Refer to Liftgate Strut Replacement.
- Using a wax pencil, mark the location of the liftgate hinge to the liftgate and the rear quarter panel.
- Remove the liftgate. Refer to Liftgate Replacement.
- Remove the headlining rear trim panel retainer. Refer to Headlining Rear Trim Panel Retainer Replacement.
- Remove the quarter inner trim finish panel. Refer to Quarter Inner Trim Finish Panel Replacement.
- Remove the body side window rear garnish moulding. Refer to Body Side Window Rear Garnish Molding Replacement.
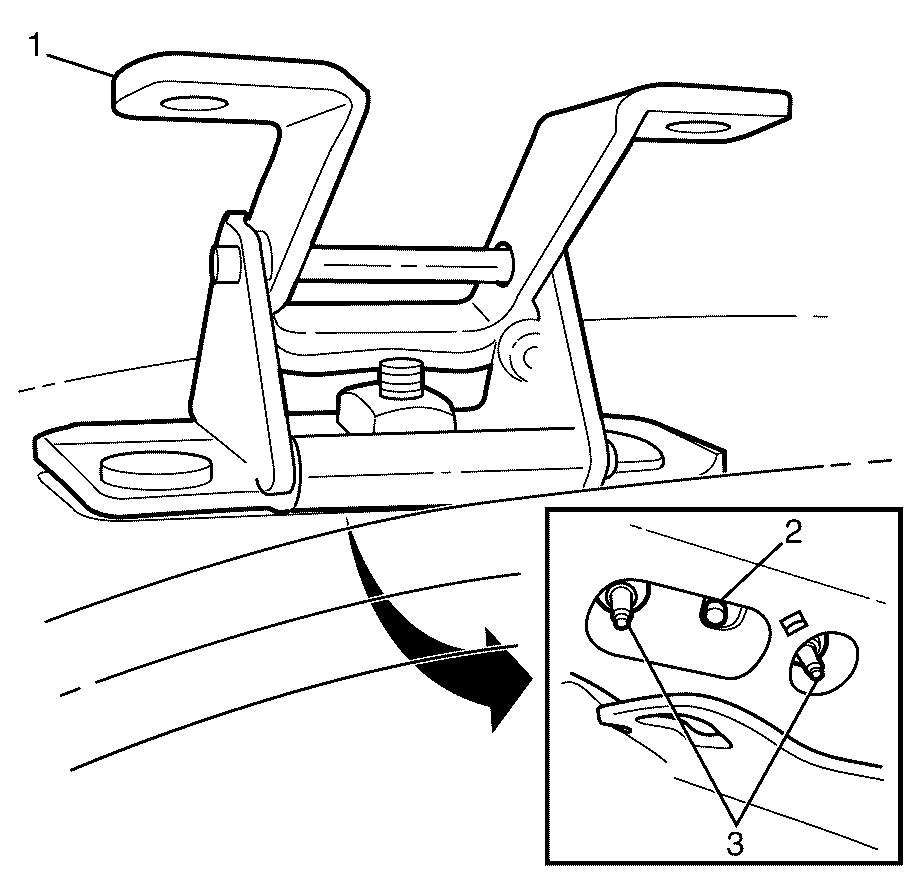
- Remove the liftgate hinge to the rear quarter panel retaining nuts (3) and retaining bolt (2).
- Remove the liftgate hinge (1) from the rear quarter panel.
Important: Apply pressure only at the end of the liftgate strut that you are removing or attaching. DO NOT apply pressure to the middle of the strut because damage or bending will result.

Installation Procedure
- Install the liftgate hinge (1) to the rear quarter panel.
- Install the liftgate hinge to the rear quarter panel retaining nuts (3) and retaining bolt (2).
- Install the body side window rear garnish moulding. Refer to Body Side Window Rear Garnish Molding Replacement.
- Install the quarter inner trim finish panel. Refer to Quarter Inner Trim Finish Panel Replacement.
- Install the headlining rear trim panel retainer. Refer to Headlining Rear Trim Panel Retainer Replacement.
- Install the liftgate. Refer to Liftgate Replacement.
- Install the liftgate strut. Refer to Liftgate Strut Replacement.
- Check and adjust the liftgate as necessary. Refer to Liftgate Adjustment.
- Remove the suitable liftgate brace from the vehicle.
- Close the liftgate.

Do not fully tighten at this stage.
