For 1990-2009 cars only
Removal Procedure
- Install a suitable liftgate brace to the vehicle.
- Remove the liftgate window side garnish moulding. Refer to Liftgate Window Side Garnish Molding Replacement.
- Remove the liftgate window lower garnish moulding. Refer to Liftgate Window Lower Garnish Molding Replacement.
- Remove the liftgate trim panel. Refer to Liftgate Trim Panel Replacement.
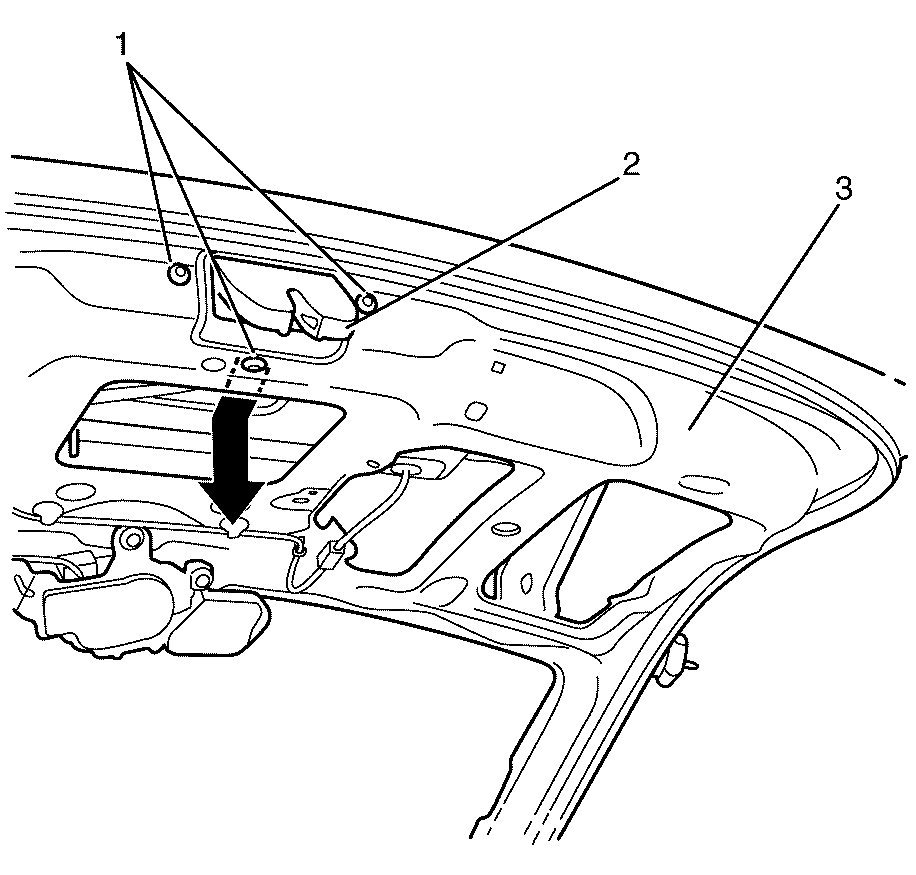
- Remove the liftgate latch to liftgate retaining bolts (1).
- Manoeuvre the liftgate latch (2) from the liftgate (3) through the access hole.
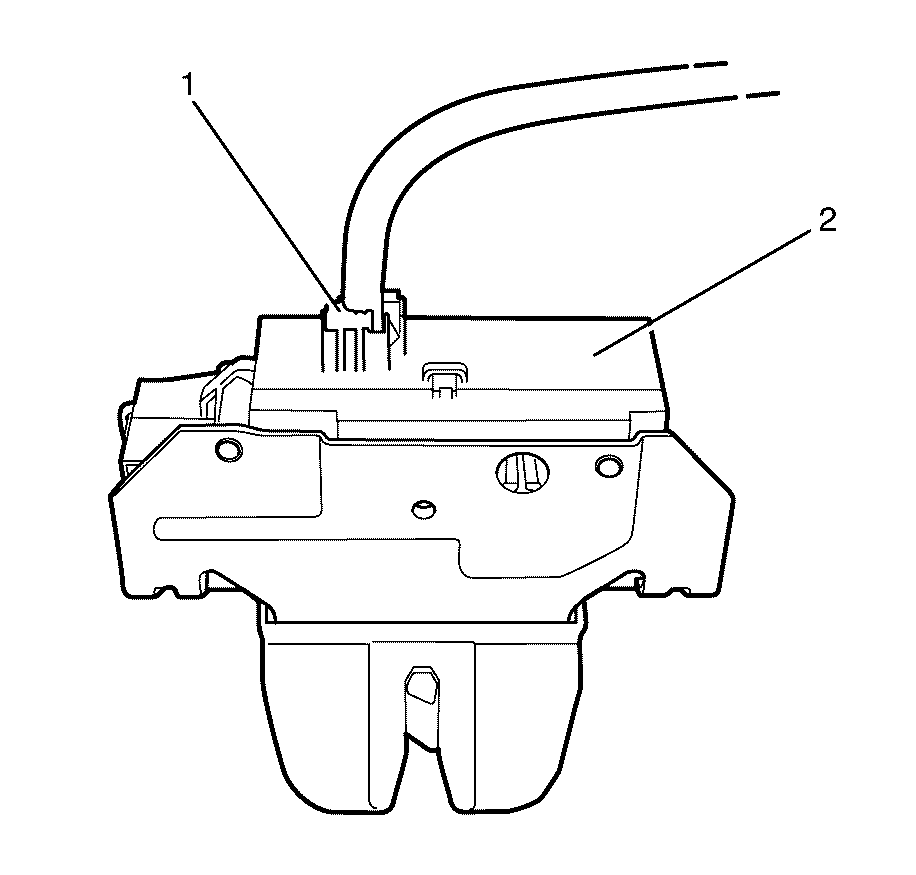
- Disconnect the electrical connector (1) from the liftgate latch (2).
- Remove the liftgate latch from the vehicle.
Important: When a suitable hold open device is being removed or installed, provide alternate support to avoid the possibility of damage to the vehicle or personal injury.


Installation Procedure
- Connect the electrical connector (1) to the liftgate latch (2).
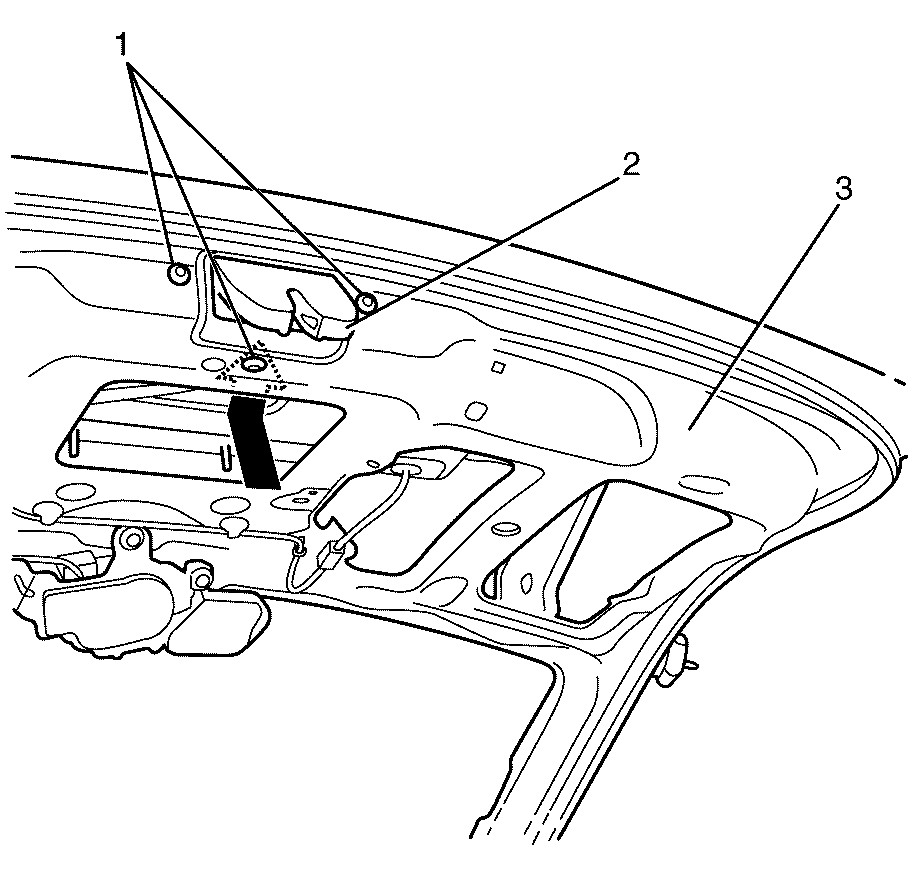
- Manoeuvre the liftgate latch (2) into position in the liftgate (3) through the access hole.
- Install the liftgate latch to liftgate retaining bolts (1).
- Install the liftgate trim panel. Refer to Liftgate Trim Panel Replacement.
- Install the liftgate window lower garnish moulding. Refer to Liftgate Window Lower Garnish Molding Replacement.
- Install the liftgate window side garnish moulding. Refer to Liftgate Window Side Garnish Molding Replacement.
- Remove the suitable liftgate brace from the vehicle.


Important: When a suitable hold open device is being removed or installed, provide alternate support to avoid the possibility of damage to the vehicle or personal injury.
Notice: Refer to Fastener Notice in the Preface section.
Tighten
Tighten the bolts to 10 N·m (89 lb in).
