Tools Required
| • | J 8433 Compressor
Pulley Puller |
Removal Procedure
- Remove the drive belt. Refer to
Drive Belt Replacement
in Engine Mechanical.
- Raise the vehicle. Refer to
Lifting and Jacking the Vehicle
in General Information.
- Remove the right side wheelhouse splash shield. Refer to
Front Fender Liner Replacement
in Body Front End.

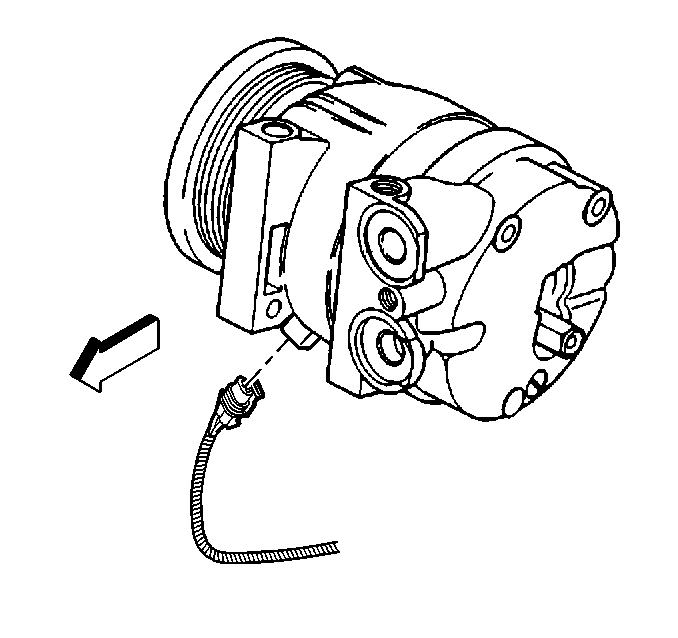
- Disconnect the electrical
connector from the compressor.
- Remove the compressor clutch plate and hub assembly. Refer to
Compressor Clutch Plate and Hub Assembly Removal
.
- Remove the compressor rotor and bearing assembly. Refer to
Clutch Rotor and/or Bearing Removal
.
- Mark the clutch coil terminal location on the compressor front
head.

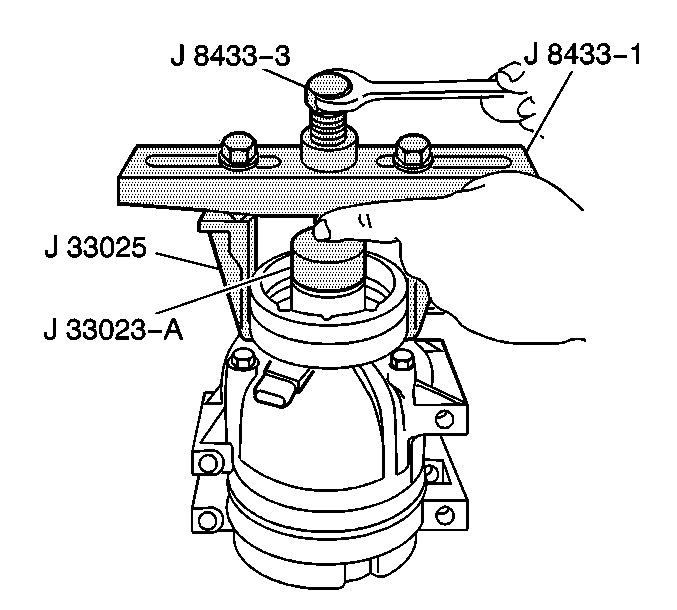
- Install the following
tools onto the A/C clutch coil:
- Tighten the center forcing screw of the puller bar until the A/C
clutch coil comes off of the compressor.
- Remove the following tools:
- Remove the A/C clutch coil.
Installation Procedure
- Place the clutch coil assembly on the front head with the coil
terminal at the positioned at the mark made during disassembly.
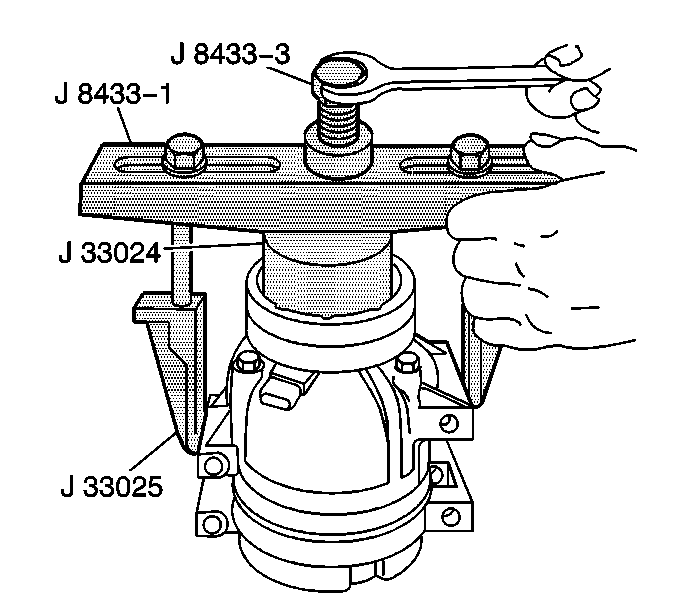
- Place the J 33024
over the internal opening of the clutch coil housing and align installer
with the compressor front head.

- Install the following
tools onto the A/C clutch coil:
- Tighten the center screw of the puller bar until the screw pushes
the A/C clutch coil all of the way down into position.
- Remove the following tools from the compressor:
- Install the compressor clutch rotor and bearing assembly. Refer
to
Clutch Rotor and/or Bearing Install
.
- Install the A/C compressor pulley. Refer to
Compressor Clutch Plate/Hub Assembly Install
.

- Install the electrical
connector to the compressor.
- Install the right side wheelhouse splash shield. Refer to
Front Fender Liner Replacement
in Body Front End.
- Lower the vehicle.
- Install the drive belt. Refer to
Drive Belt Replacement
in Engine Mechanical.


