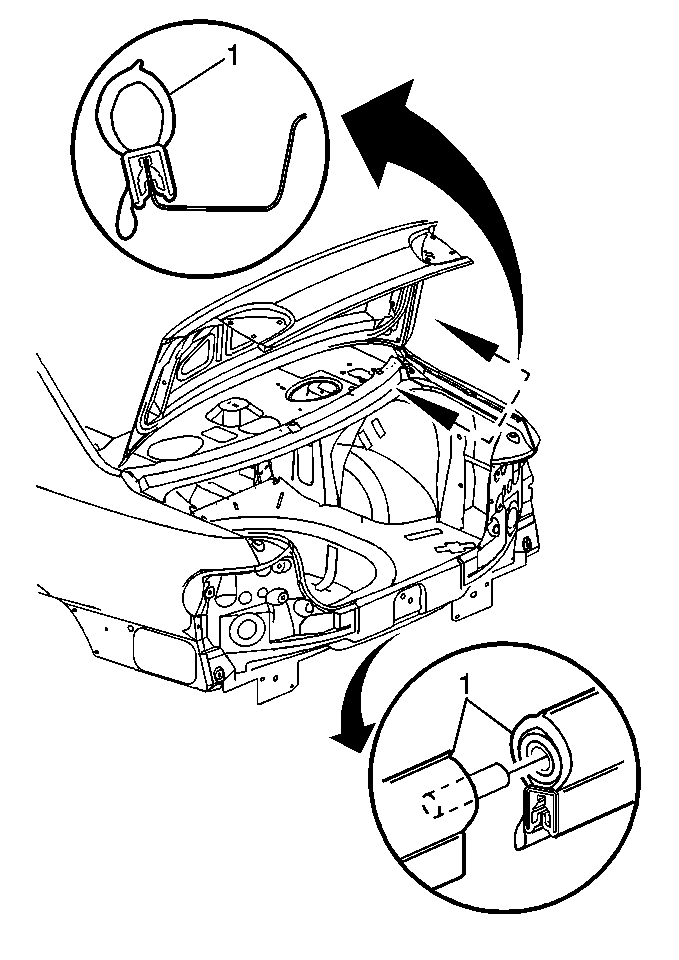
Removal Procedure

- Open the rear compartment.
- Starting at the joint, pull the rear compartment lid weatherstrip (1)
from the from the flange.
- Remove the rear compartment lid weatherstrip from the vehicle.
- Remove any adhesive from the flange with 3M™ Adhesive Remover
P/N 8984 or equivalent.
Installation Procedure

Important: Apply light hand pressure in order to seat the strip when installing
the rear compartment lid weatherstrip to the flange. Impact loads, such as
with a mallet, will result in waterleaks.
- Position the rear compartment lid weatherstrip (1) to the flange.
- Use light hand pressure to seat the rear compartment lid weatherstrip (1)
to the flange.
- Inspect the entire flange opening in order to ensure that the
clinch is completely seated.
- Close the rear compartment.
- Use a hose with no nozzle attached to test the weatherstrip for
leaks.
- If the weatherstrip leaks, do the following:
| 6.1. | Remove the rear compartment lid weatherstrip from the flange. |
| 6.2. | Brush the perimeter of the flange with weatherstrip adhesive,
3M™ P/N 08011 or equivalent. |
| 6.3. | Install the rear compartment lid weatherstrip to the flange. |


