For 1990-2009 cars only
Fuel Tank Replacement Malibu Sedan
Removal Procedure
- Relieve the fuel system pressure. Refer to Fuel Pressure Relief .
- Drain the fuel tank. Refer to Fuel Tank Draining .
- Raise and support the vehicle. Refer to Lifting and Jacking the Vehicle in General Information.
- Disconnect the fuel pump module harness electrical connector from the vehicle underbody wiring harness.
- Disconnect the evaporative emissions (EVAP) vent valve solenoid harness electrical connector from the vehicle underbody wiring harness.
- If applicable, disengage the antilock brake system (ABS) wiring harness from the retainer on the side of the EVAP canister.
- Disconnect the fuel feed and purge lines at the fuel and brake line bundle on the right side of the vehicle.
- Cap or plug the fuel tank feed and vapor return pipes to prevent fuel loss and/or contamination.
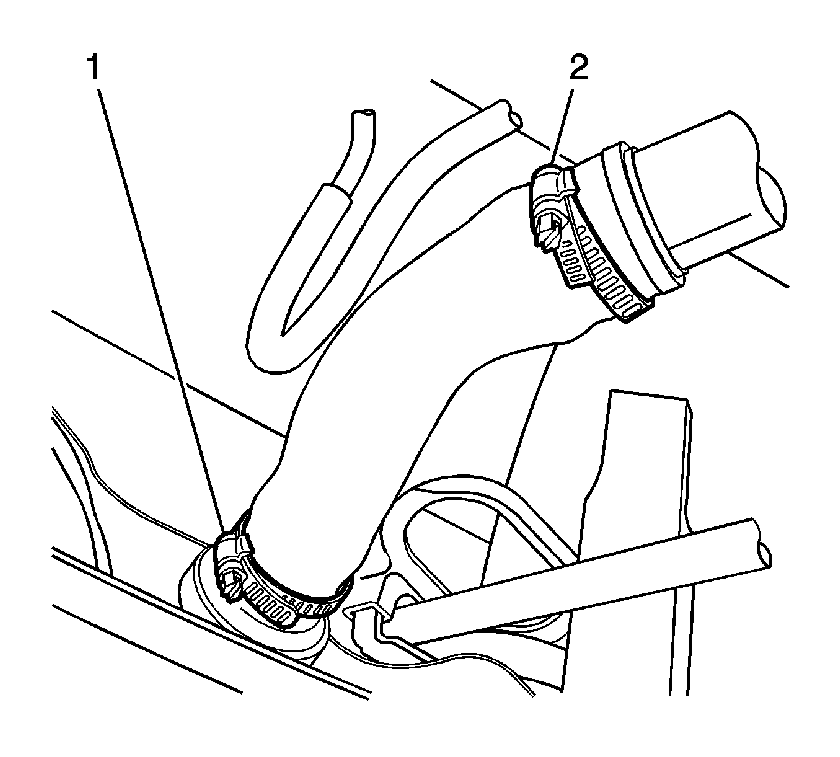
- Loosen the fuel filler pipe jumper hose clamp at the fuel tank (1).
- Disconnect the fuel filler pipe jumper hose from the fuel tank.
- Disconnect the vapor recirculation line that runs parallel to the fuel filler pipe jumper hose.
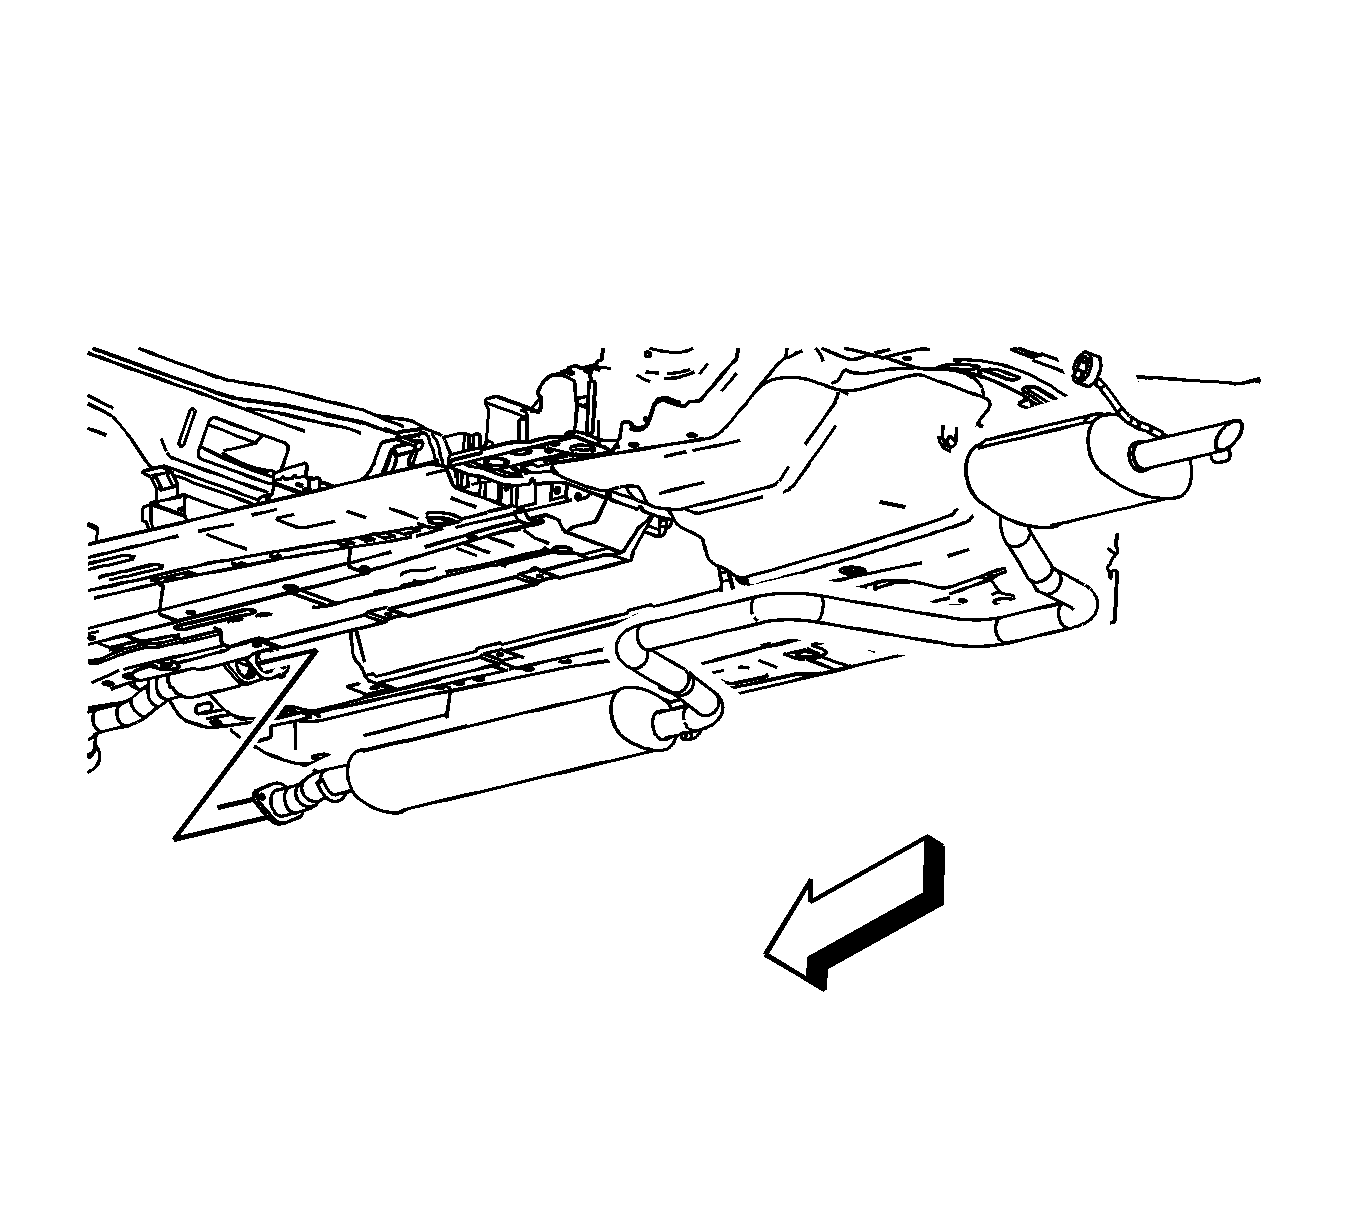
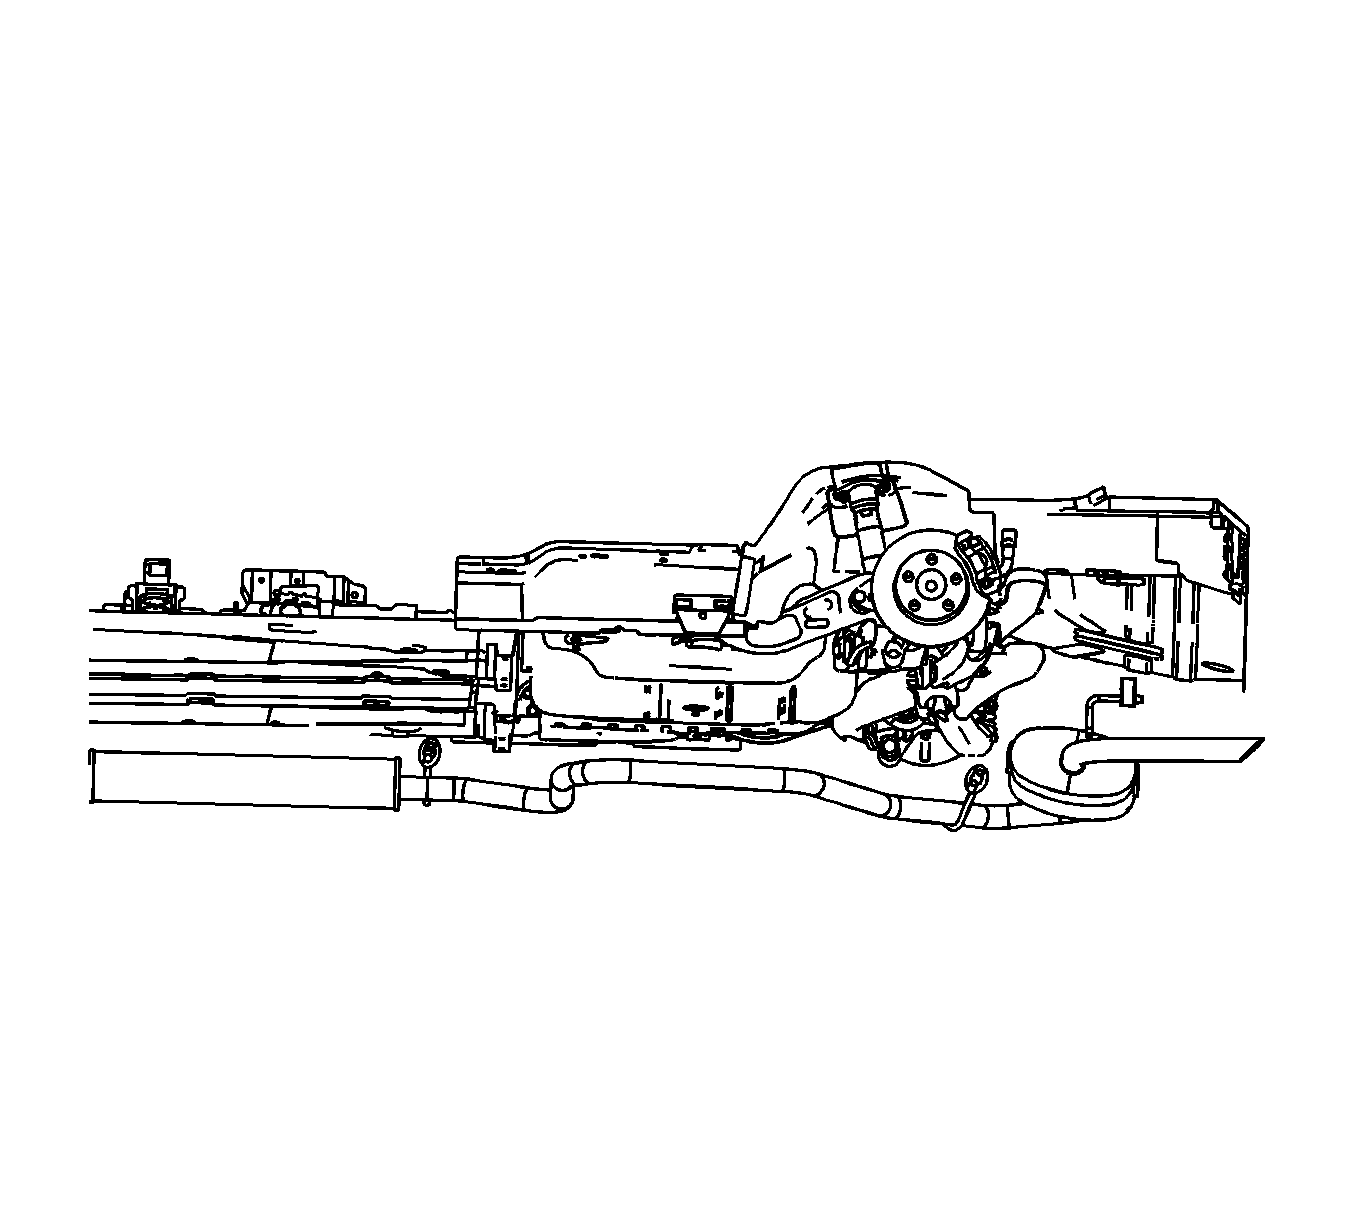
- Release the exhaust pipe insulators from the underbody hangers.
- Release the muffler insulator from the underbody hanger and slowly lower the exhaust to rest on a tall jackstand. If this is not possible, remove the rear half of the exhaust system at the take down flange.
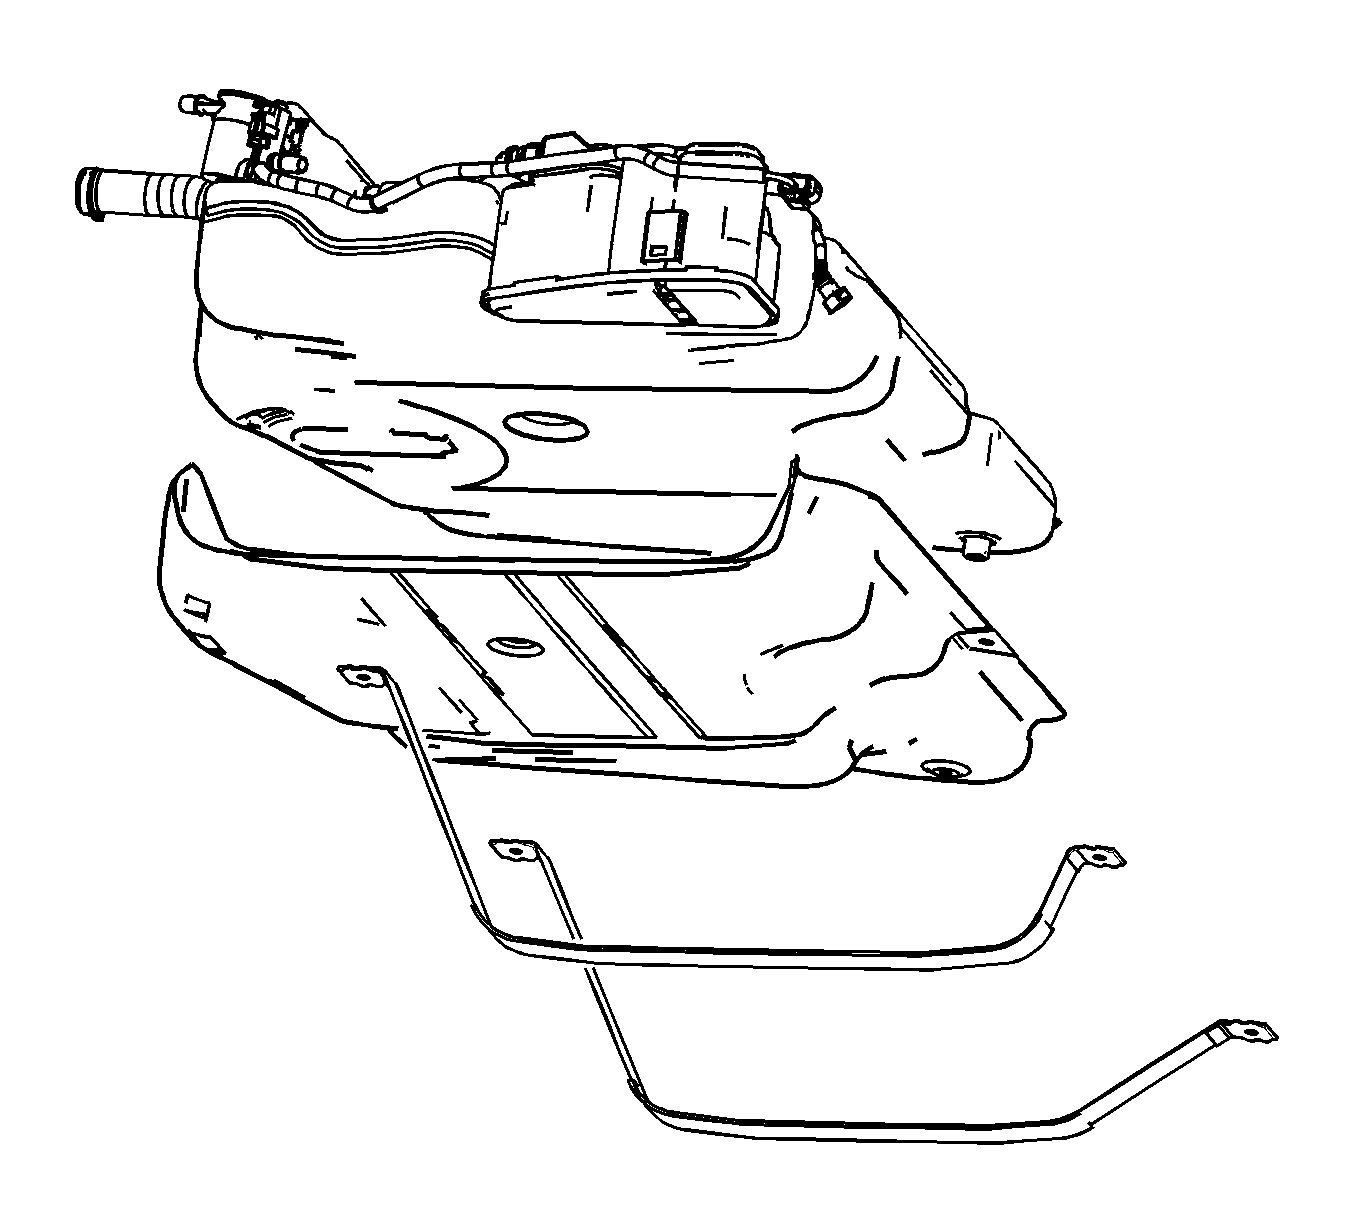
- Have an assistant support the fuel tank during fuel tank strap removal, and during tank removal. Or use an appropriate jack to support the fuel tank during removal
- Remove front LH fuel tank strap bolts.
- Remove the RH tank strap bolts.
- In order to clear the exhaust pipe, slowly lower the RH side of the fuel tank.
- Once the tank is clear of the RH frame rail, remove the fuel tank down and forward toward the RH side of the vehicle.
- If only the fuel tank is to be replaced, remove the fuel pump module assembly from the fuel tank. Refer to Fuel Sender Assembly Replacement .


Installation Procedure
- If fuel tank replacement was necessary, install the fuel pump module assembly to the fuel tank. Refer to Fuel Sender Assembly Replacement .
- Have an assistant support the fuel tank during fuel tank and fuel tank strap installation.
- Begin to install the LH side of the fuel tank over the exhaust pipe.
- Raise the RH side of the fuel tank into position inboard of the RH frame rail. Use care in feeding the fuel feed, the EVAP vapor pipe, and the fuel pump module electrical harness over the exhaust system.
- Install the RH fuel tank strap and strap bolts.
- Install the LH fuel tank strap and strap bolts.
- Tighten the fuel tank strap bolts.
- Raise the exhaust into position and install the muffler insulator to the underbody hanger.
- Install the exhaust extension pipe insulators to the underbody hangers.
- Connect the fuel pump module harness electrical connector to the vehicle underbody connector.
- Connect the fuel filler pipe jumper hose to the fuel tank.
- Tighten the fuel filler pipe jumper hose clamp (1) at the fuel tank.
- Connect vapor recirculation line that runs parallel to the fuel filler pipe jumper hose.
- Remove the caps or plugs from the fuel tank feed and vapor return pipes.
- Connect the fuel feed and vapor purge lines to the fuel and brake line bundle on the right side of the vehicle.
- Connect the fuel sender electrical connector to the underbody harness and connect the EVAP purge valve electrical connector to the underbody harness.
- Attach the ABS harness (if applicable) to the retainer on the side of the EVAP canister.
- Lower the vehicle.
- Refill the fuel tank.
- Connect the negative battery cable. Refer to Battery Negative Cable Disconnection and Connection in Engine Electrical.
- Inspect for fuel leaks using the following procedure:

Notice: Refer to Fastener Notice in the Preface section.
Tighten
Tighten the bolts to 20 N·m (15 lb ft).


Notice: Refer to Component Fastener Tightening Notice in the Preface section.
Tighten
Tighten the clamp to 4 N·m (35 lb in).
| 21.1. | Turn ON the ignition, with the engine OFF for 2 seconds. |
| 21.2. | Turn OFF the ignition for 10 seconds. |
| 21.3. | Turn ON the ignition, with the engine OFF. |
| 21.4. | Inspect for fuel leaks. |
Fuel Tank Replacement Malibu MAXX
Removal Procedure
- Relieve the fuel system pressure. Refer to Fuel Pressure Relief .
- Drain the fuel tank. Refer to Fuel Tank Draining .
- Raise and support the vehicle. Refer to Lifting and Jacking the Vehicle in General Information.
- Disconnect the fuel pump module harness electrical connector from the vehicle underbody wiring harness.
- Disconnect the evaporative emissions (EVAP) vent valve solenoid harness electrical connector from the vehicle underbody wiring harness.
- If applicable, disengage the antilock brake system (ABS) wiring harness from the retainer on the side of the EVAP canister.
- Disconnect the fuel feed and purge lines at the fuel and brake line bundle on the right side of the vehicle.
- Cap or plug the fuel tank feed and vapor return pipes to prevent fuel loss and/or contamination.
- Loosen the fuel filler pipe jumper hose clamp at the fuel tank (1).
- Disconnect the fuel filler pipe jumper hose from the fuel tank.
- Disconnect the vapor recirculation line that runs parallel to the fuel filler pipe jumper hose.
- Release the exhaust pipe insulators from the underbody hangers.
- Release the muffler insulator from the underbody hanger and slowly lower the exhaust to rest on a tall jackstand. If this is not possible, remove the rear half of the exhaust system at the take down flange.
- Have an assistant support the fuel tank during fuel tank strap removal, and during tank removal. Or use an appropriate jack to support the fuel tank during removal
- Remove front LH fuel tank strap bolts.
- Remove the RH tank strap bolts.
- In order to clear the exhaust pipe, slowly lower the RH side of the fuel tank.
- Once the tank is clear of the RH frame rail, remove the fuel tank down and forward toward the RH side of the vehicle.
- If only the fuel tank is to be replaced, remove the fuel pump module assembly from the fuel tank. Refer to Fuel Sender Assembly Replacement .


Installation Procedure
- If fuel tank replacement was necessary, install the fuel pump module assembly to the fuel tank. Refer to Fuel Sender Assembly Replacement .
- Have an assistant support the fuel tank during fuel tank and fuel tank strap installation.
- Begin to install the LH side of the fuel tank over the exhaust pipe.
- Raise the RH side of the fuel tank into position inboard of the RH frame rail. Use care in feeding the fuel feed, the EVAP vapor pipe, and the fuel pump module electrical harness over the exhaust system.
- Install the RH fuel tank strap and strap bolts.
- Install the LH fuel tank strap and strap bolts.
- Tighten the fuel tank strap bolts.
- Raise the exhaust into position and install the muffler insulator to the underbody hanger.
- Install the exhaust extension pipe insulators to the underbody hangers.
- Connect the fuel pump module harness electrical connector to the vehicle underbody connector.
- Connect the fuel filler pipe jumper hose to the fuel tank.
- Tighten the fuel filler pipe jumper hose clamp (1) at the fuel tank.
- Connect vapor recirculation line that runs parallel to the fuel filler pipe jumper hose.
- Remove the caps or plugs from the fuel tank feed and vapor return pipes.
- Connect the fuel feed and vapor purge lines to the fuel and brake line bundle on the right side of the vehicle.
- Connect the fuel sender electrical connector to the underbody harness and connect the EVAP purge valve electrical connector to the underbody harness.
- Attach the ABS harness (if applicable) to the retainer on the side of the EVAP canister.
- Lower the vehicle.
- Refill the fuel tank.
- Connect the negative battery cable. Refer to Battery Negative Cable Disconnection and Connection in Engine Electrical.
- Inspect for fuel leaks using the following procedure:

Notice: Refer to Fastener Notice in the Preface section.
Tighten
Tighten the bolts to 20 N·m (15 lb ft).


Notice: Refer to Component Fastener Tightening Notice in the Preface section.
Tighten
Tighten the clamp to 4 N·m (35 lb in).
| 21.1. | Turn ON the ignition, with the engine OFF for 2 seconds. |
| 21.2. | Turn OFF the ignition for 10 seconds. |
| 21.3. | Turn ON the ignition, with the engine OFF. |
| 21.4. | Inspect for fuel leaks. |
