For 1990-2009 cars only
Removal Procedure
- Raise the vehicle on a hoist. Refer to Lifting and Jacking the Vehicle in General Information.
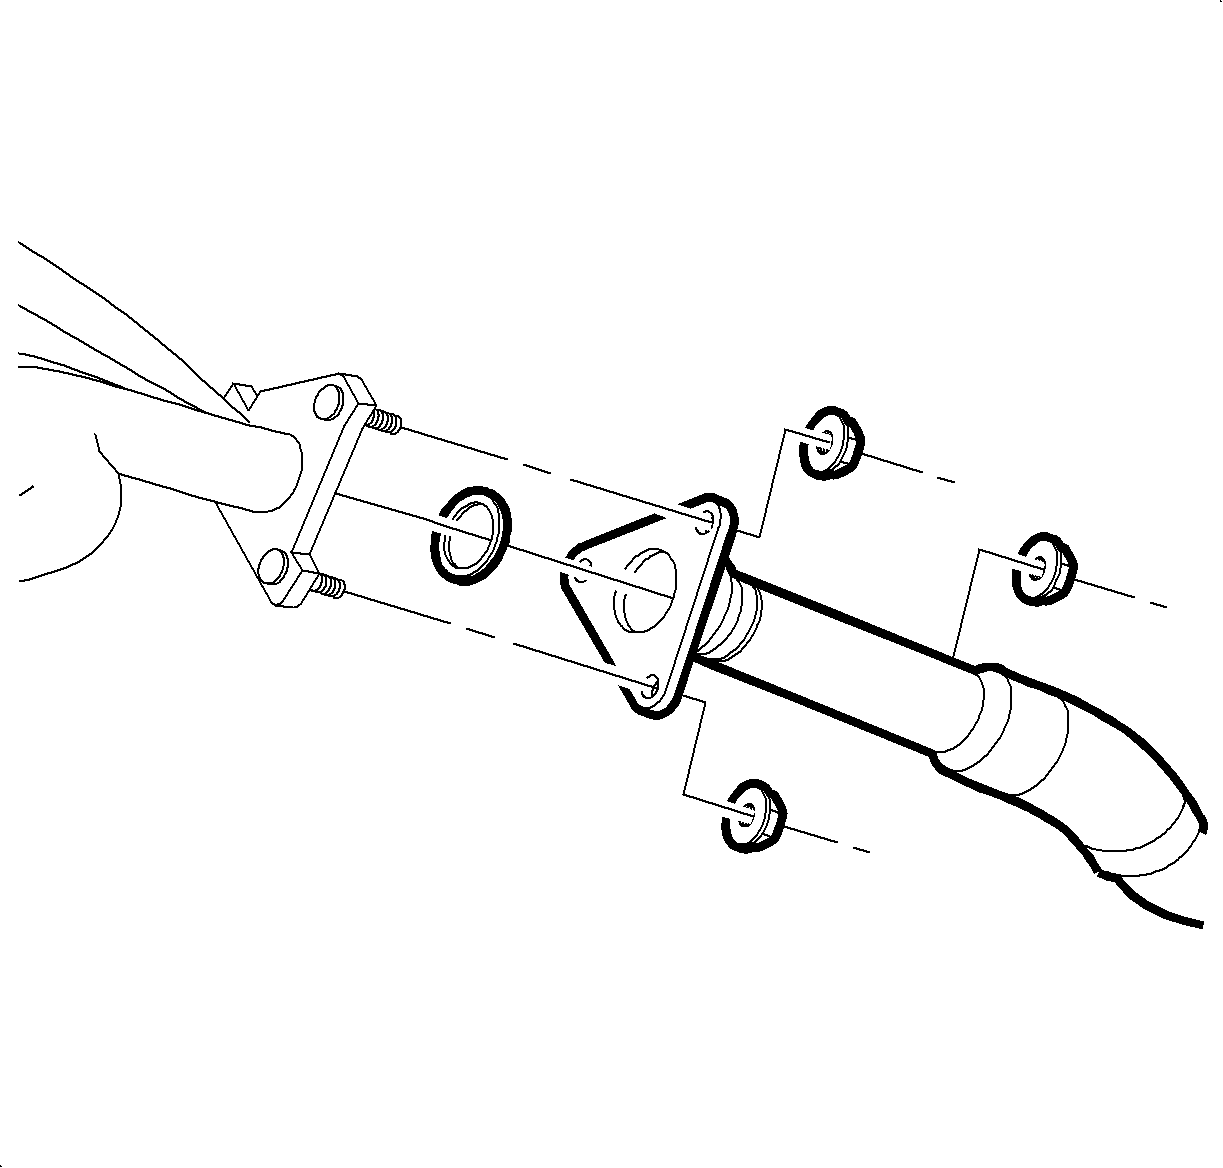
- Remove the exhaust manifold pipe-to-exhaust manifold nuts.
- Pull down on the exhaust manifold pipe just enough to free from the manifold studs and secure to the frame.
- Lower the vehicle.
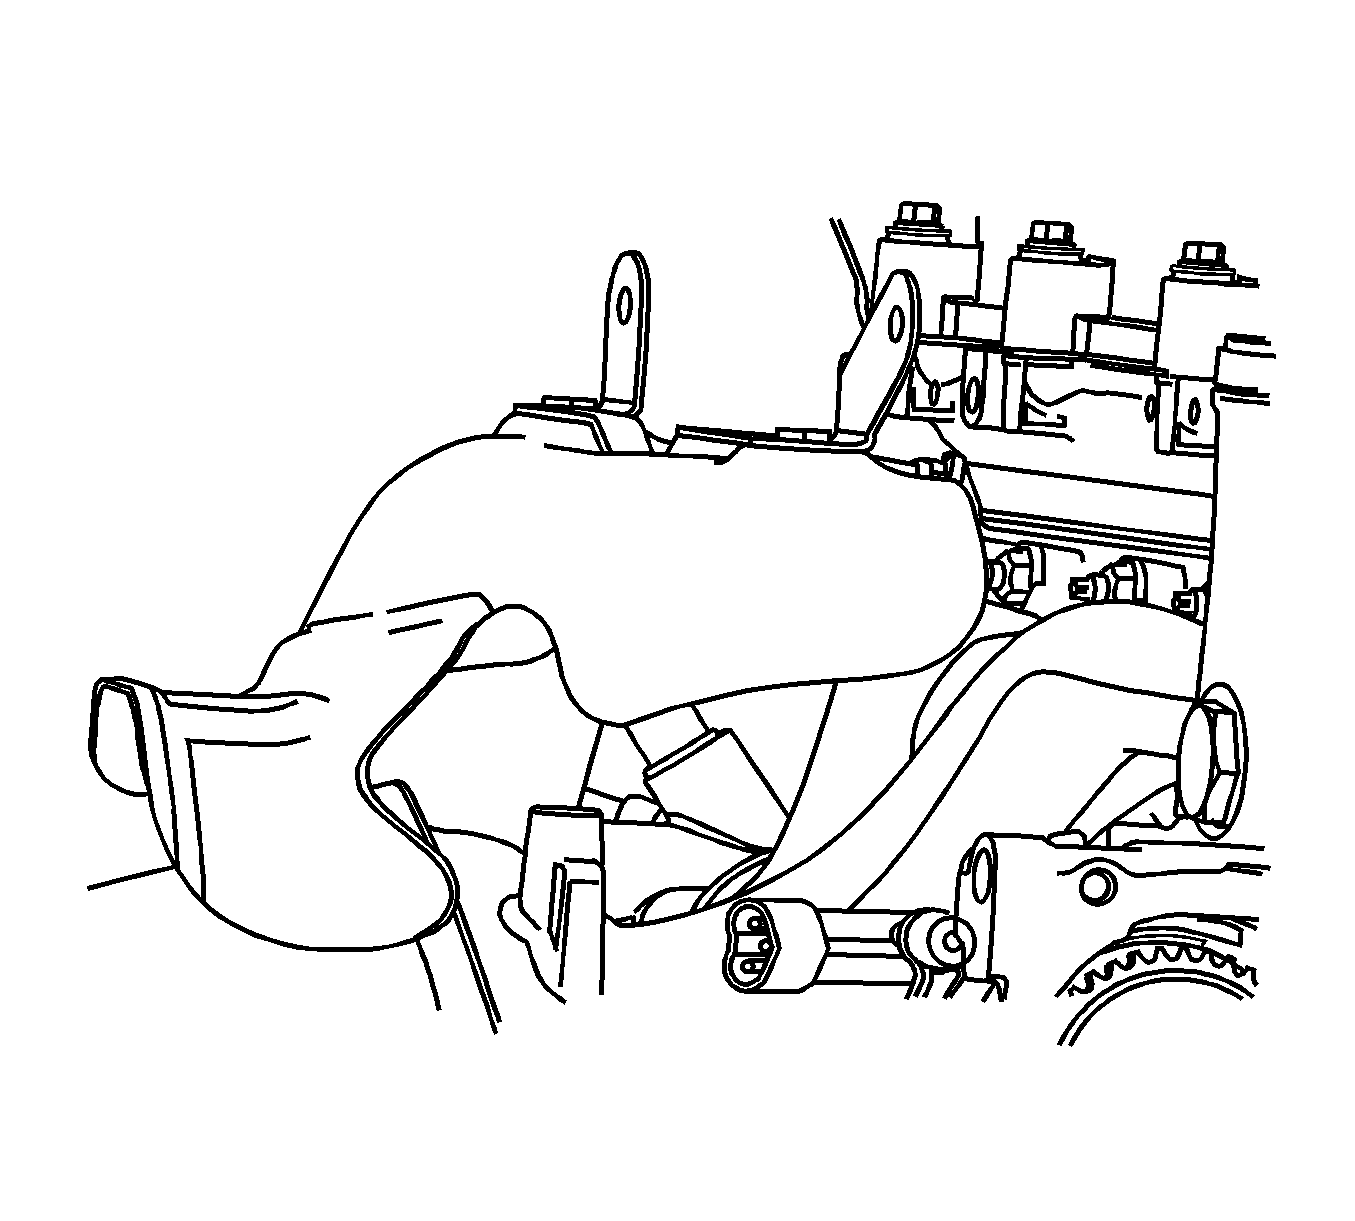
- Remove the exhaust manifold heat shield bolts.
- Remove the heat shield.
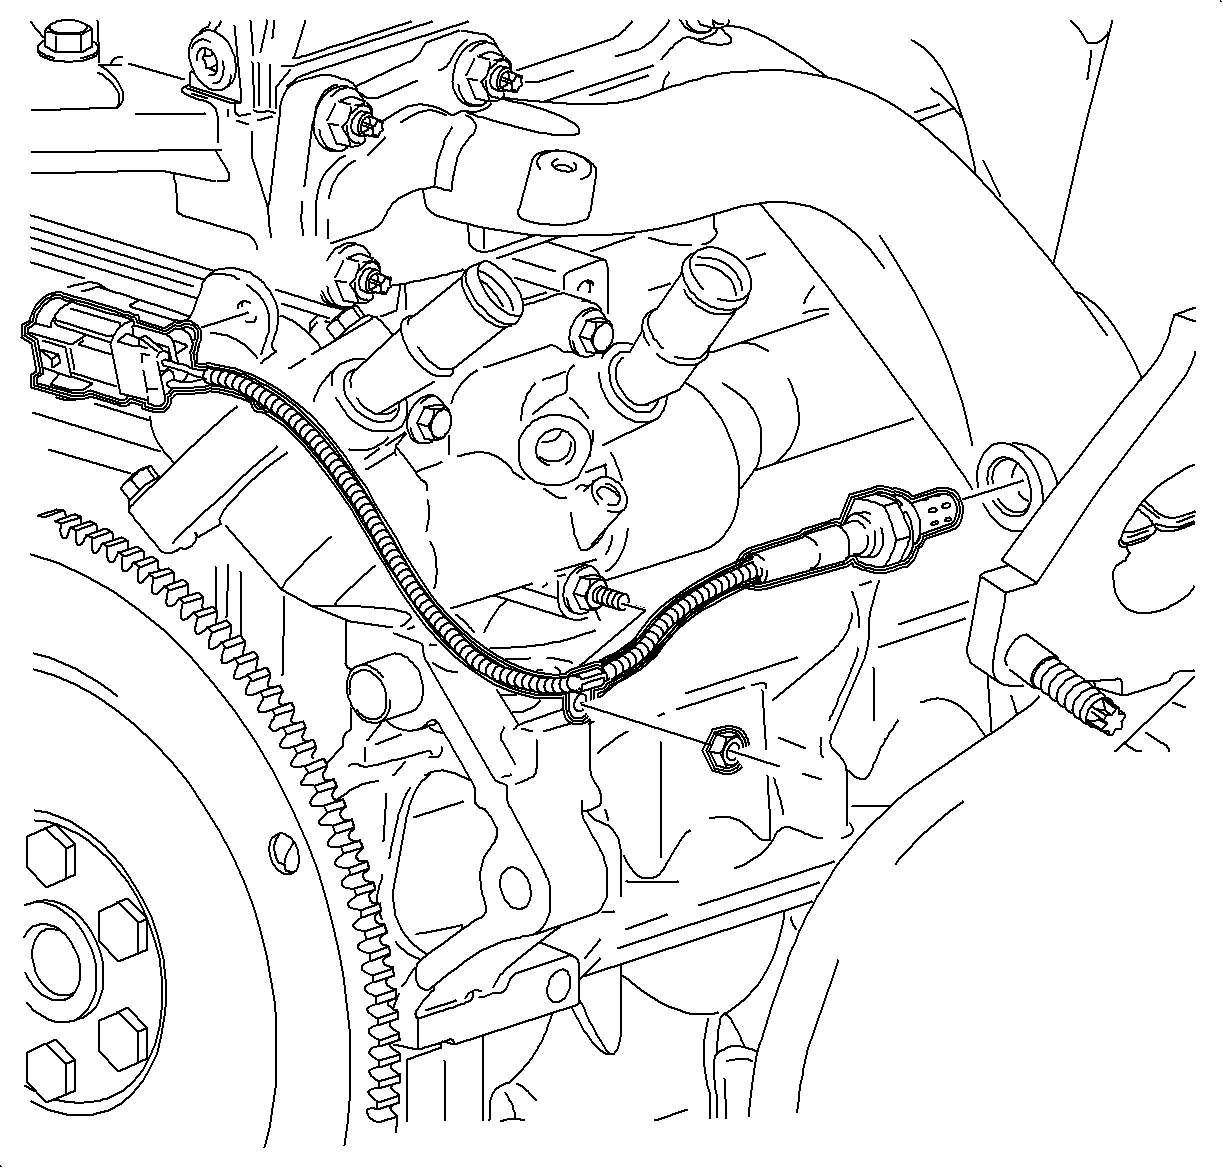
- Disconnect the exhaust manifold heated oxygen sensor (HO2S) electrical connection.
- Remove the HO2S from the manifold.
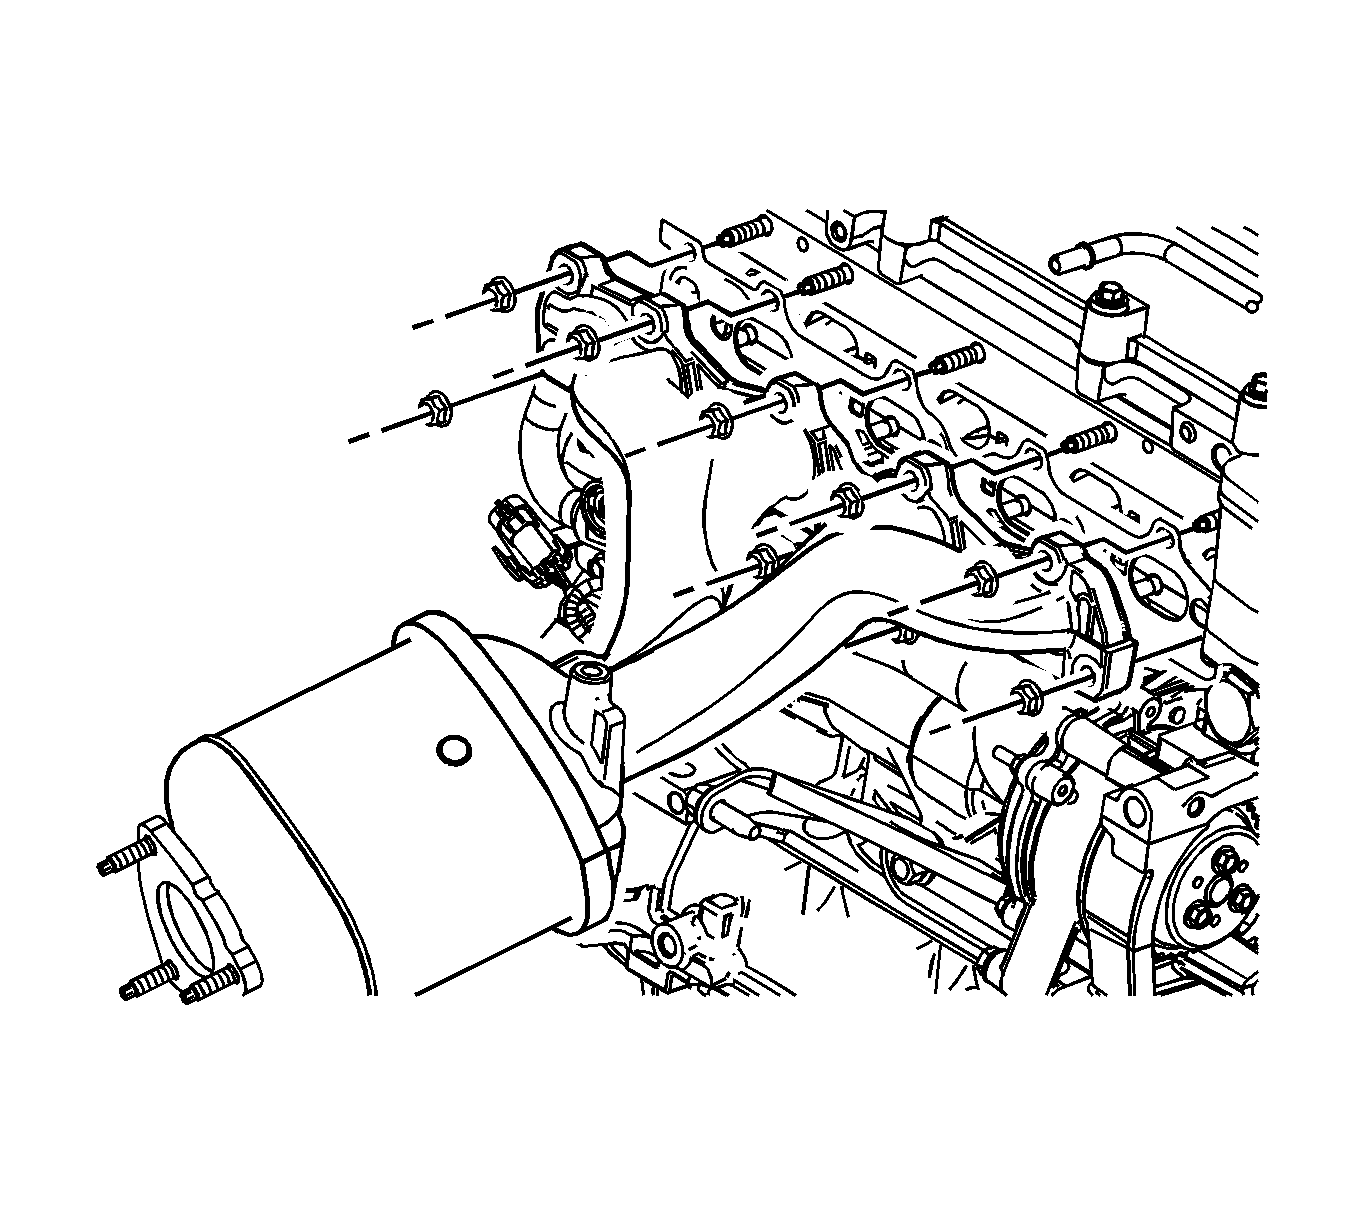
- Remove the exhaust manifold nuts.
- Remove the exhaust manifold and discard the gasket.

Notice: Do not over-flex or damage the flex joint when moving the flex joint from the normal mounting position.


Installation Procedure
- Install the new exhaust manifold gasket on the cylinder head.
- Install the exhaust manifold. Refer to Exhaust Manifold Replacement .
- Install the exhaust manifold nuts.
- Install the HO2S.
- Connect the exhaust manifold HO2S electrical connection.
- Install the exhaust manifold heat shield.
- Install the new exhaust manifold flange gasket onto the exhaust manifold flange studs.
- Raise the vehicle on a hoist. Refer to Lifting and Jacking the Vehicle in General Information.
- Position the exhaust manifold pipe flange onto the exhaust manifold studs.
- Lower the vehicle.
- Start the vehicle and inspect for leaks.

Notice: Refer to Fastener Notice in the Preface section.
Tighten
Tighten the exhaust manifold-to-cylinder head nuts to 14 N·m (124 lb in).

Tighten
Tighten the oxygen sensor-to-exhaust manifold pipe to 45 N·m (33 lb ft).

Tighten
Tighten the exhaust manifold heat shield bolts to 25 N·m (18 lb ft).

Tighten
Tighten the exhaust manifold pipe-to-exhaust manifold nuts to 30 N·m (22 lb ft).
