Catalytic Converter Replacement LX9 - Front
Tools Required
J 39194-B Heated Oxygen Sensor Wrench
Removal Procedure
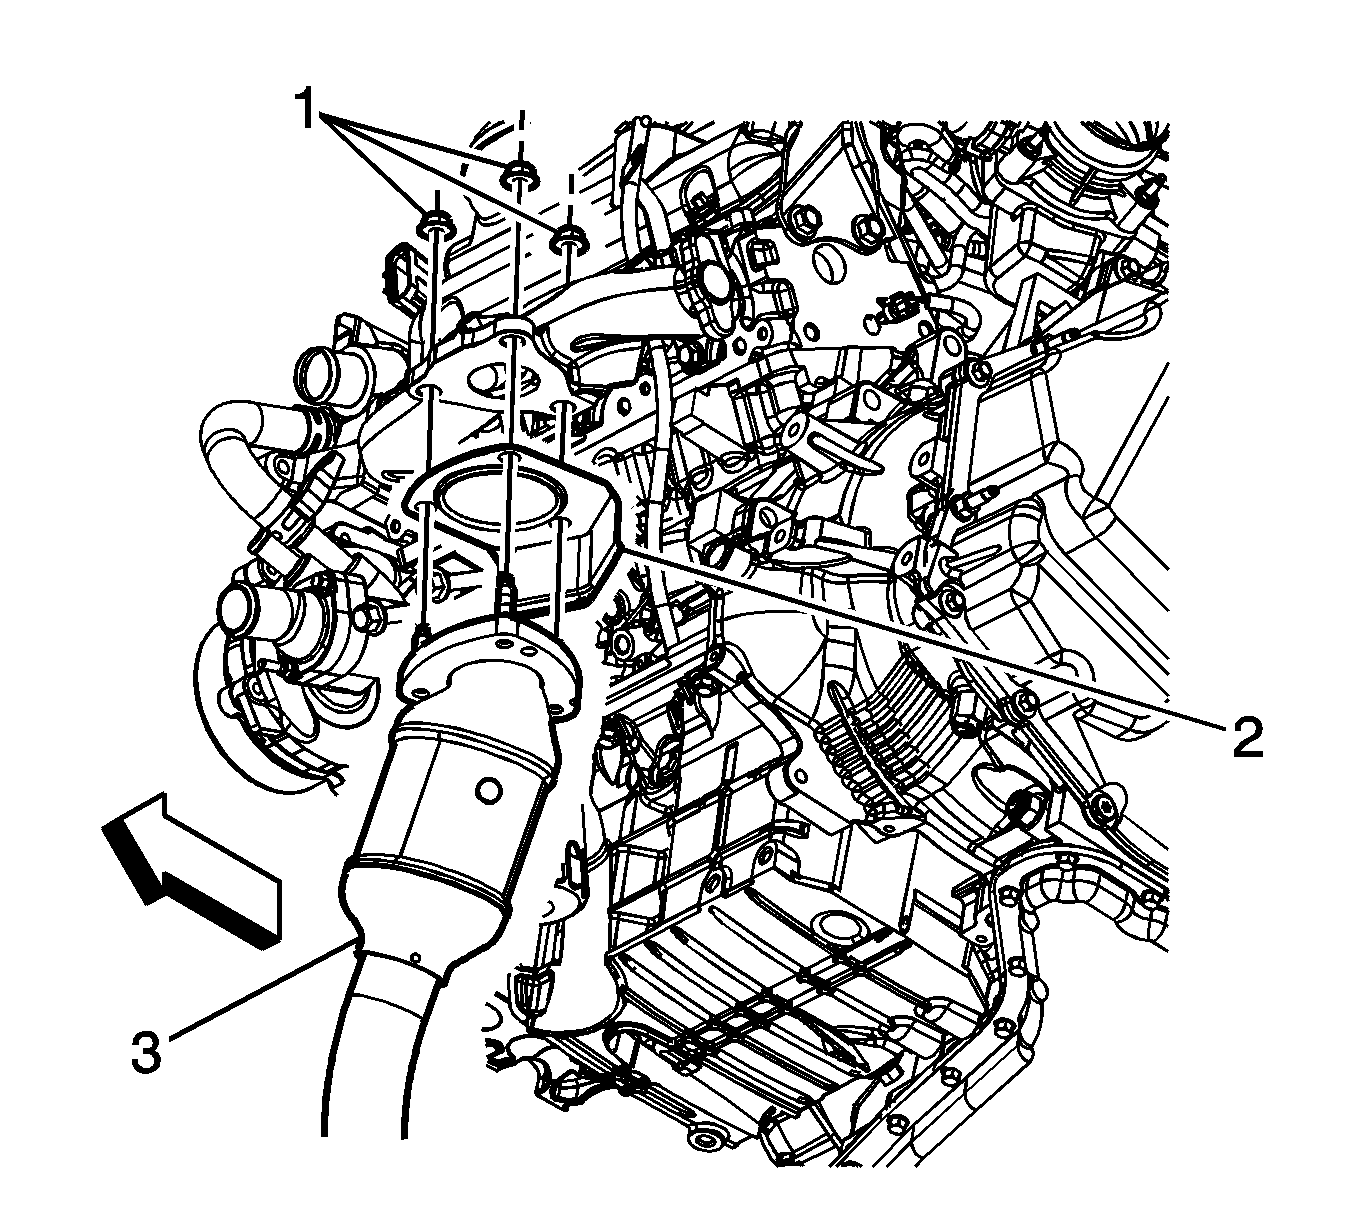
- Remove the front catalytic converter nuts (1) at the exhaust manifold.
- Remove the muffler assembly. Refer to Muffler Replacement .
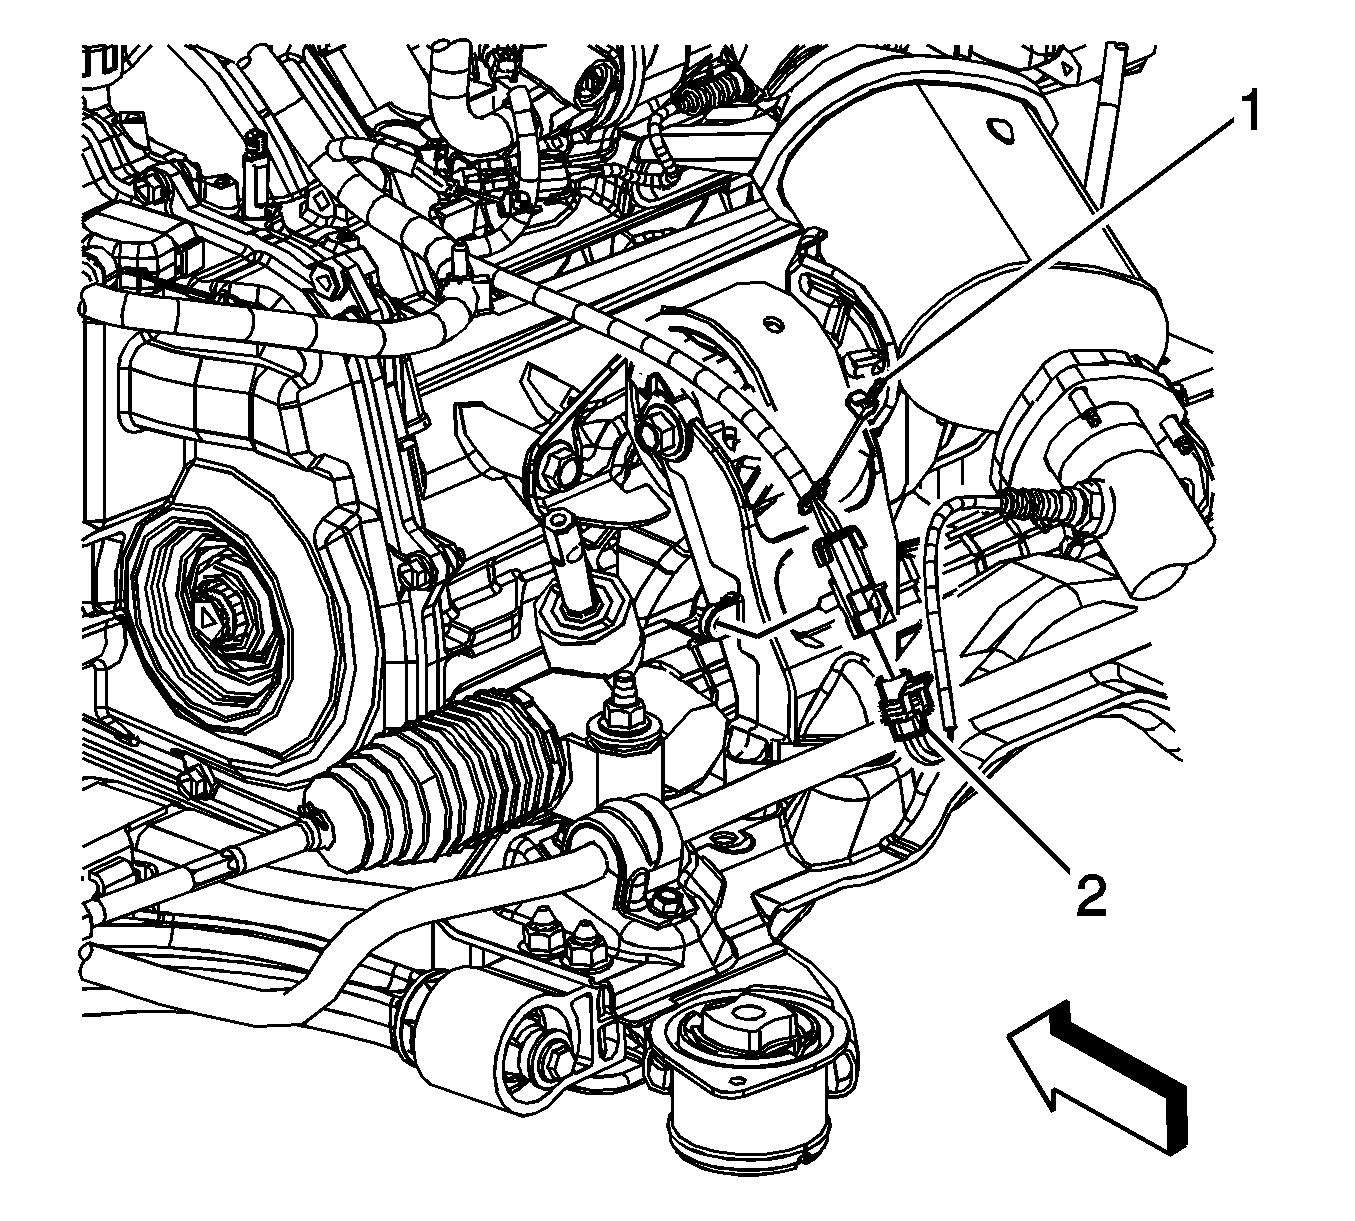
- Remove the rear heated oxygen sensor (HO2S) connector position assurance (CPA) retainer (1).
- Disconnect the rear HO2S electrical connector (2).
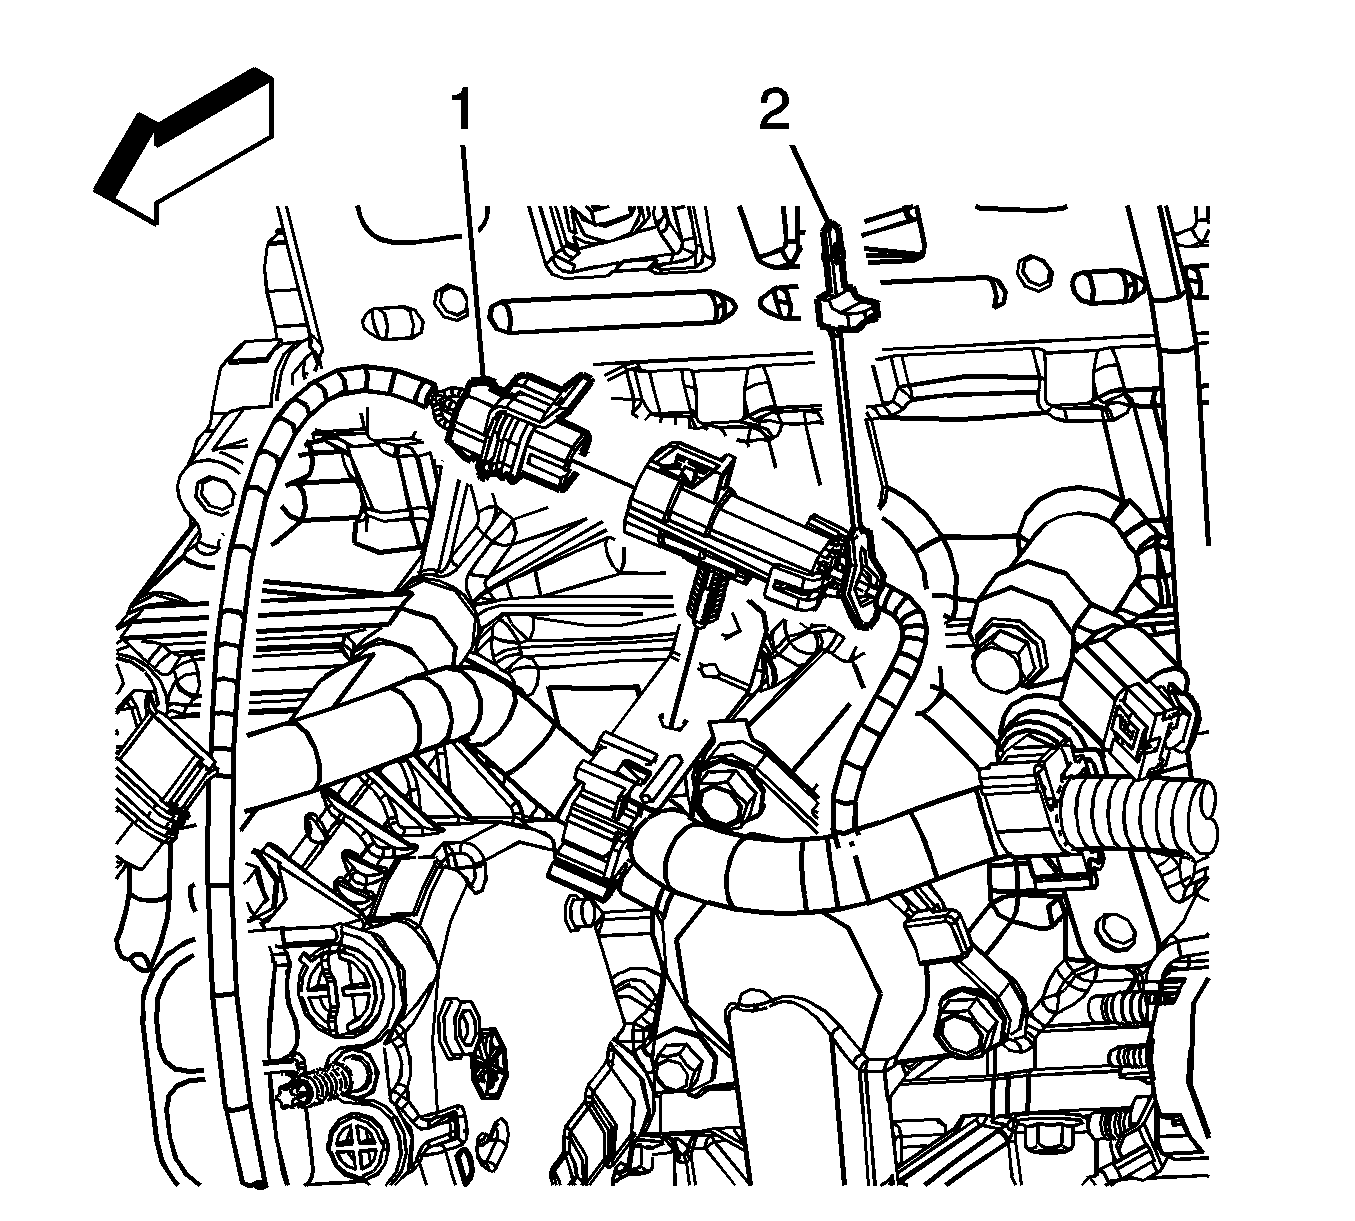
- Remove the front HO2S CPA retainer (2).
- Disconnect the front HO2S electrical connector (1).
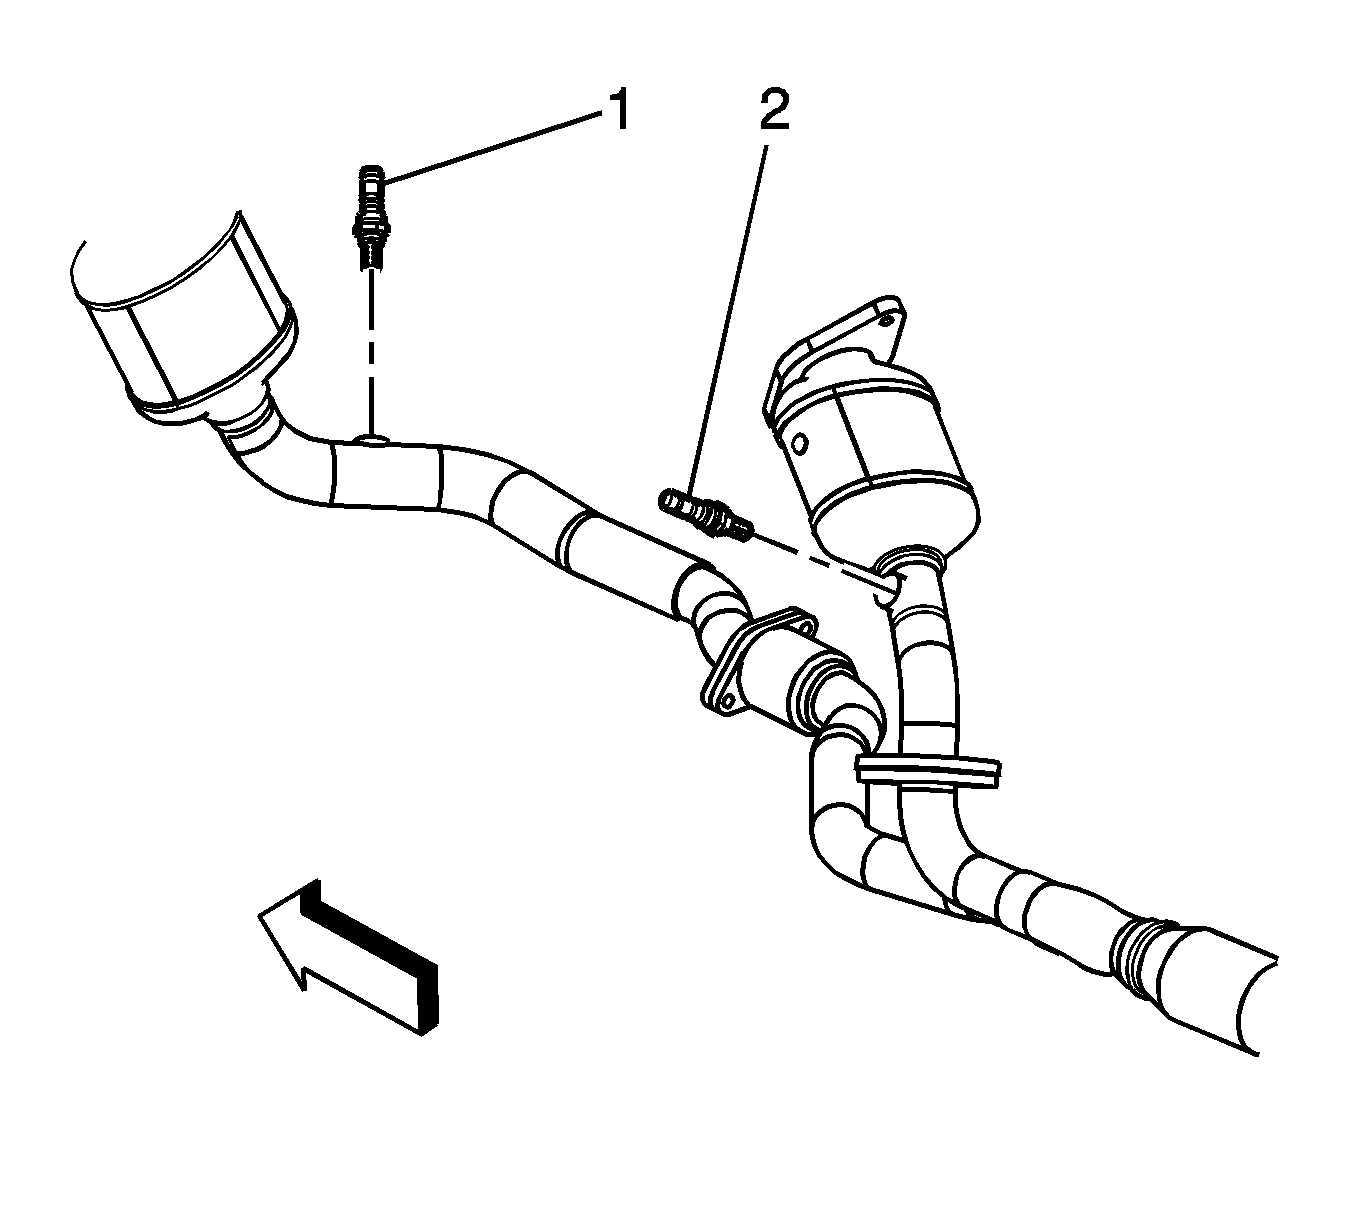
- Remove the front and rear HO2Ss (1, 2) using the J 39194-B .
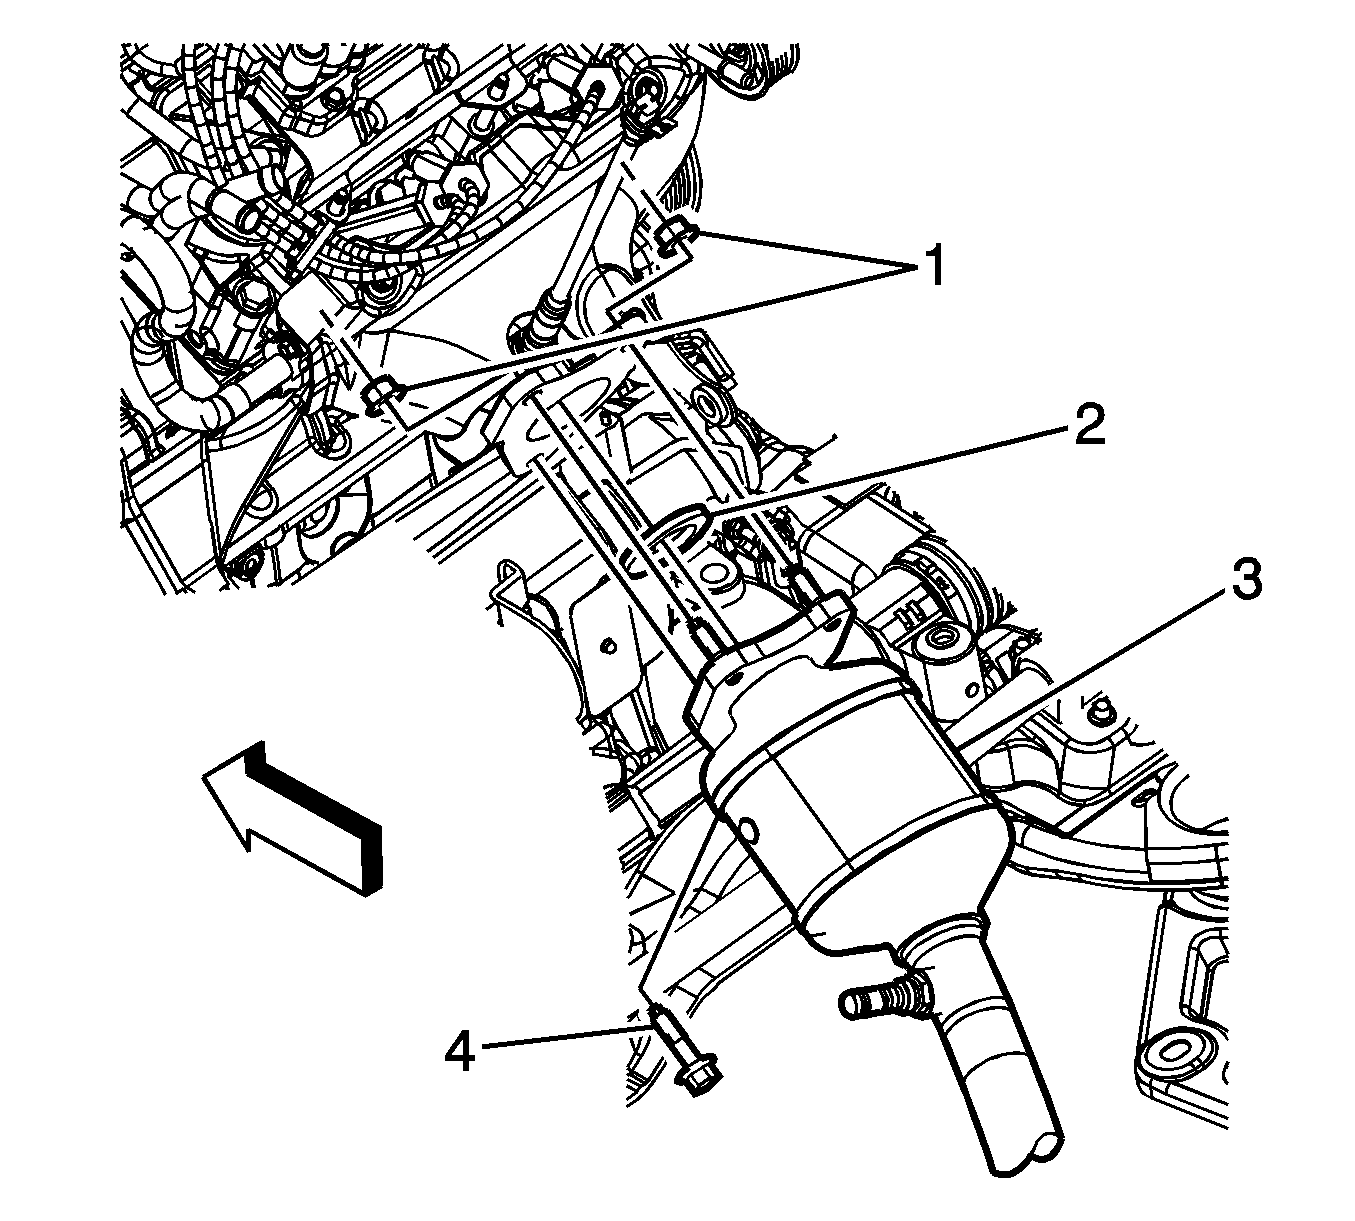
- Remove the rear catalytic converter bolt (4) and nuts (1) at the exhaust manifold.
- Remove and discard the gasket (2).
- Remove the rear catalytic converter (3).
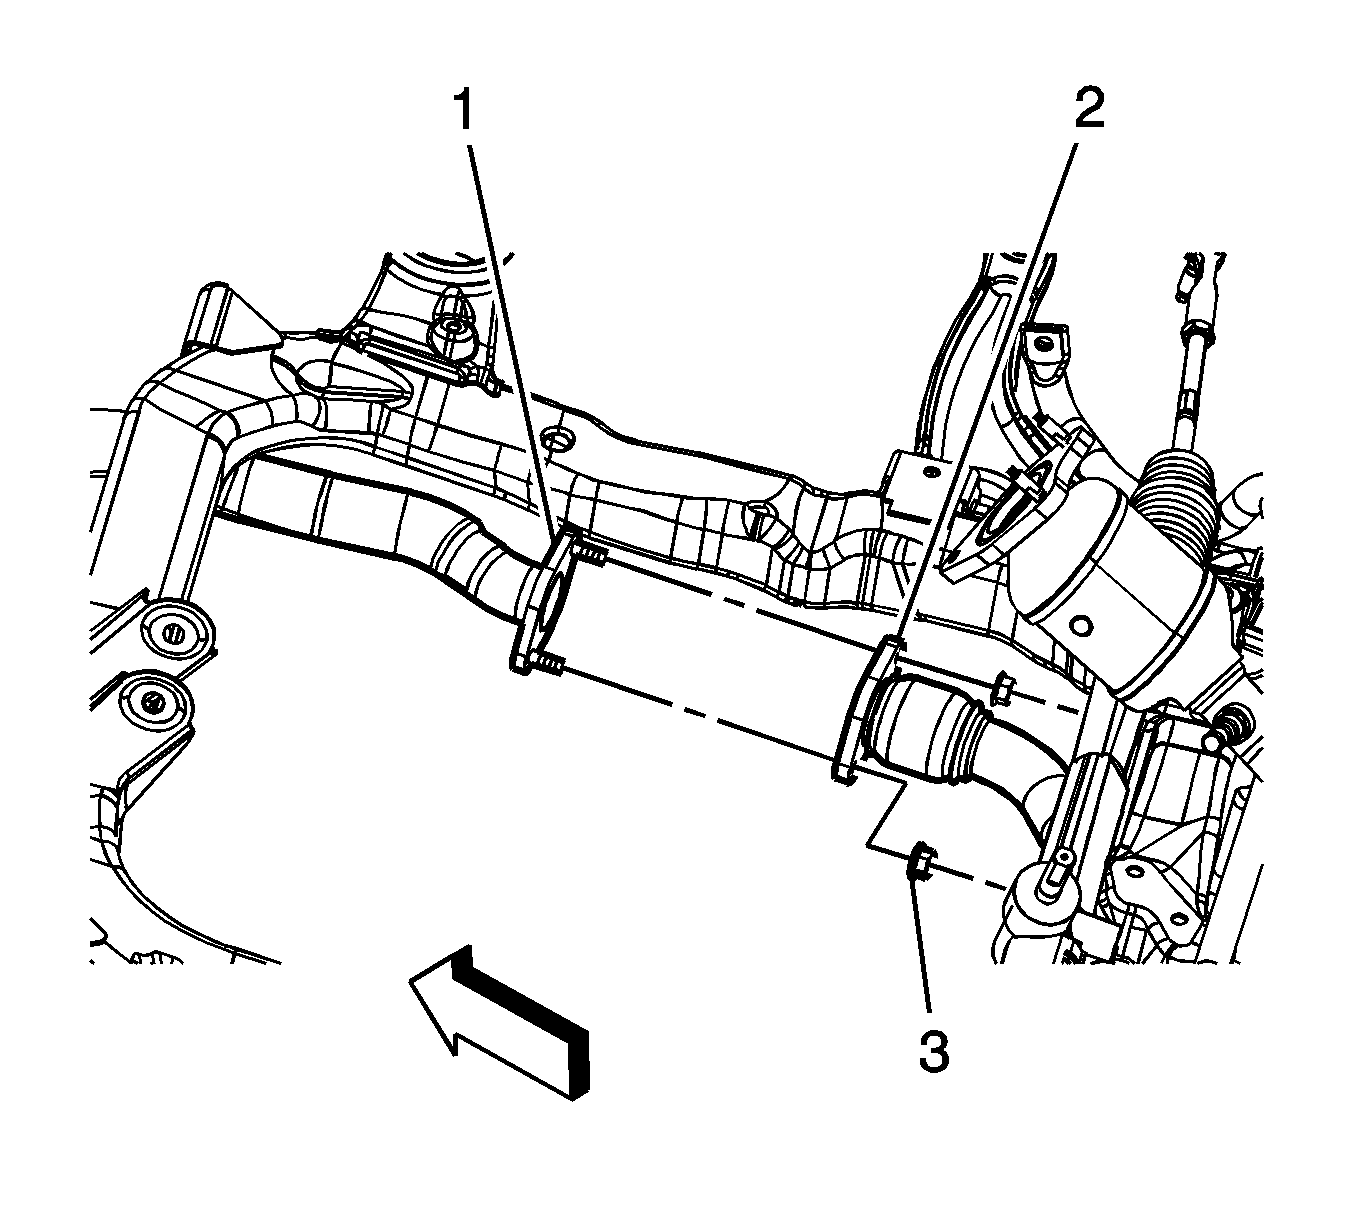
- Remove the front catalytic converter to rear catalytic converter nuts (3). (Powertrain shown removed for clarity).
- Remove the front catalytic converter (1)
- Remove and discard the front catalytic converter to manifold gasket.
- Inspect the catalytic converter-to-exhaust manifold flange.
Important: The HO2S uses a permanently attached pigtail and connector. This pigtail should not be removed from the sensor. Damage or removal of the pigtail or connector will affect proper operation of the sensor.
Important: The HO2S uses a permanently attached pigtail and connector. This pigtail should not be removed from the sensor. Damage or removal of the pigtail or connector will affect proper operation of the sensor.
Catalytic Converter to Manifold Flange Warpage:
| • | Service Limit: 0.7 mm (0.028 in) max. |
| • | Standard: 0.7 mm (0.028 in) max. |
Installation Procedure
- Install a NEW gasket to the front catalytic converter studs.
- Install the front catalytic converter (1)
- Install a NEW gasket (2) to the rear catalytic converter studs.
- Install the rear catalytic converter (3).
- Install the rear catalytic converter bolt (4) and nuts (1) at the exhaust manifold.
- Install the front catalytic converter to rear catalytic converter nuts (3). (Powertrain shown removed for clarity).
- Install the front and rear HO2Ss (1, 2) using the J 39194-B .
- Connect the front HO2S electrical connector (1).
- Install the front HO2S CPA retainer (2).
- Disconnect the rear HO2S electrical connector (2).
- Install the rear HO2S CPA retainer (1).
- Install the muffler assembly. Refer to Muffler Replacement .
- Install the front catalytic converter nuts (1) at the exhaust manifold.
- Start the engine, and check for exhaust leaks.

Notice: Refer to Fastener Notice in the Preface section.
Tighten
Tighten the bolt and nuts to 31 N·m (23 lb ft).

Tighten
Tighten the nuts to 31 N·m (23 lb ft).

Tighten
Tighten the sensor to 42 N·m (31 lb ft).


Tighten
Tighten the nuts to 31 N·m (23 lb ft).
Catalytic Converter Replacement LX9 - Rear
Tools Required
J 39194-B Heated Oxygen Sensor Wrench
Removal Procedure
- Remove the muffler assembly. Refer to Muffler Replacement .
- Remove the connector position assurance (CPA) retainer (1).
- Disconnect the HO2S electrical connector (2).
- Remove the HO2S (2) using the J 39194-B .
- Remove the front catalytic converter to rear catalytic converter nuts (3). (Powertrain shown removed for clarity).
- Remove the catalytic converter bolt (4) and nuts (1) at the exhaust manifold.
- Remove the rear catalytic converter 3).
- Remove and discard the gasket (2).
- Inspect the catalytic converter-to-exhaust manifold flange.

Important: The heated oxygen sensor (HO2S) 2 uses a permanently attached pigtail and connector. This pigtail should not be removed from the sensor. Damage or removal of the pigtail or connector will affect proper operation of the sensor.


Catalytic Converter to Manifold Flange Warpage:
| • | Service Limit: 0.7 mm (0.028 in) max. |
| • | Standard: 0.7 mm (0.028 in) max. |
Installation Procedure
- Install a NEW gasket (2) to the catalytic converter studs.
- Install the rear catalytic converter (3).
- Install the catalytic converter bolt (4) and nuts (1) at the exhaust manifold.
- Install the front catalytic converter to rear catalytic converter nuts (3). (Powertrain shown removed for clarity).
- Install the HO2S (2) using the J 39194-B .
- Connect the HO2S electrical connector (2).
- Install the CPA retainer (1).
- Install the muffler assembly. Refer to Muffler Replacement .
- Start the engine, and check for exhaust leaks.

Notice: Refer to Fastener Notice in the Preface section.
Tighten
Tighten the bolt and nuts to 31 N·m (23 lb ft).

Tighten
Tighten the nuts to 31 N·m (23 lb ft).

Tighten
Tighten the sensor to 42 N·m (31 lb ft).

