For 1990-2009 cars only
Removal Procedure
- Remove the center console. Refer to Console Replacement in Instrument Panel, Gages and Console.
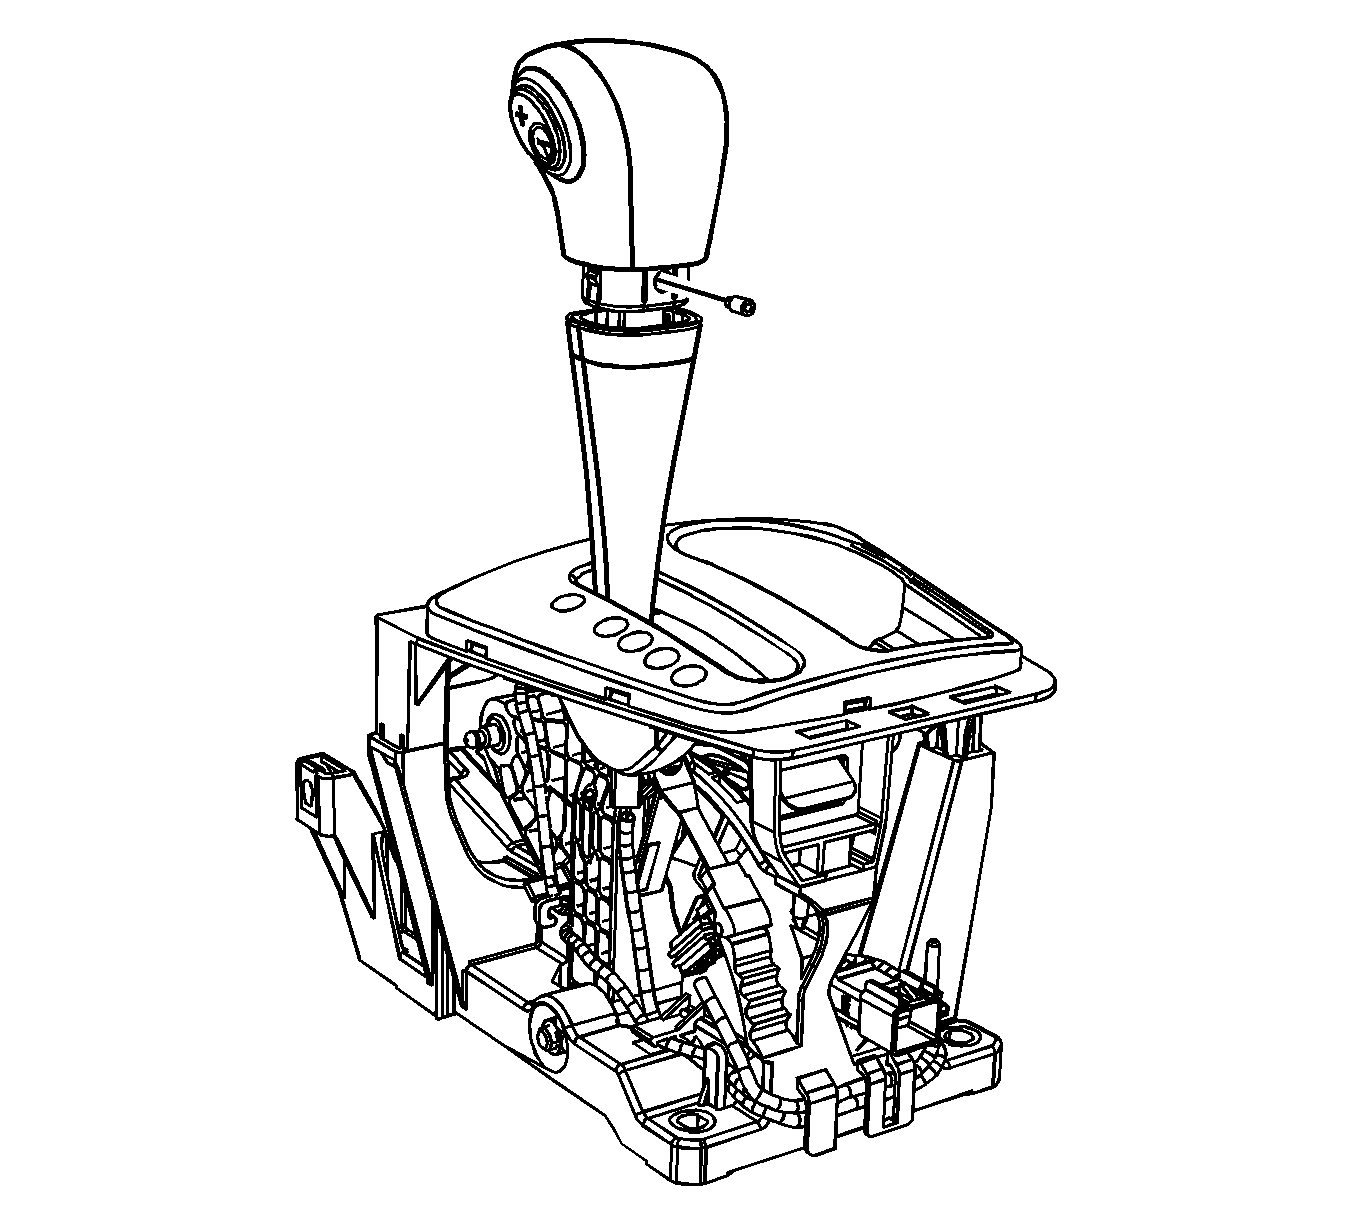
- Remove the shift control shaft trim by sliding it downward on the shift control assembly shaft.
- Remove the shift knob setscrew and raise the shift knob off of the shift control assembly shaft.
- Disconnect the shift knob electrical connector.
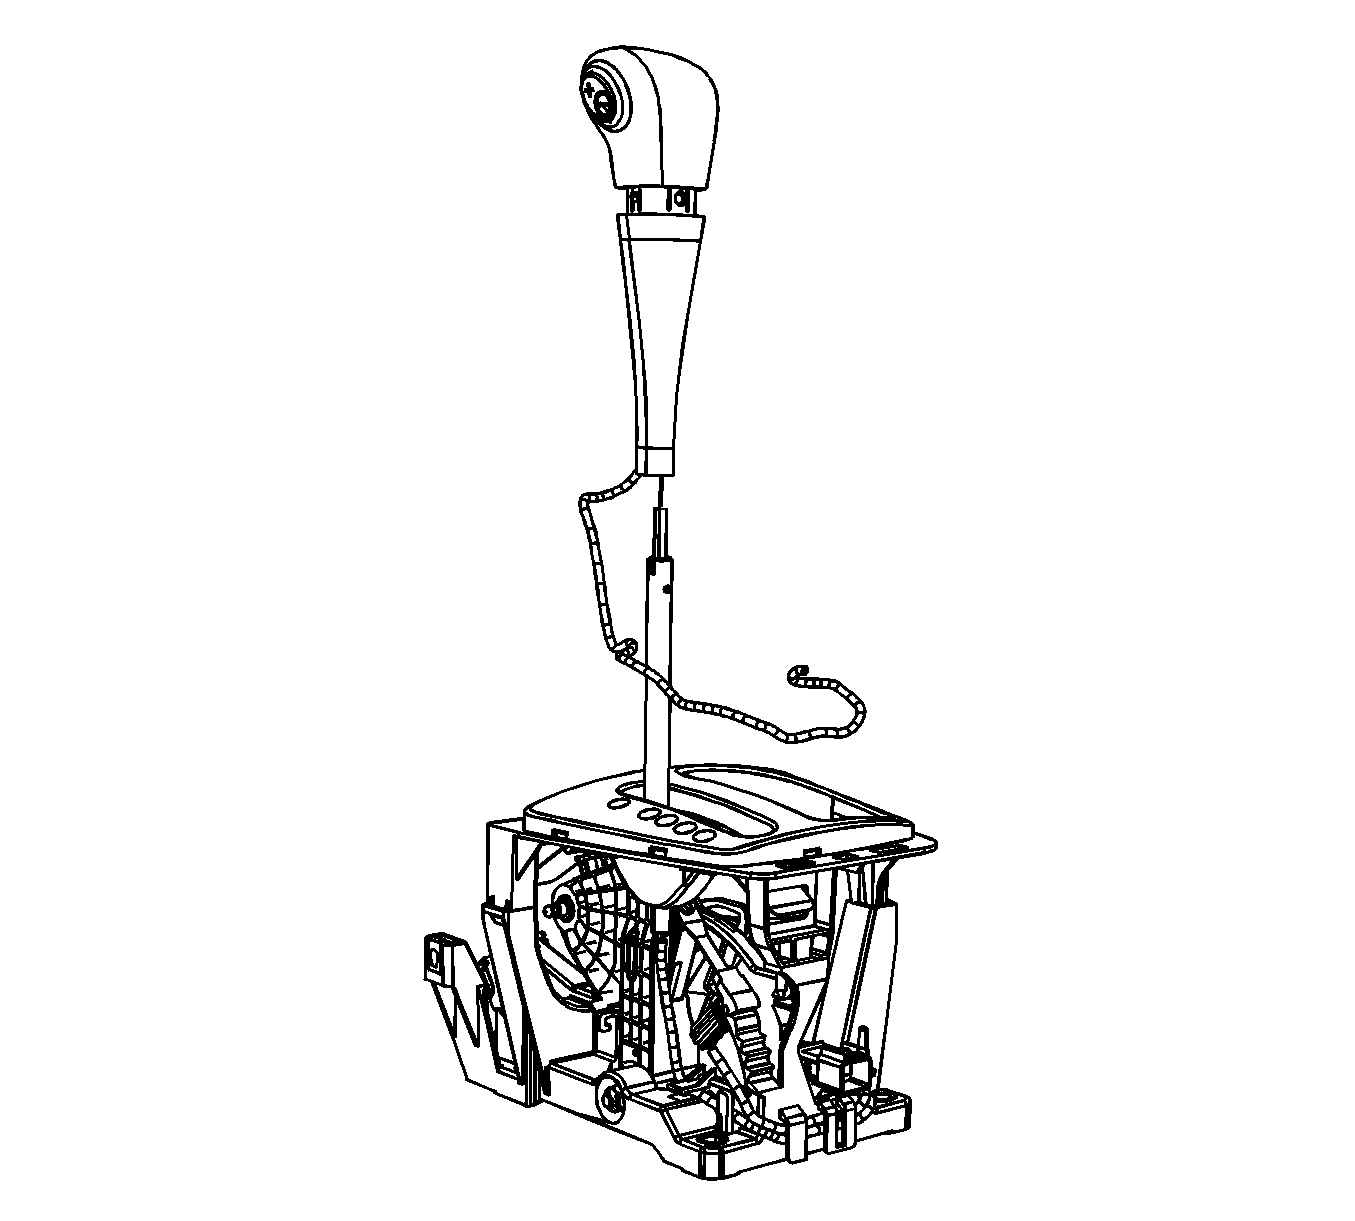
- Remove the shift knob wiring harness from the retaining tabs on the shift control assembly.
- Remove the shift knob and shift control shaft trim as an assembly and then remove the knob wiring from the shift control shaft trim.


Installation Procedure
- Install the new shift knob wiring through the shift control shaft trim and reinstall the shift knob and trim as an assembly.
- Install the shift knob wiring harness in the retaining tabs on the shift control assembly.
- Connect the shift knob electrical connector.
- Clean the shift knob setscrew with a wire brush, and apply thread locking compound LOCTITE® 242 (GM P/N 12345382) or equivalent to the setscrew.
- Install the shift knob on the shift control shaft and reinstall the setscrew .
- Install the shift control shaft trim by pushing up until it snaps onto the lower portion of the shift knob.
- Install the center console. Refer to Console Replacement in Instrument Panel, Gages and Console.

Notice: Refer to Fastener Notice in the Preface section.

Tighten
Tighten the shift knob setscrew to 2.5 N·m (22 lb in).
