Removal Procedure
- Disconnect the negative battery cable.
- Remove the console. Refer to Console Replacement in Instrument Panel, Gages and Console.
- Remove the left sound insulator. Refer to Instrument Panel Insulator Panel Replacement - Left Side in Instrument Panel, Gages and Console.
- Remove the knee bolster.
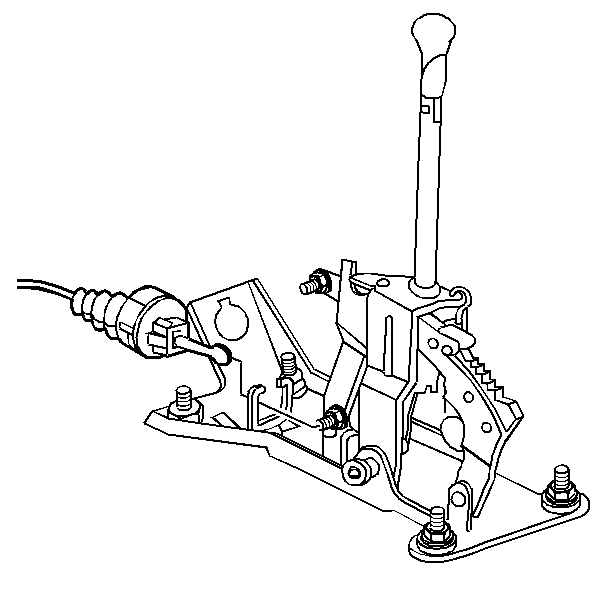
- Place the transmission shift lever in the P (Park) position.
- Turn the ignition key to the RUN position.
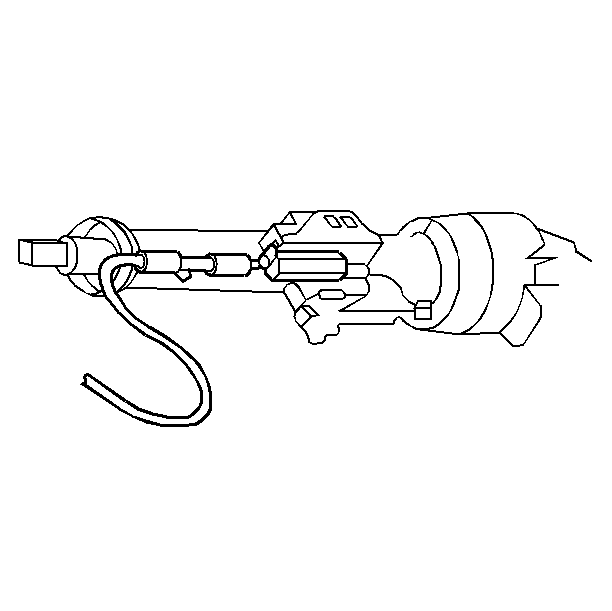
- Insert a screwdriver blade into the slot provided in the ignition switch inhibitor.
- Depress the cable latch. Pull the control cable from the inhibitor.
- Push the cable connector lock button at the shifter base to the up position.
- Snap the cable from the park/lock lever pin.
- Depress the two cable latches. Remove the control cable from the transmission control.
Caution: Unless directed otherwise, the ignition and start switch must be in the OFF or LOCK position, and all electrical loads must be OFF before servicing any electrical component. Disconnect the negative battery cable to prevent an electrical spark should a tool or equipment come in contact with an exposed electrical terminal. Failure to follow these precautions may result in personal injury and/or damage to the vehicle or its components.
Important: Do not proceed to the next step with the key in any other position.
Installation Procedure
- Cut the park lock cable adjuster and cable off at the location just before the end of the retaining barb.
- Tie the inhibitor end of the new cable to the old cable in an overlapping fashion using zip ties or electrical tape.
- Carefully use the old cable to route the new cable. If the cable becomes stuck, move the lower part of the cable toward the RH side of the vehicle while pulling the upper half gently.
- The cable is routed between the HVAC plenum and the vehicle cowl.
- Place the shift lever in P (Park).
- Snap the control cable connector into the automatic transmission control.
- Place the ignition key in the RUN position.
- Snap the control cable into the inhibitor housing until the snap lock is seated.
- Turn the key to the LOCK position.
- Snap the control cable end onto the shift park/lock lever pin.
- Raise and connect the steering column.
- Tighten the lower steering column bracket bolts.
- Install the knee bolster.
- Install the left sound insulator. Refer to Instrument Panel Insulator Panel Replacement - Left Side in Instrument Panel, Gages and Console.
- Install the console. Refer to Console Replacement in Instrument Panel, Gages and Console.
- Connect the negative battery cable.

Important: Do not insert the cable with the key in any other position.
Important: Ensure that the park lock cable functions as designed. With the key in the OFF position, the shift lever should not be able to be moved from the Park position. With the key in the ON position, the key must not be able to be removed from the ignition cylinder. If either of these tests are not passed, Refer to Park Lock Cable Adjustment
Important: Test for proper operation of the park/lock control cable before installing the steering column to the instrument panel.
