For 1990-2009 cars only
Evaporative Emission Canister Vent Solenoid Valve Replacement Maxx
Removal Procedure
- Raise and support the vehicle. Refer to Lifting and Jacking the Vehicle .
- Place a jackstand under the muffler assembly.
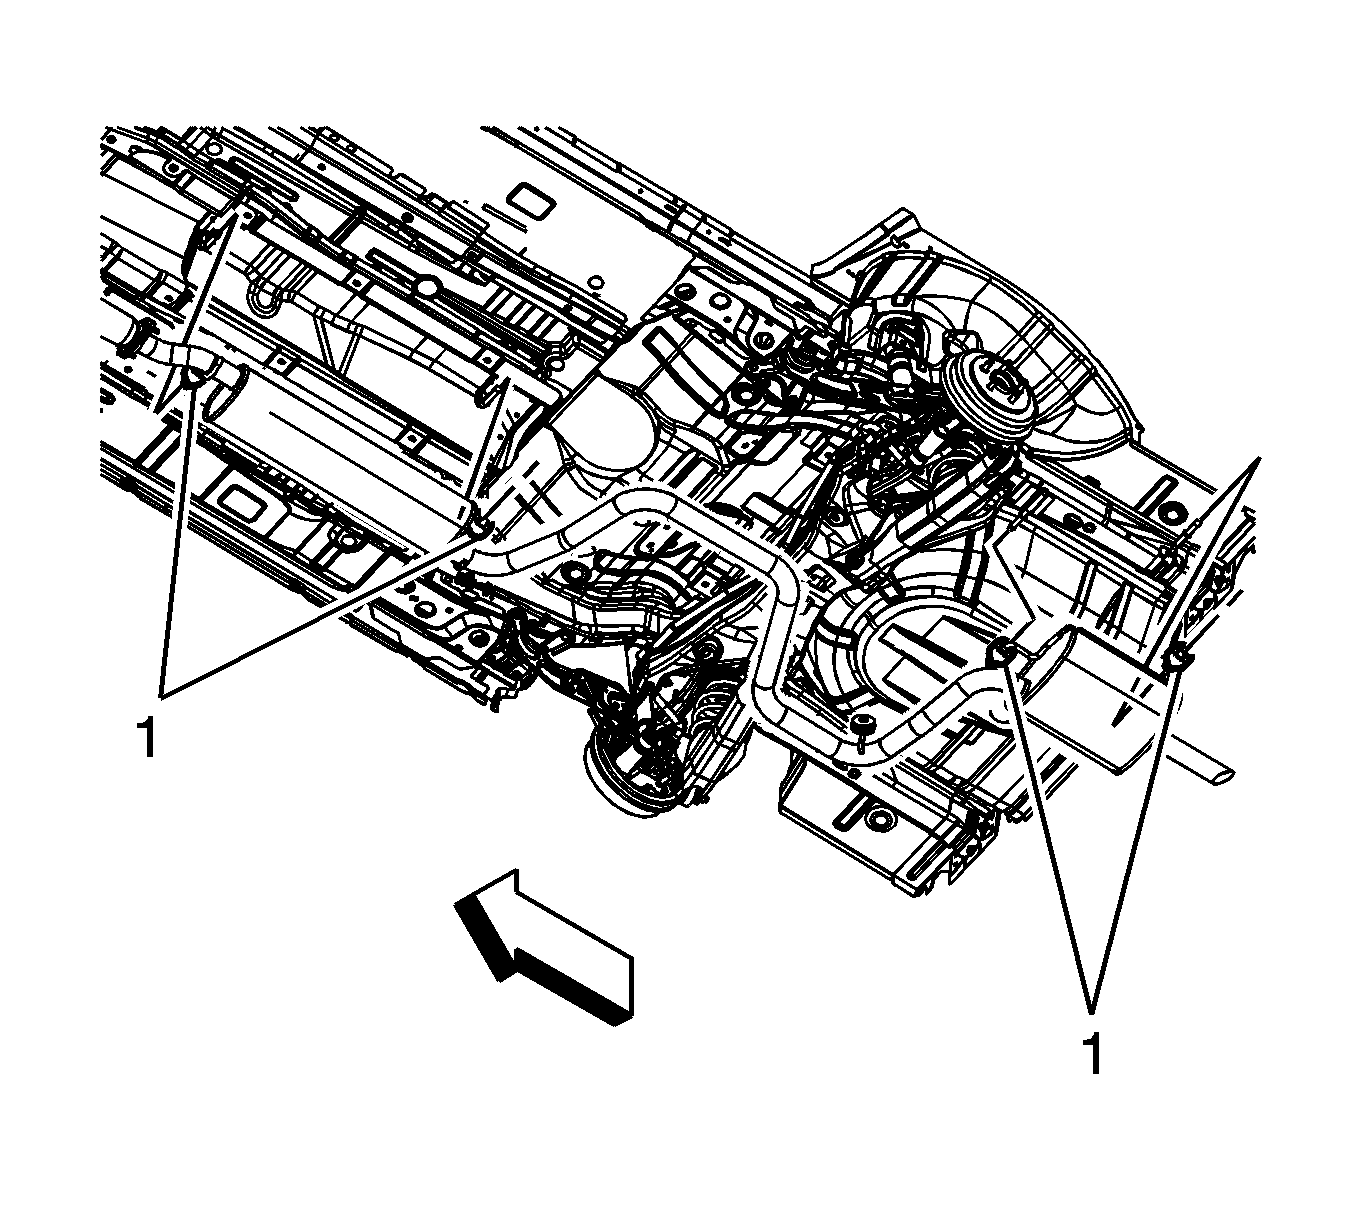
- With the aid of an assistant, separate the muffler insulators (1) from the underbody hangers.
- Slowly lower the muffler assembly allowing it to rest on the jackstand.
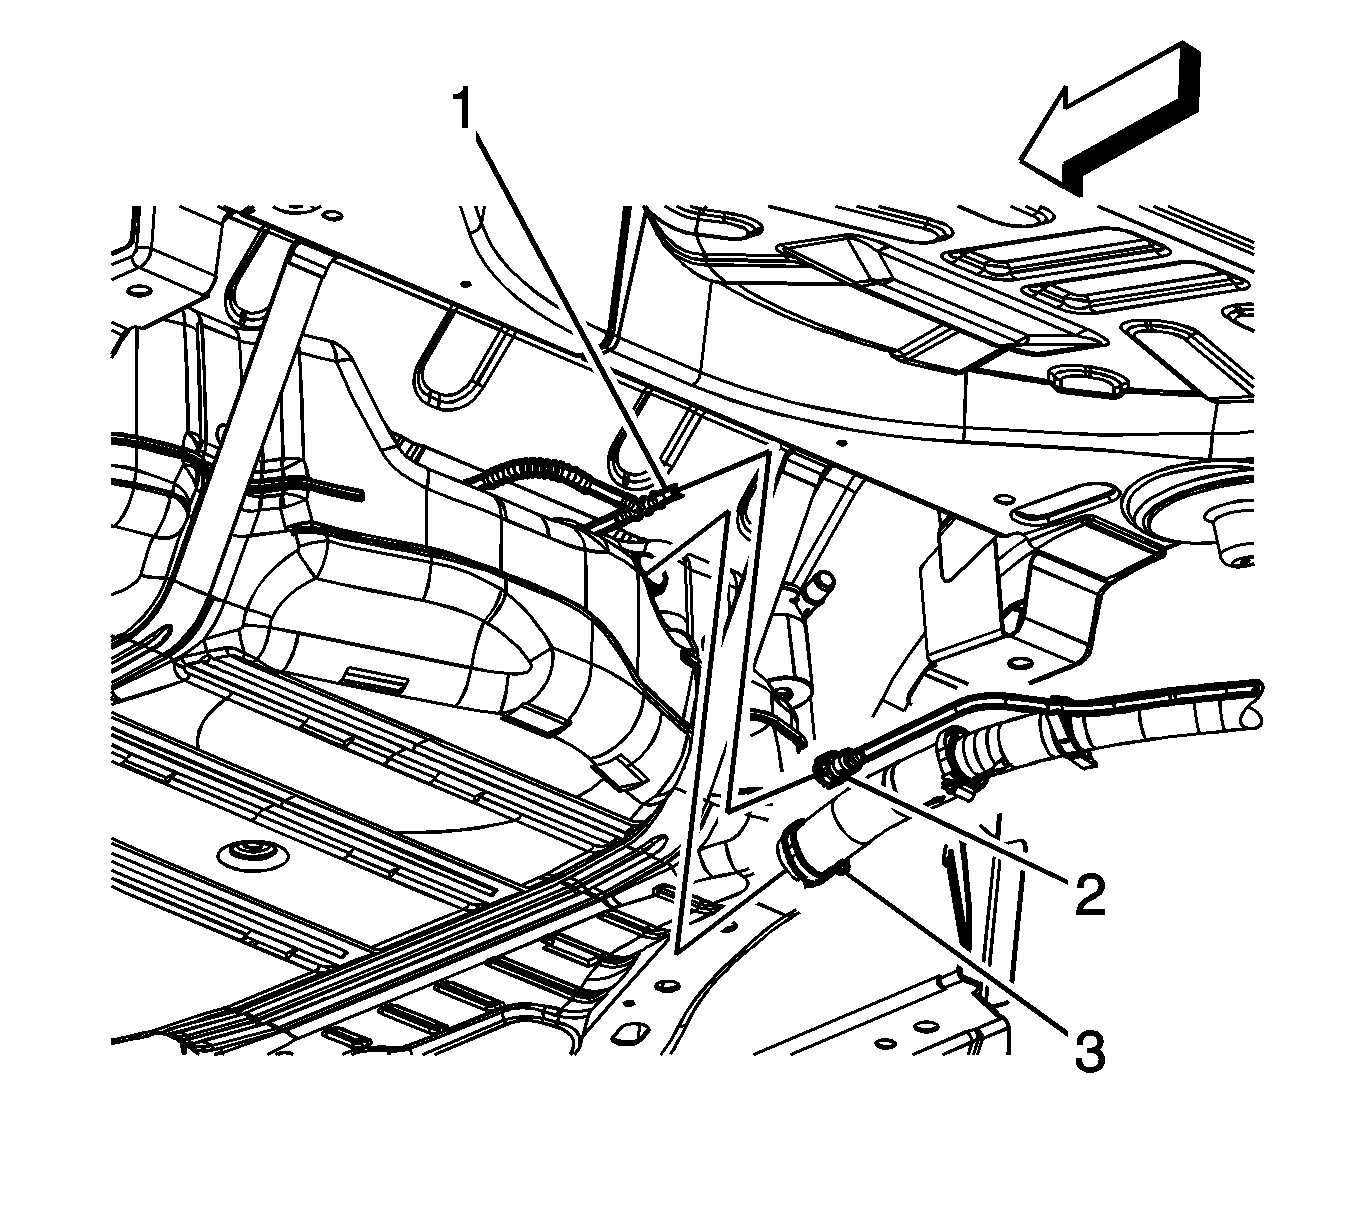
- Loosen the fuel fill hose clamp (3) at the fuel tank.
- Separate the fuel fill pipe hose from the fuel tank.
- Disconnect the fuel tank fill evaporative emission (EVAP) pipe quick connect fitting (2) from the fuel tank fill EVAP emission pipe. Refer to Plastic Collar Quick Connect Fitting Service .
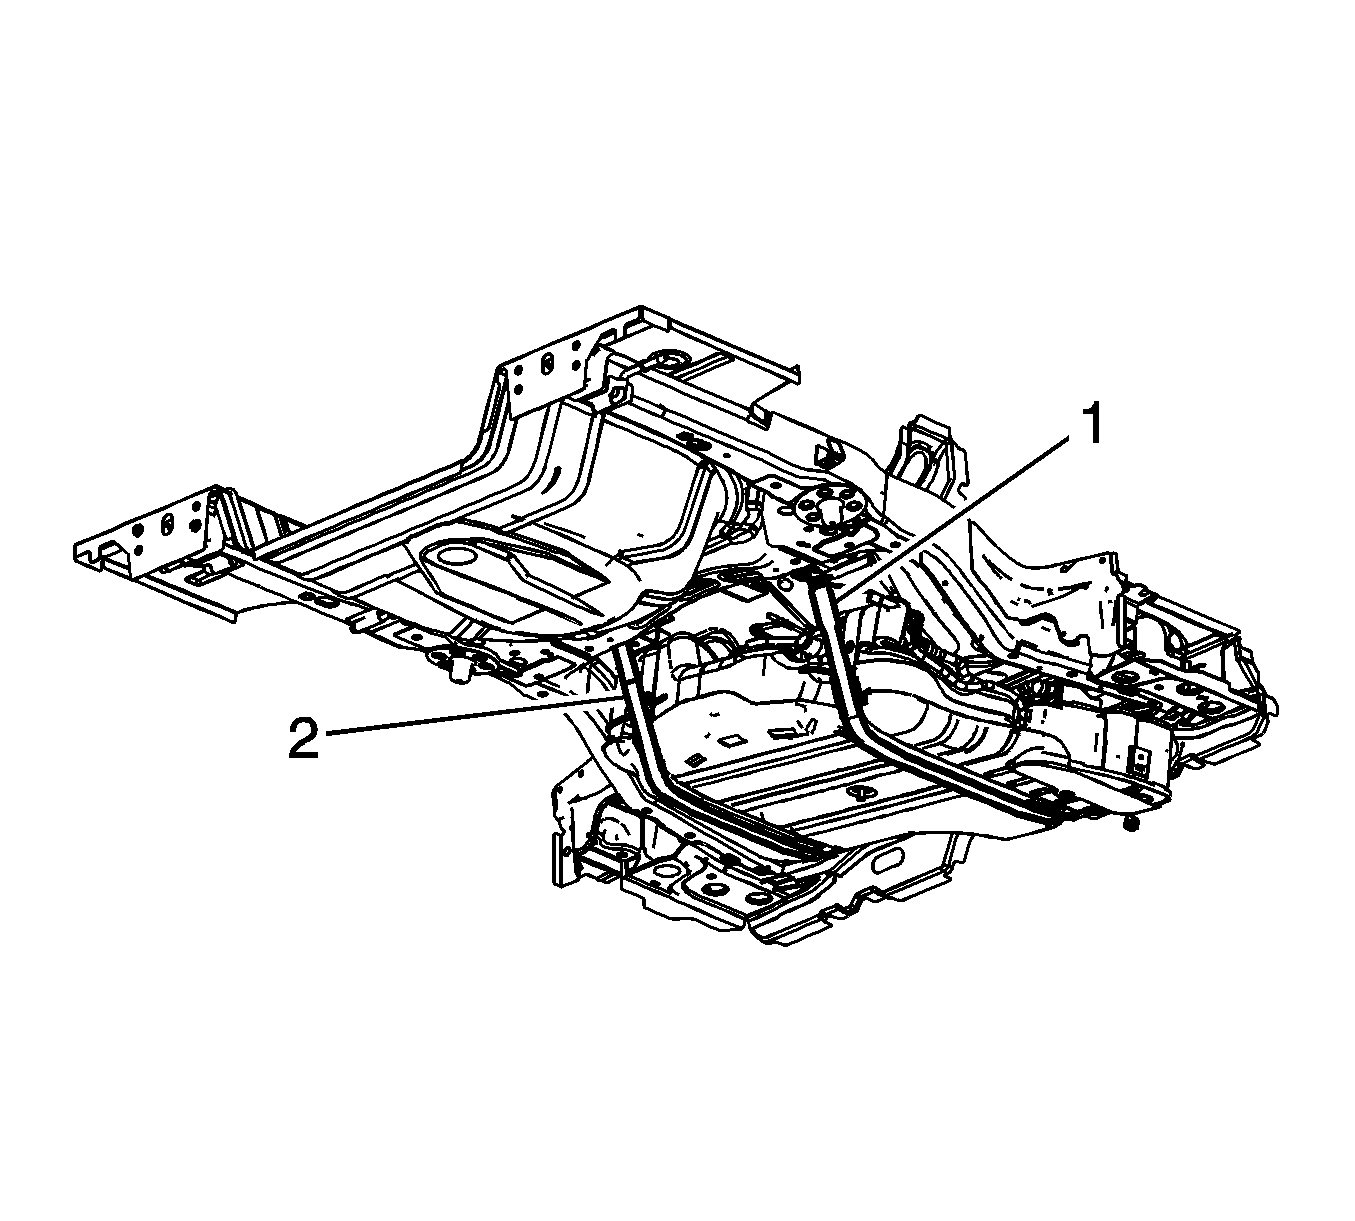
- Loosen, DO NOT REMOVE the left side fuel tank strap (2) bolts.
- Support the fuel tank with a suitable adjustable jackstand.
- Loosen, DO NOT REMOVE the right side front fuel tank strap (1) bolt.
- Remove the right side rear fuel tank strap bolt.
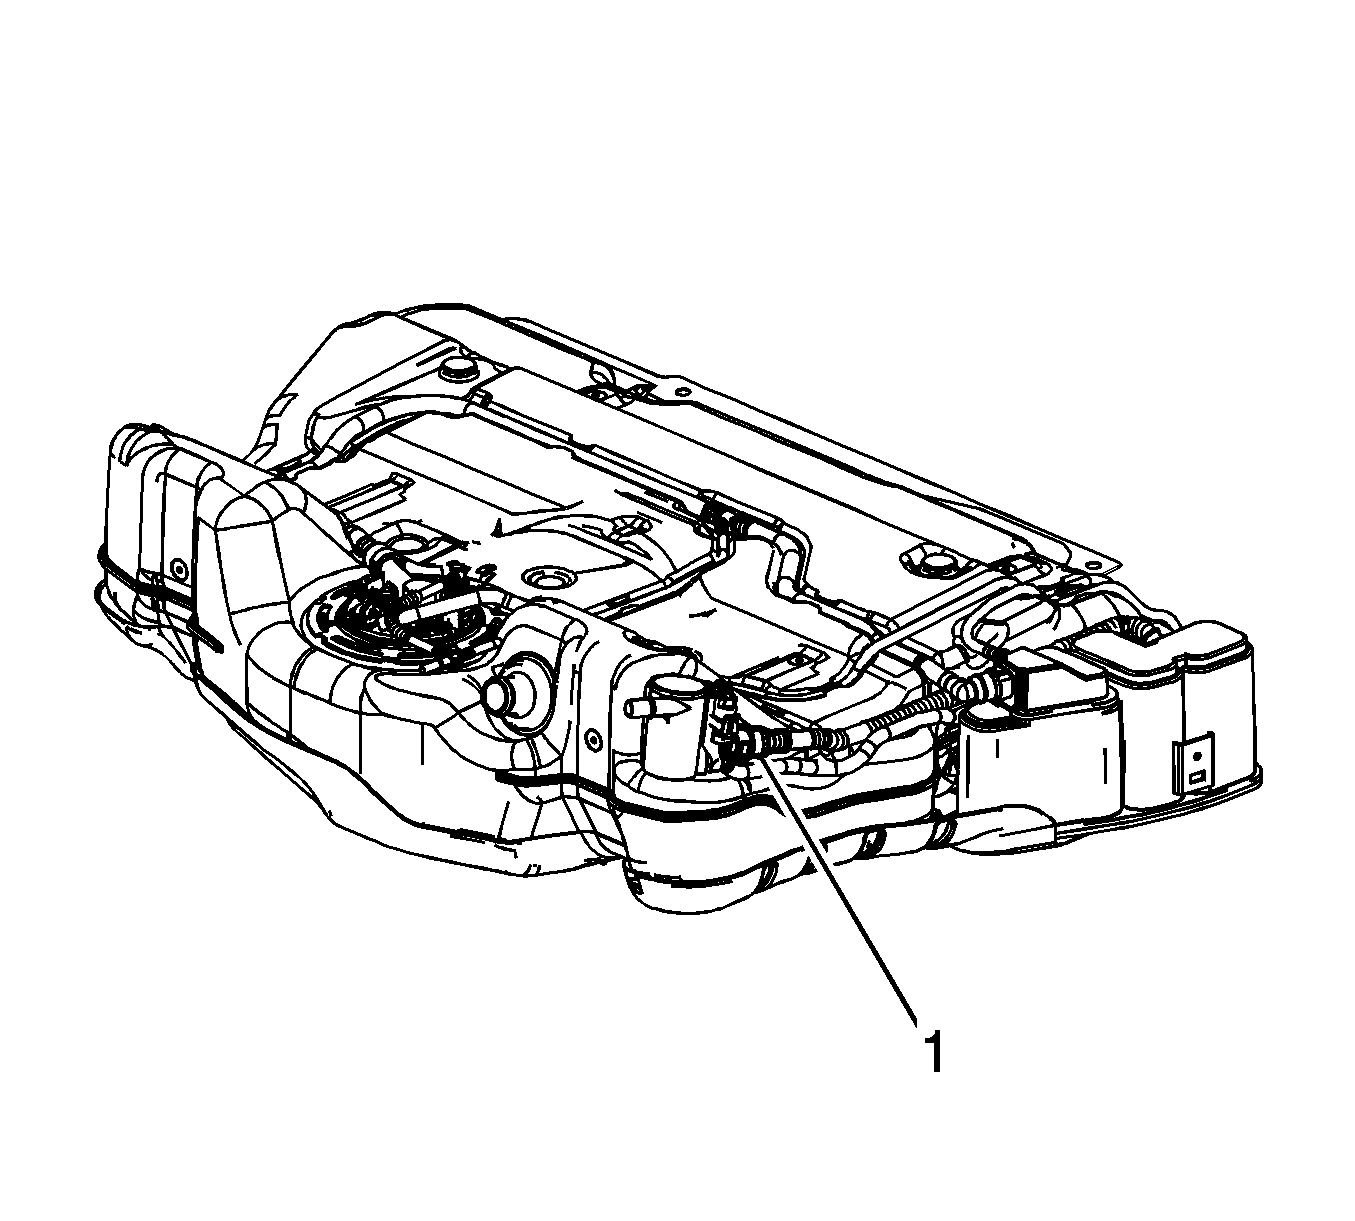
- Using the adjustable jack, lower the right side of the fuel tank enough to access the EVAP canister vent solenoid.
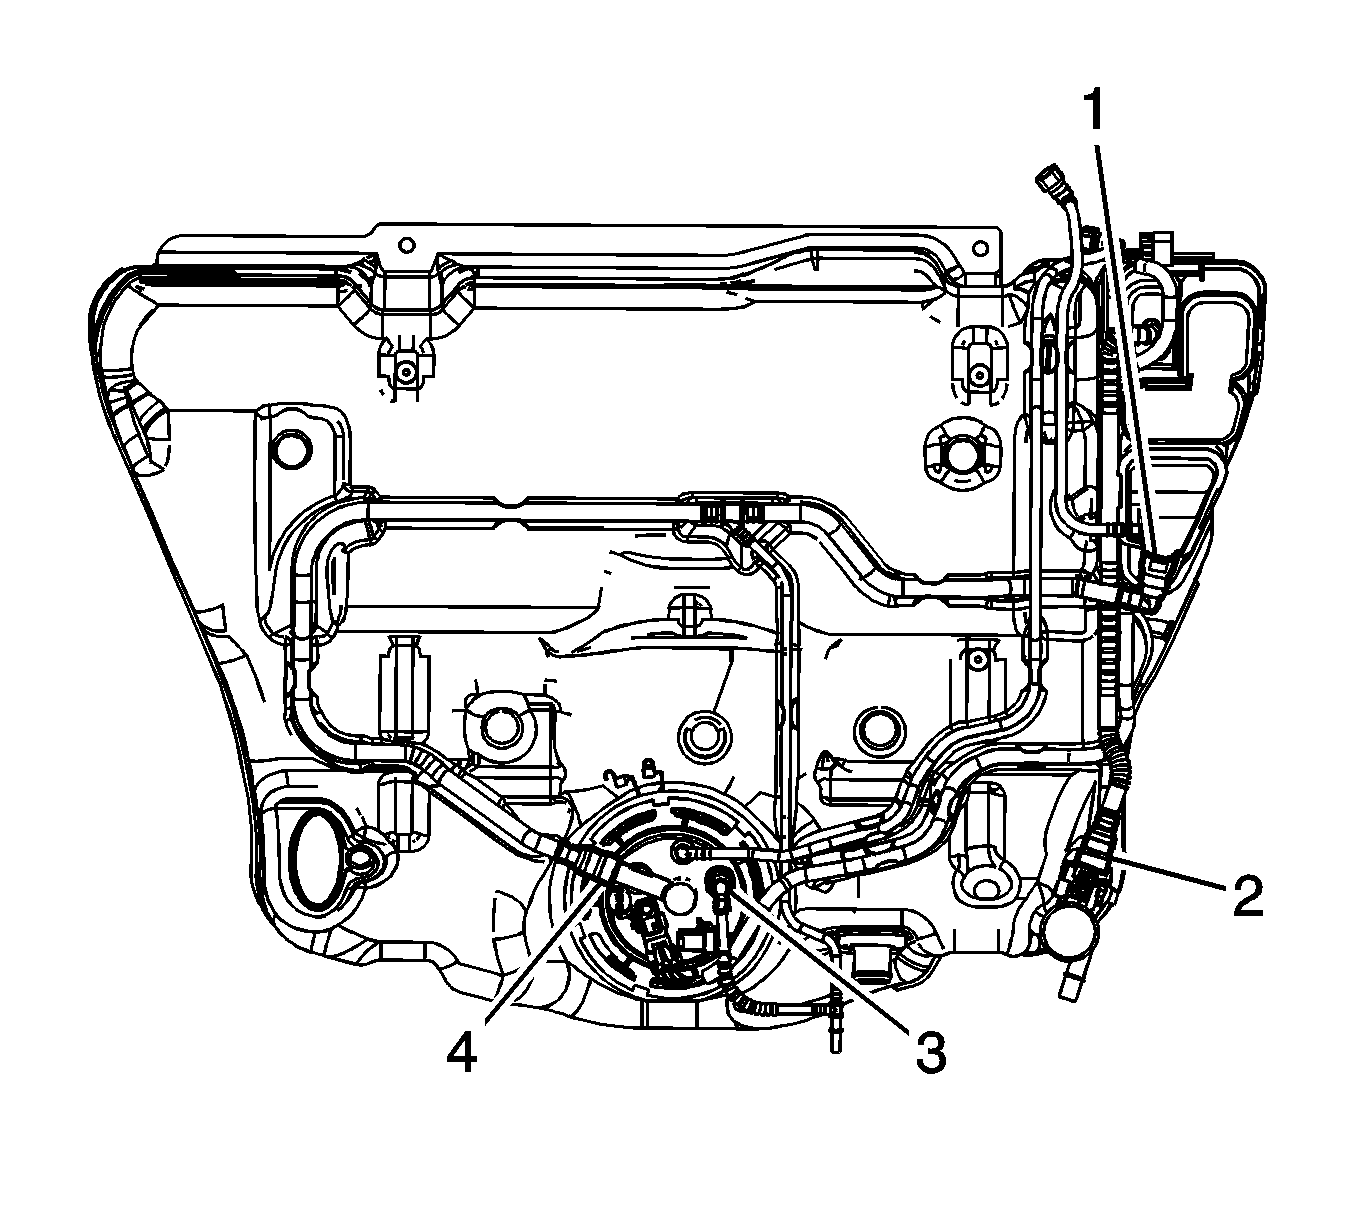
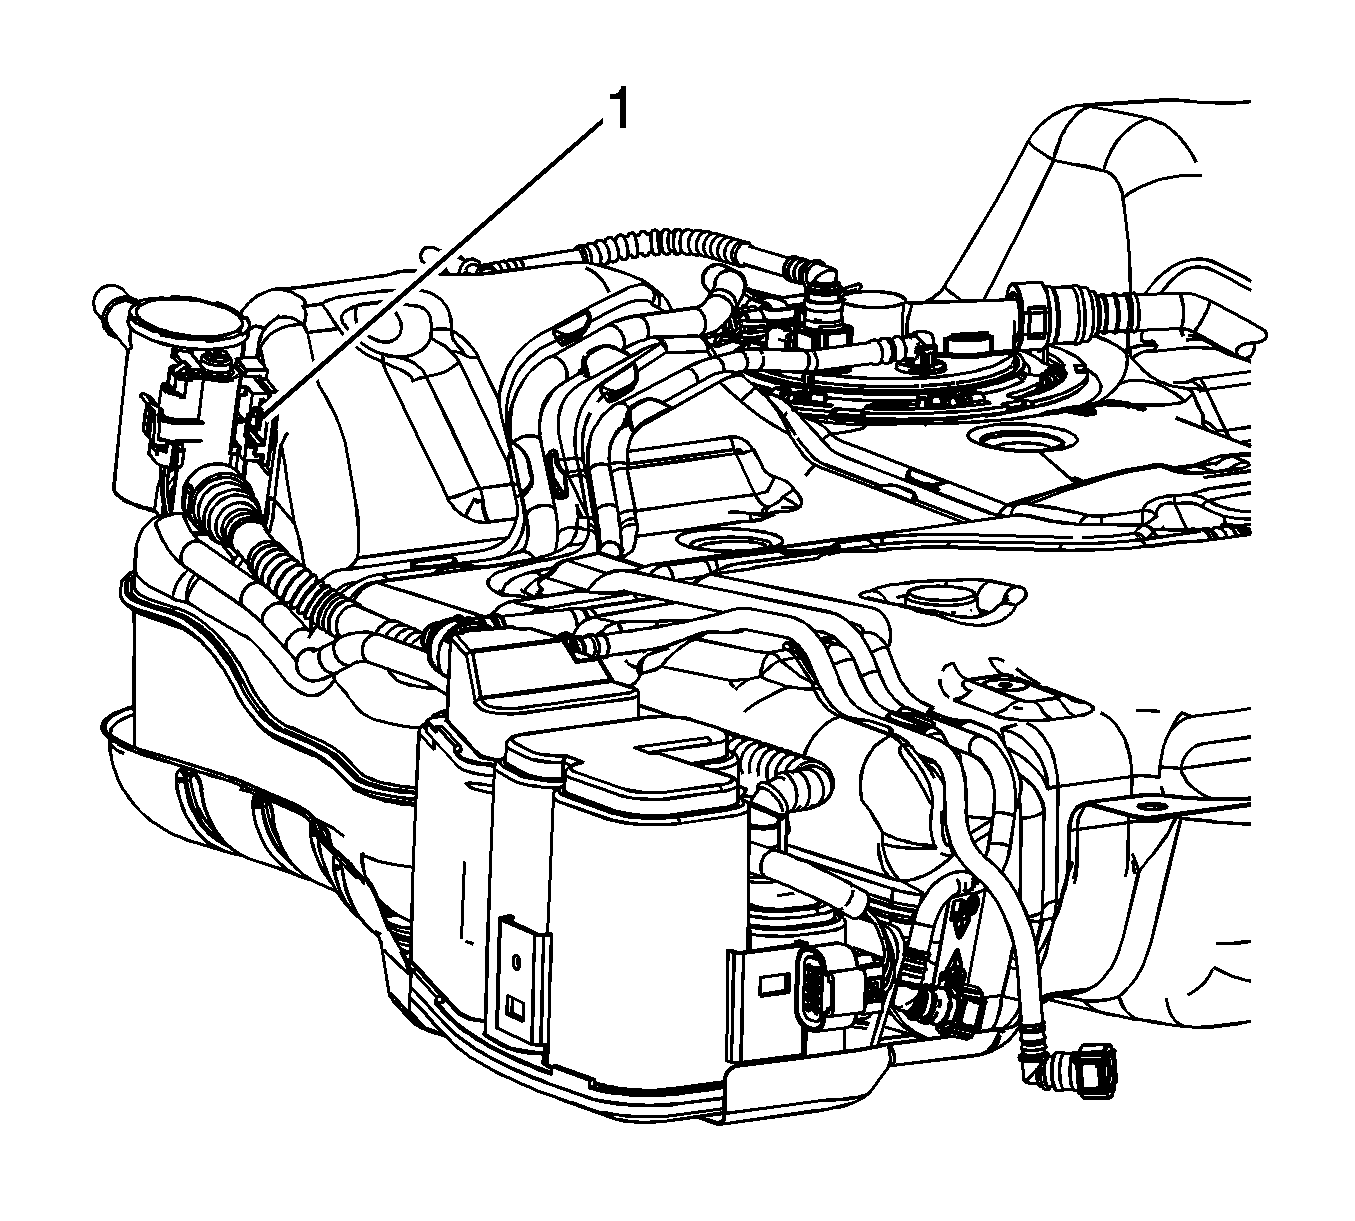
- Disconnect the fuel tank fuel pump wiring harness electrical connector (1) from the EVAP canister vent solenoid valve.
- Disconnect the EVAP canister line quick connect fitting (2) from the EVAP canister vent solenoid valve. Refer to Plastic Collar Quick Connect Fitting Service .
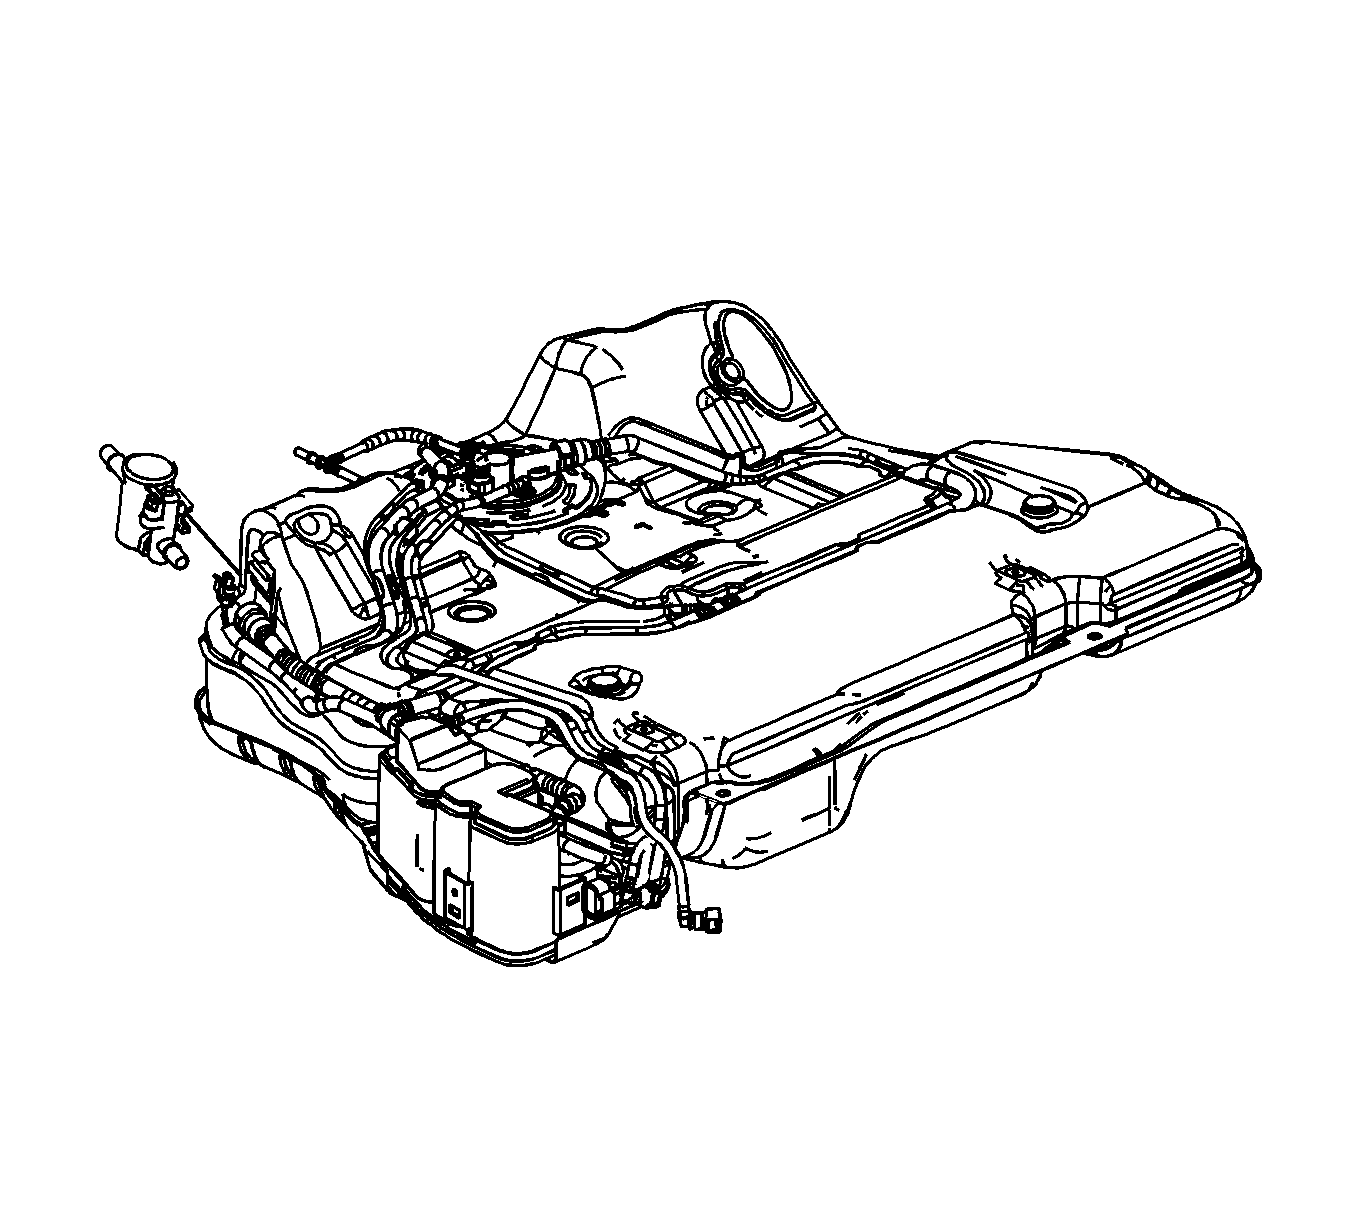
- Insert and gently push a small flat-bladed tool between the EVAP canister vent solenoid and the retaining bracket, disengaging the retaining tab (1).
- Slide the EVAP canister vent solenoid valve toward the rear of the vehicle.
Installation Procedure
- Slide the EVAP canister vent solenoid valve onto the bracket on the fuel tank.
- Connect the EVAP canister line quick connect fitting (2) to the EVAP canister vent solenoid valve. Refer to Plastic Collar Quick Connect Fitting Service .
- Connect the fuel tank fuel pump wiring harness electrical connector (1) to the EVAP canister vent solenoid valve.
- Using the adjustable jack, raise the right side of the fuel tank.
- Install the right side front fuel tank strap (1) bolt.
- Tighten the left side fuel tank strap (2) bolts.
- Tighten the right side front fuel tank strap bolt.
- Remove the support from the fuel tank.
- Install the fuel fill pipe hose to the fuel tank.
- Connect the fuel tank fill EVAP pipe quick connect fitting (2) to the fuel tank fill EVAP emission pipe. Refer to Plastic Collar Quick Connect Fitting Service .
- Tighten the fuel fill hose clamp (3) at the fuel tank.
- Raise the muffler assembly into position.
- With the aid of an assistant, install the muffler insulators (1) to the underbody hangers.
- Remove the jackstand from under the muffler assembly.
- Lower the vehicle.


Notice: Refer to Fastener Notice in the Preface section.
Tighten
Tighten the bolts to 20 N·m (15 lb ft).

Tighten
Tighten the clamp to 4 N·m (35 lb in).

Evaporative Emission Canister Vent Solenoid Valve Replacement Sedan
Removal Procedure
- Raise and support the vehicle. Refer to Lifting and Jacking the Vehicle .
- Place a jackstand under the muffler assembly.
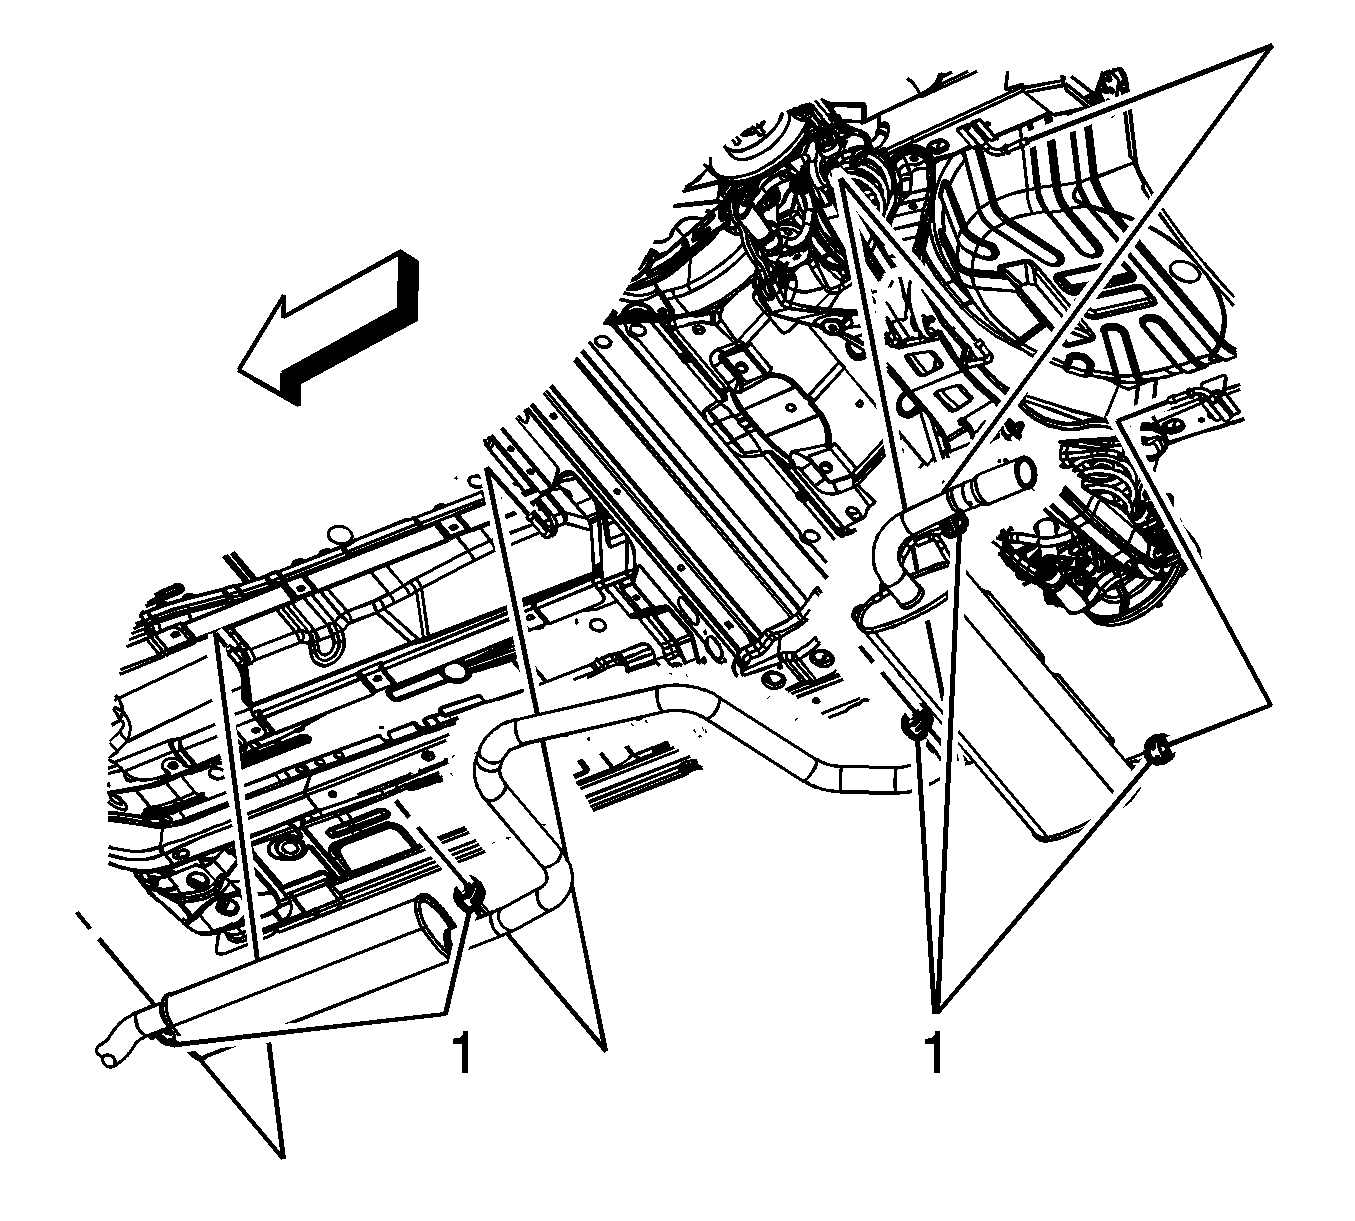
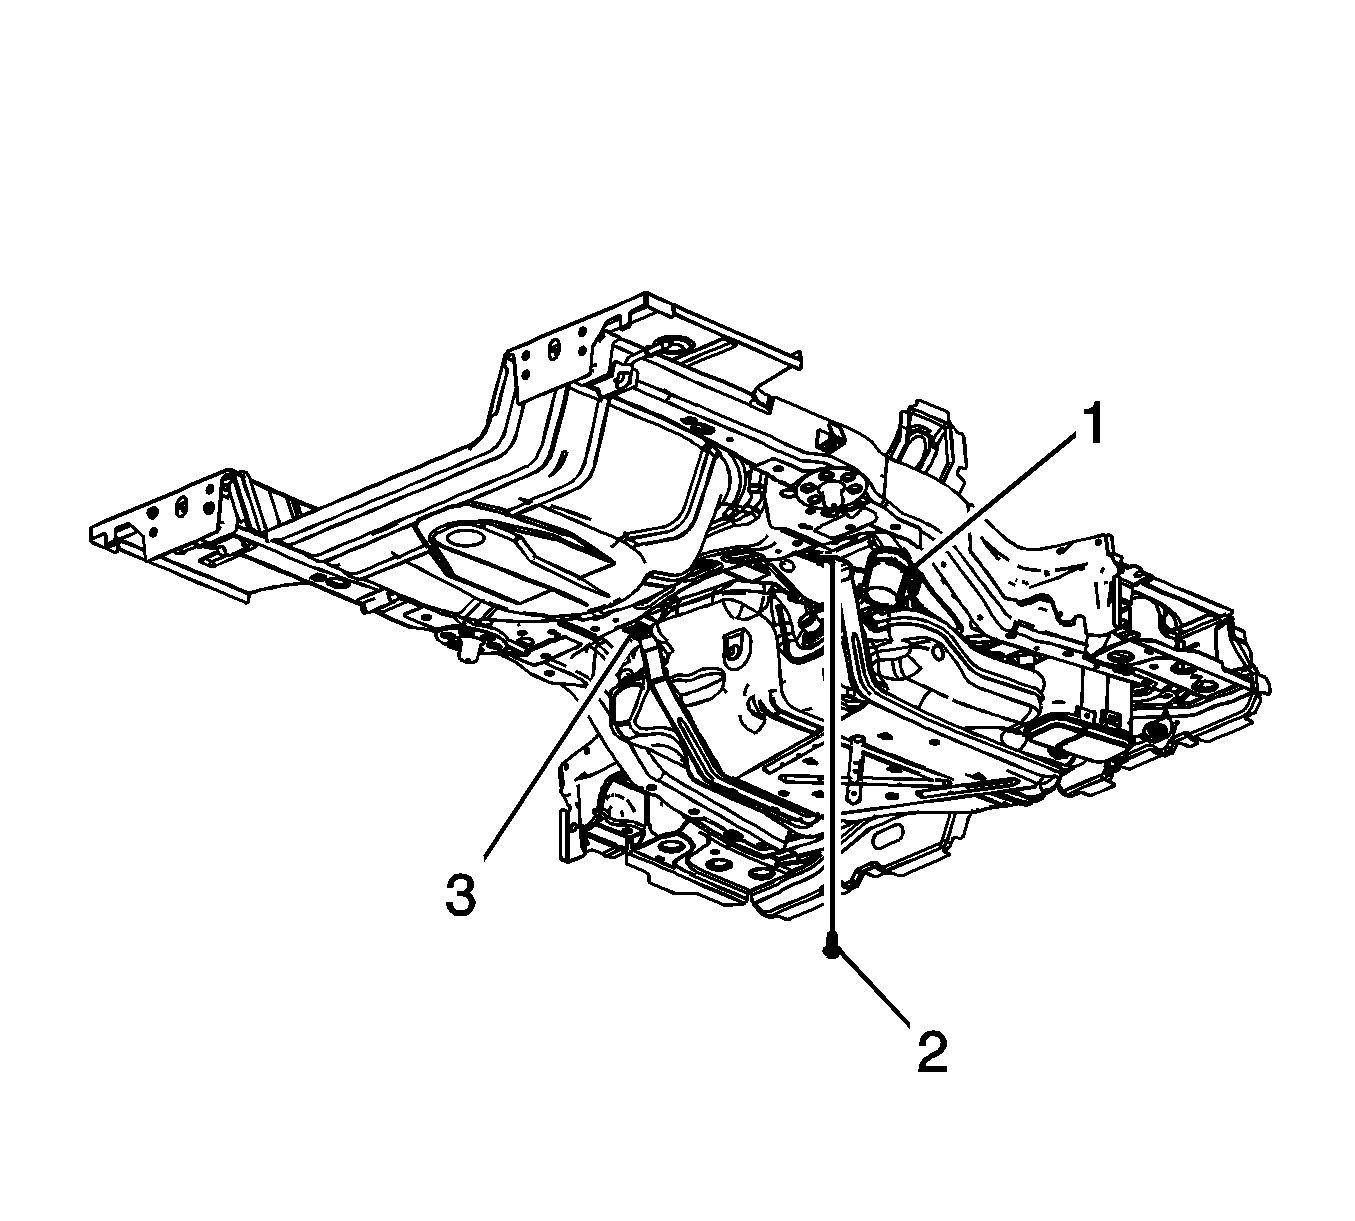
- With the aid of an assistant, separate the muffler insulators (1) from the underbody hangers.
- Slowly lower the muffler assembly allowing it to rest on the jackstand.
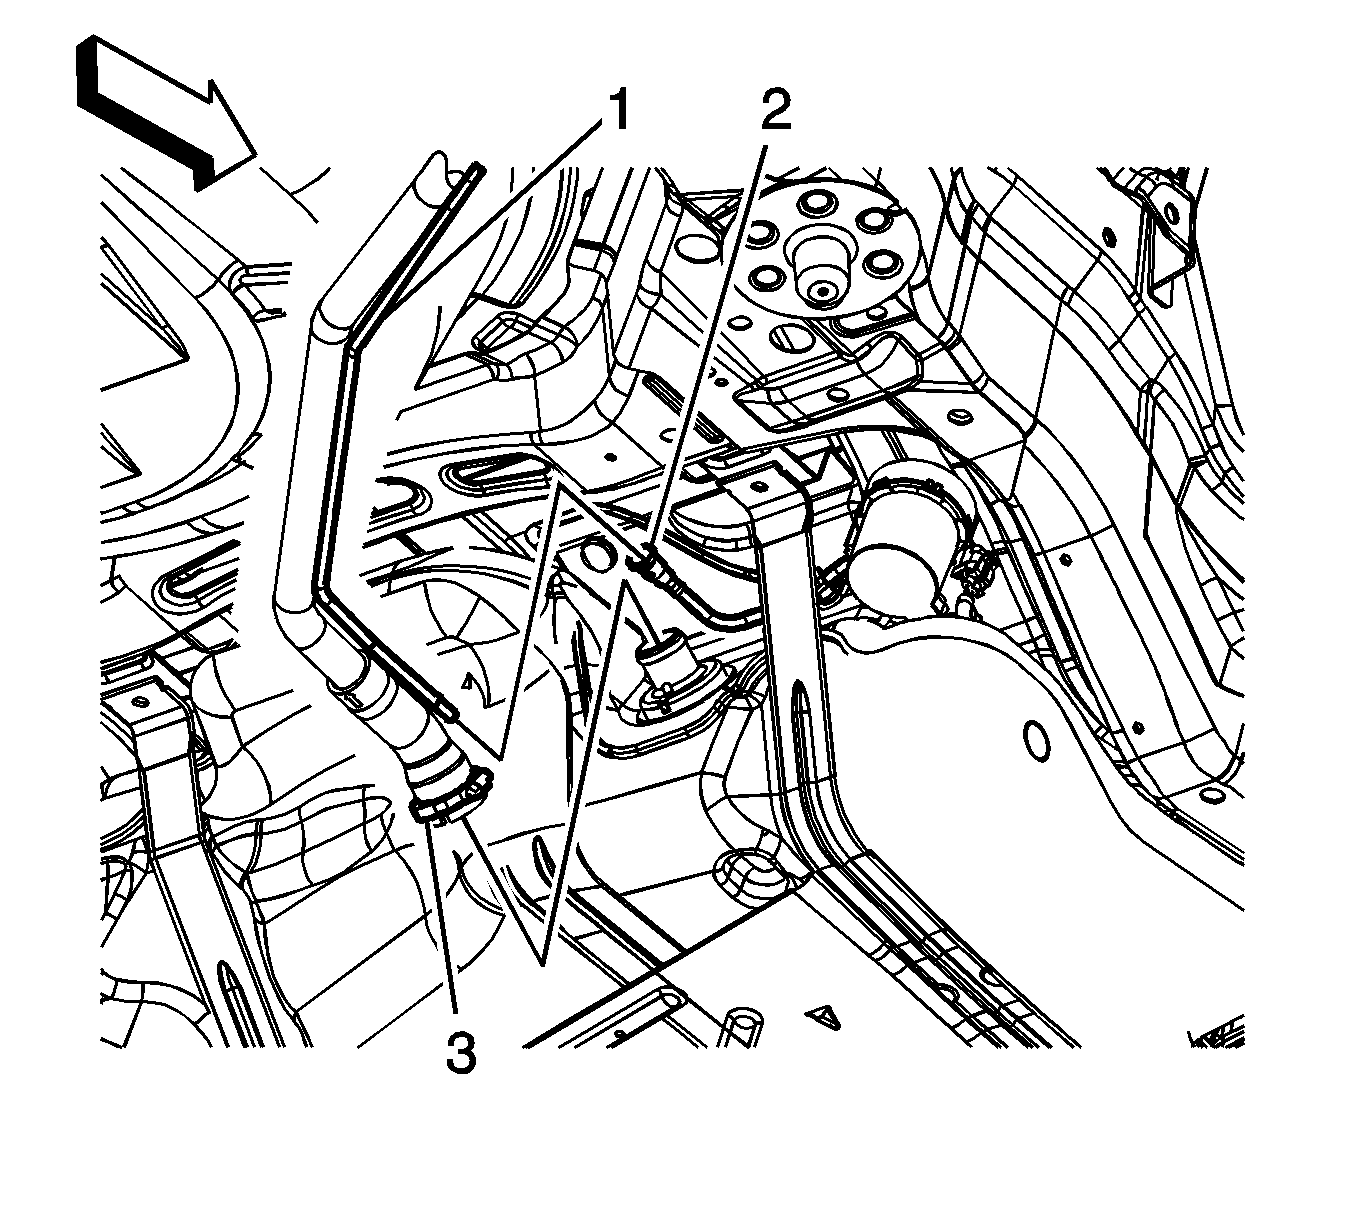
- Loosen the fuel fill pipe hose clamp (3) at the fuel tank.
- Separate the fuel fill pipe hose from the fuel tank.
- Disconnect the fuel tank evaporative emission (EVAP) canister vent pipe quick connect fitting (2) from the fuel tank fill EVAP emission pipe. Refer to Plastic Collar Quick Connect Fitting Service .
- Loosen, DO NOT REMOVE the left side fuel tank strap bolts (3).
- Support the fuel tank with a suitable adjustable jackstand.
- Loosen, DO NOT REMOVE the right side front fuel tank strap bolt.
- Remove the right side rear fuel tank strap bolt (2).
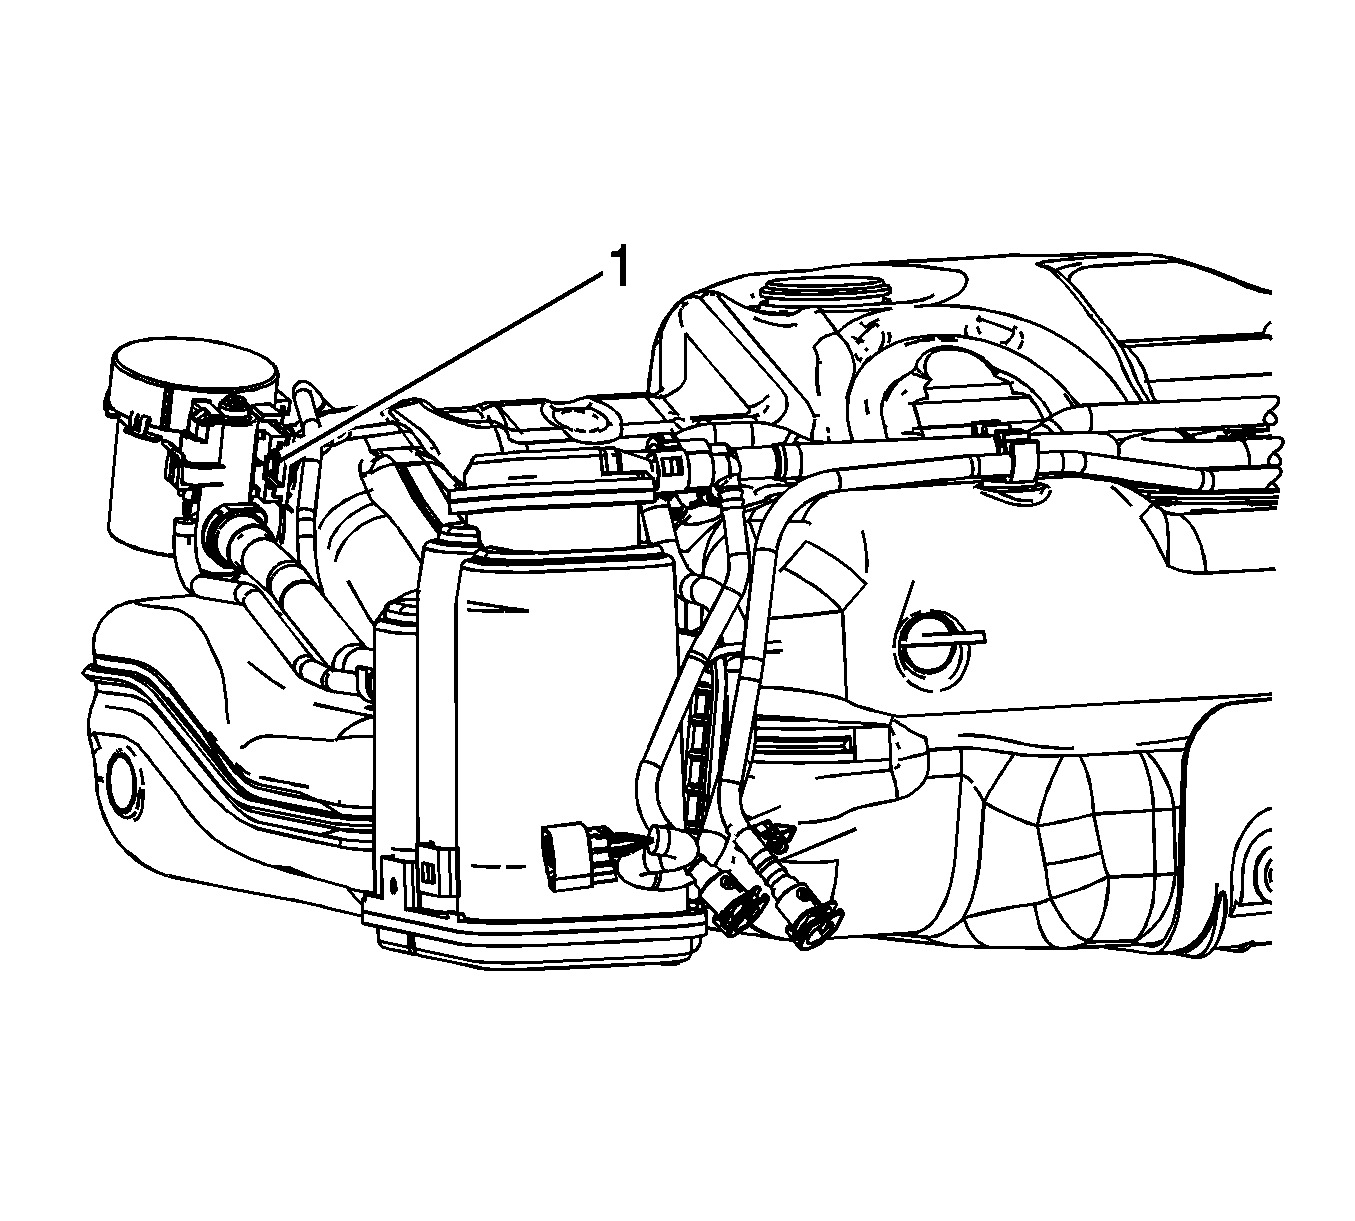
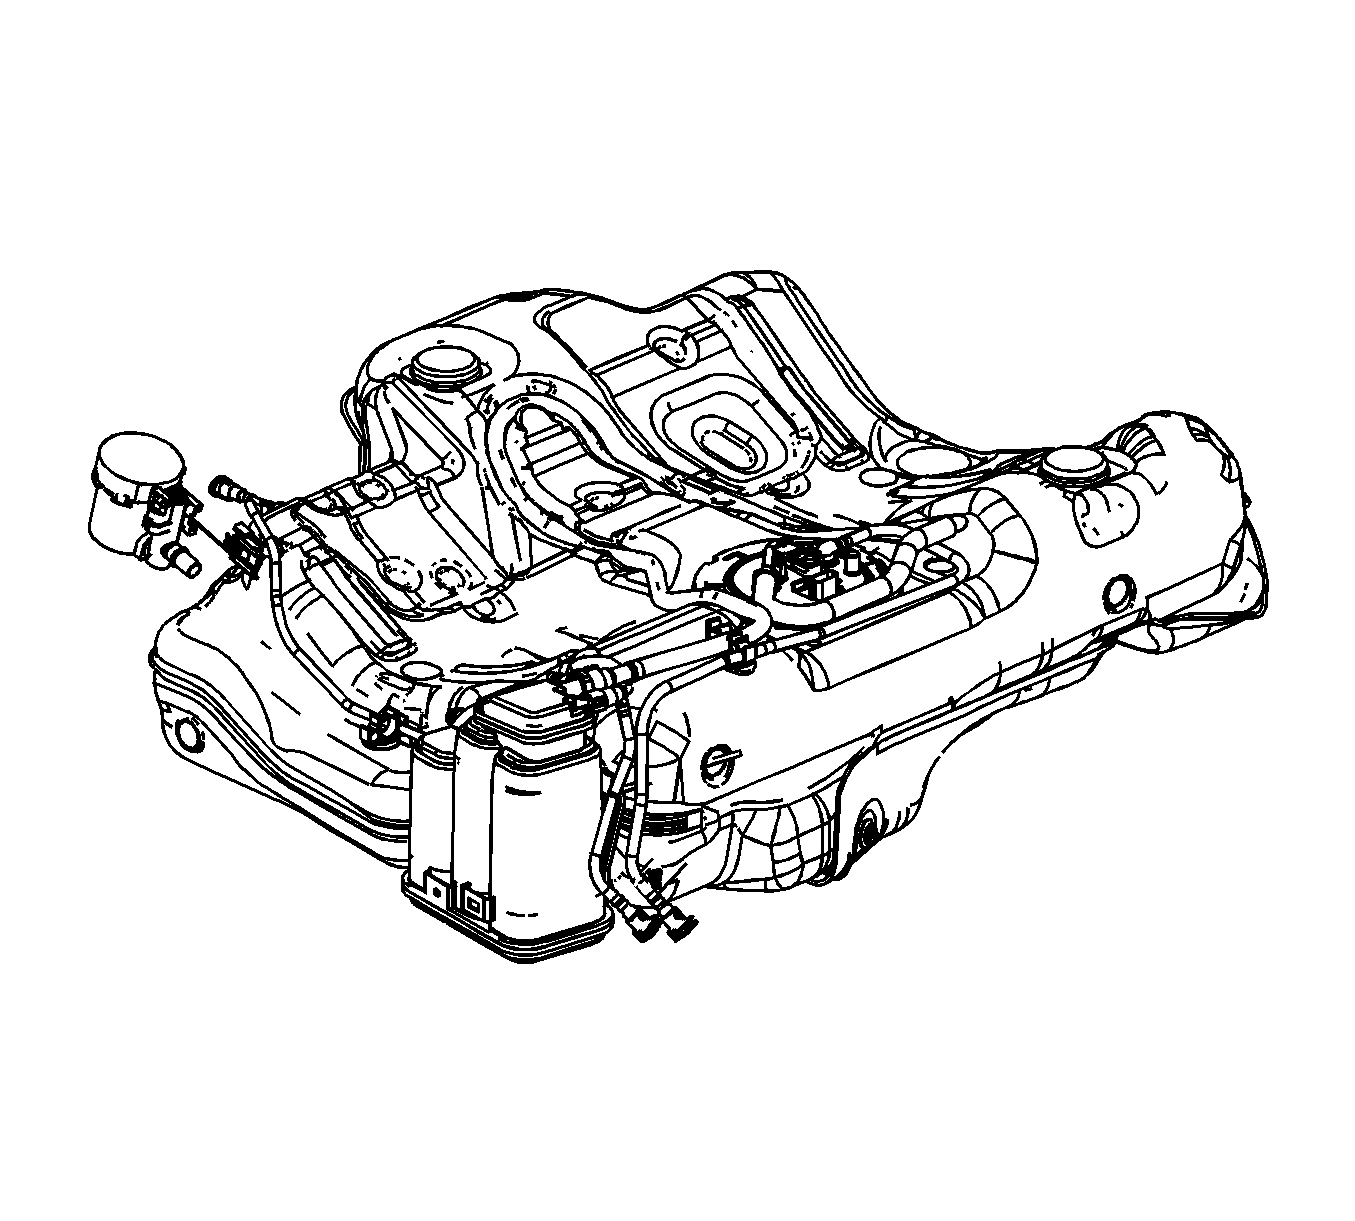
- Using the adjustable jack, lower the right side of the fuel tank enough to access the EVAP canister vent solenoid valve (1).
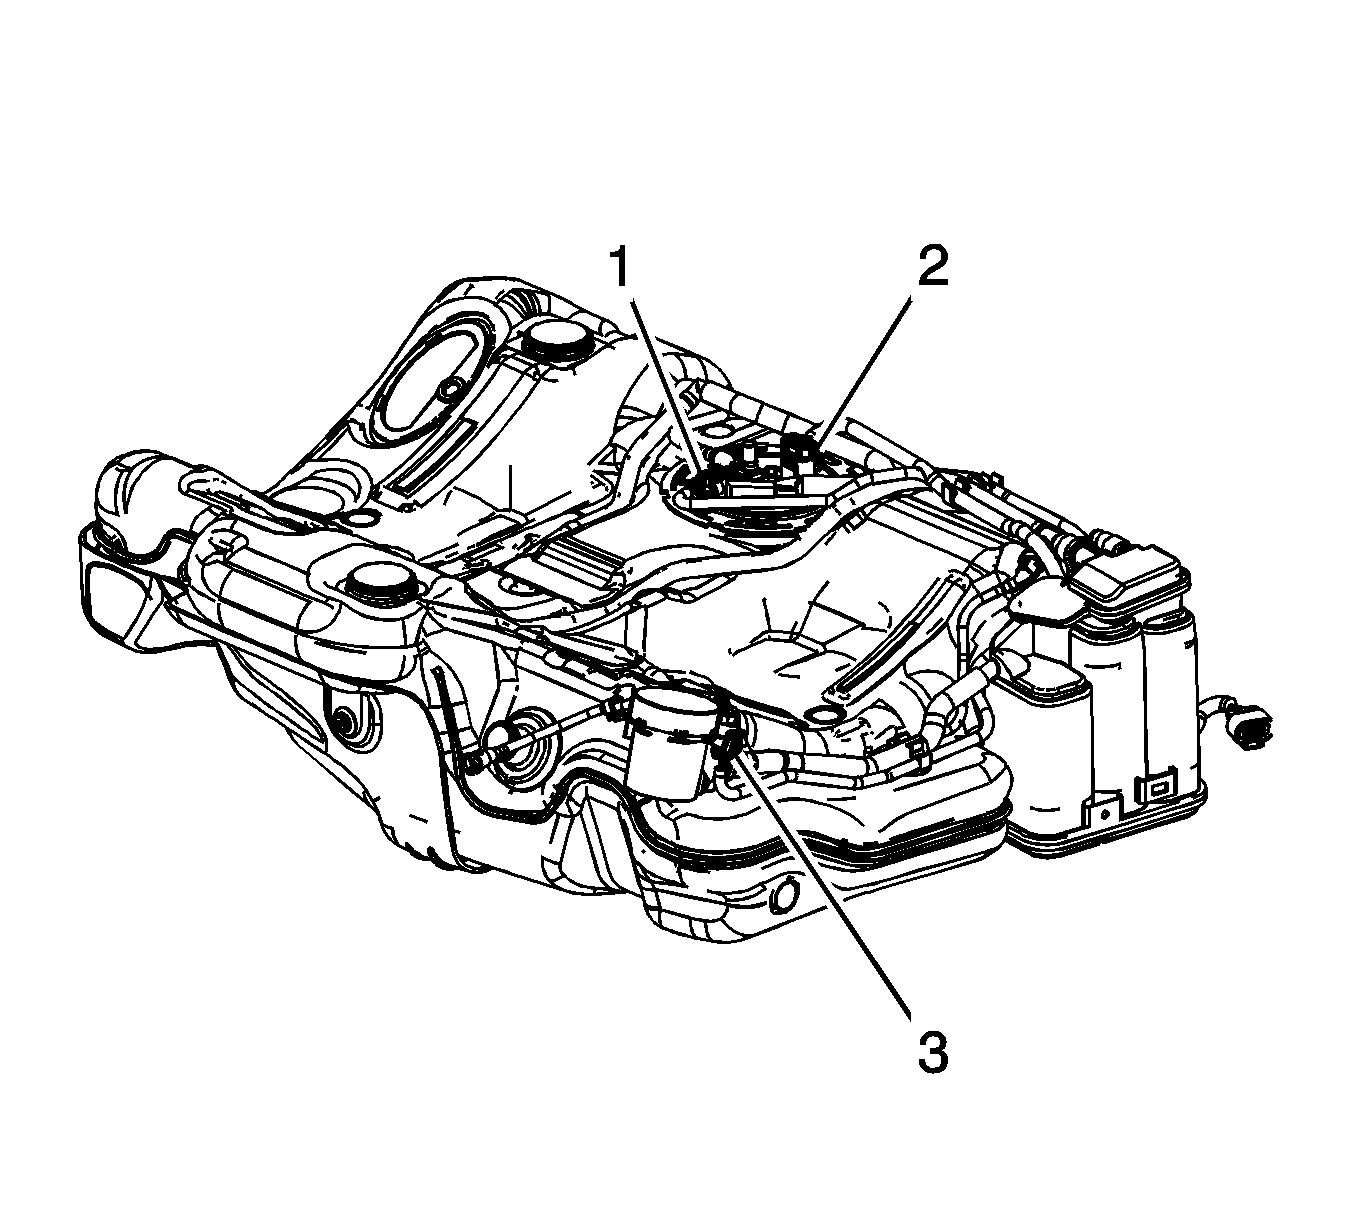
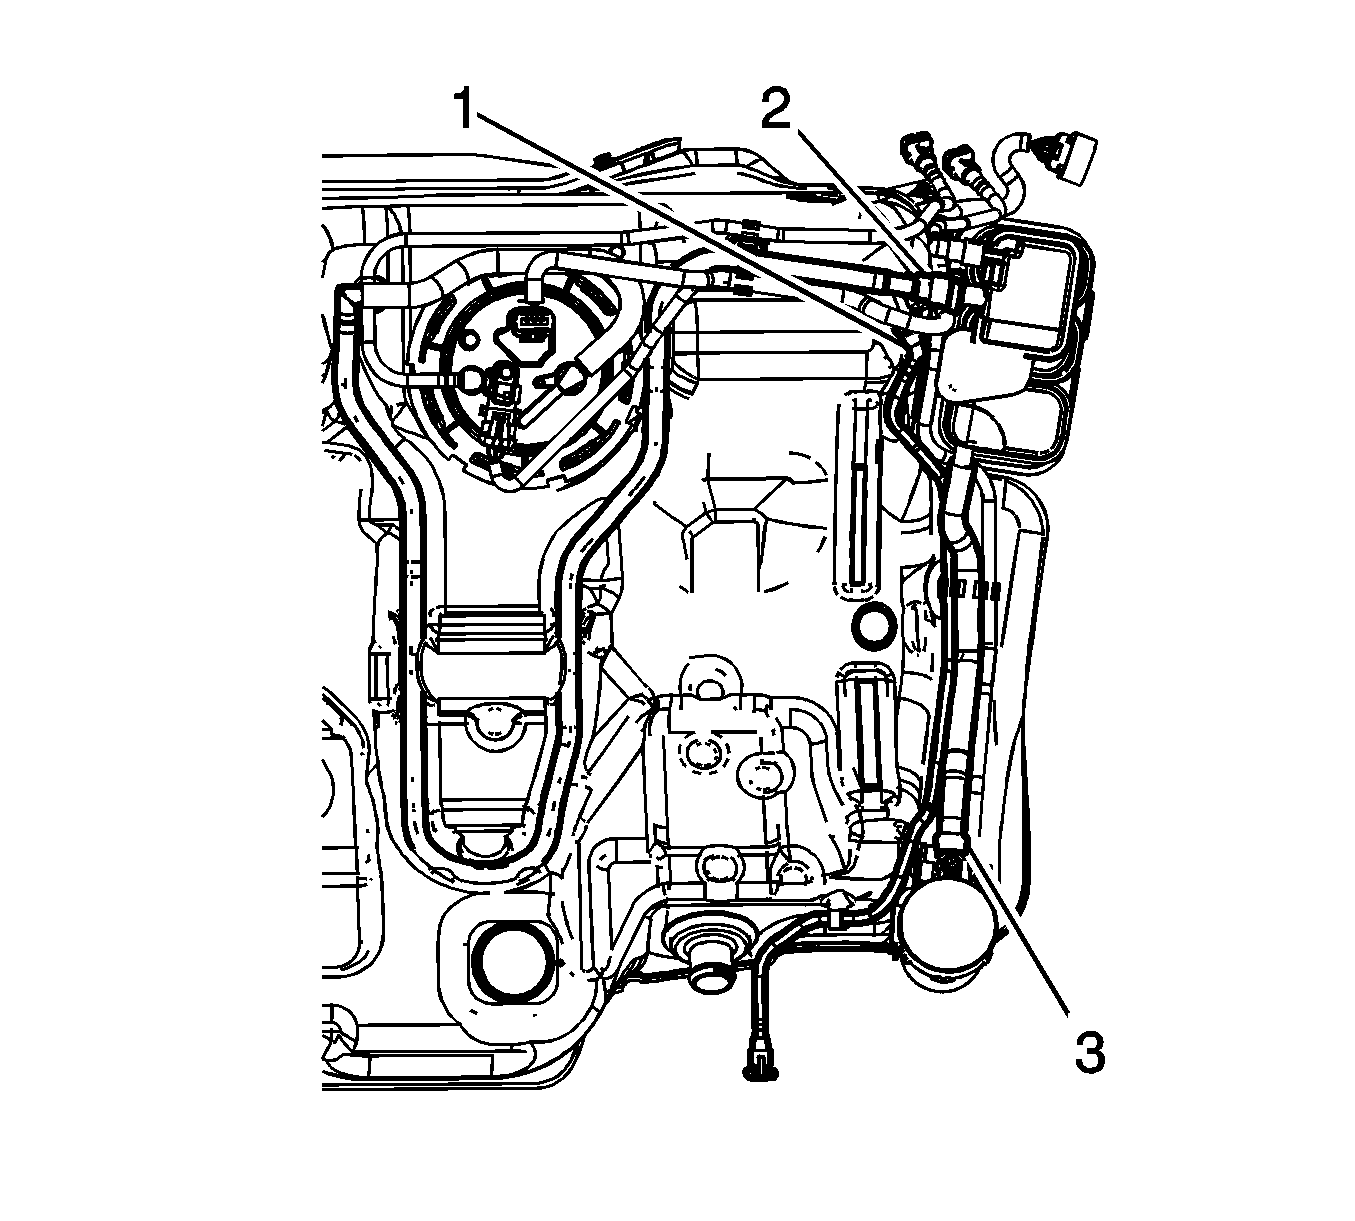
- Disconnect the fuel tank fuel pump wiring harness electrical connector (3) from the EVAP canister vent solenoid valve.
- Disconnect the EVAP canister line quick connect fitting (3) from the EVAP canister vent solenoid valve. Refer to Plastic Collar Quick Connect Fitting Service .
- Insert and gently push a small flat-bladed tool between the EVAP canister vent solenoid and the retaining bracket, disengaging the retaining tab (1).
- Slide the EVAP canister vent solenoid valve toward the rear of the vehicle.

Installation Procedure
- Slide the EVAP canister vent solenoid valve onto the bracket on the fuel tank.
- Connect the EVAP canister line quick connect fitting (3) to the EVAP canister vent solenoid valve. Refer to Plastic Collar Quick Connect Fitting Service .
- Connect the fuel tank fuel pump wiring harness electrical connector (3) to the EVAP canister vent solenoid valve.
- Using the adjustable jack, raise the right side of the fuel tank.
- Install the right side rear fuel tank strap bolt (2).
- Tighten the left side fuel tank strap bolts (3).
- Tighten the right side front fuel tank strap bolt.
- Remove the support from the fuel tank.
- Install the fuel fill pipe hose to the fuel tank.
- Connect the fuel tank EVAP emission canister vent pipe quick connect fitting (2) to the fuel tank fill EVAP emission pipe. Refer to Plastic Collar Quick Connect Fitting Service .
- Tighten the fuel fill pipe hose clamp (3) at the fuel tank.
- Raise the muffler assembly into position.
- With the aid of an assistant, install the muffler insulators (1) to the underbody hangers.
- Remove the jackstand from under the muffler assembly.
- Lower the vehicle.


Notice: Refer to Fastener Notice in the Preface section.
Tighten
Tighten the bolts to 20 N·m (15 lb ft).

Tighten
Tighten the clamp to 4 N·m (35 lb in).
