For 1990-2009 cars only
Removal Procedure
- Remove the intake manifold cover. Refer to Intake Manifold Cover Replacement .
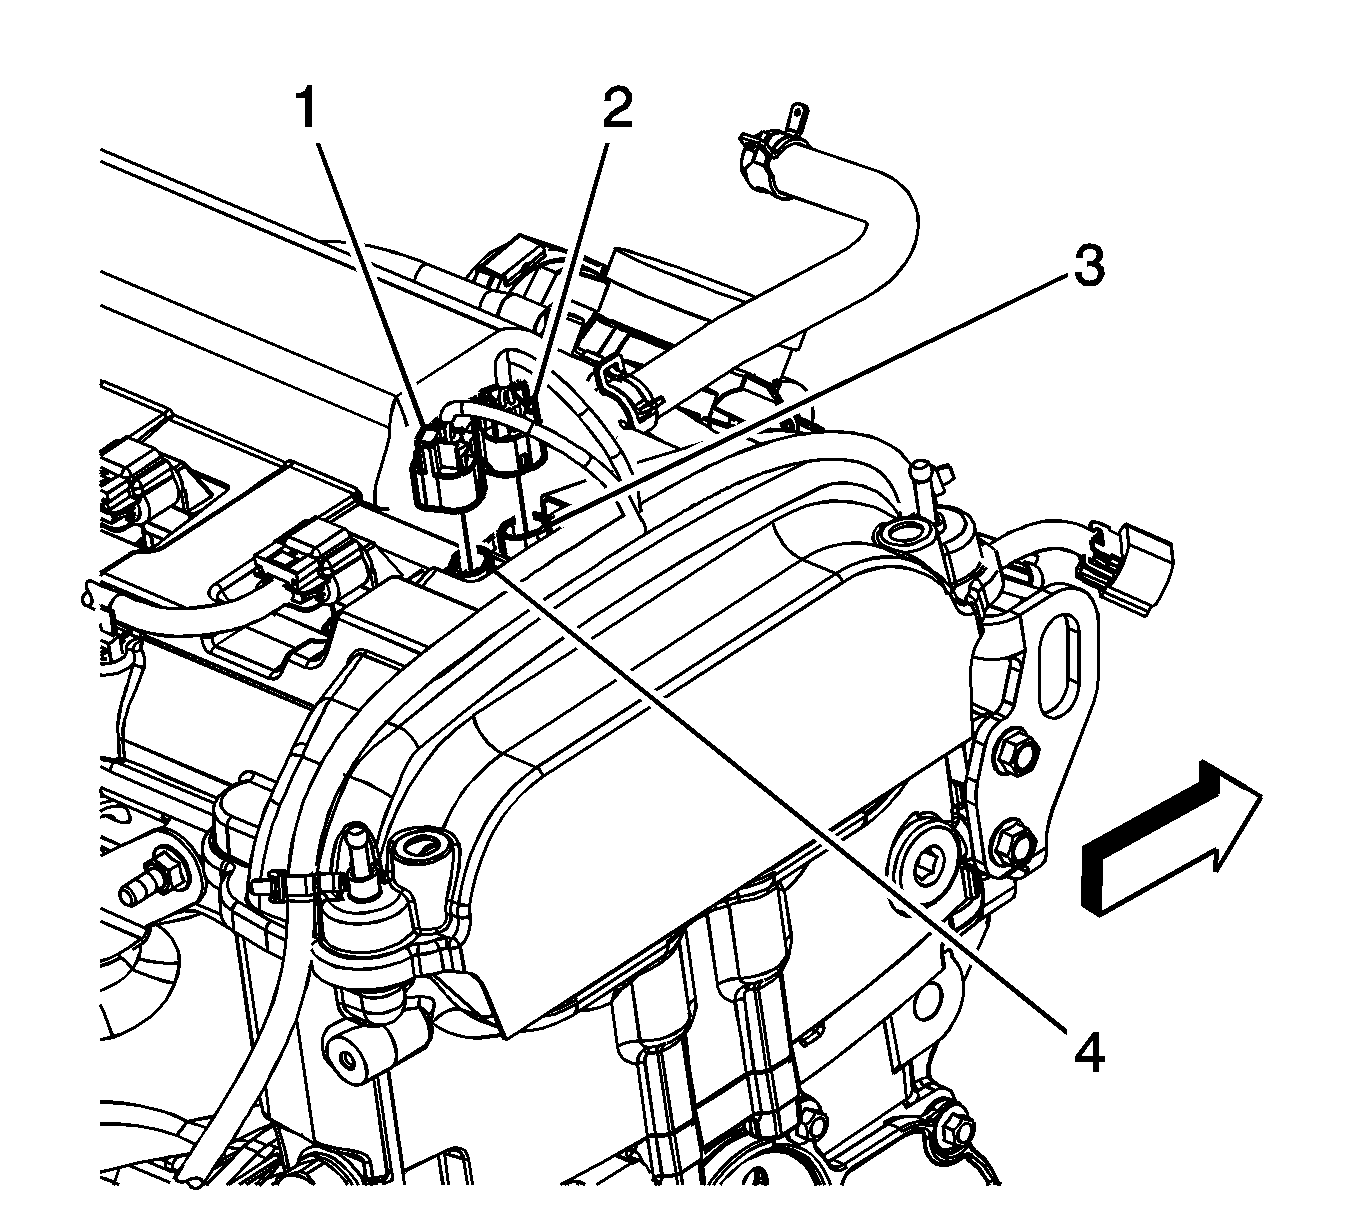
- Disconnect the engine wiring harness electrical connector (1) from the exhaust camshaft position (CMP) actuator solenoid valve (4), if required.
- Disconnect the engine wiring harness electrical connector (2) from the intake CMP actuator solenoid valve (3), if required.
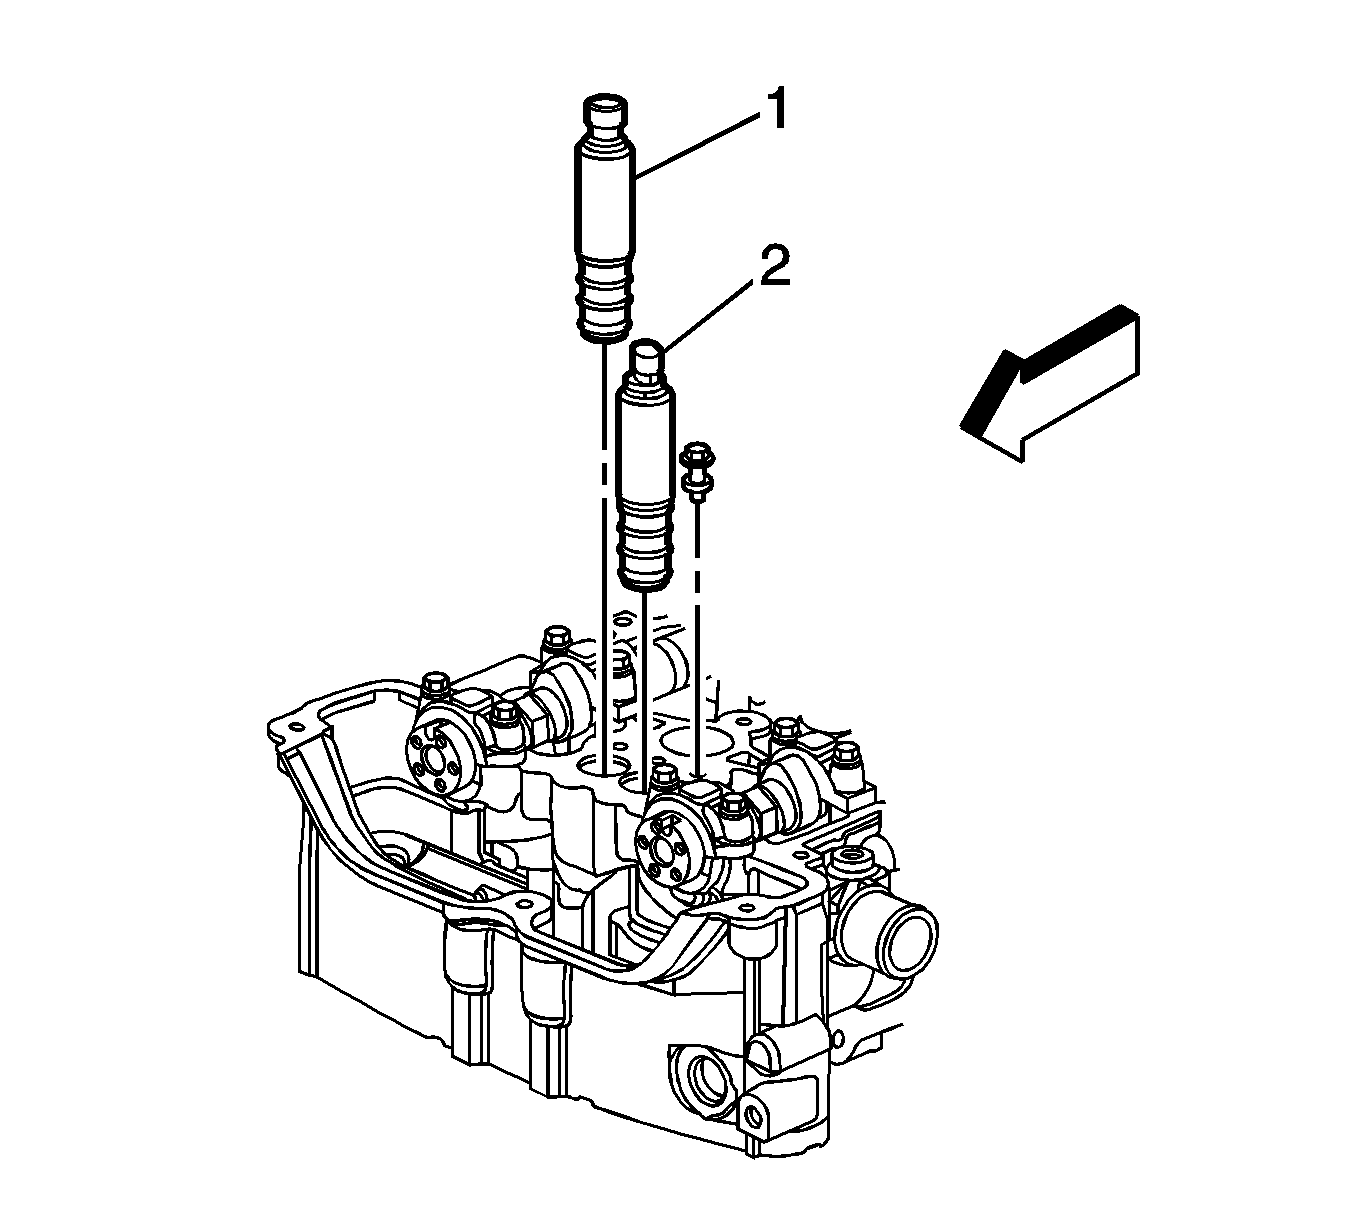
- Remove the exhaust (1) CMP actuator solenoid valve bolt and valve, if required.
- Remove the intake (2) CMP actuator solenoid valve bolt and valve, if required.
- Inspect the solenoid valve O-ring seals for damage, replace as necessary.
Installation Procedure
- Lubricate the solenoid valve O-ring seals with clean engine oil.
- Install the intake (2) CMP actuator solenoid valve and bolt, if required.
- Install the exhaust (1) CMP actuator solenoid valve and bolt, if required.
- Connect the engine wiring harness electrical connector (2) to the intake CMP actuator solenoid valve (3), if required.
- Connect the engine wiring harness electrical connector (1) to the exhaust CMP actuator solenoid valve (4), if required.
- Install the intake manifold cover. Refer to Intake Manifold Cover Replacement .
Notice: Refer to Fastener Notice in the Preface section.
Tighten
Tighten the bolt to 10 N·m (89 lb in).
Tighten
Tighten the bolt to 10 N·m (89 lb in).
