For 1990-2009 cars only
Air Cleaner Assembly Replacement 1st Design
Removal Procedure
- Remove the air cleaner outlet duct. Refer to Air Cleaner Outlet Duct Replacement .
- Disconnect the engine wiring harness electrical connector (1) from the mass airflow (MAF)/intake air temperature (IAT) sensor.
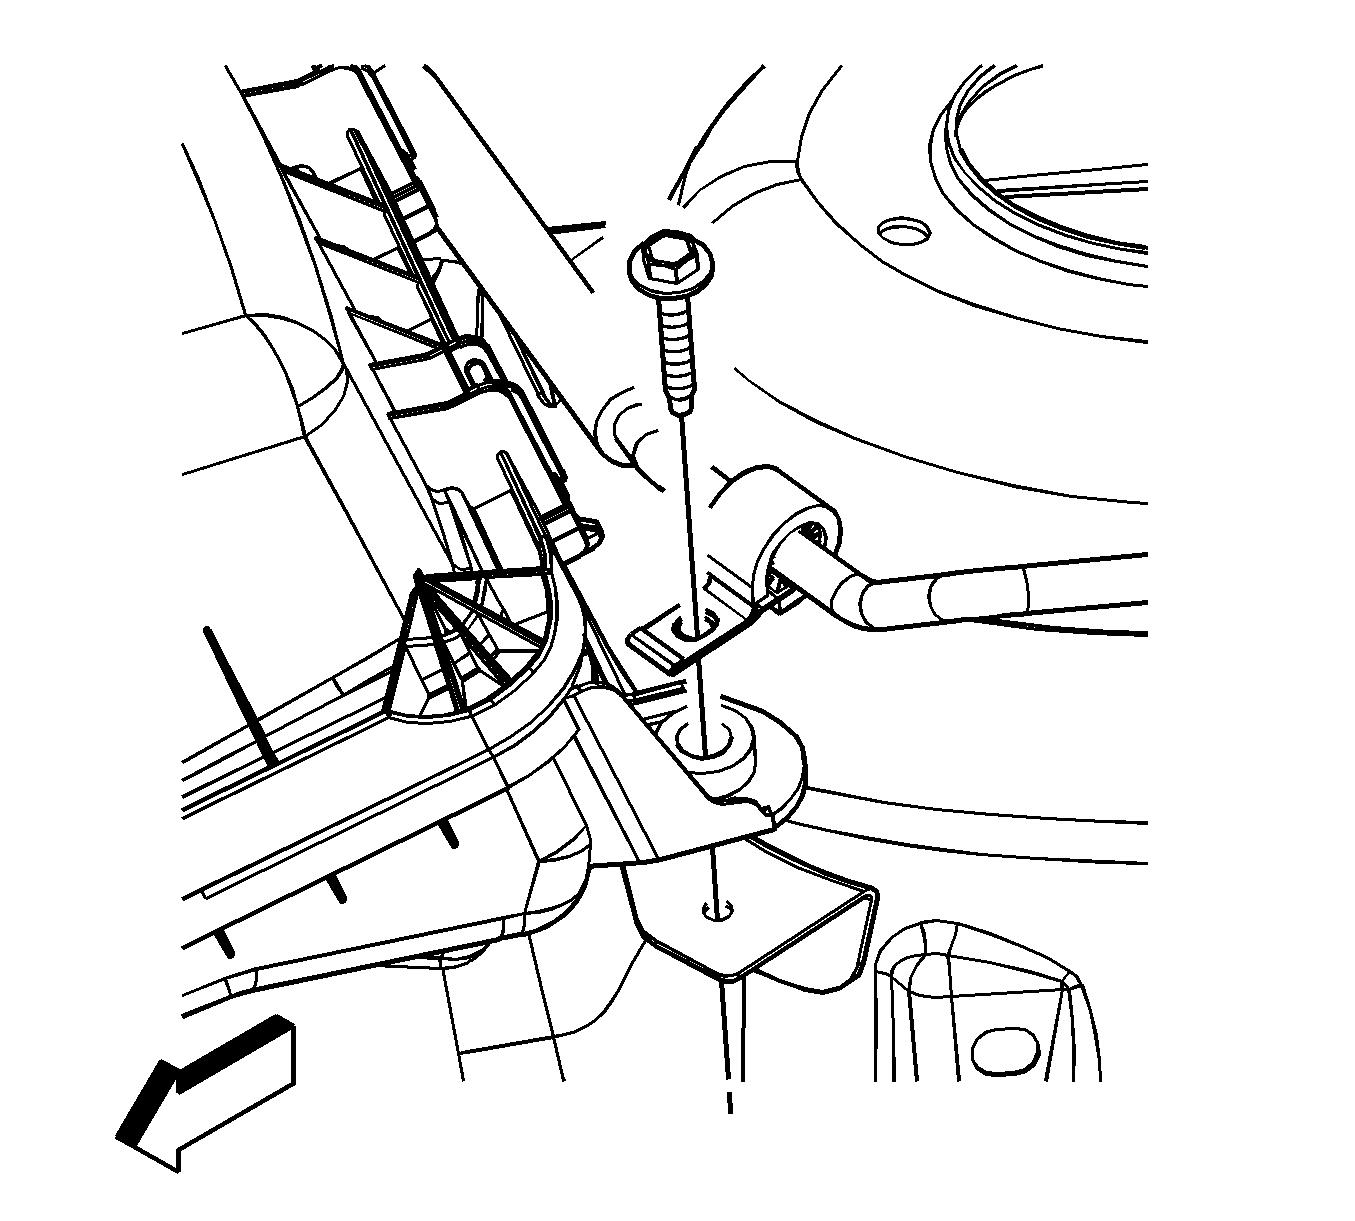
- Remove the air cleaner housing rear bolt.
- Reposition the air conditioning (A/C) condenser and evaporator tube clamp as required.
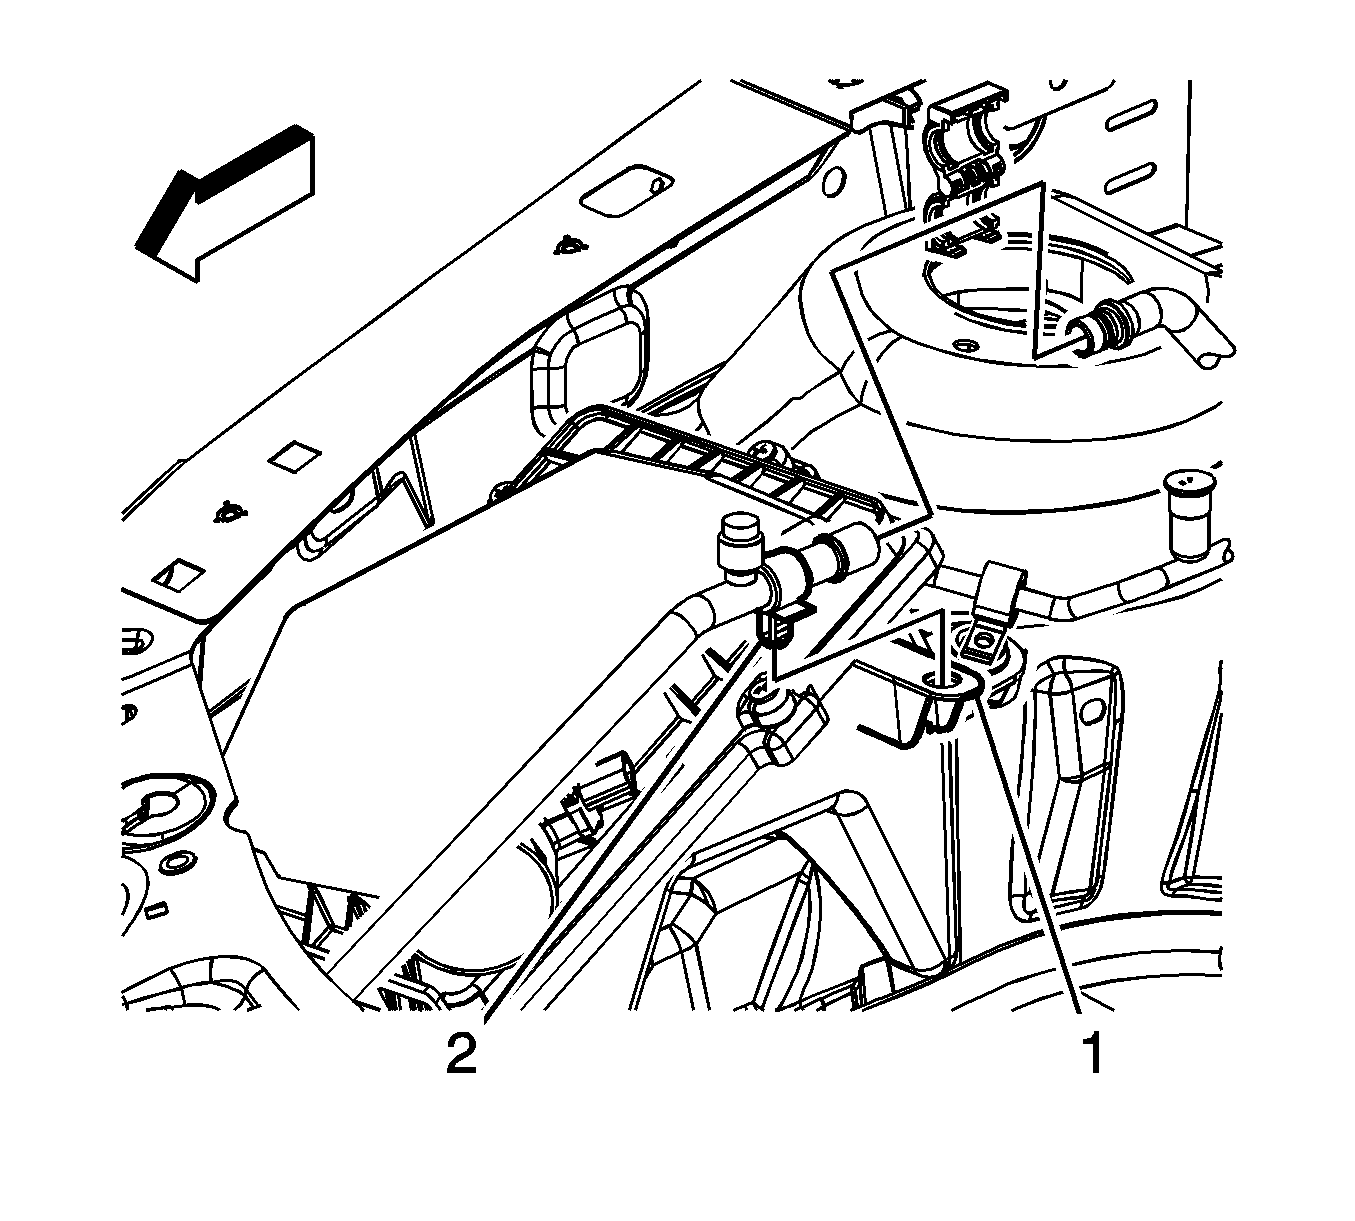
- Remove the A/C compressor and condenser line clip (2) from the air cleaner tab (1).
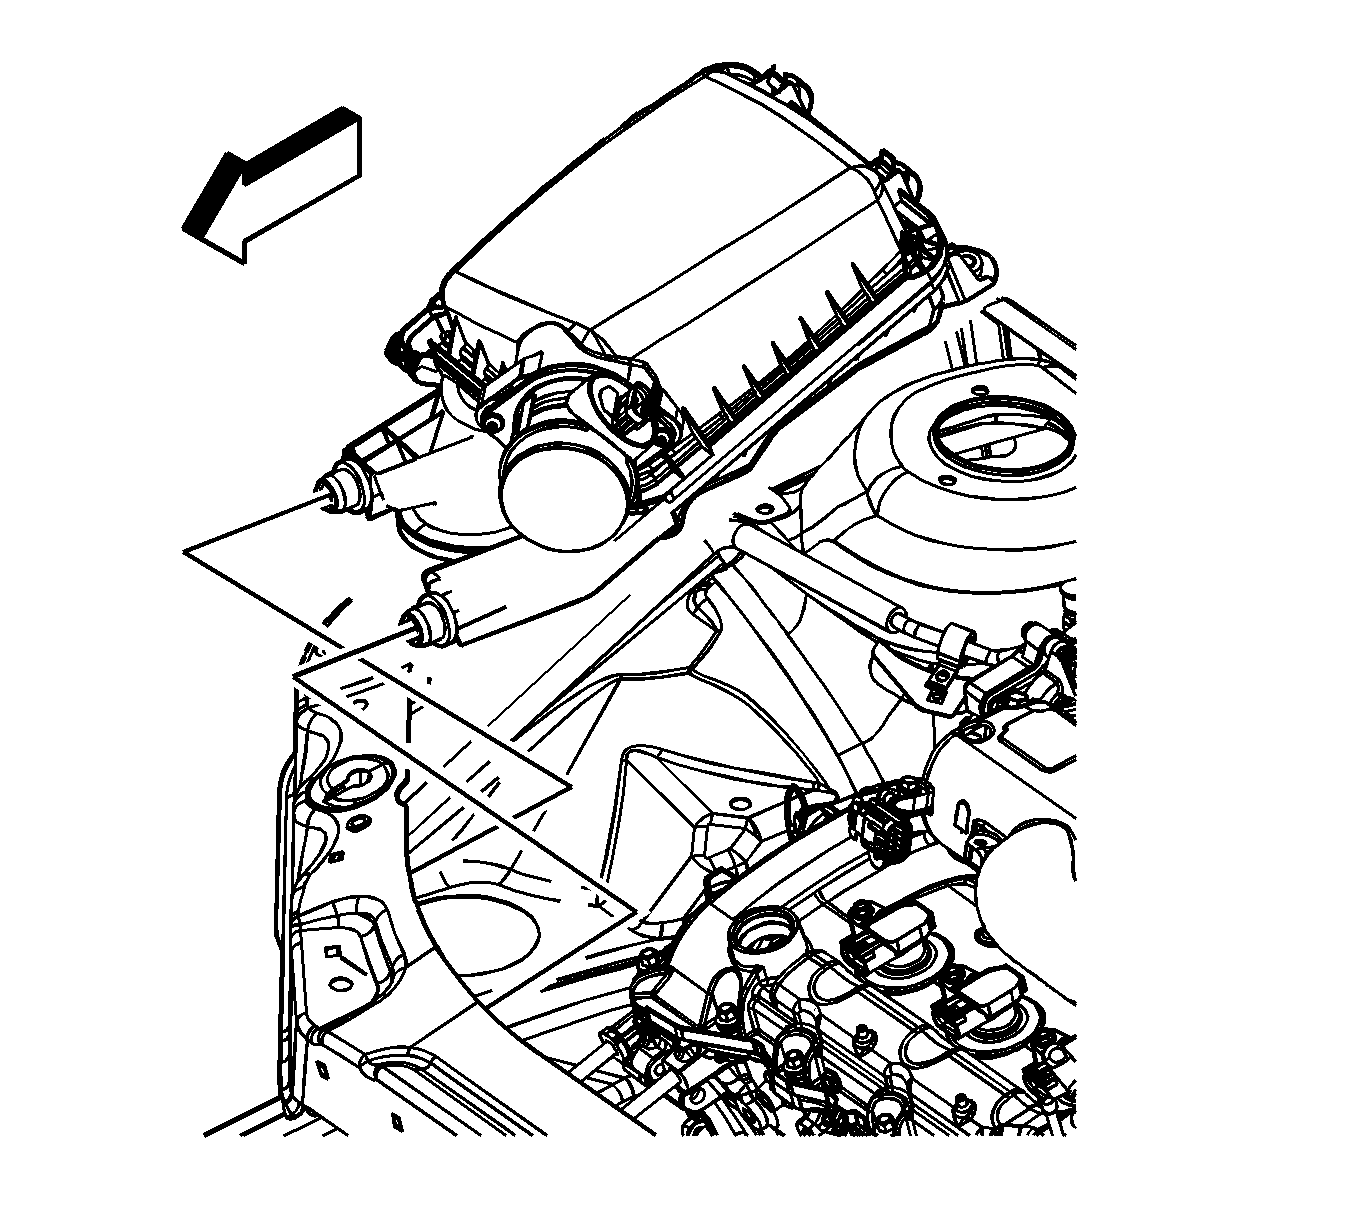
- Remove the air cleaner assembly from the upper tie bar.
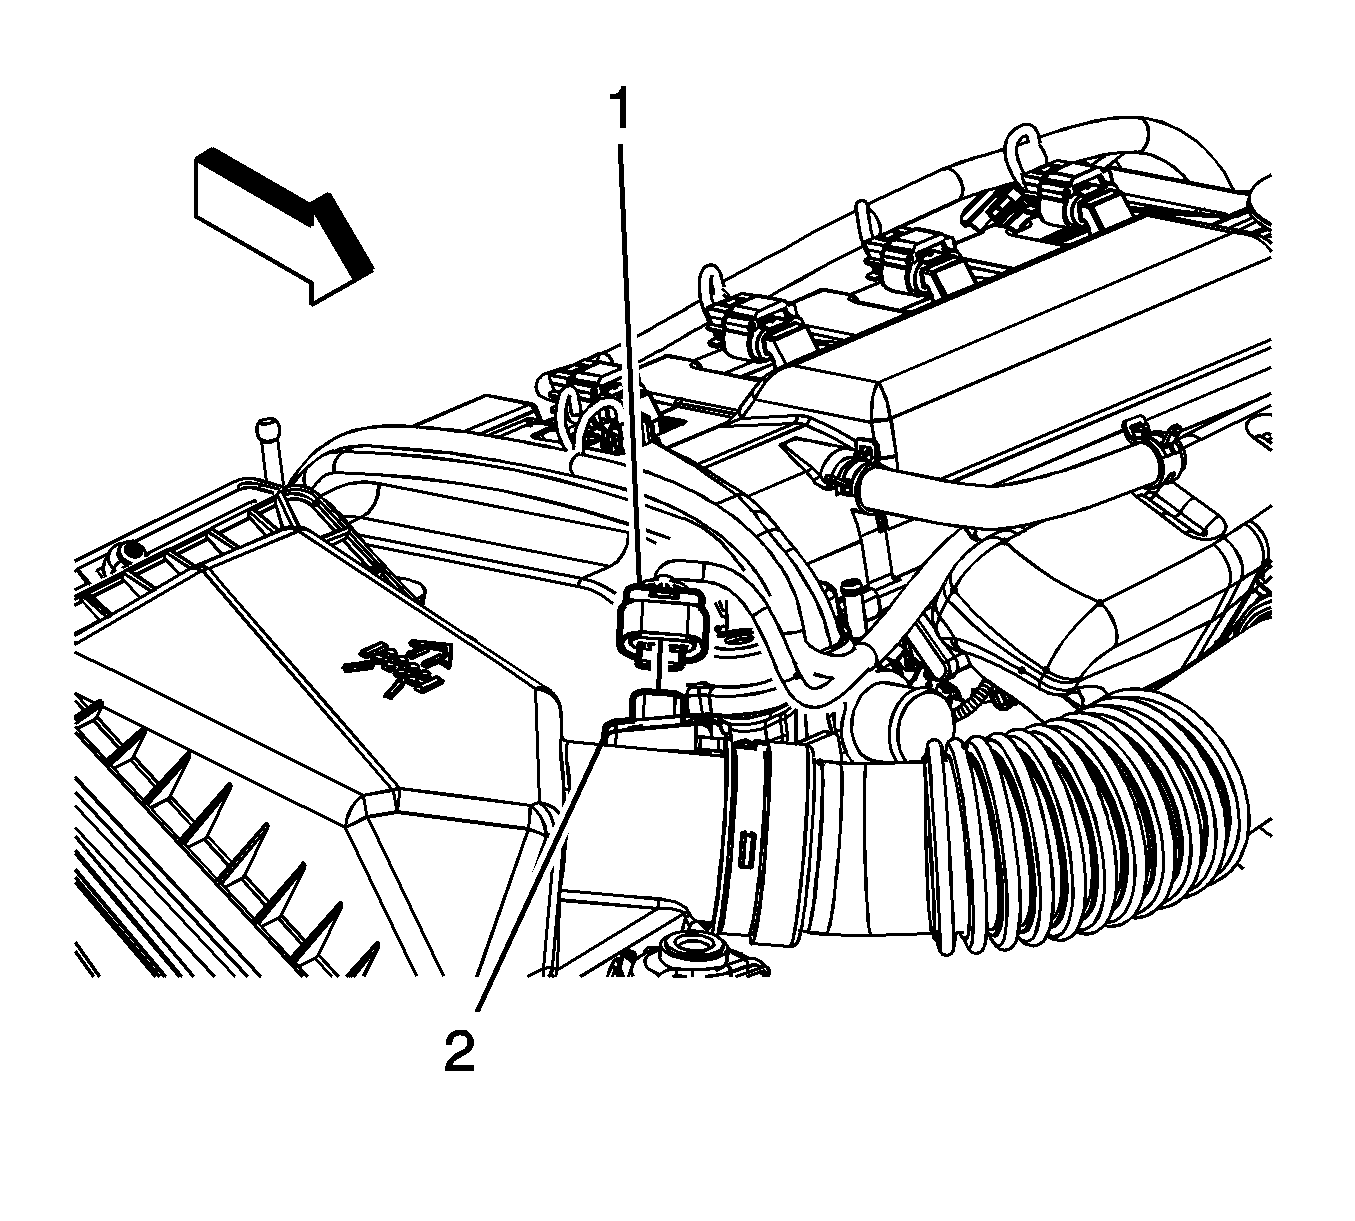
Installation Procedure
- Install the air cleaner assembly to the upper tie bar.
- Install the A/C compressor and condenser line clip (2) to the air cleaner tab (1).
- Position the A/C condenser and evaporator tube clamp as required.
- Install the air cleaner housing rear bolt.
- Connect the engine wiring harness electrical connector (1) to the MAF/IAT sensor.
- Install the air cleaner outlet duct. Refer to Air Cleaner Outlet Duct Replacement .


Notice: Refer to Fastener Notice in the Preface section.
Tighten
Tighten the bolt to 10 N·m (89 lb in).

Air Cleaner Assembly Replacement 2nd Design
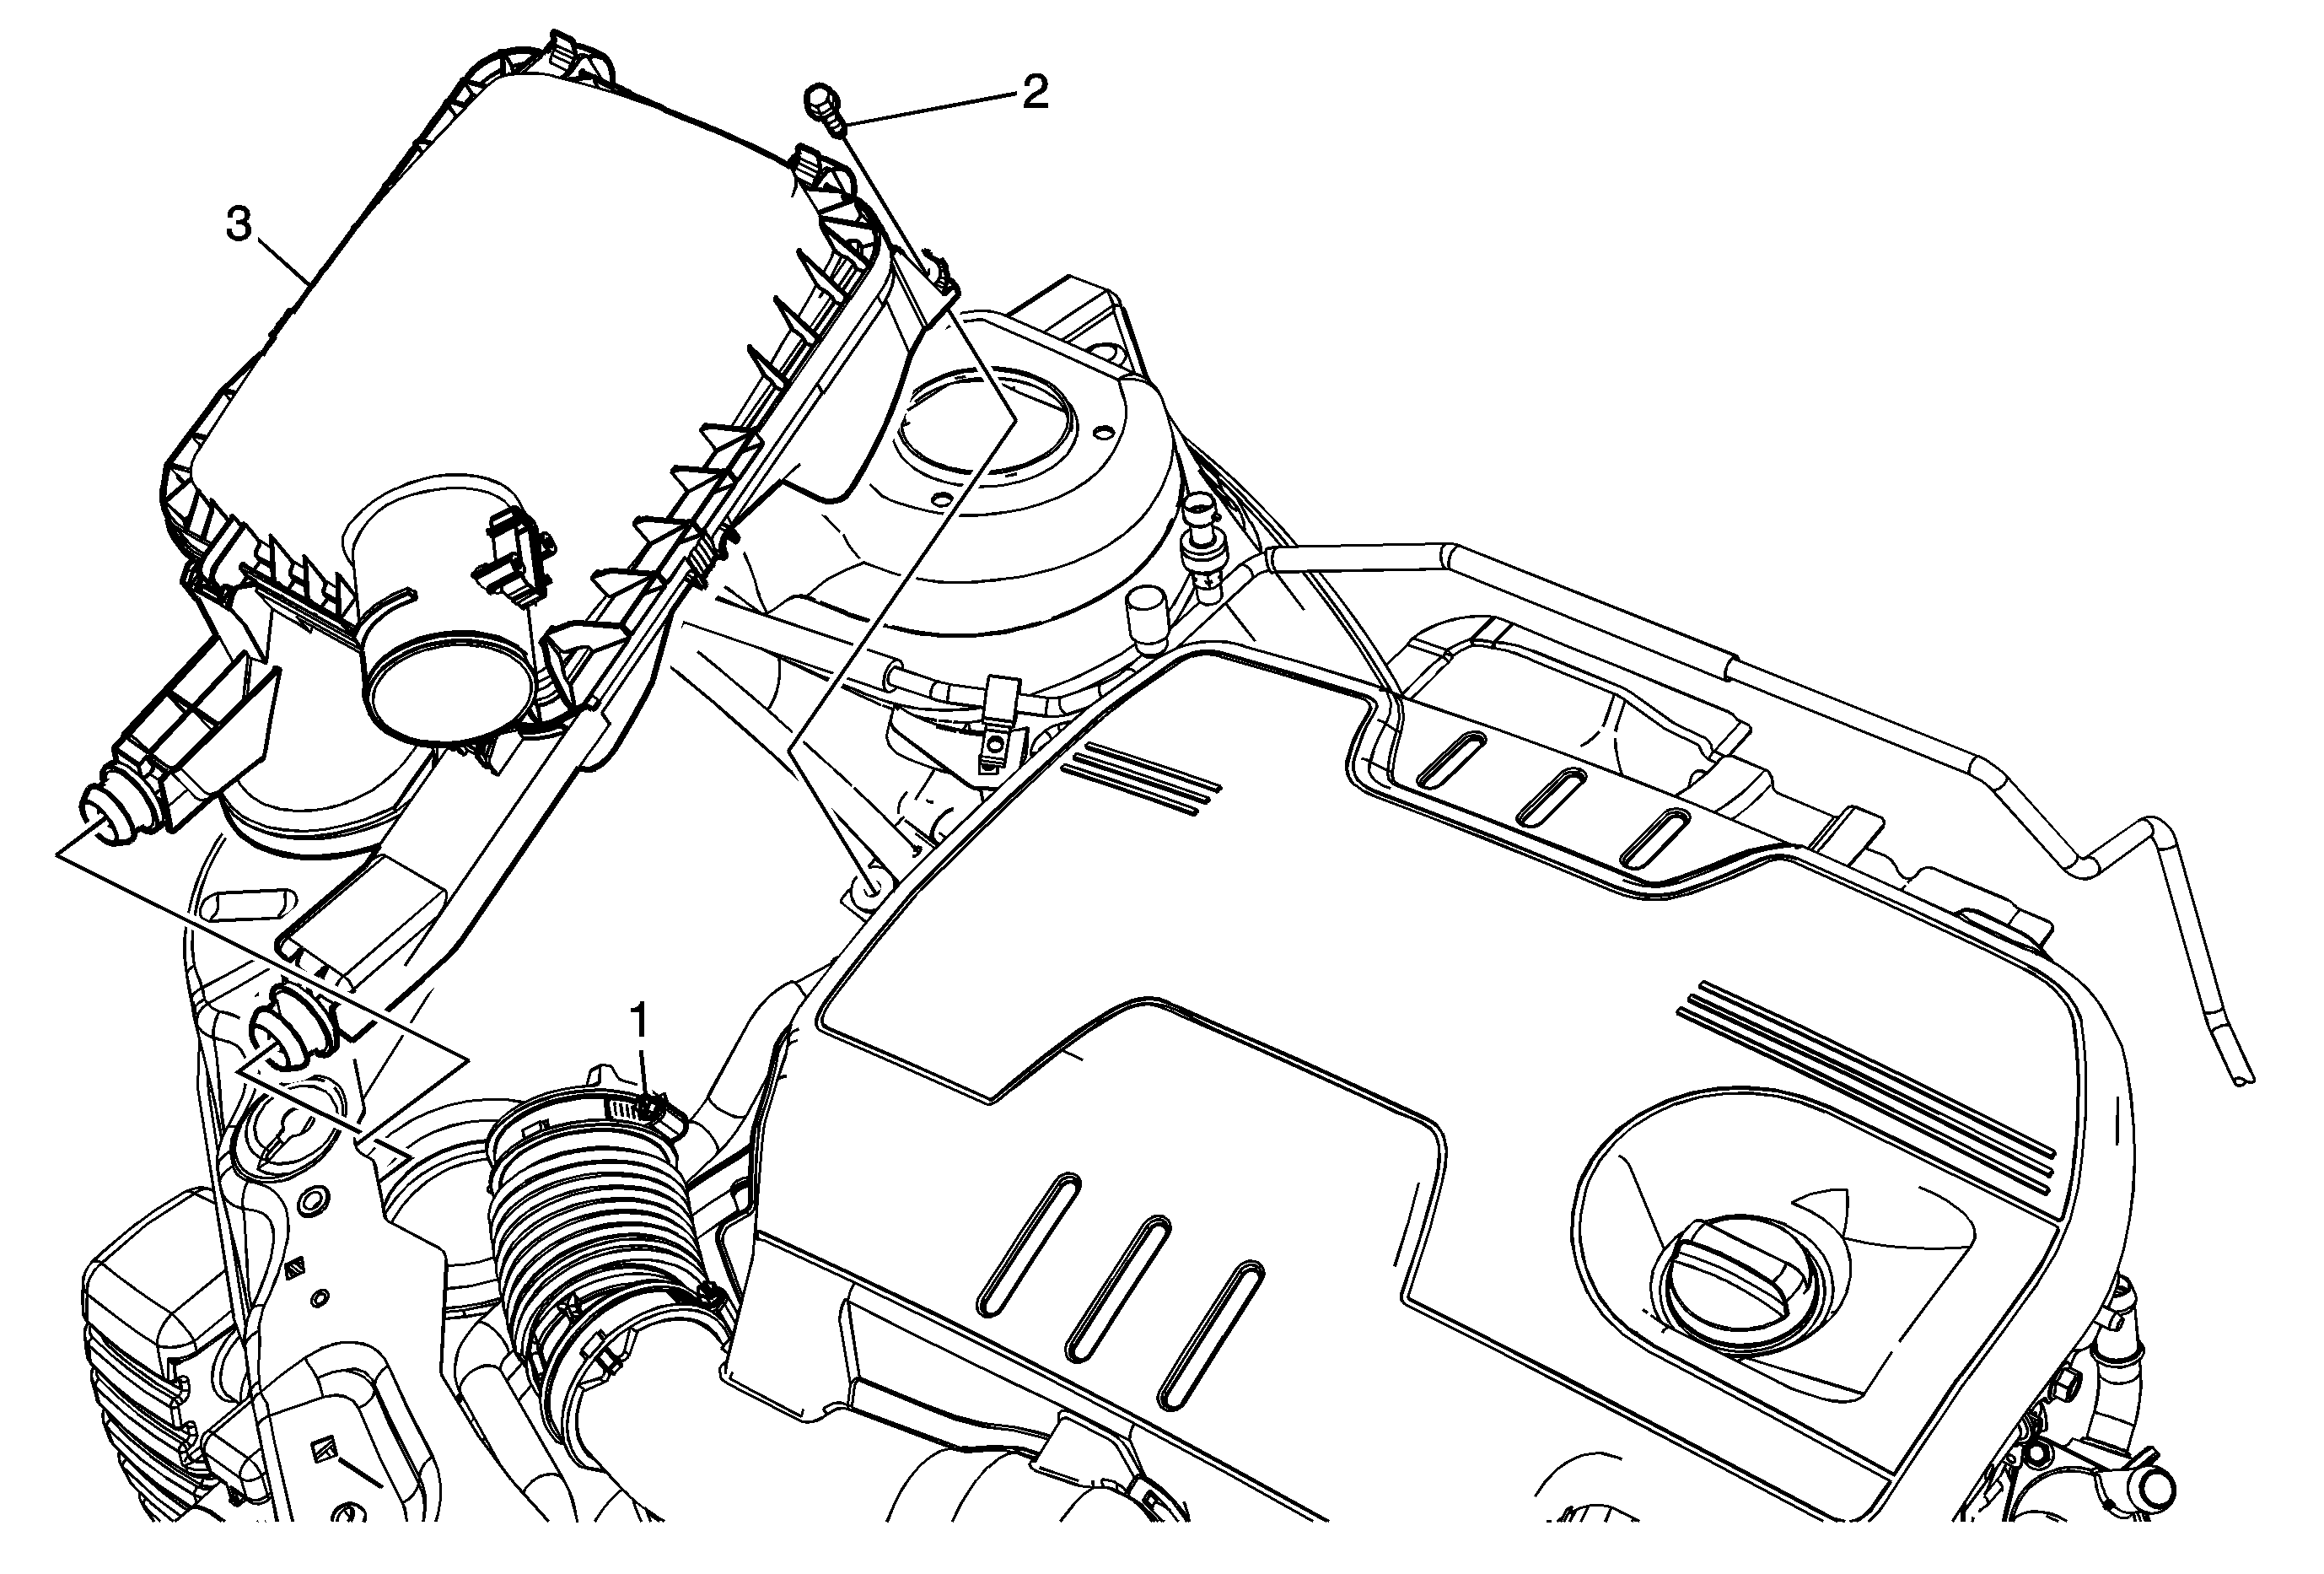
Callout | Component Name |
|---|---|
Preliminary ProcedureRemove the mass airflow (MAF) sensor. Refer to Mass Airflow Sensor/Intake Air Temperature Sensor Replacement. | |
1 | Air Cleaner Outlet Duct Clamp Notice: Refer to Fastener Notice in the Preface section. ProcedureLoosen the clamp in order to slide the duct off. Tighten |
2 | Air Cleaner Bolt Tighten |
3 | Air Cleaner Assembly |
