For 1990-2009 cars only
Removal Procedure
Caution: To help avoid personal injury, be careful when working in the vicinity of the generator battery disconnect control module. Internal components will still be live, 36V potential, even when the cover has been opened or removed.
- Disconnect the hybrid battery. Refer to Hybrid Battery Service Disconnect/Connect .
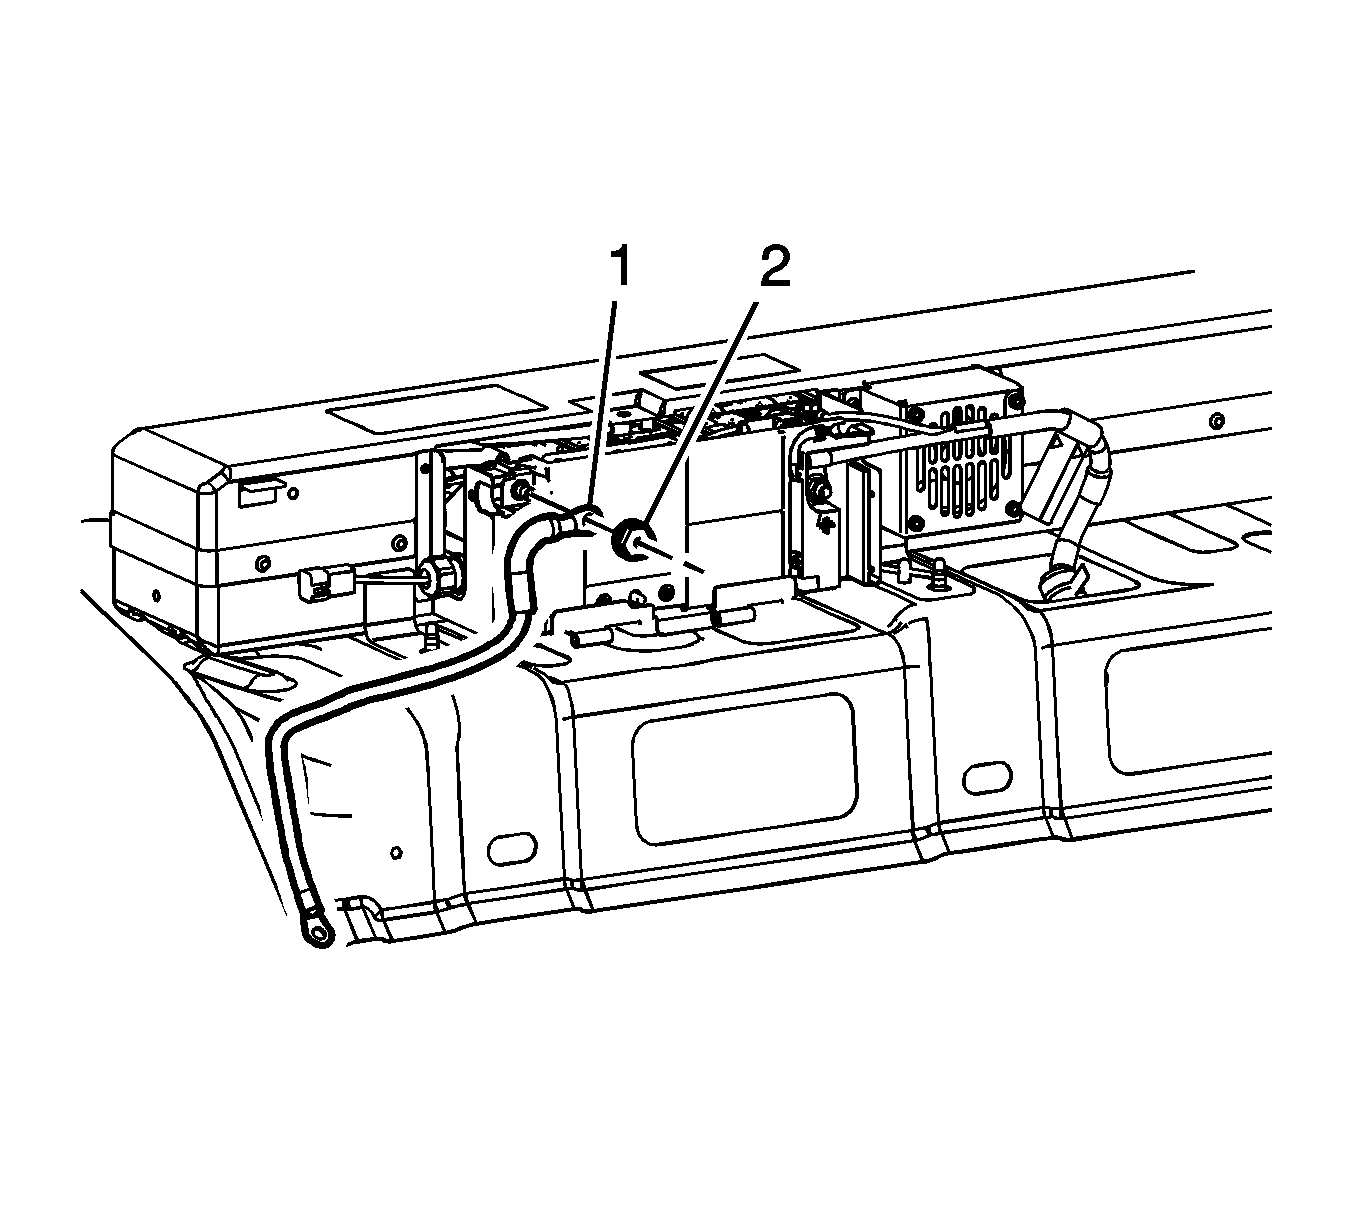
- Remove the plastic nut (2) from the generator battery disconnect control module negative stud.
- Remove the 36-volt negative battery cable lead (1) from the generator battery disconnect control module negative stud.
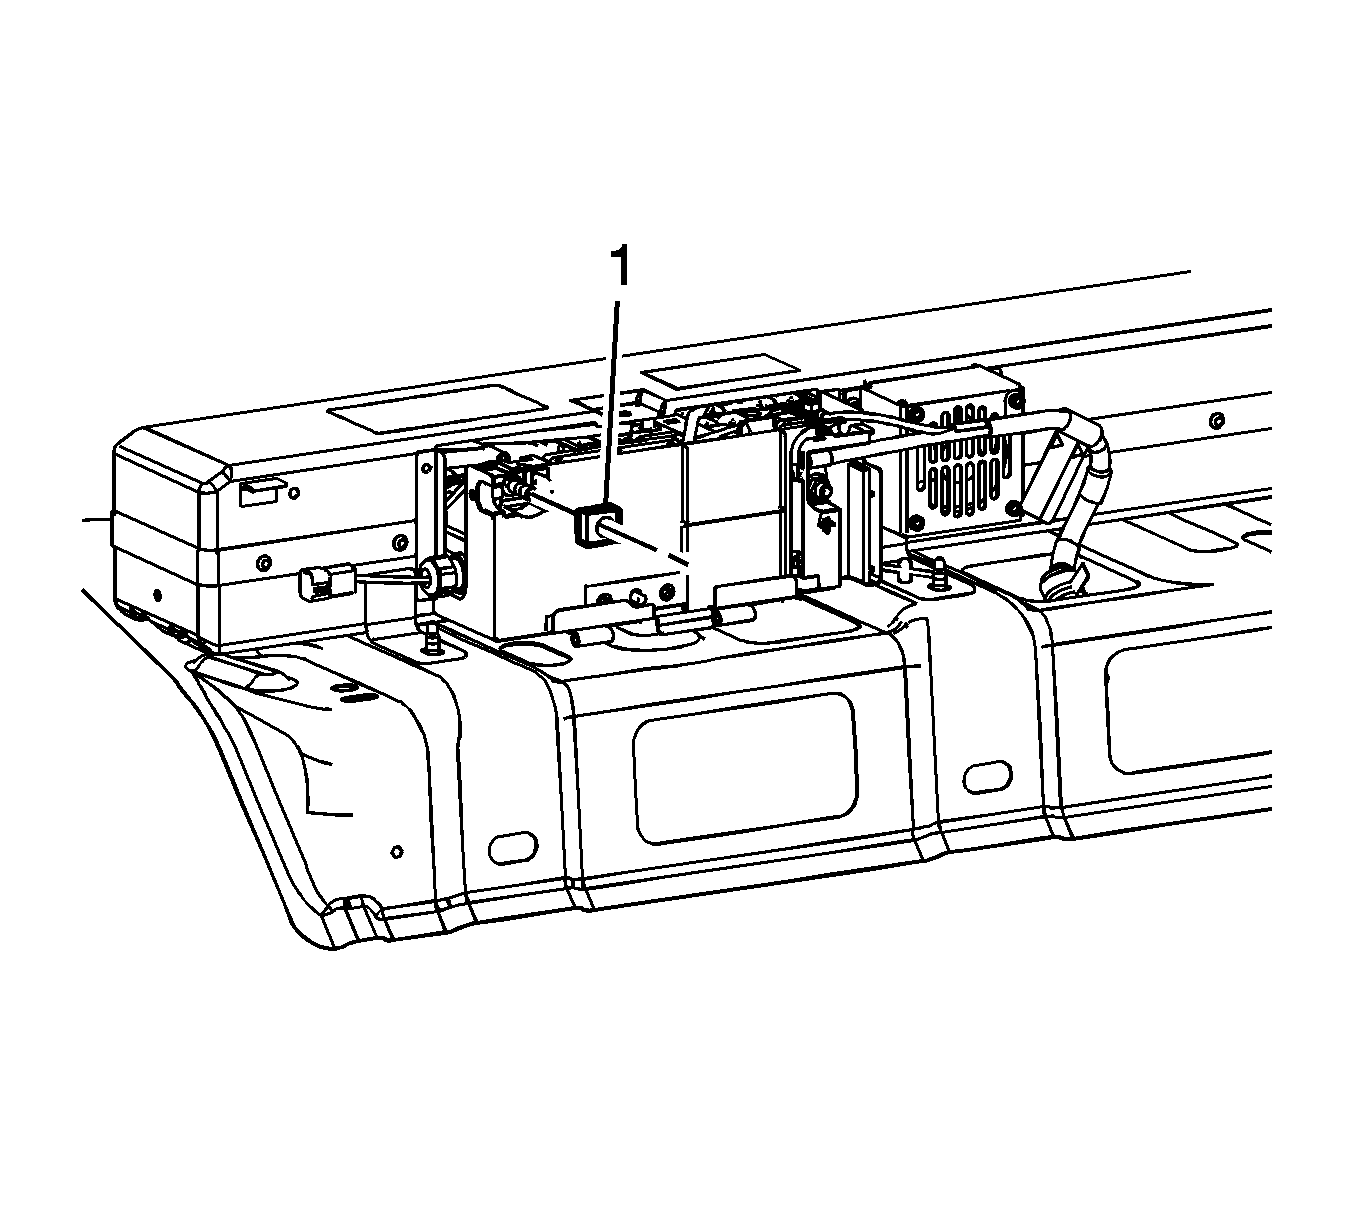
- Remove the generator battery fuse (1) from the generator battery disconnect module negative stud.
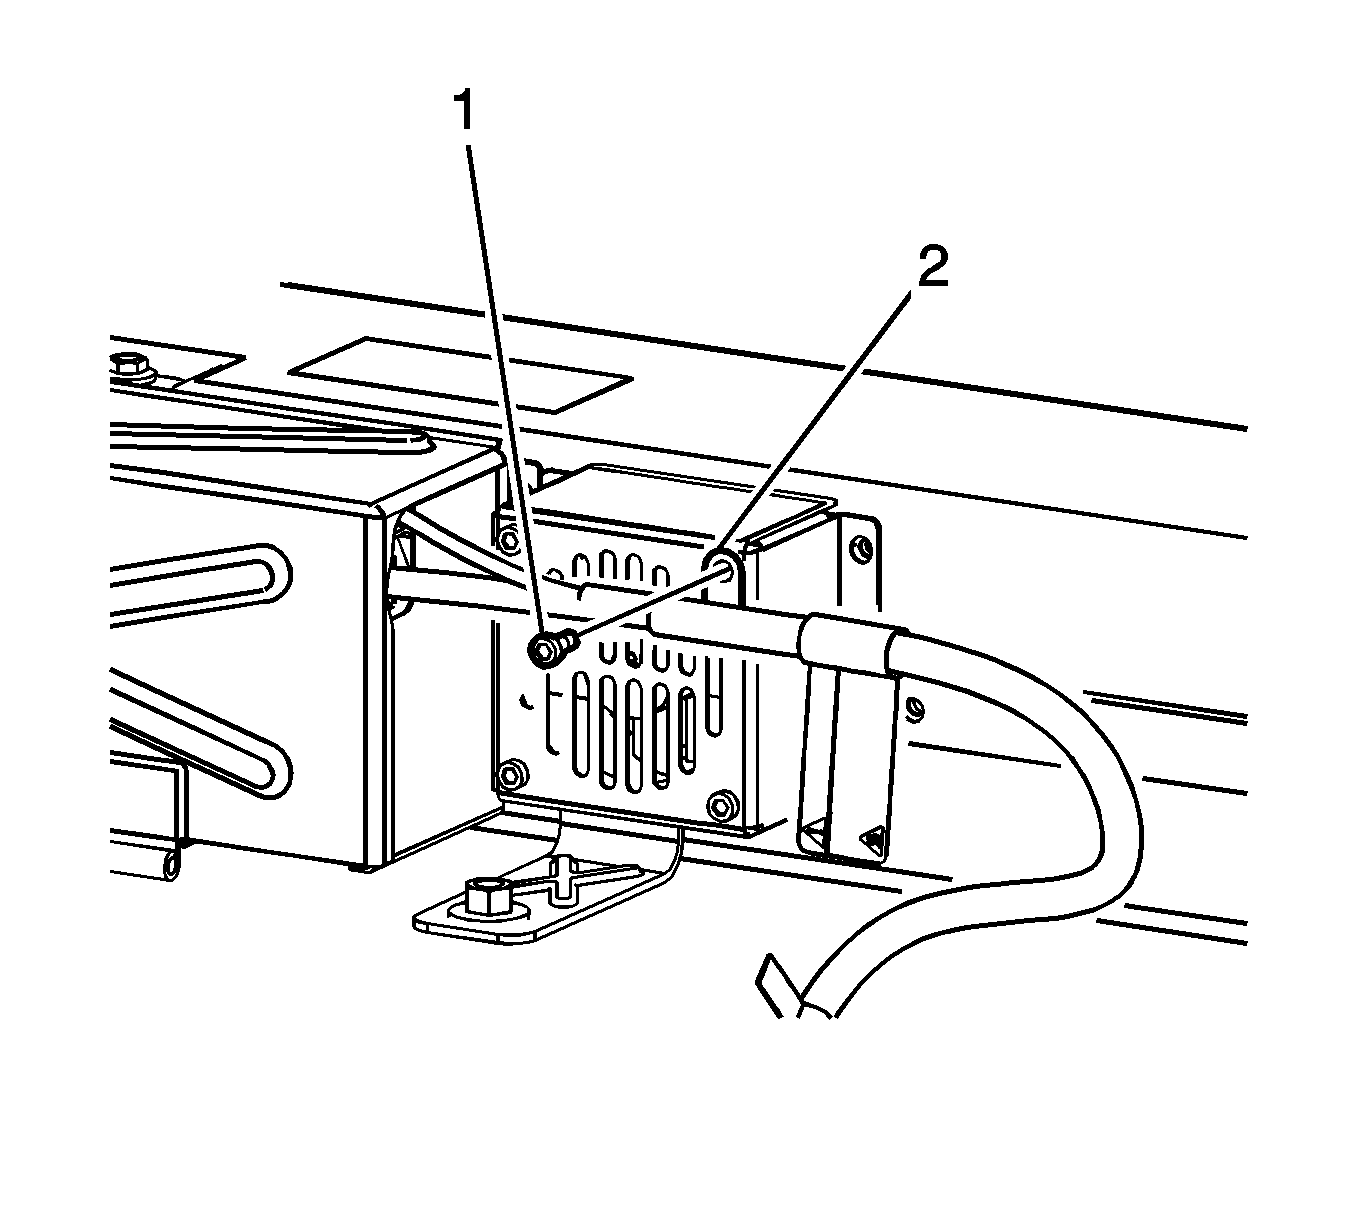
- Remove the 36-volt positive battery cable retainer bolt (1).
- Remove and discard the 36-volt positive battery cable lead nut (3).
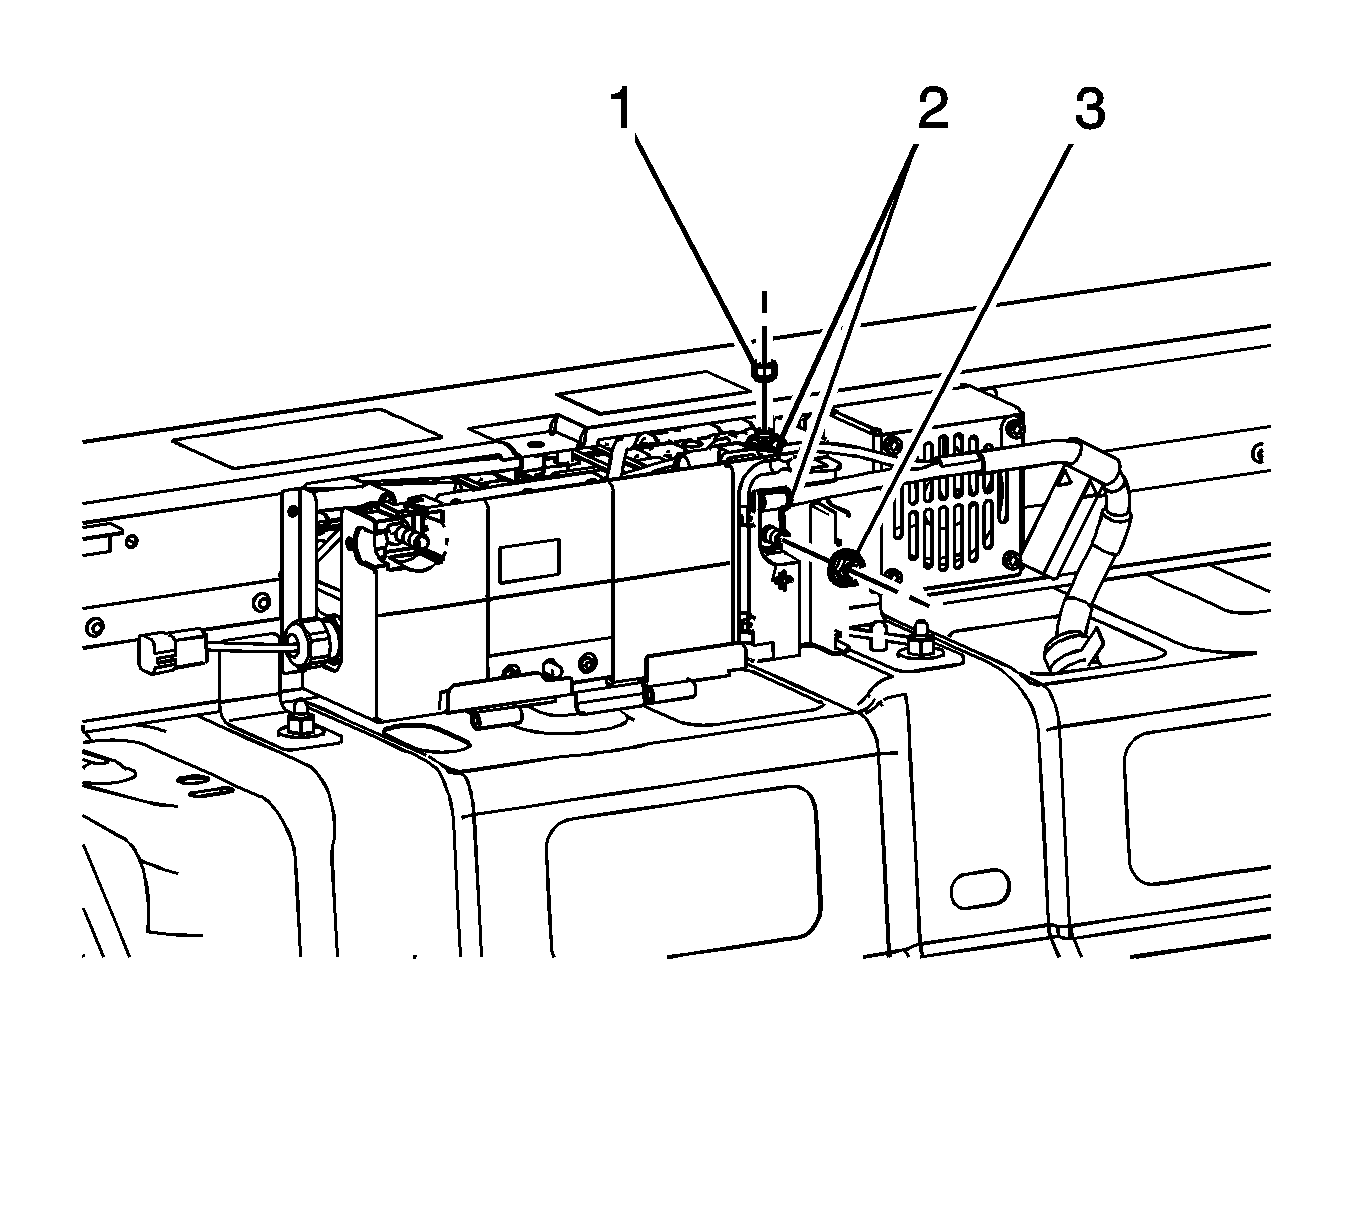
- Remove the 36-volt positive battery cable lead nut (1).
- Remove the 36-volt positive battery cable leads (2).
- Secure the cables out of the way, ensuring that the cables CANNOT be re-installed without your knowledge.
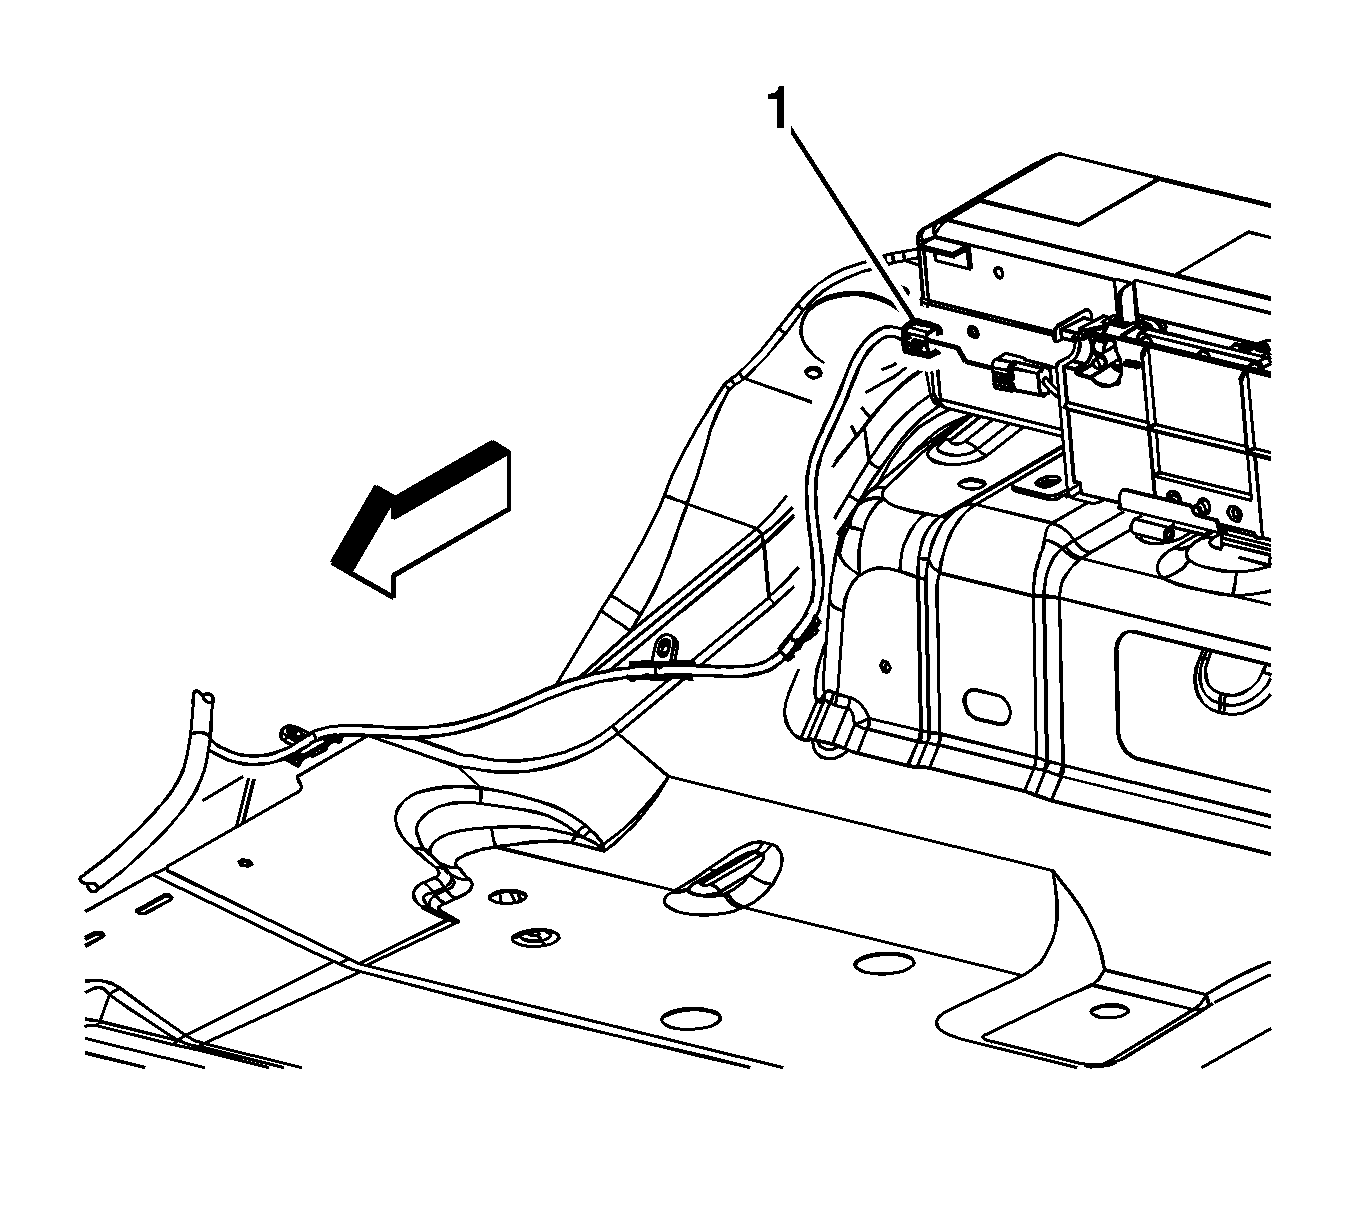
- Disconnect the body wiring harness electrical connector (1) from the generator battery disconnect control module pigtail.
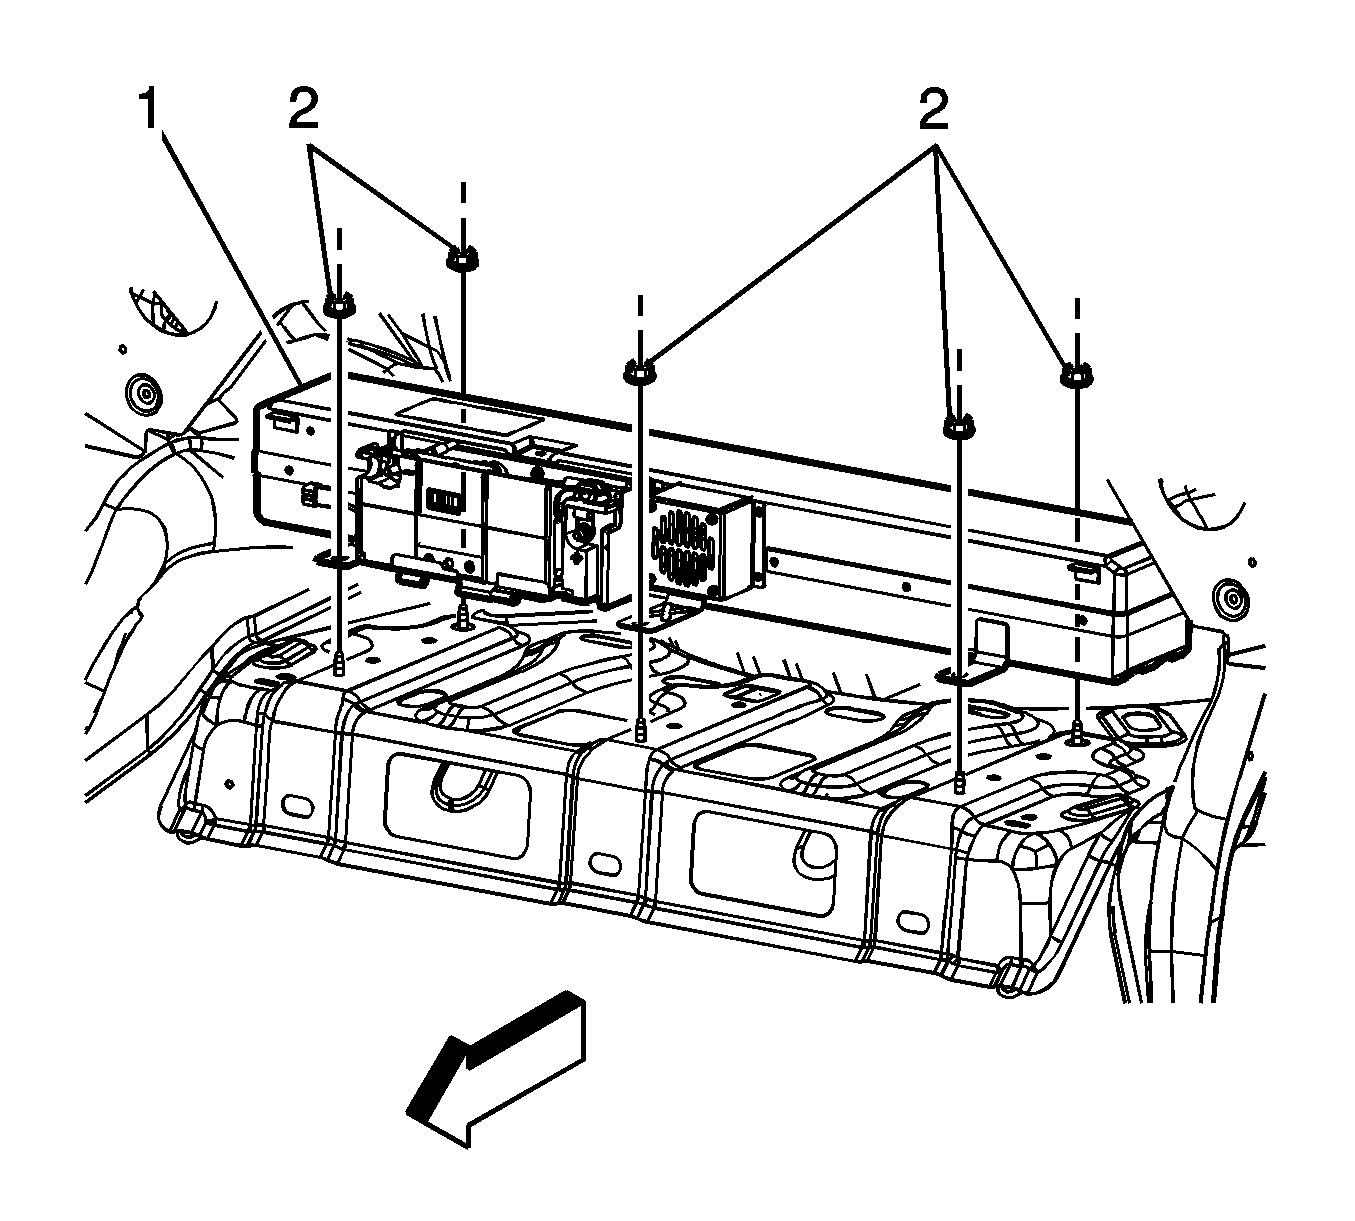
- Remove the generator battery carrier nuts (2).
- With the aid of an assistant, lift the generator battery carrier up off of the studs, and rotate and position the carrier towards the rear of the vehicle.
- With the aid of an assistant, remove the generator battery carrier out though the truck opening.
Installation Procedure
- With the aid of an assistant, install the generator battery carrier in though the truck opening and rotate and position the carrier towards the front of the vehicle.
- With the aid of an assistant, lift the generator battery carrier up onto the studs.
- Install the generator battery carrier nuts (2).
- Connect the body wiring harness electrical connector (1) to the generator battery disconnect control module pigtail.
- Install the 36-volt positive battery cable leads (2).
- Install the 36-volt positive battery cable lead nut (1).
- Install a NEW 36-volt positive battery cable lead nut (3). Start the nut finger tight, and then torque to the specification given.
- Position the 36-volt positive battery cable retainer (2) to the fan cover.
- Install the 36-volt positive battery cable retainer bolt (1).
- Install the generator battery fuse (1) yo the generator battery disconnect module negative stud.
- Position the plastic nut (2) to the 36-volt negative battery cable lead ensuring that the nipple on the plastic nut is inserted through the hole in the terminal.
- Install the 36-volt negative battery cable lead (1) and nut to the generator battery disconnect module negative stud.
- Connect the hybrid battery. Refer to Hybrid Battery Service Disconnect/Connect .
Notice: Refer to Fastener Notice in the Preface section.
Tighten
Tighten the nuts to 25 N·m (18 lb ft).
Tighten
Tighten the nut to 9 N·m (18 lb in).
Tighten
Tighten the nut to 15 N·m (11 lb ft).
Tighten
Tighten the bolt to 8 N·m (71 lb in).
Important: Position the plastic nut to the negative battery cable and ensure that the nipple is inserted to the terminal prior to installing the negative cable to the generator battery, Otherwise damage to the nut may occur.
Tighten
Tighten the nut to 10.7 N·m (95 lb in).
