Master Cylinder Replacement Without RPO LAT
Caution: Refer to Brake Fluid Irritant Caution in the Preface section.
Notice: Refer to Brake Fluid Effects on Paint and Electrical Components Notice in the Preface section.
Removal Procedure
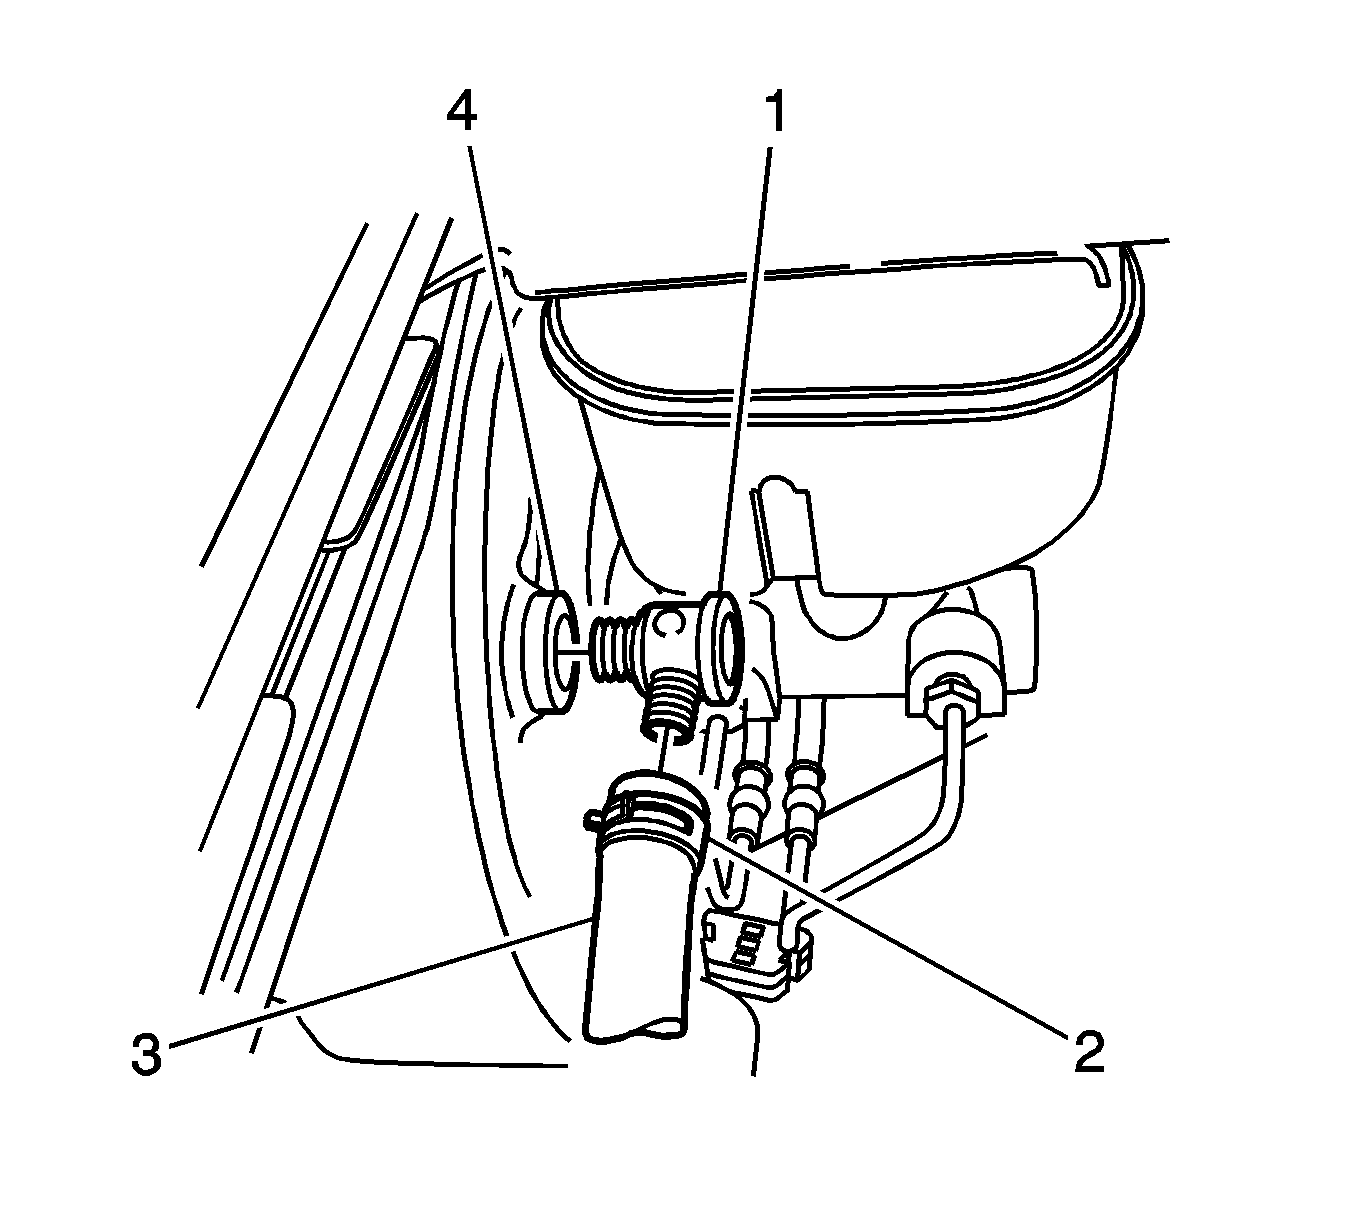
- Deplete the vacuum reserve from the vacuum brake booster by removing the vacuum check valve (1) from the vacuum brake booster grommet.
- Disconnect the brake fluid level indicator switch electrical connector.
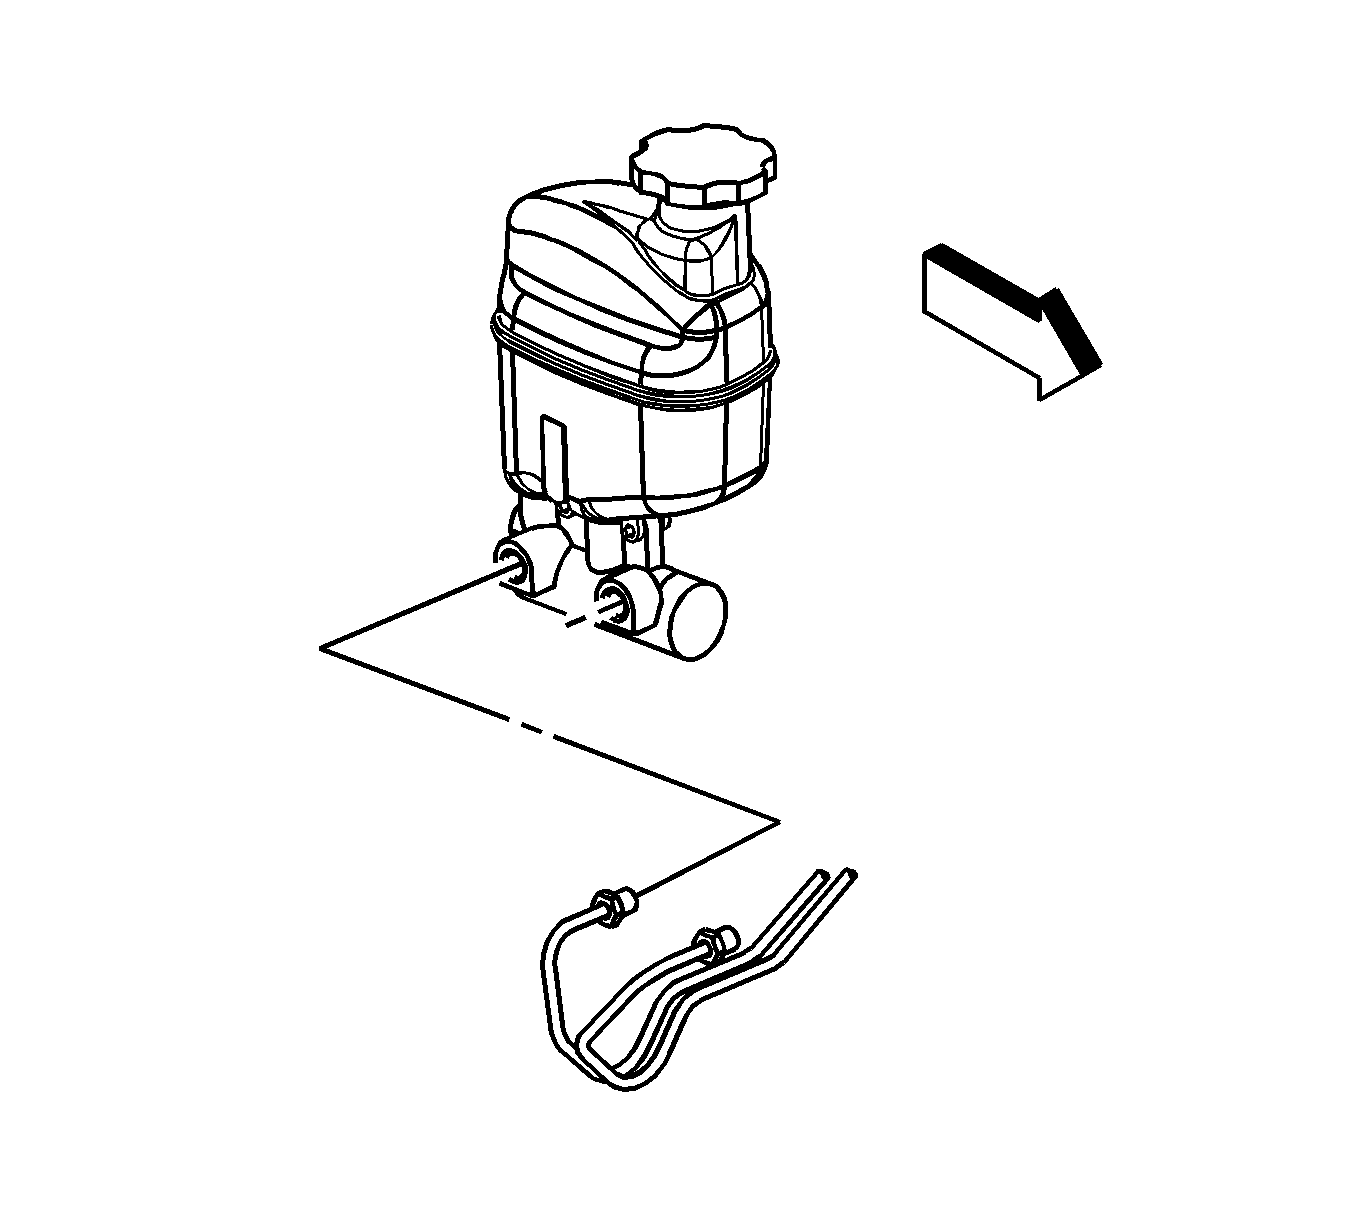
- Disconnect the master cylinder secondary brake pipe fitting (1).
- Disconnect the master cylinder primary brake pipe fitting (1).
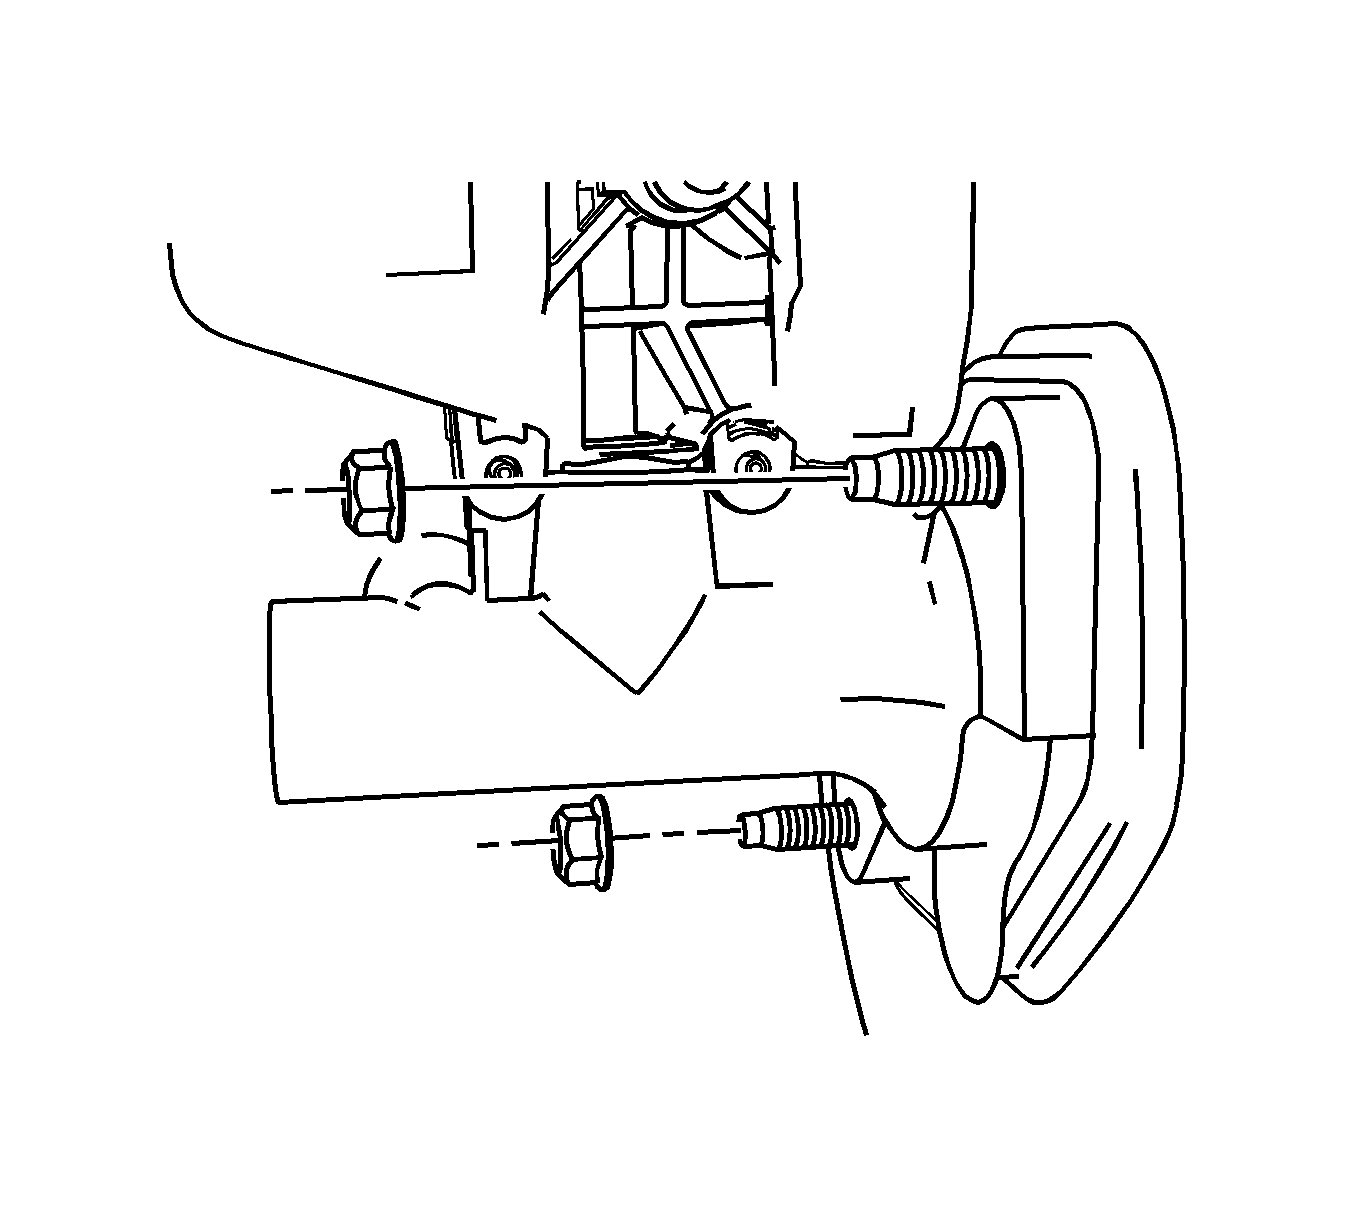
- Remove the master cylinder nuts (1) .
- Remove the master cylinder.
- Inspect the master cylinder to vacuum brake booster seal for damage and replace, if necessary.
- Remove the master cylinder reservoir, if necessary. Refer to Master Cylinder Reservoir Replacement.
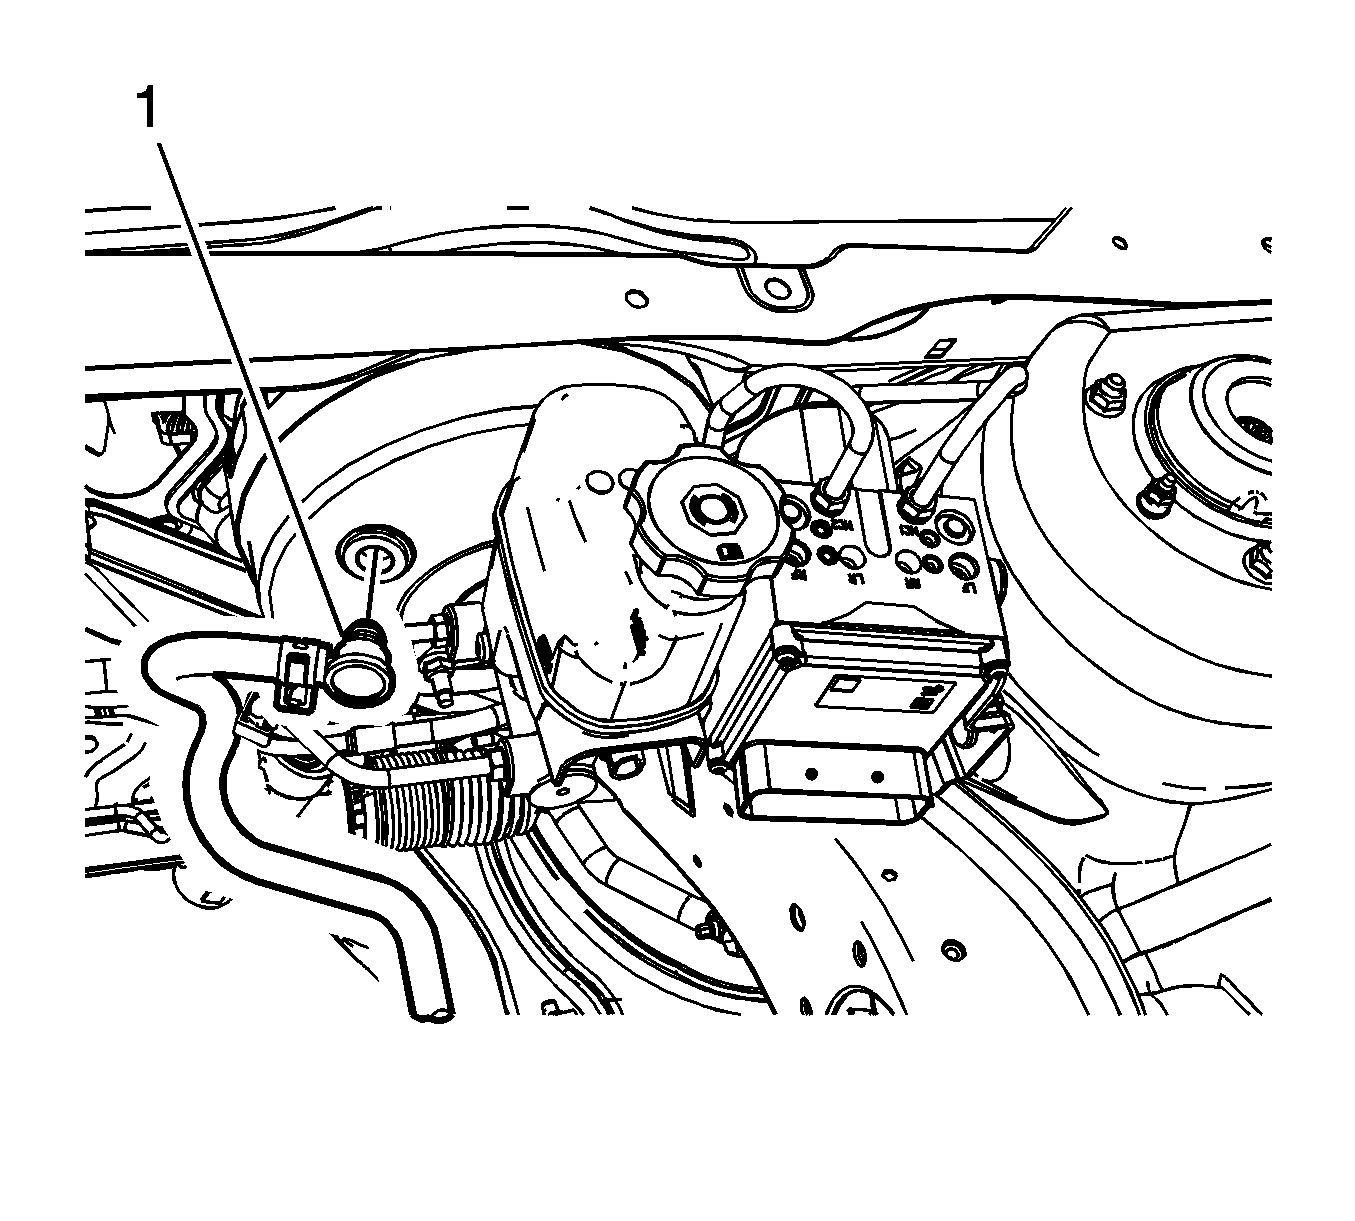
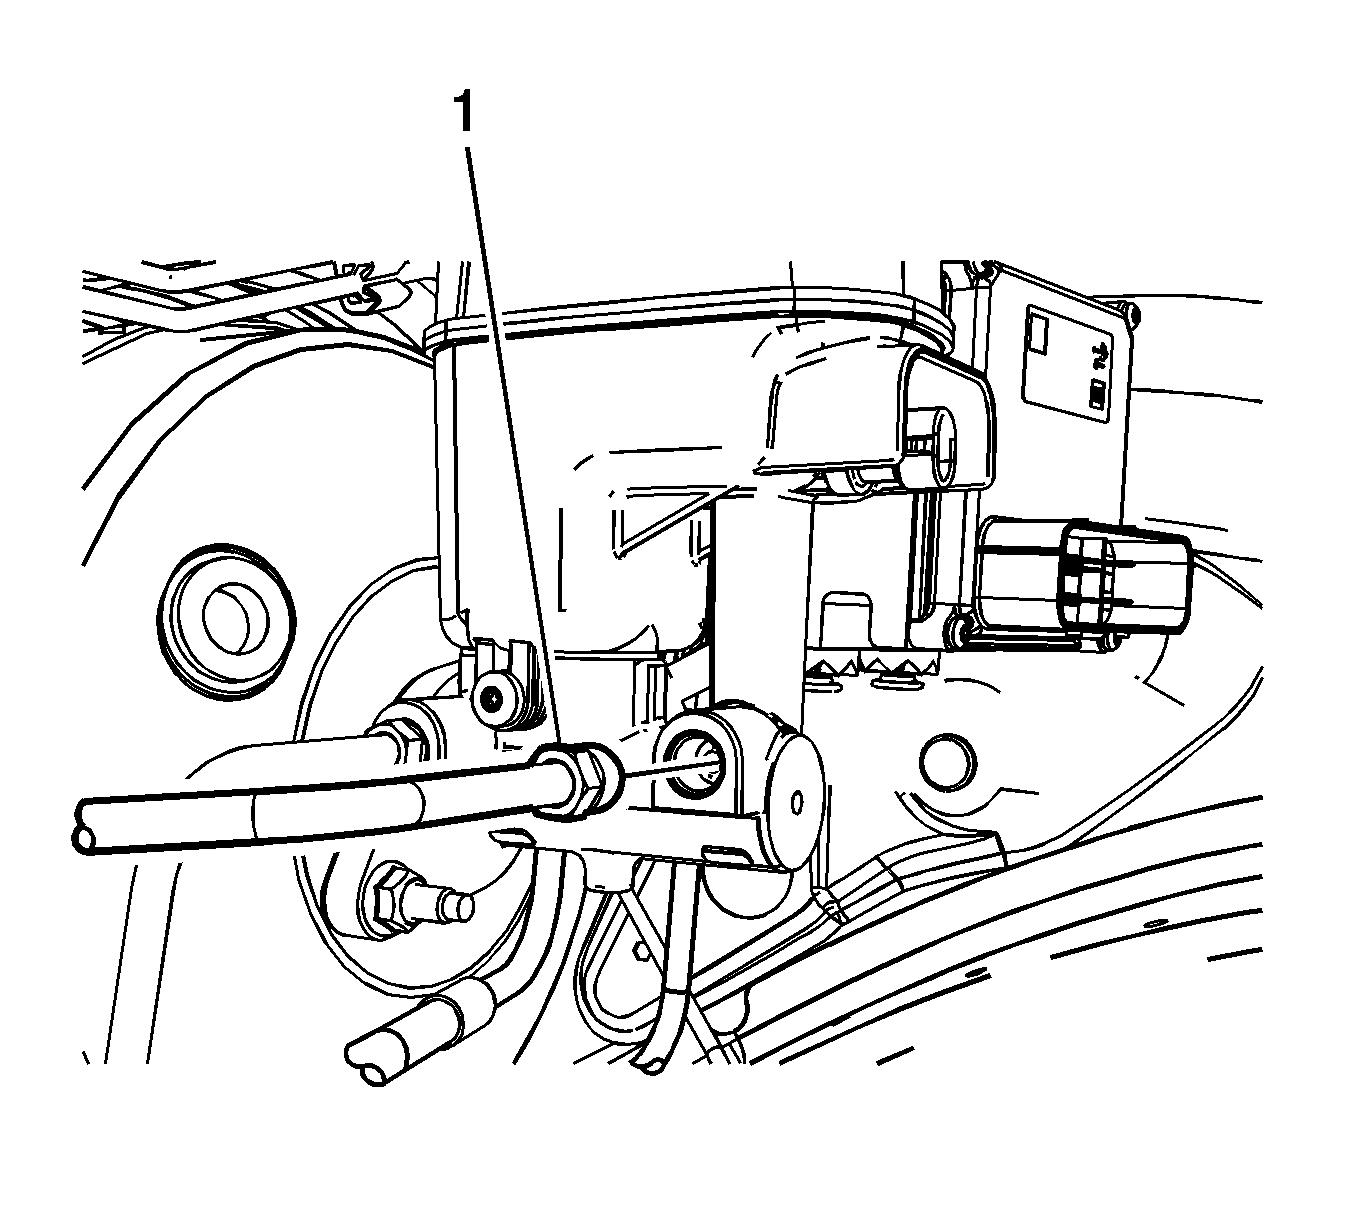
Cap the brake pipe fitting and plug the master cylinder outlet port to prevent brake fluid loss and contamination.
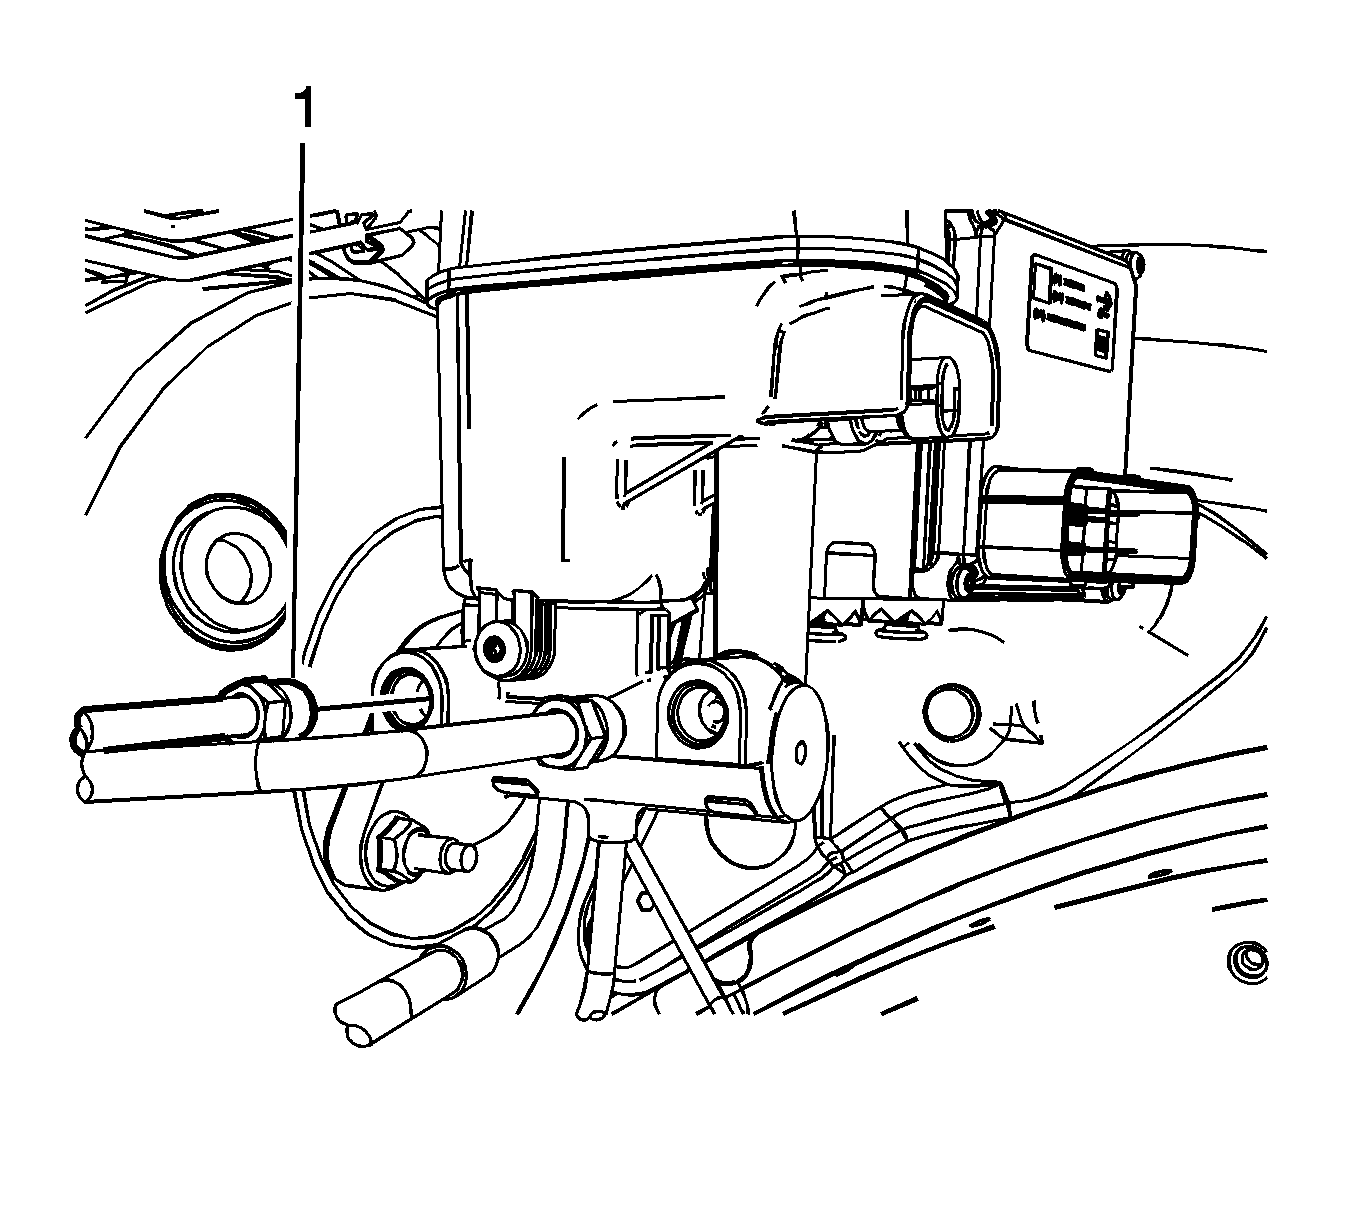
Cap the brake pipe fitting and plug the master cylinder outlet port to prevent brake fluid loss and contamination.
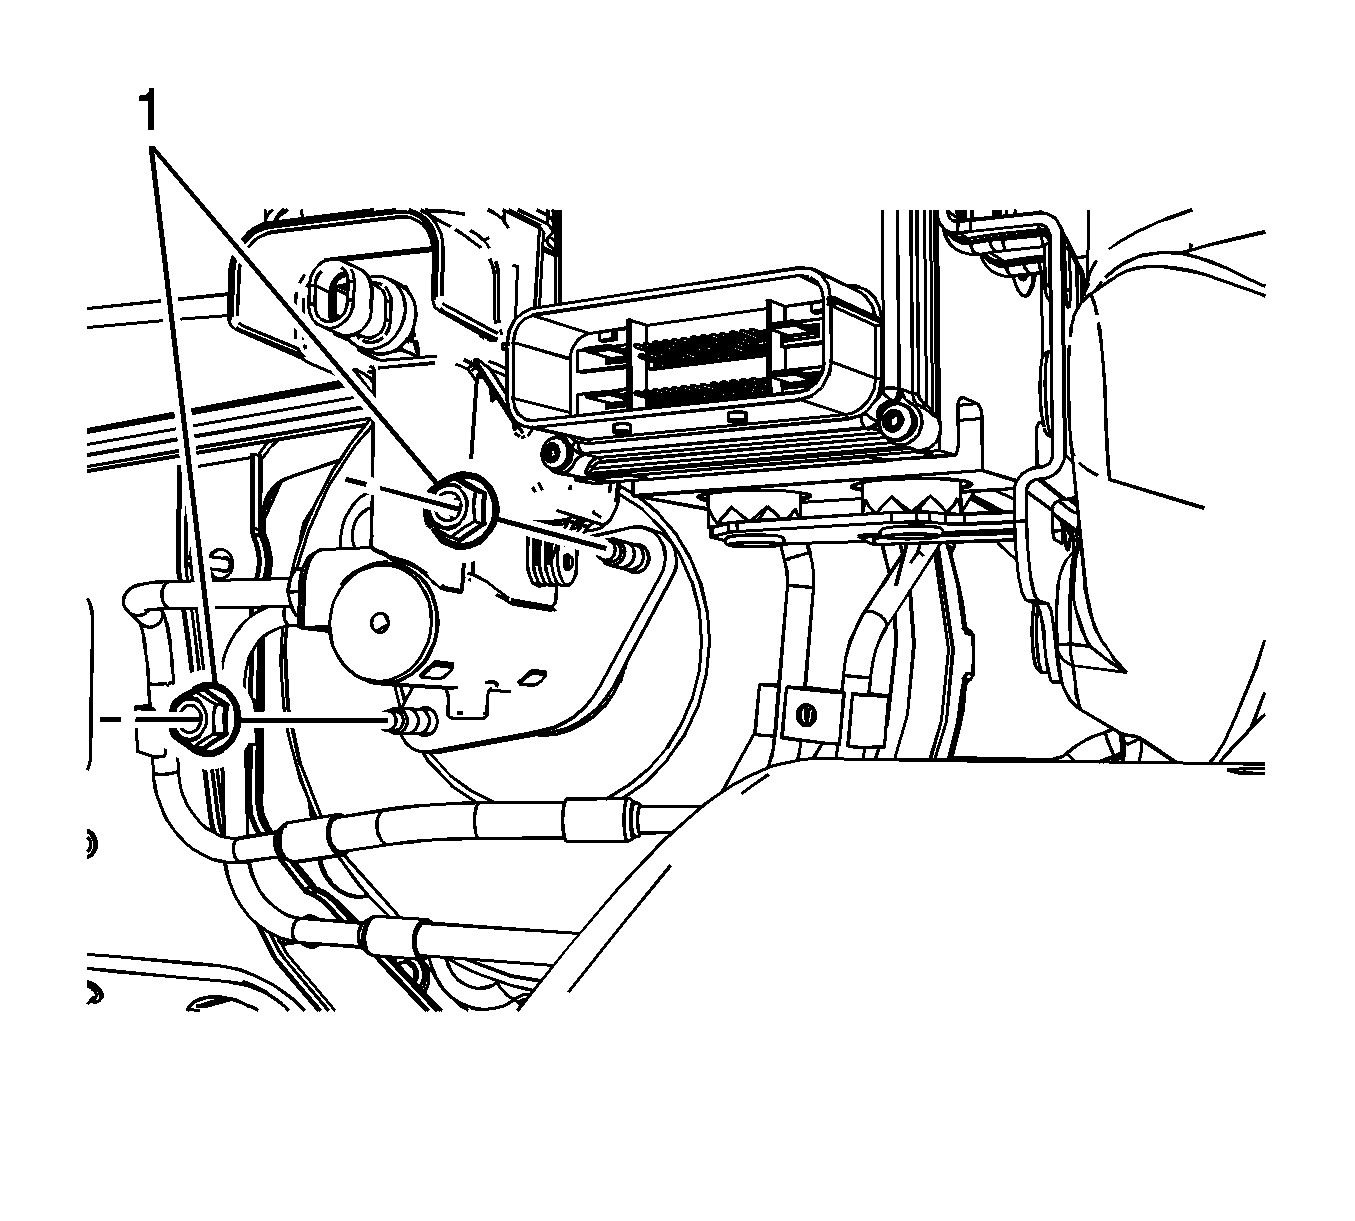
Installation Procedure
- Install the brake master cylinder reservoir to the master cylinder, if removed. Refer to Master Cylinder Reservoir Replacement.
- Bench bleed the master cylinder. Refer to Master Cylinder Bench Bleeding.
- Ensure the master cylinder to vacuum brake booster seal is properly seated on the master cylinder barrel.
- Install the master cylinder to the vacuum brake booster.
- Install the master cylinder nuts (1).
- Connect the master cylinder primary brake pipe fitting (1).
- Connect the master cylinder secondary brake pipe fitting (1).
- Install the vacuum check valve (1) to the vacuum brake booster grommet.
- Connect the brake fluid level indicator switch electrical connector.
- Bleed the hydraulic brake system. Refer to Hydraulic Brake System Bleeding.

Notice: Refer to Fastener Notice in the Preface section.
Tighten
Tighten the nuts to 25 N·m (18 lb ft).

Tighten
Tighten the fitting to 20 N·m (15 lb ft).

Tighten
Tighten the fitting to 20 N·m (15 lb ft).

If necessary, a small amount of denatured alcohol may be used as a lubricant for assembly. Do not use soap.
Master Cylinder Replacement With RPO LAT
Caution: Refer to Brake Fluid Irritant Caution in the Preface section.
Notice: Refer to Brake Fluid Effects on Paint and Electrical Components Notice in the Preface section.
Removal Procedure
- Without disconnecting the hoses, position the radiator surge tank aside. Refer to Radiator Surge Tank Replacement .
- Deplete the vacuum from the vacuum brake booster by removing the vacuum check valve (1) from the vacuum brake booster grommet (4). Do not disconnect the vacuum check valve (1) from the vacuum brake hose (3).
- Disconnect the electrical connector from the brake fluid level sensor.
- Disconnect the brake pipes from the master cylinder.
- Plug the master cylinder outlet ports.
- Remove the 2 master cylinder mounting nuts.
- Remove the master cylinder.
- Inspect the master cylinder-to-vacuum brake booster seal. Replace the seal if it is damaged.
- If replacing the master cylinder, remove the master cylinder reservoir. Refer to Master Cylinder Reservoir Replacement .
Important: Cap the exposed brake pipe fitting to prevent brake fluid loss and contamination.
Installation Procedure
- If removed, install the master cylinder reservoir. Refer to Master Cylinder Reservoir Replacement .
- Bench bleed the master cylinder. Refer to Master Cylinder Bench Bleeding .
- Check to ensure that the master cylinder-to-vacuum brake booster seal is properly seated on the master cylinder barrel.
- Install the master cylinder to the vacuum brake booster.
- Install the 2 brake master cylinder mounting nuts.
- Install the brake pipes to the master cylinder.
- Connect the electrical connector to the brake fluid level sensor.
- Connect the vacuum brake booster check valve (1) to the vacuum brake booster grommet (4).
- Position the radiator surge tank to the bracket. Refer to Radiator Surge Tank Replacement .
- Bleed the hydraulic brake system. Refer to Hydraulic Brake System Bleeding .

Notice: Refer to Fastener Notice in the Preface section.
Tighten
Tighten the 2 brake master cylinder mounting nuts to 25 N·m (18 lb ft).

Tighten
Tighten the brake pipe fittings at the master cylinder to 20 N·m (15 lb ft).

