For 1990-2009 cars only
Removal Procedure
- Raise and support the vehicle. Refer to Lifting and Jacking the Vehicle.
- Remove the left tire and wheel. Refer to Tire and Wheel Removal and Installation.
- Using a suitable jack stand, support the rear of the powertrain.
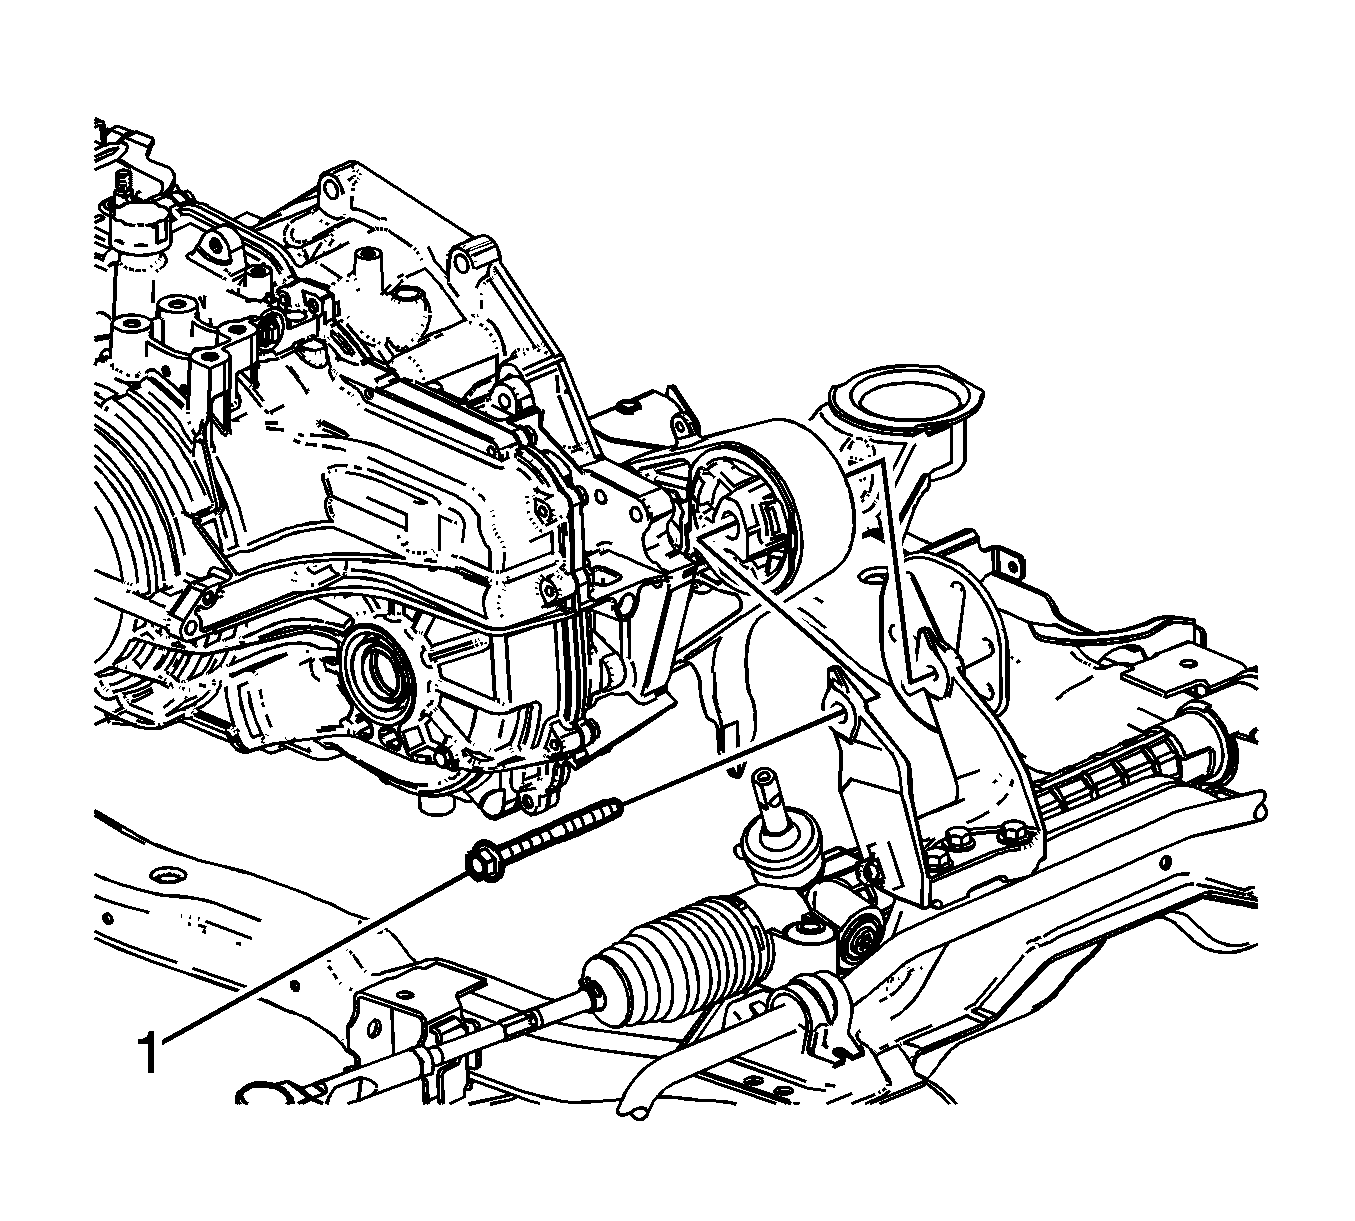
- Remove the transmission mount to bracket through bolt (1).
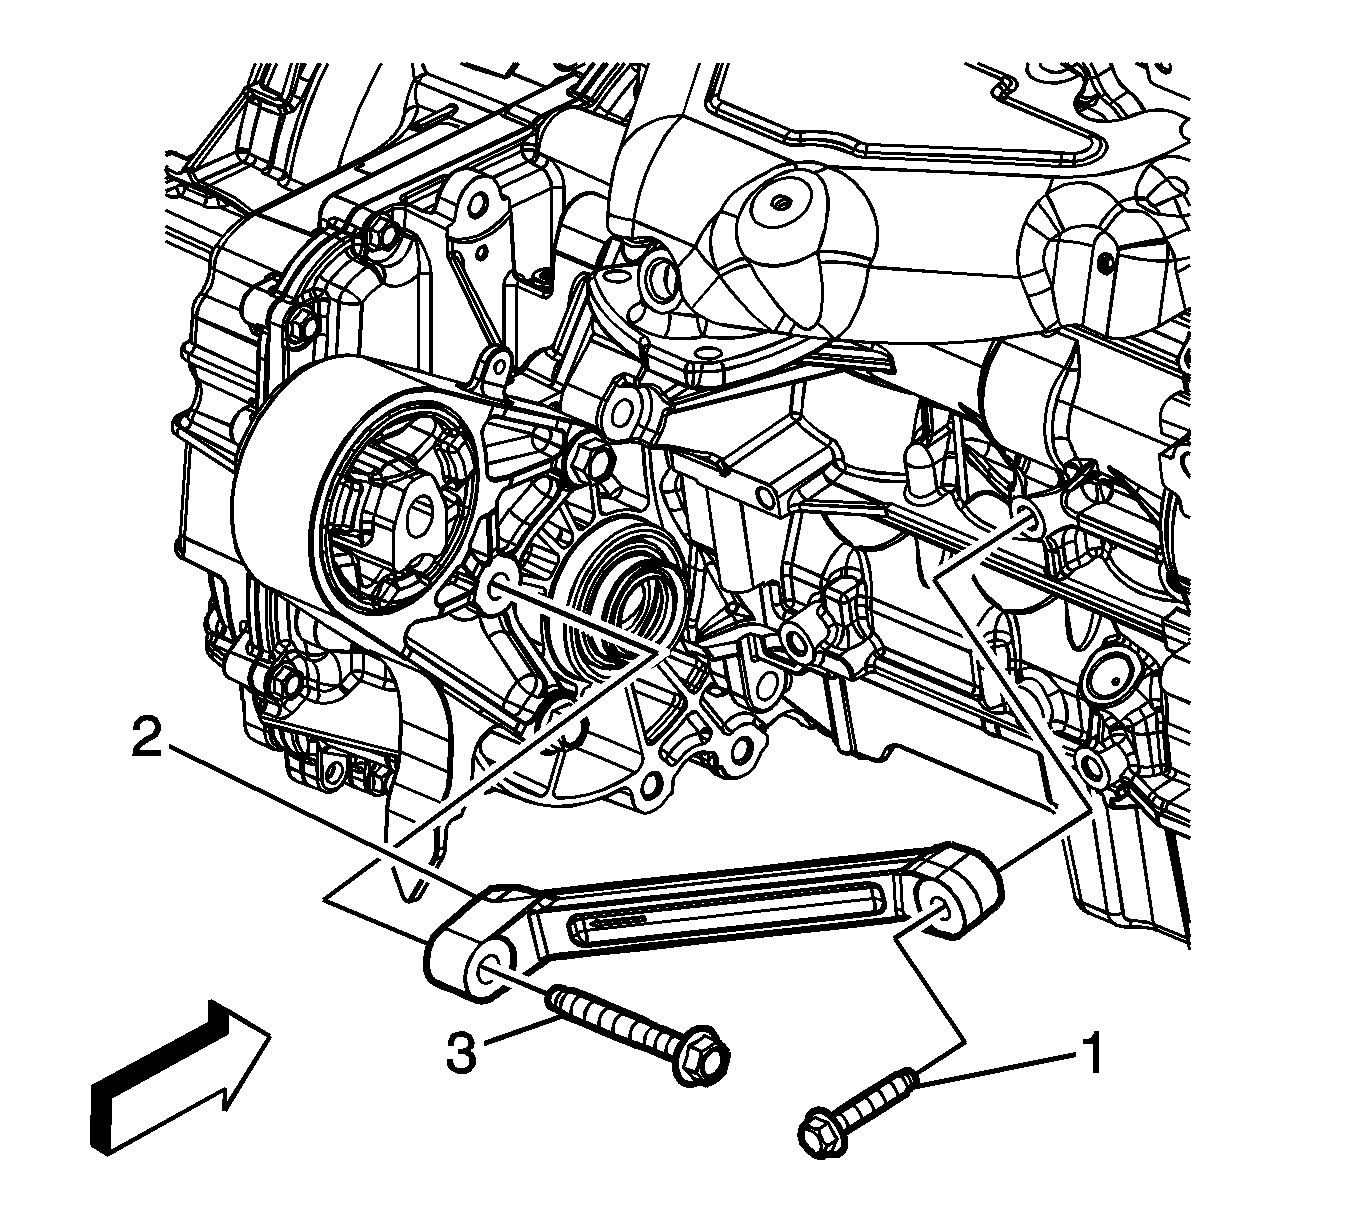
- Remove the transaxle brace bolts (1), then loosen bolt (3) until it no longer engages the transaxle.
- Remove the transaxle brace (2) with bolt (3) still retained in the brace.
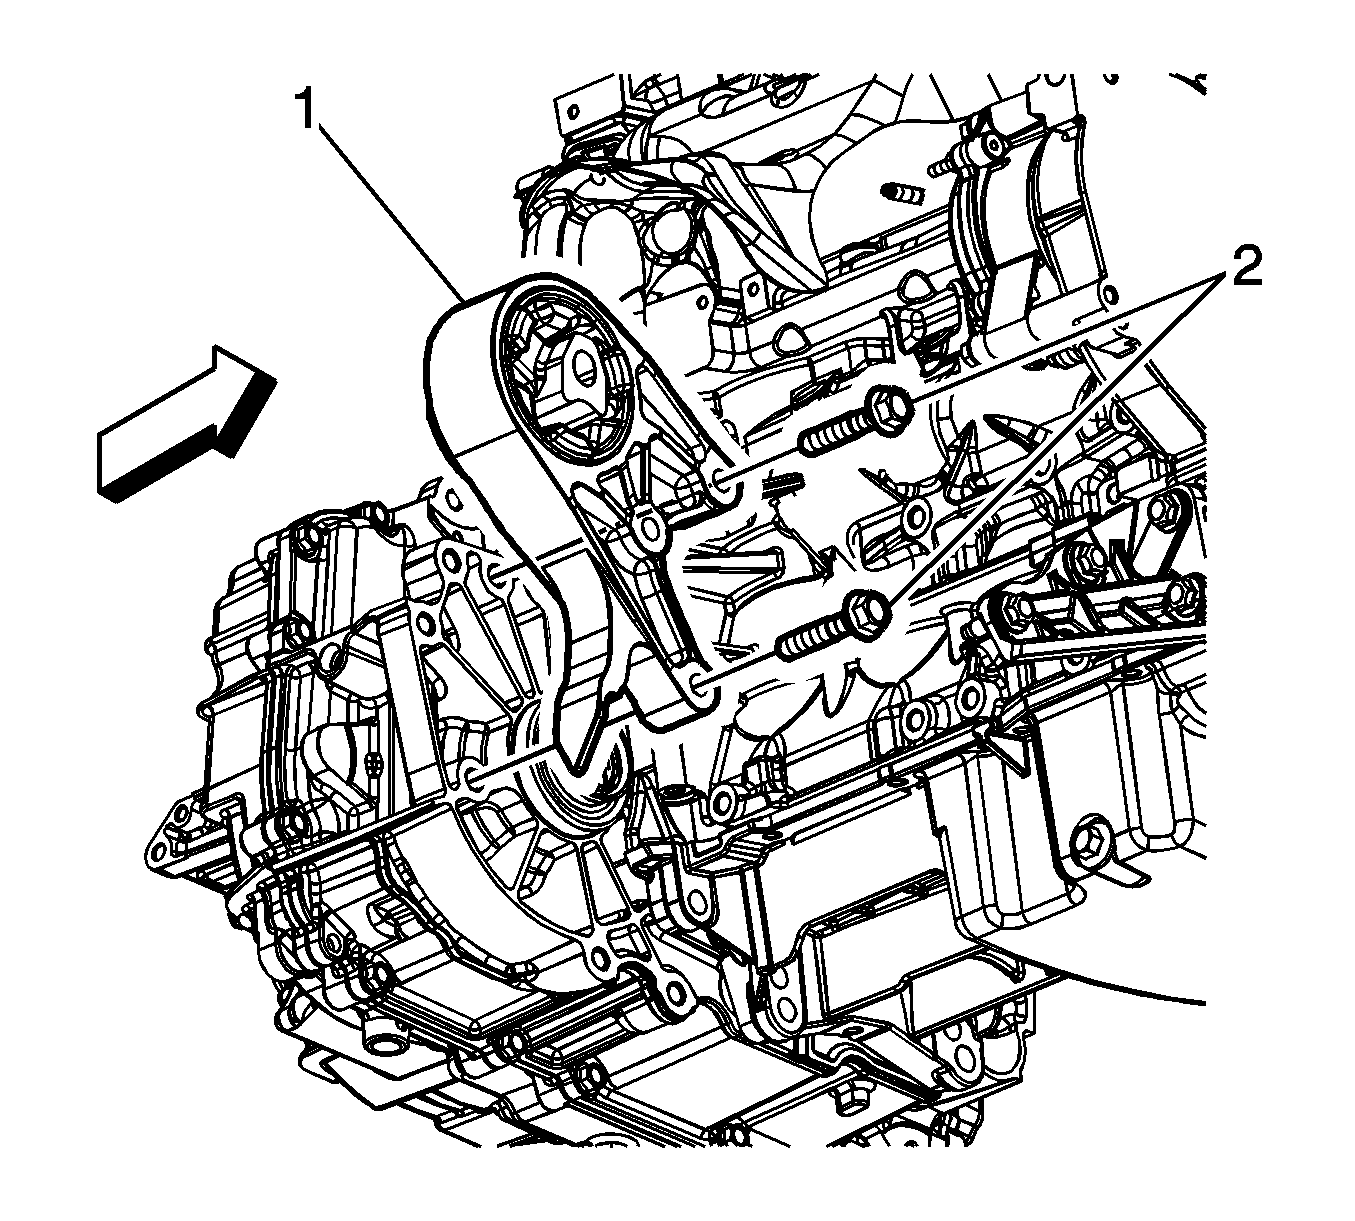
- Remove the transmission mount to transmission bolts (2).
- Unclip the wiring harness retainer, then remove the transmission mount (1).


Installation Procedure
- Install the transmission mount (1).
- Install the transmission mount to transmission bolts (2) and tighten to 90 N·m (66 lb ft).
- Install the transaxle brace (2) with bolt (3) seated in the brace.
- Install the transaxle brace bolt (1) and tighten to 50 N·m (37 lb ft).
- Tighten brace bolt (3) to 100 N·m (74 lb ft).
- Install the transmission mount to bracket through bolt (1) and tighten to 90 N·m (66 lb ft).
- Remove the jack stand.
- Install the left tire and wheel. Refer to Tire and Wheel Removal and Installation.
- Lower the vehicle.

Caution: Refer to Fastener Caution in the Preface section.


