Removal Procedure
- Turn the steering wheel to the straight forward position and support it from movement.
- Remove the left front tire and wheel assembly. Refer to Tire and Wheel Removal and Installation.
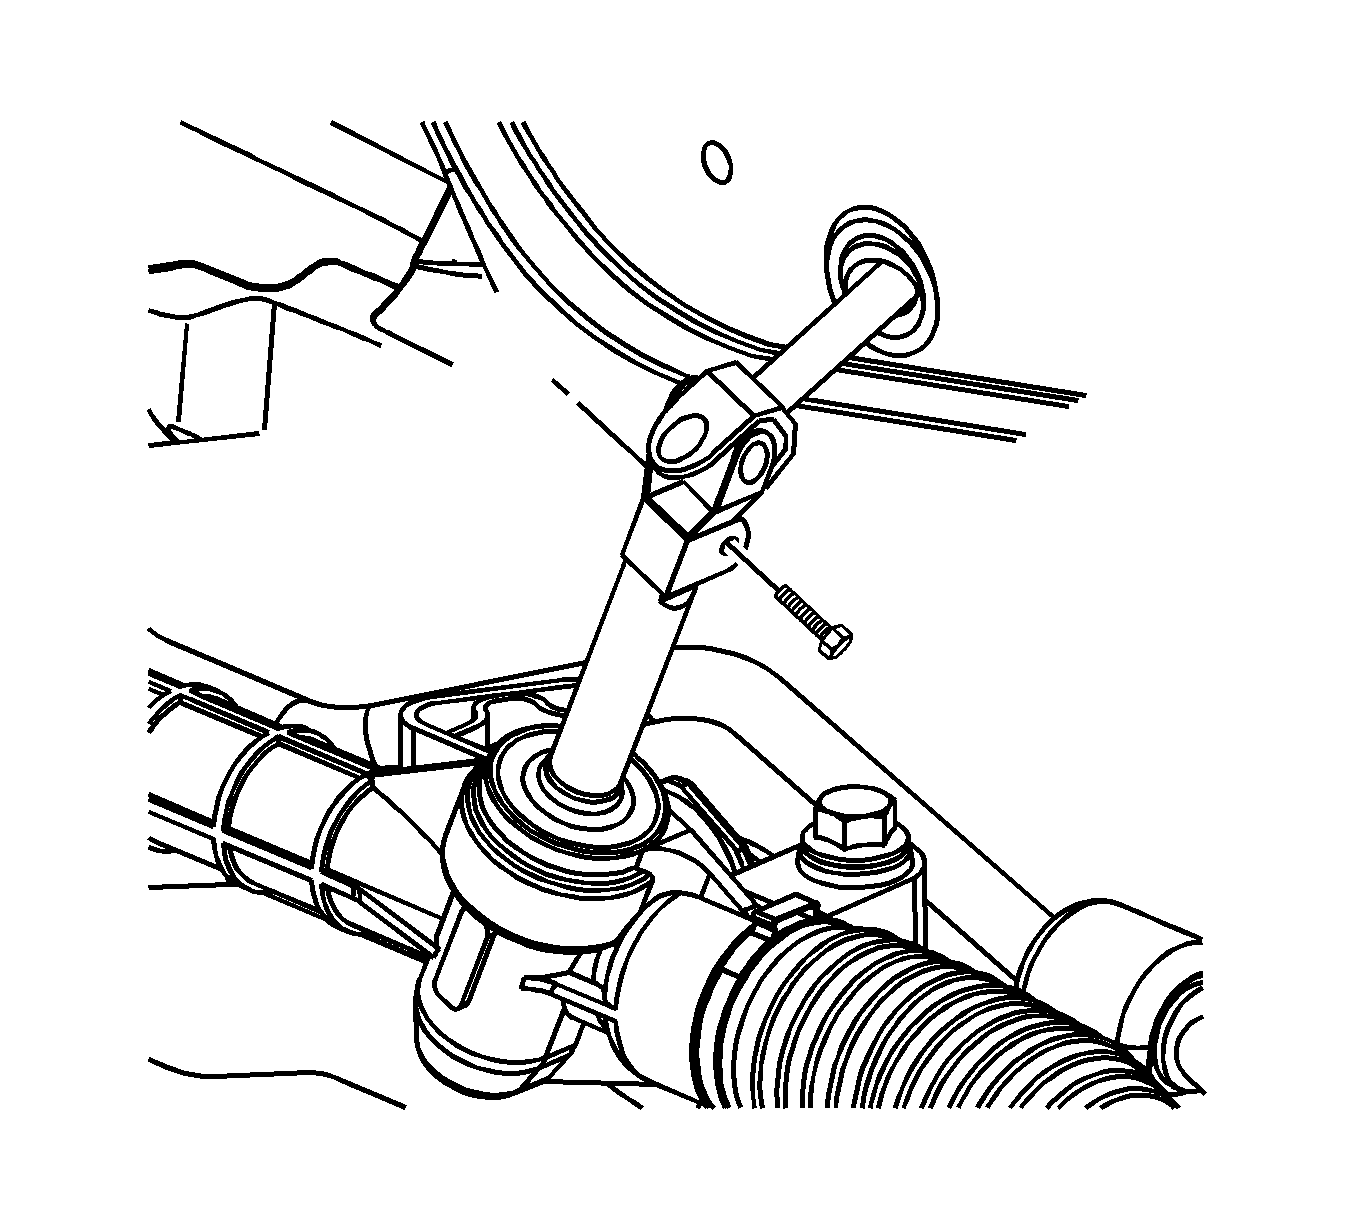
- Remove the intermediate steering shaft lower bolt at the steering gear and discard it.
- Separate the intermediate steering shaft from the steering gear.
- Remove the left side instrument panel insulator. Refer to Instrument Panel Insulator Replacement - Left Side.
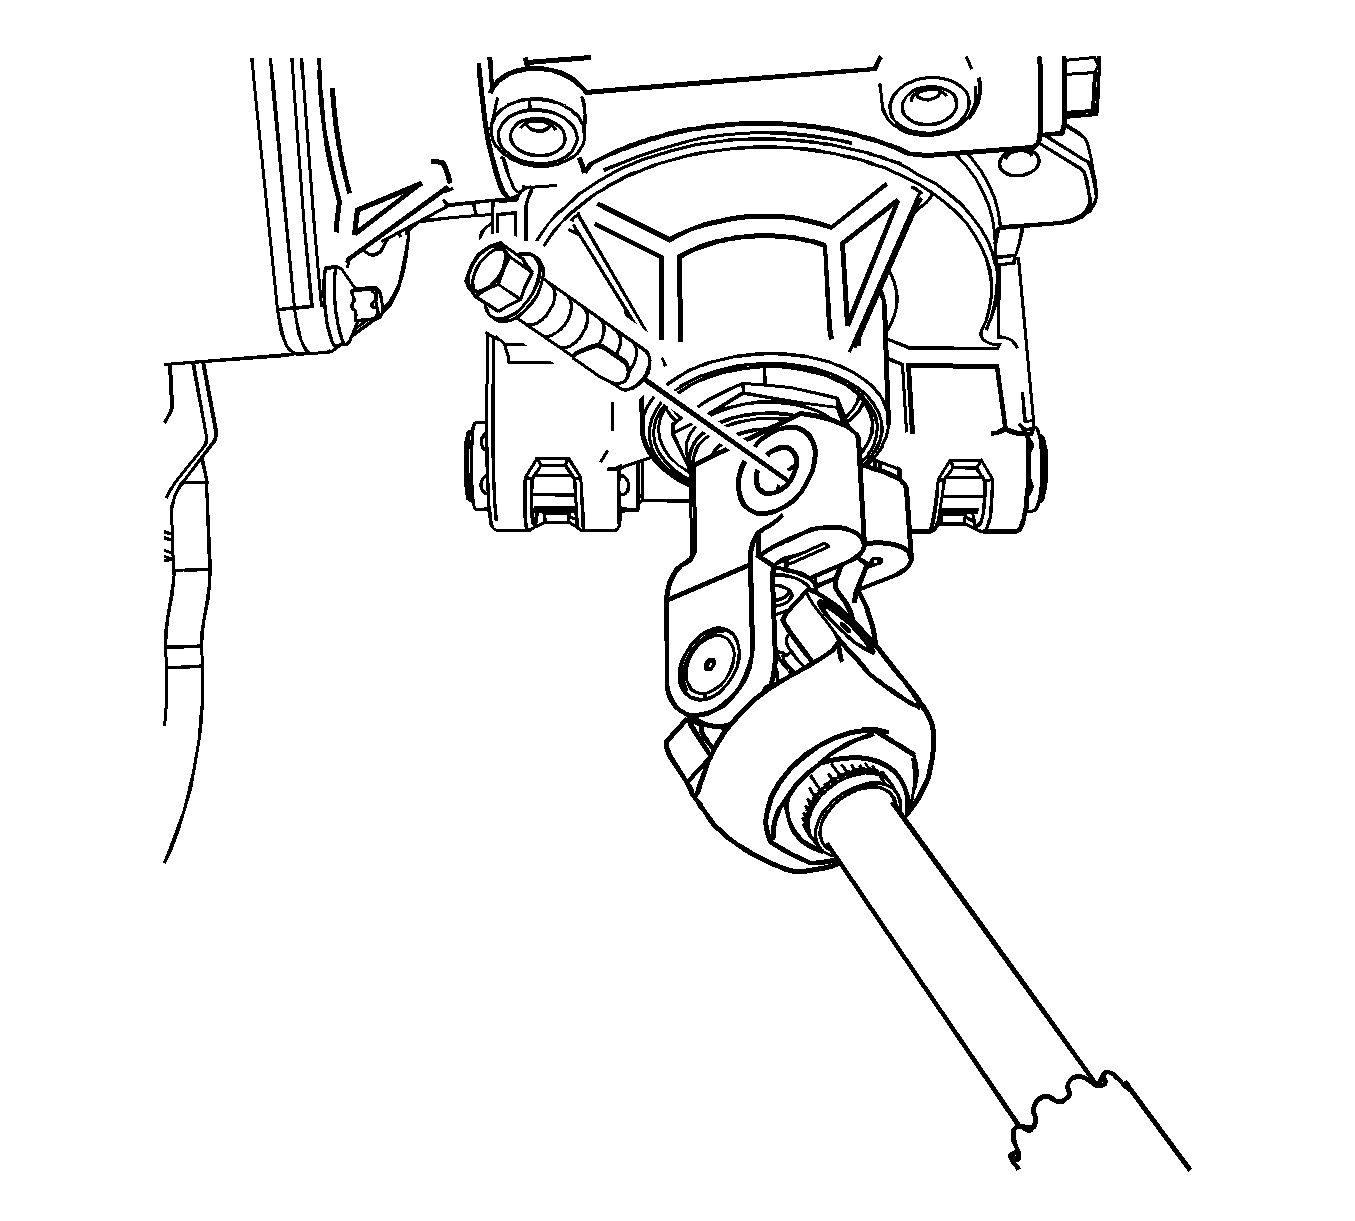
- Remove the intermediate steering shaft bolt at the steering column and discard it.
- Separate the intermediate steering shaft from the steering column.
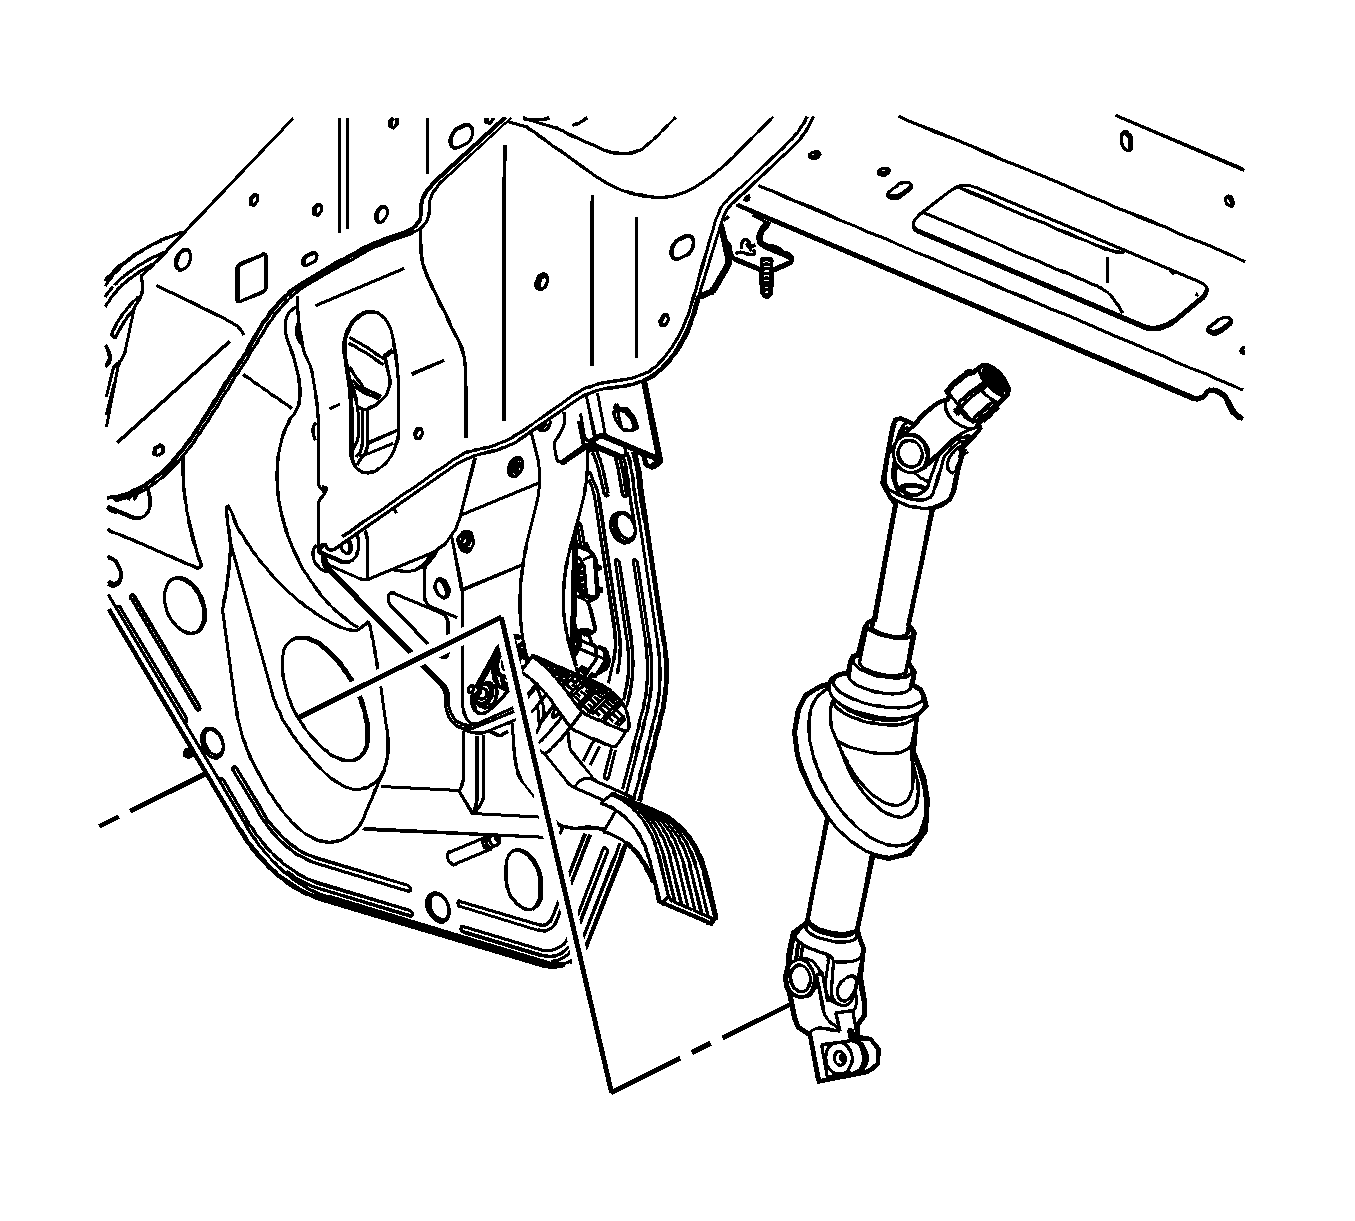
- Squeeze the 4 lock tabs on the intermediate steering shaft seal and pull it towards the inside of the vehicle to unseat it from the instrument panel compartment pass-through.
- Remove the intermediate steering shaft from inside the vehicle.
Caution: Secure the steering wheel utilizing a strap to prevent rotation. Locking of the steering column will prevent damage and a possible malfunction of the SIR system. The steering wheel must be secured
in position before disconnecting the following components:
• The steering column • The intermediate shaft • The steering gear
Note: The steering column tilt lever MUST be in the LOCK (FULL UP) position before disconnecting the following components:
• The steering column • The intermediate steering shaft


Installation Procedure
- Install the intermediate steering shaft from inside the vehicle.
- Seat the intermediate steering shaft seal by pushing it forward from the inside of the vehicle until all four lock tabs are fully seated.
- Connect the intermediate steering shaft to the steering column.
- Install the new intermediate steering shaft bolt.
- Install the left side instrument panel insulator. Refer to Instrument Panel Insulator Replacement - Left Side.
- Connect the intermediate steering shaft to the steering gear.
- Install the new intermediate steering shaft lower bolt and tighten to 49 N·m (36 lb ft).
- Install the left front tire and wheel assembly. Refer to Tire and Wheel Removal and Installation.

Note: Do NOT twist or squeeze the seal during installation and position it in its original position. Ensure the it is properly seated and inspect the 4 lock tabs from the engine side for any damage. If the intermediate steering shaft seal lock tabs are damaged then replace the seal.
Caution: Refer to Fastener Caution in the Preface section.

| • | For electronic power steering, tighten the bolt to 49 N·m (36 lb ft). |
| • | For hydraulic power steering, tighten the bolt to 62 N·m (46 lb ft). |

