For 1990-2009 cars only
Removal Procedure
- Remove the door inner trim panel. Refer to Front Side Door Trim Panel Replacement .
- Remove the rear door water deflector. Refer to Front Side Door Water Deflector Replacement .
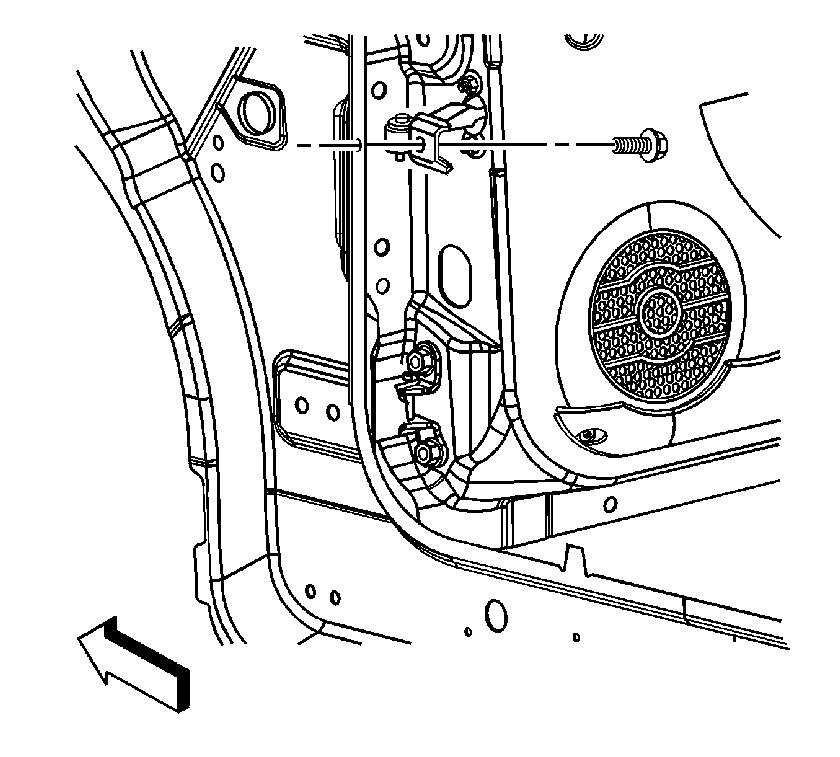
- Remove the check link bolt.
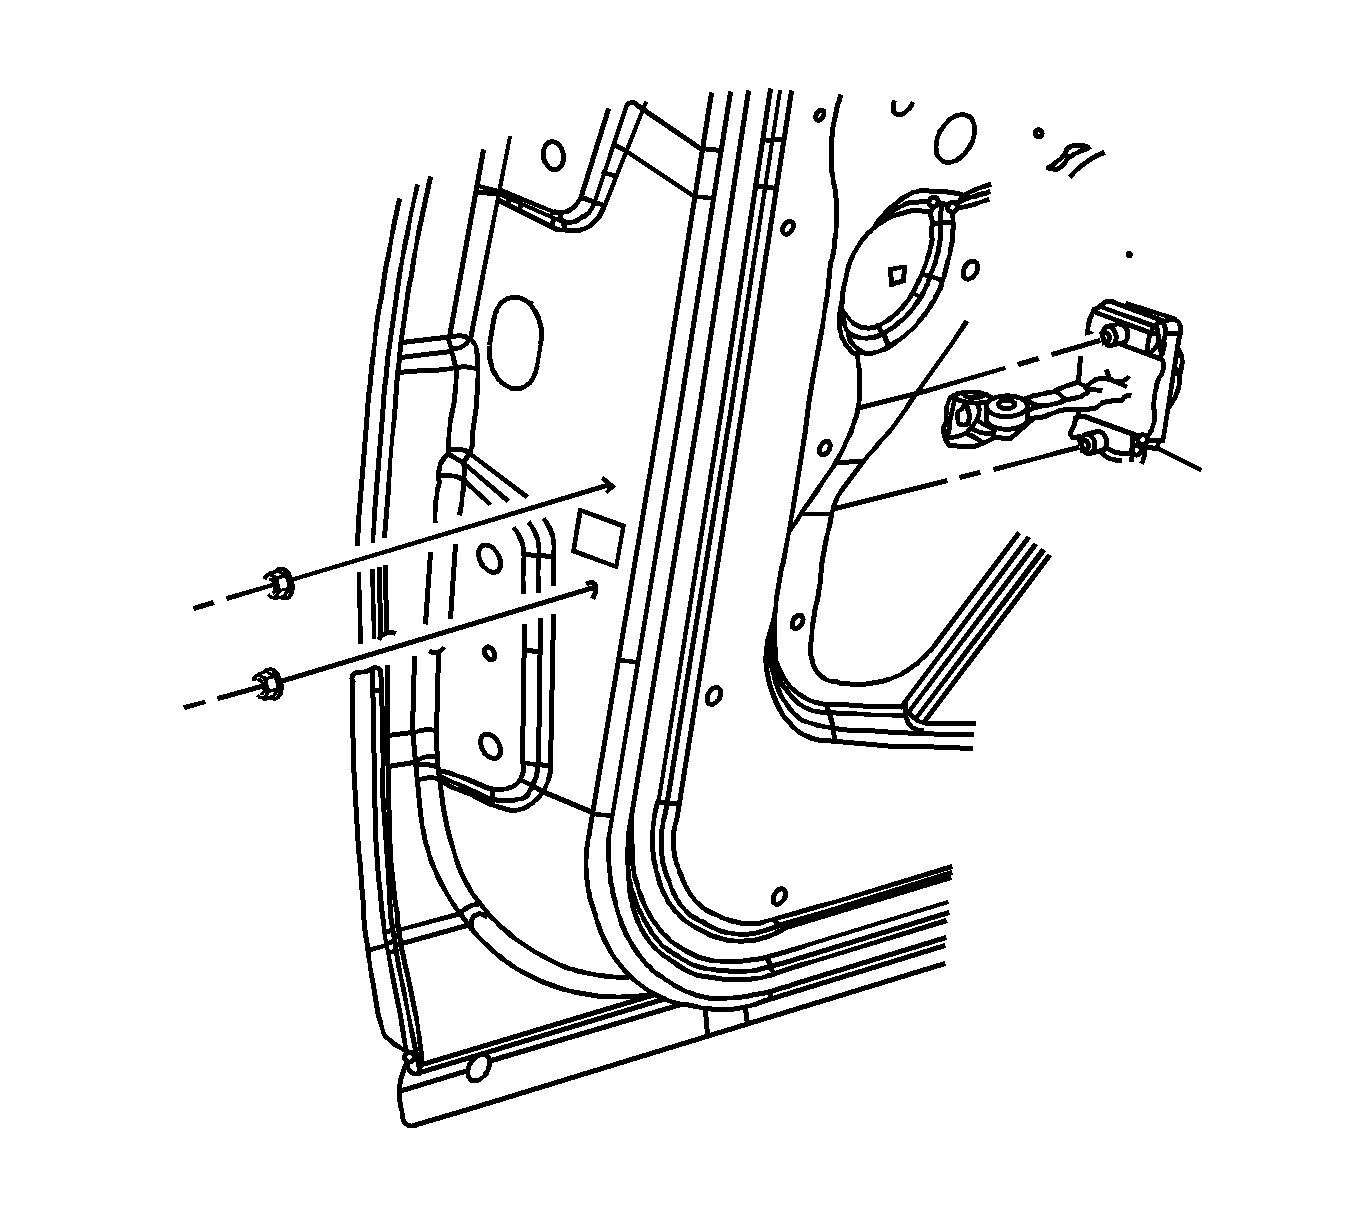
- Remove the check link nuts.
- Remove the check link from the rear door.


Installation Procedure
- Position the check link in the rear door.
- Install the rear door check link nuts.
- Install the front door check link bolt.
- Install the rear door water deflector. Refer to Thermal Expansion Valve Replacement .
- Install the door inner trim panel. Refer to Front Side Door Trim Panel Replacement .

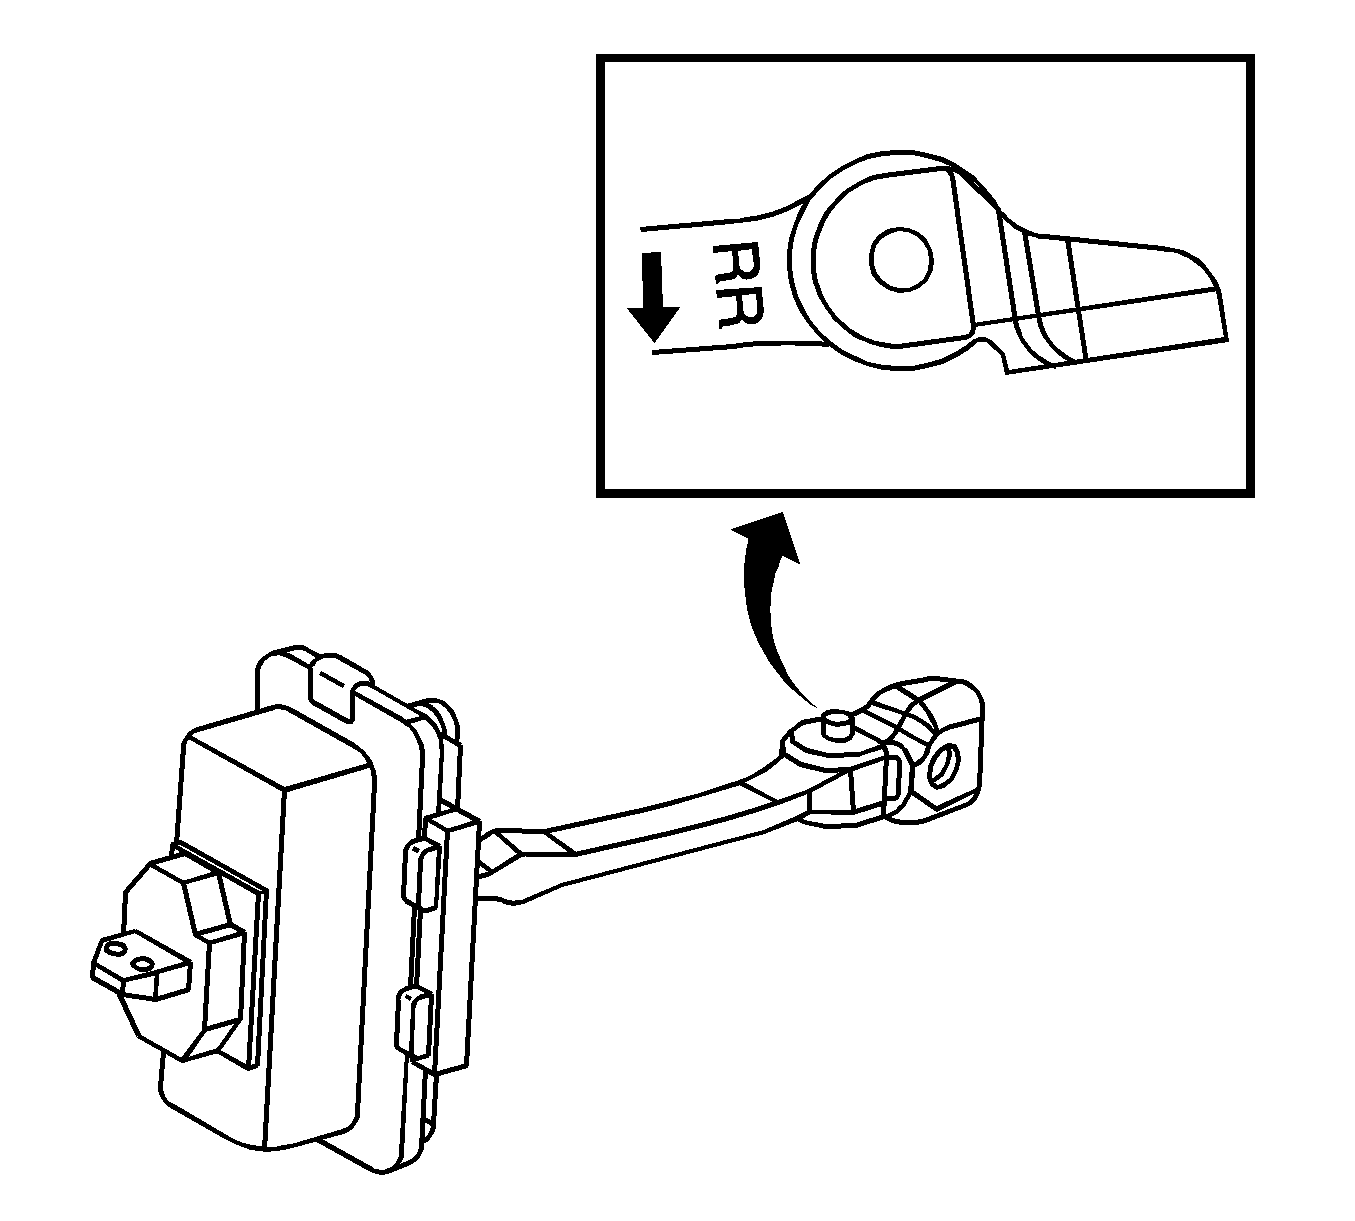
Important: The letters R and L are molded into the check link arm. If you are installing on the right side, the R must be facing up. If you are installing on the left side, the L must be facing up.
Notice: Refer to Fastener Notice in the Preface section.

Tighten
Tighten the nuts to 10 N·m (89 lb in).

Tighten
Tighten the bolt to 9 N·m (80 lb in).
