For 1990-2009 cars only
Battery Positive Cable Replacement L61
Removal Procedure
- Disconnect the negative battery cable. Refer to Battery Negative Cable Disconnection and Connection.
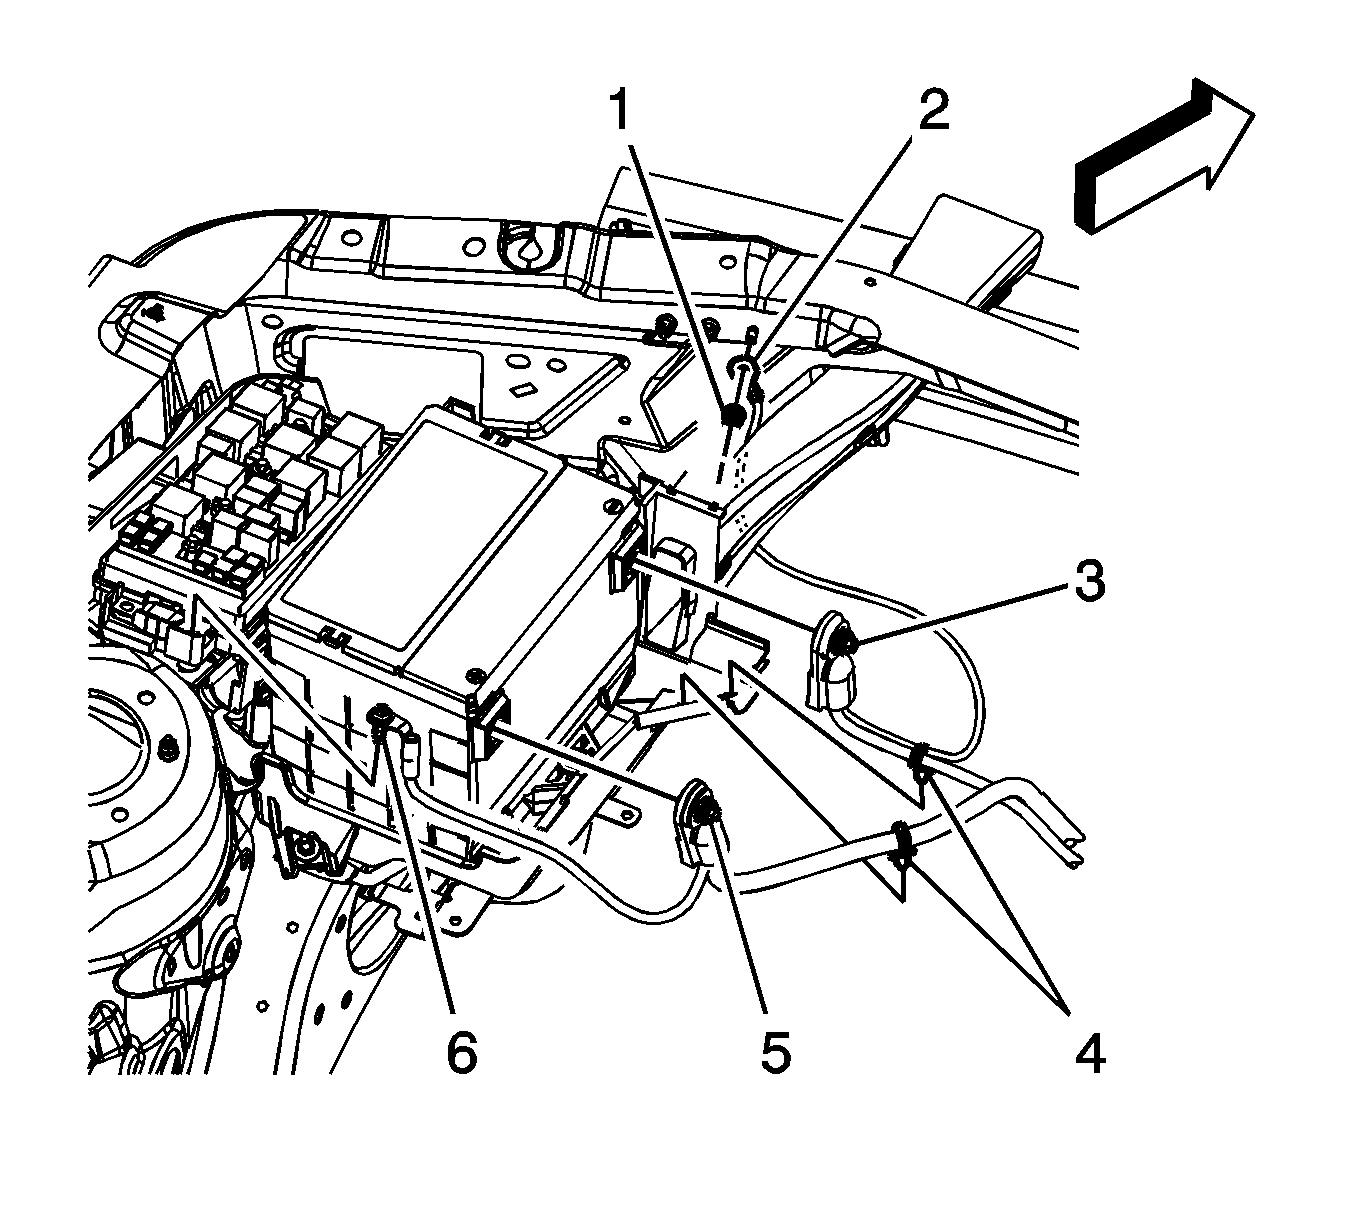
- Loosen the positive battery cable bolt (5) and remove the positive battery cable from the battery.
- Loosen the positive battery cable bolt (6) at the junction block and remove the cable from the junction block.
- Remove the positive battery cable clip (4) from the battery tray.
- Remove the tape holding the negative battery cable to the positive battery cable.
- Raise and support the vehicle. Refer to Lifting and Jacking the Vehicle.
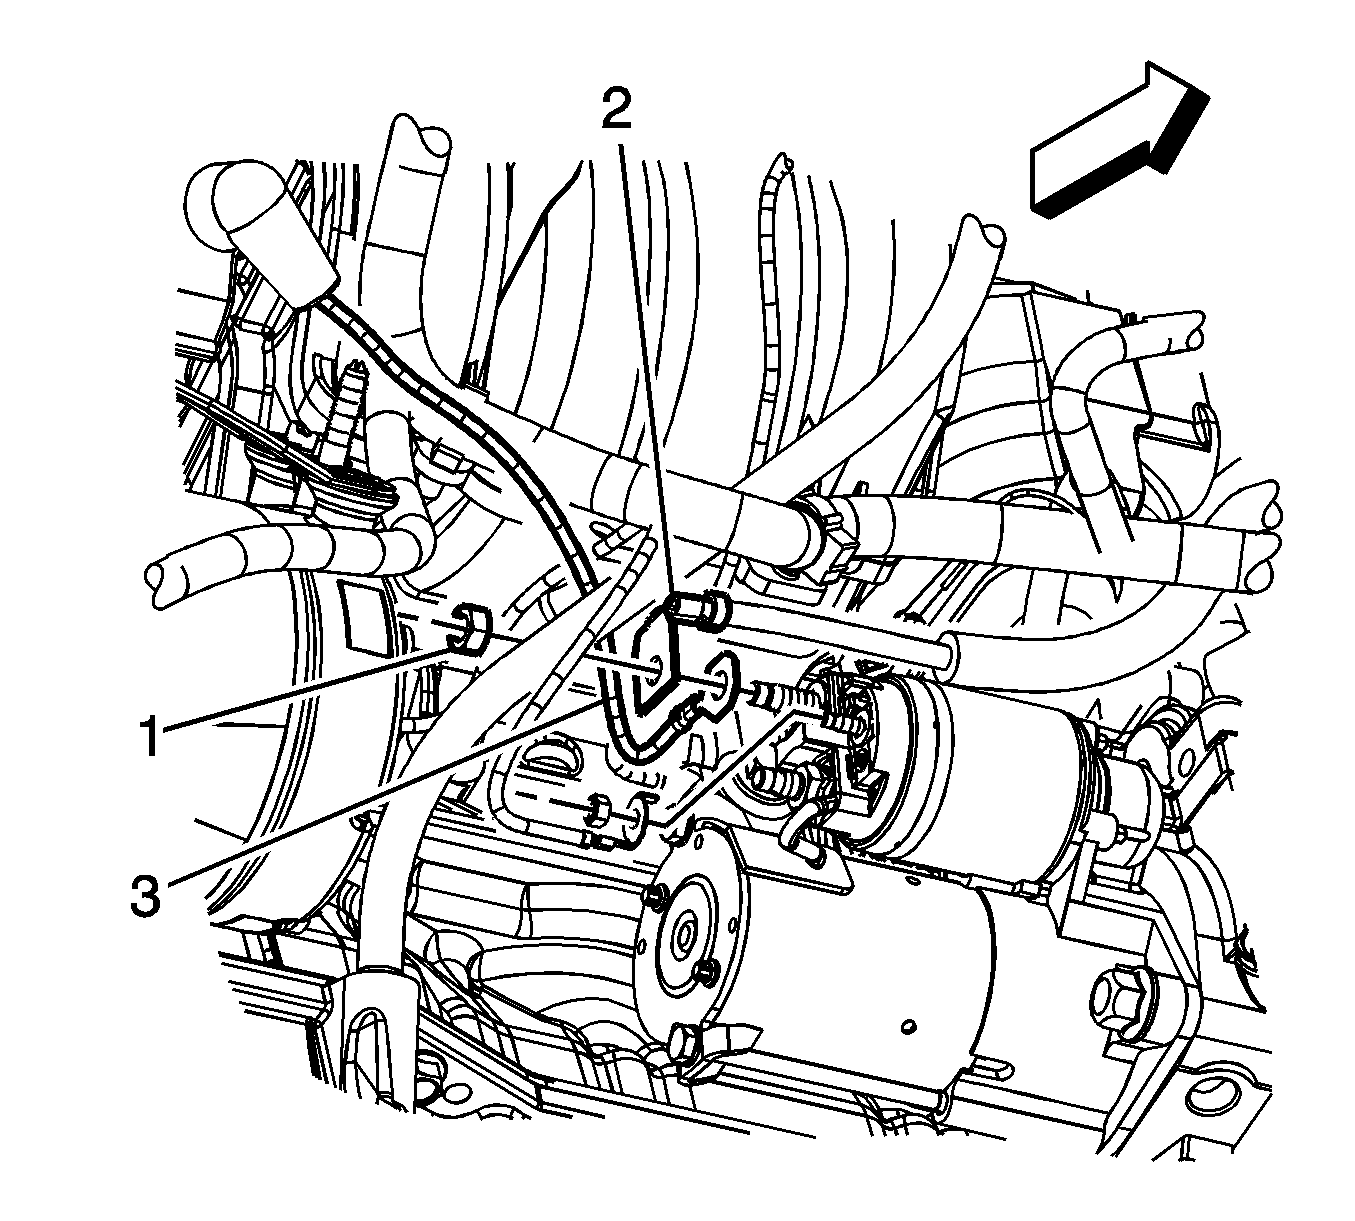
- Remove the positive battery cable nut (1) from the starter solenoid.
- Remove the positive battery cable (2) from the starter solenoid.
- Lower the vehicle.
- Remove the positive battery cable.


Installation Procedure
- Install the positive battery cable.
- Raise and the vehicle.
- Install the positive battery cable (2) to the starter solenoid.
- Install the positive battery cable nut (1) to the starter solenoid.
- Lower the vehicle.
- Install the positive battery cable to the junction block and tighten the positive battery cable bolt (6).
- Install the positive battery cable clip (4) to the battery tray.
- Install tape in order to secure the negative battery cable to the positive battery cable.
- Position the positive battery cable to the battery.
- Tighten the positive battery cable bolt (5).
- Connect the negative battery cable. Refer to Battery Negative Cable Disconnection and Connection.

Notice: Refer to Fastener Notice in the Preface section.
Tighten
Tighten the nut to 10 N·m (89 lb in).

Tighten
Tighten the bolt to 10 N·m (89 lb in).
Tighten
Tighten the bolt to 17 N·m (13 lb ft).
Battery Positive Cable Replacement LZ4
Removal Procedure
- Disconnect the negative battery cable. Refer to Battery Negative Cable Disconnection and Connection .
- Loosen the positive battery cable bolt (5) and remove the positive battery cable from the battery.
- Loosen the positive battery cable bolt (6) at the junction block and remove the cable from the junction block.
- Remove the positive battery cable clip (4) from the battery tray.
- Remove the tape holding the negative battery cable to the positive battery cable.
- Raise and support the vehicle. Refer to Lifting and Jacking the Vehicle .
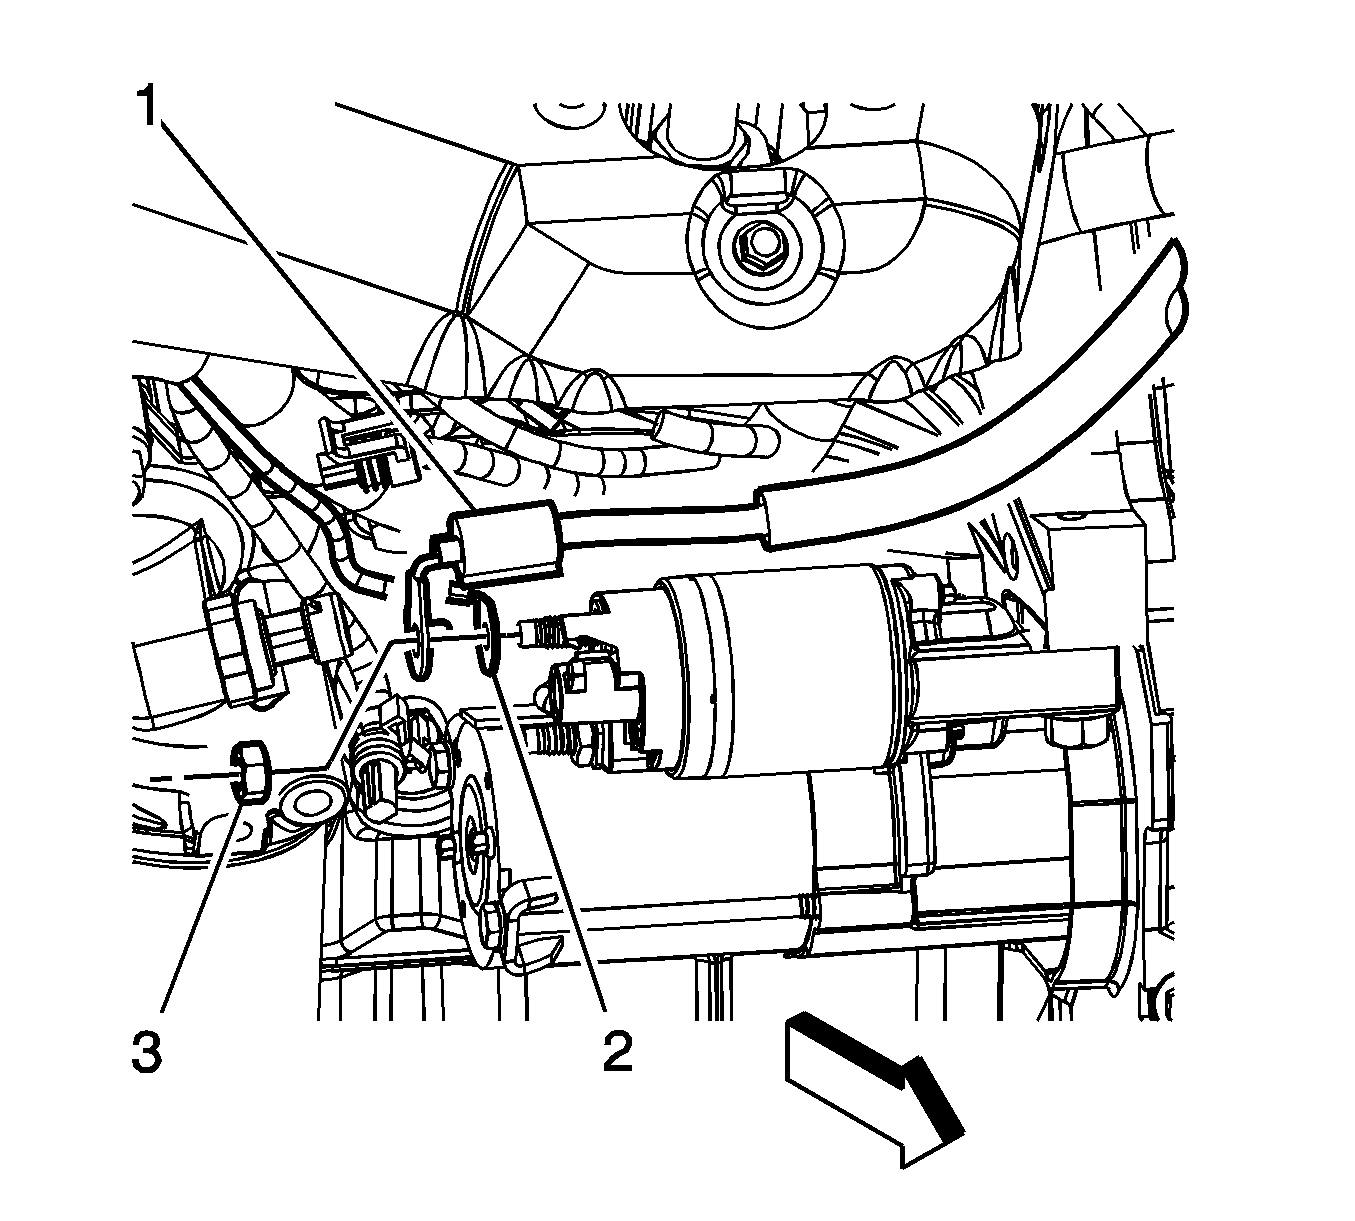
- Remove the positive battery cable nut (3) from the starter solenoid.
- Remove the positive battery cable (1) from the starter solenoid.
- Lower the vehicle.
- Remove the positive battery cable.


Installation Procedure
- Install the positive battery cable.
- Raise and the vehicle.
- Install the positive battery cable (1) to the starter solenoid.
- Install the positive battery cable nut (3) to the starter solenoid.
- Lower the vehicle.
- Install the positive battery cable to the junction block and tighten the positive battery cable bolt (6).
- Install the positive battery cable clip (4) to the battery tray.
- Install tape in order to secure the negative battery cable to the positive battery cable.
- Position the positive battery cable to the battery.
- Tighten the positive battery cable bolt (5).
- Connect the negative battery cable. Refer to Battery Negative Cable Disconnection and Connection .

Notice: Refer to Fastener Notice in the Preface section.
Tighten
Tighten the nut to 10 N·m (89 lb in).

Tighten
Tighten the bolt to 10 N·m (89 lb in).
Tighten
Tighten the bolt to 17 N·m (13 lb ft).
