Parking Pawl and Manual Shift Linkage Installation for Chevrolet Metro 1998
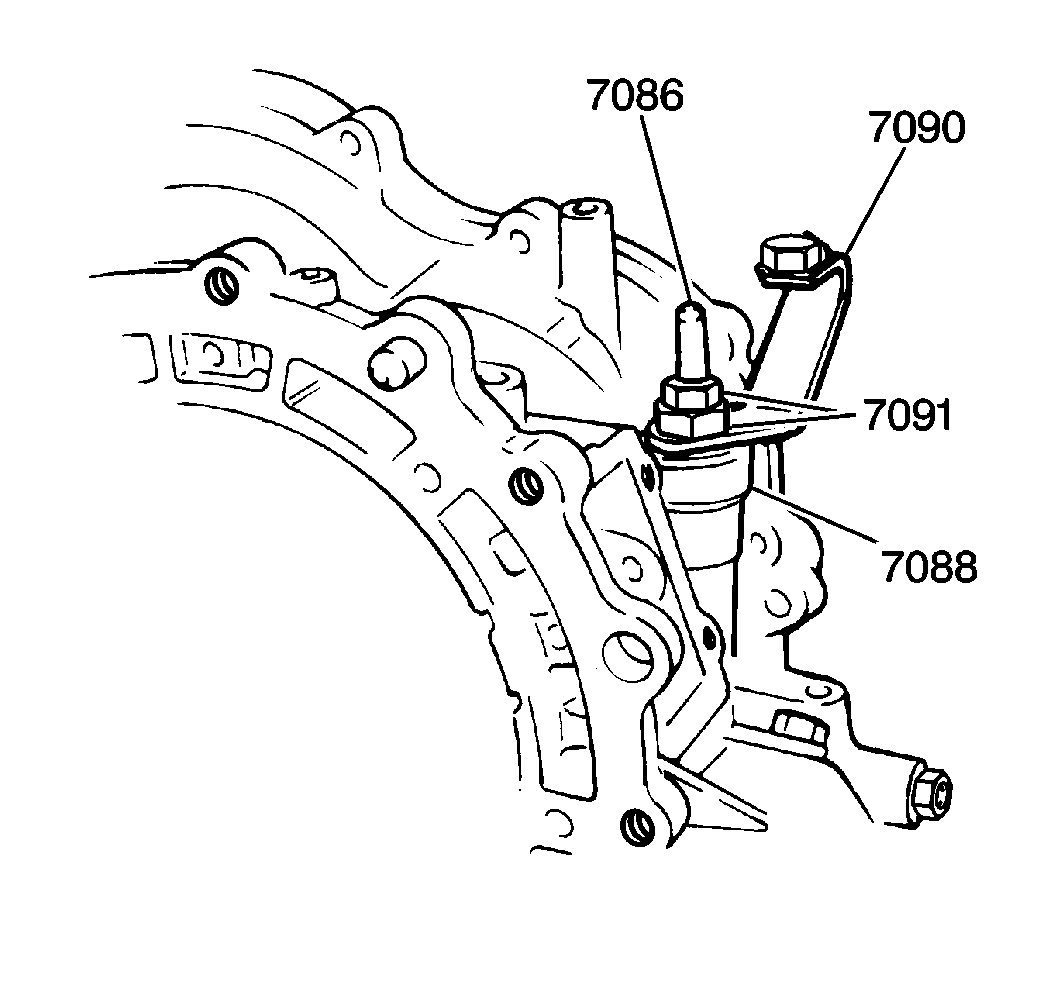
- Inspect the manual shift shaft seal (7088) at the transaxle case and replace the seal if necessary.
- Install the manual shift shaft (7086) into the transaxle case. Be careful not to damage the manual shift shaft seal (7088).
- Install the shift shaft upper washer and the manual shift lever (7090) to the manual shift shaft (7086).
- Install the manual lever locknuts (7091).
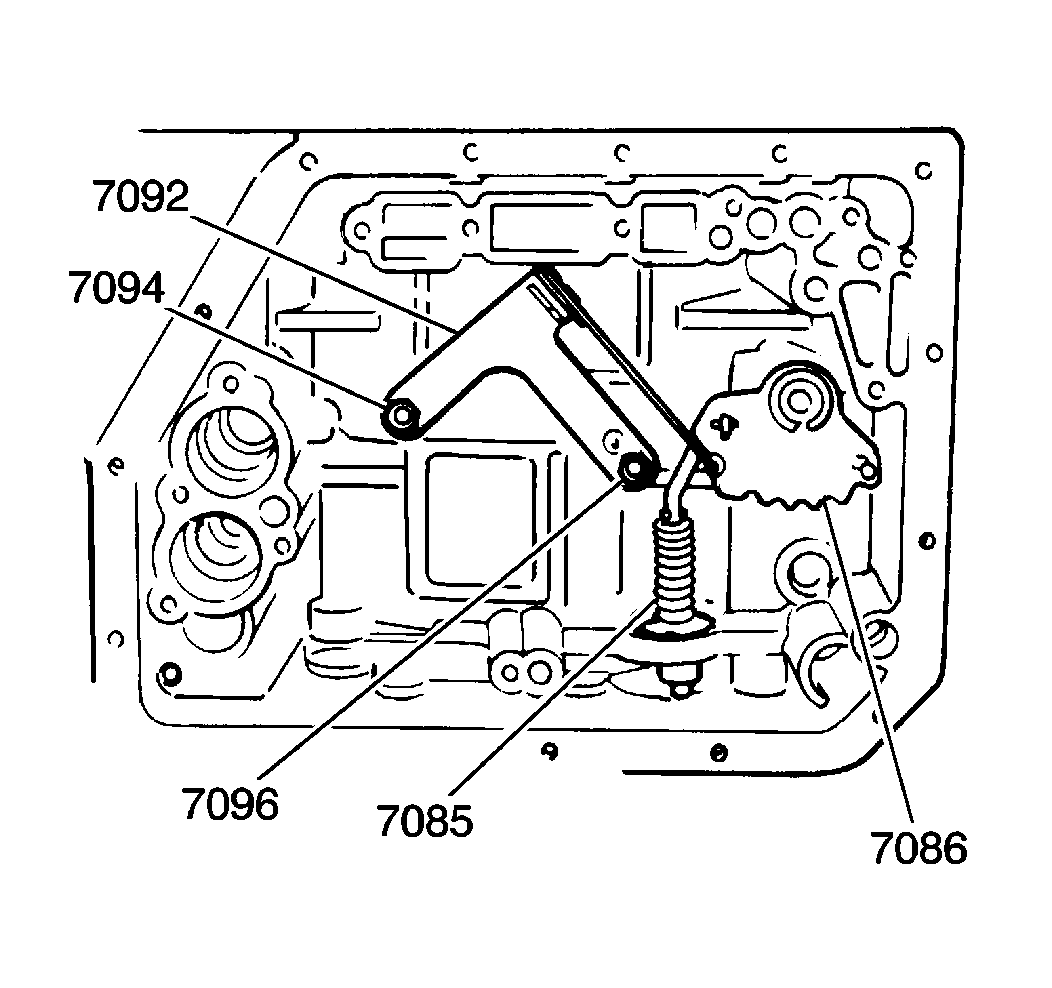
- Install the manual detent spring assembly (7092).
- Inspect the manual shift shaft (7086) for smooth rotation.
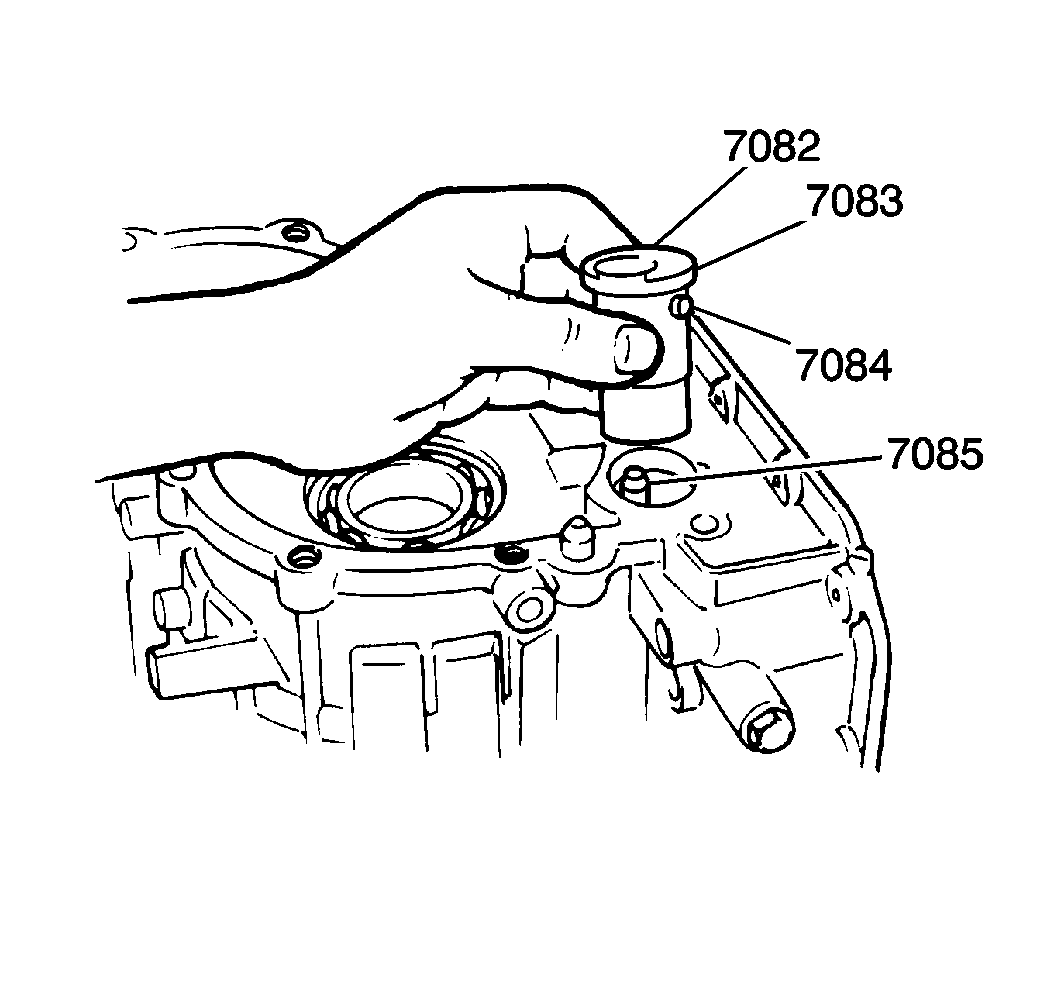
- Install the restrictor pin (7084) and the snap ring (7083) onto the parking lock pawl sleeve (7082).
- Install the parking lock pawl sleeve (7082) into the transaxle case.
- Move the manual shift lever to any position other than Park.
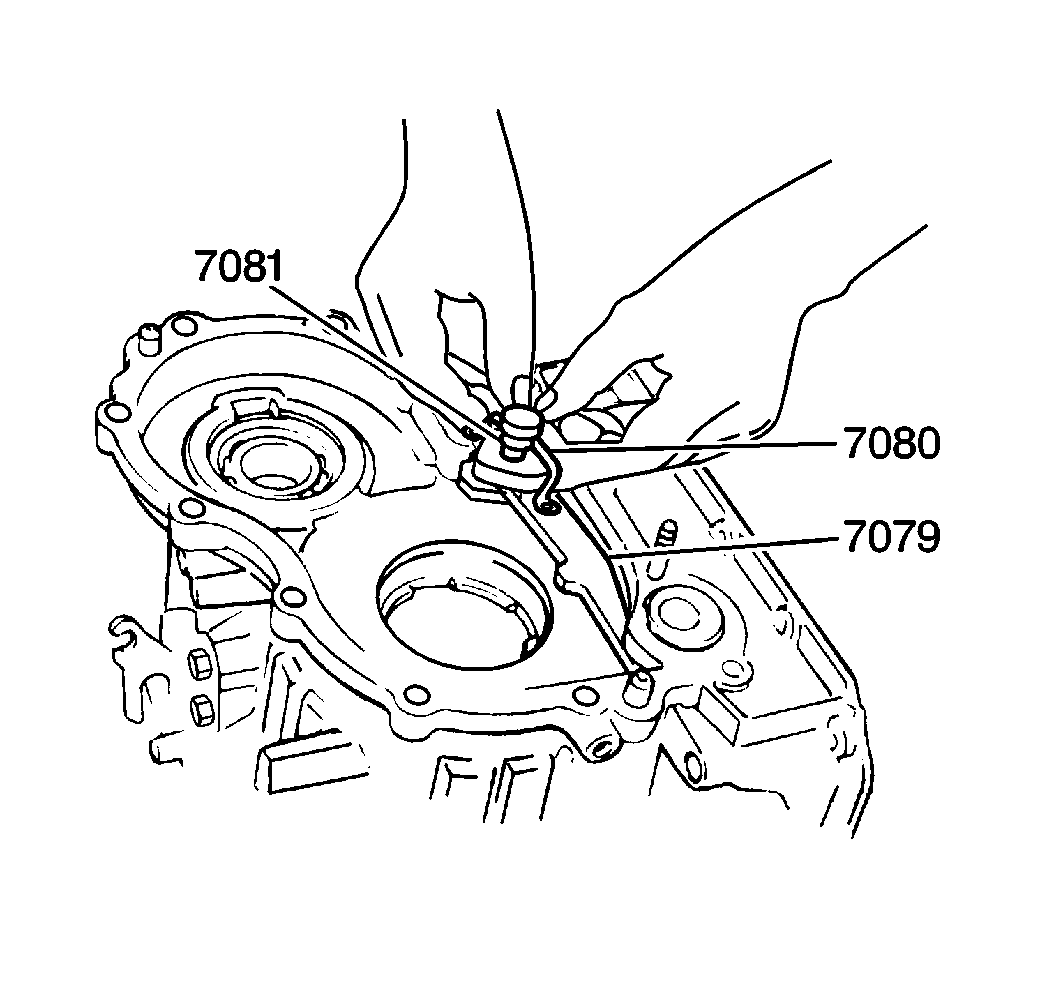
- Install the parking lock pawl (7079), the lock pawl spring (7080) and the lock pawl shaft (7081) onto the transaxle case.
- Inspect the parking lock pawl for smooth operation by moving the manual shift lever in and out of Park.
Notice: Use the correct fastener in the correct location. Replacement fasteners must be the correct part number for that application. Fasteners requiring replacement or fasteners requiring the use of thread locking compound or sealant are identified in the service procedure. Do not use paints, lubricants, or corrosion inhibitors on fasteners or fastener joint surfaces unless specified. These coatings affect fastener torque and joint clamping force and may damage the fastener. Use the correct tightening sequence and specifications when installing fasteners in order to avoid damage to parts and systems.
Tighten
Tighten both manual shift lever locknuts to 33 N·m (24 lb ft).
Completely tighten the lower locknut before securing the upper locknut.
Tighten
| • | Tighten the manual detent spring assembly retaining bolt (7096) to 12 N·m (106 lb in). |
| • | Tighten the manual detent spring assembly nut (7094) to 12 N·m (106 lb in). |