Strut Assembly Replacement for Chevrolet Metro 1999
Removal Procedure
- On two-door models, raise the liftgate.
- On two-door models, remove the trim cover from the strut tower. Place the rear seat back in the forward position.
- Raise and support the vehicle in order to allow access to the top of the strut and to the bottom of the strut. Refer to Lifting and Jacking the Vehicle in General Information.
- Remove the rear tire and wheel assembly. Refer to Tire and Wheel Removal and Installation in Tires and Wheels.
- Support the rear suspension using a floor jack.
- Remove the bolt (3) that retains the strut (2) to the knuckle (1).
- Remove the 2 nuts (2) from the strut (1).
- Use the following procedure in order to remove the strut from the vehicle:
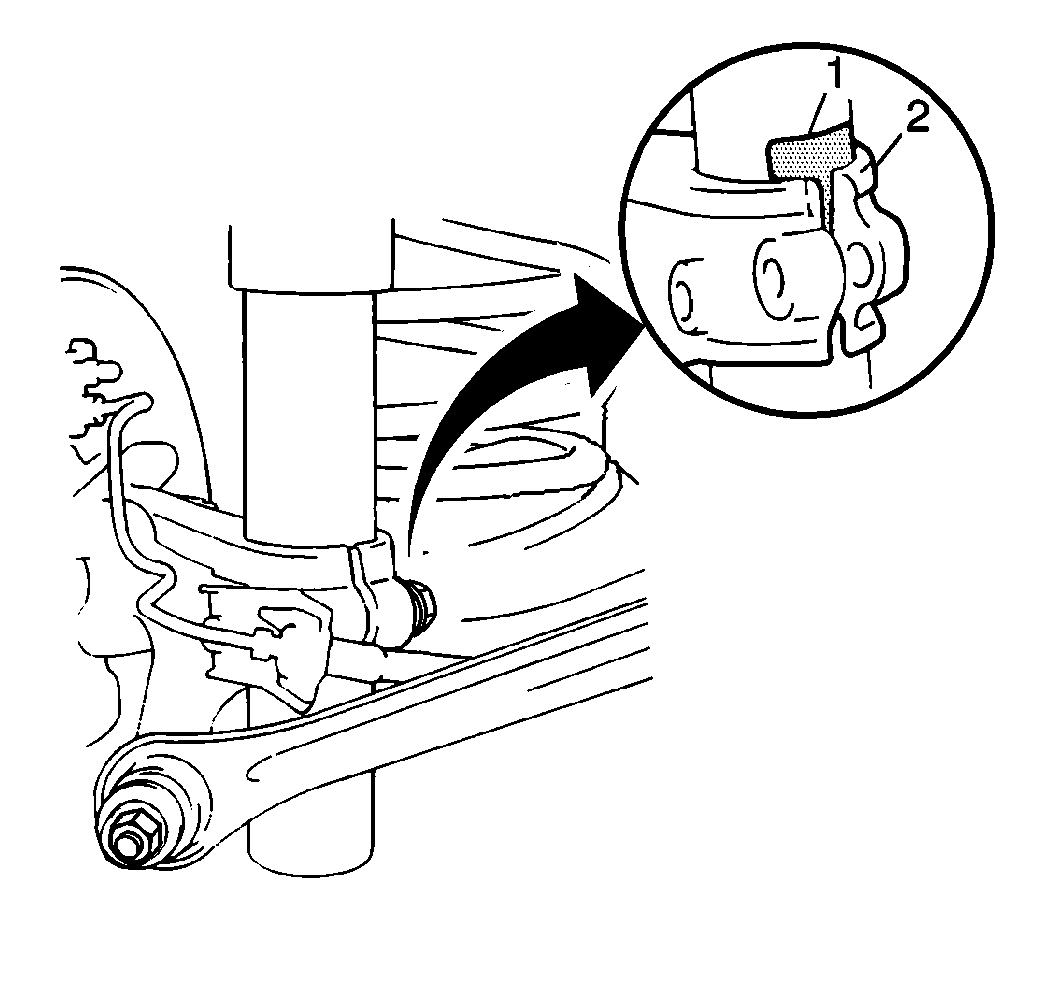
- If the strut (1) is difficult to remove, insert a wedge (3) in order to expand the opening in the knuckle (2).
On four-door models, open the rear compartment lid.
On four-door models, reposition the rear compartment side trim in order to access the strut nuts.
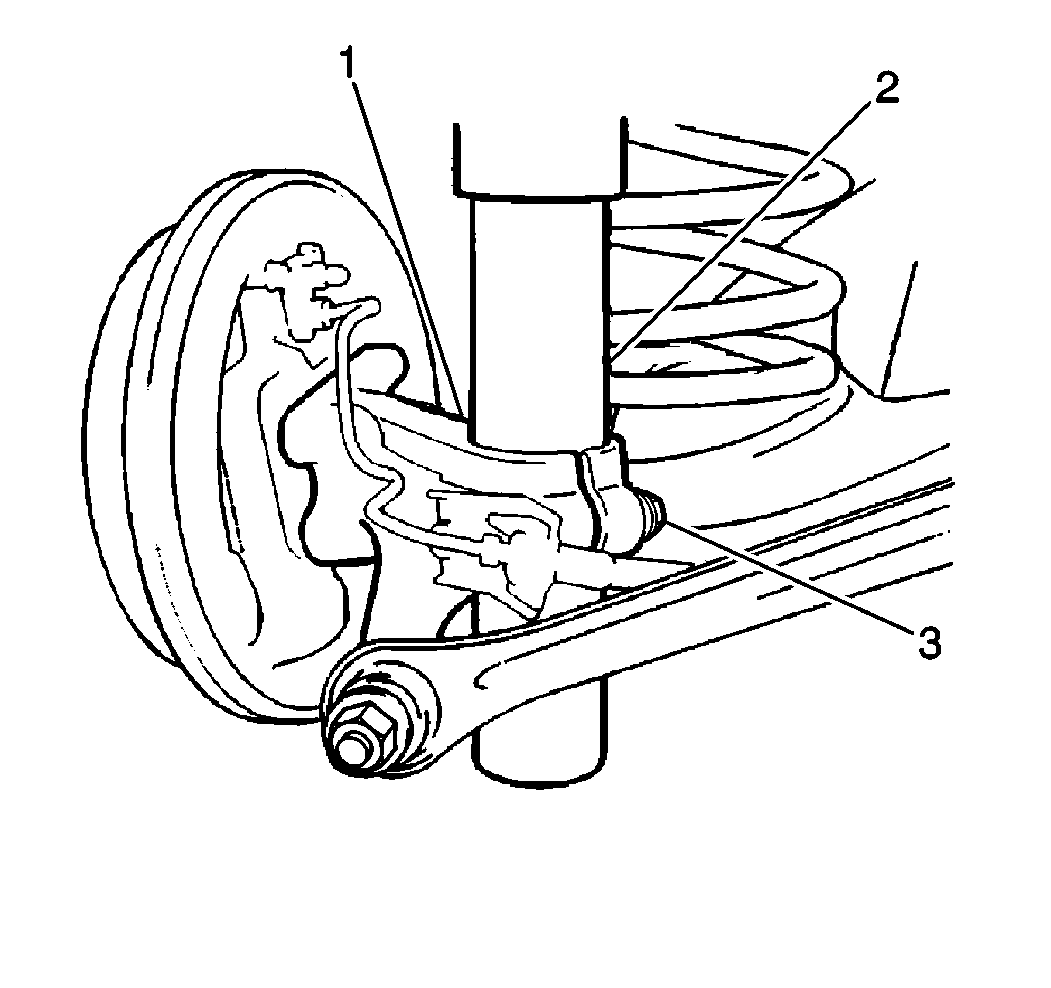

| • | Compress the strut. |
| • | Separate the strut from the knuckle. |
| • | Remove the strut from the vehicle. |

Notice: Keep the floor jack in place while the strut is off the vehicle to keep the coil spring from fully extending and falling off, and to prevent damaging the brake hose.
Important: Do not expand the opening in the knuckle wider than necessary.
Installation Procedure
- Compress the strut.
- Install the strut to the knuckle (2). Position the strut alignment projection (1) inside the opening in the knuckle (2).
- Install the 2 nuts (2) to the strut (1).
- On two-door models, install the trim cover to the strut tower. Move the rear seat back to the upright position.
- Install the bolt (3) to the knuckle.
- Remove the floor jack.
- Install the rear tire and wheel assembly. Refer to Tire and Wheel Removal and Installation in Tires and Wheels.
- Lower the vehicle.
- On two-door models, close the liftgate.
Notice: Use the correct fastener in the correct location. Replacement fasteners must be the correct part number for that application. Fasteners requiring replacement or fasteners requiring the use of thread locking compound or sealant are identified in the service procedure. Do not use paints, lubricants, or corrosion inhibitors on fasteners or fastener joint surfaces unless specified. These coatings affect fastener torque and joint clamping force and may damage the fastener. Use the correct tightening sequence and specifications when installing fasteners in order to avoid damage to parts and systems.
Tighten
Tighten the nuts to 30 N·m (24 lb ft).
On four-door models, install the rear compartment side trim.
Tighten
Tighten the bolt to 60 N·m (44 lb ft).
On four-door models, close the rear compartment lid.
