Disassembly Procedure
- Remove the caliper. Refer to
Rear Brake Caliper Replacement
.

Caution: Do not place fingers in front of the caliper piston(s) in an attempt
to catch or protect it when applying compressed air. The piston(s) can fly
out with force and could result in serious bodily injury.
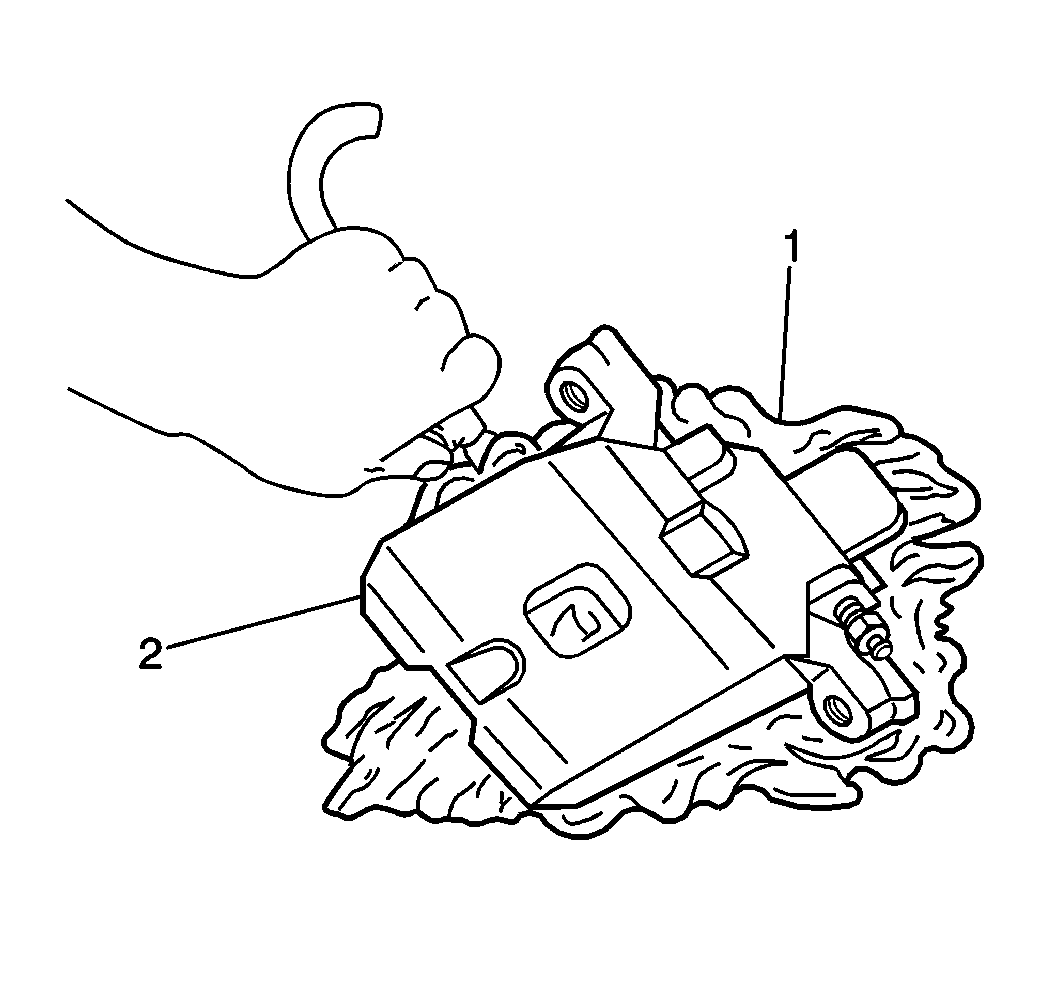
Notice: Use clean cloths to pad interior of caliper housing during piston removal.
Use just enough air to ease the pistons out of the bores. If the pistons are
blown out, even with the padding provided, it may be damaged.
- Remove the piston. Blow compressed air into the caliper inlet hole.
The piston will come out through the piston boot.
- Inspect the piston for the following conditions:
| • | Replace the piston if any of the above conditions are found. |

Notice: Do not use a metal tool for seal removal. Damage to the caliper bore
or the seal grooves can result.
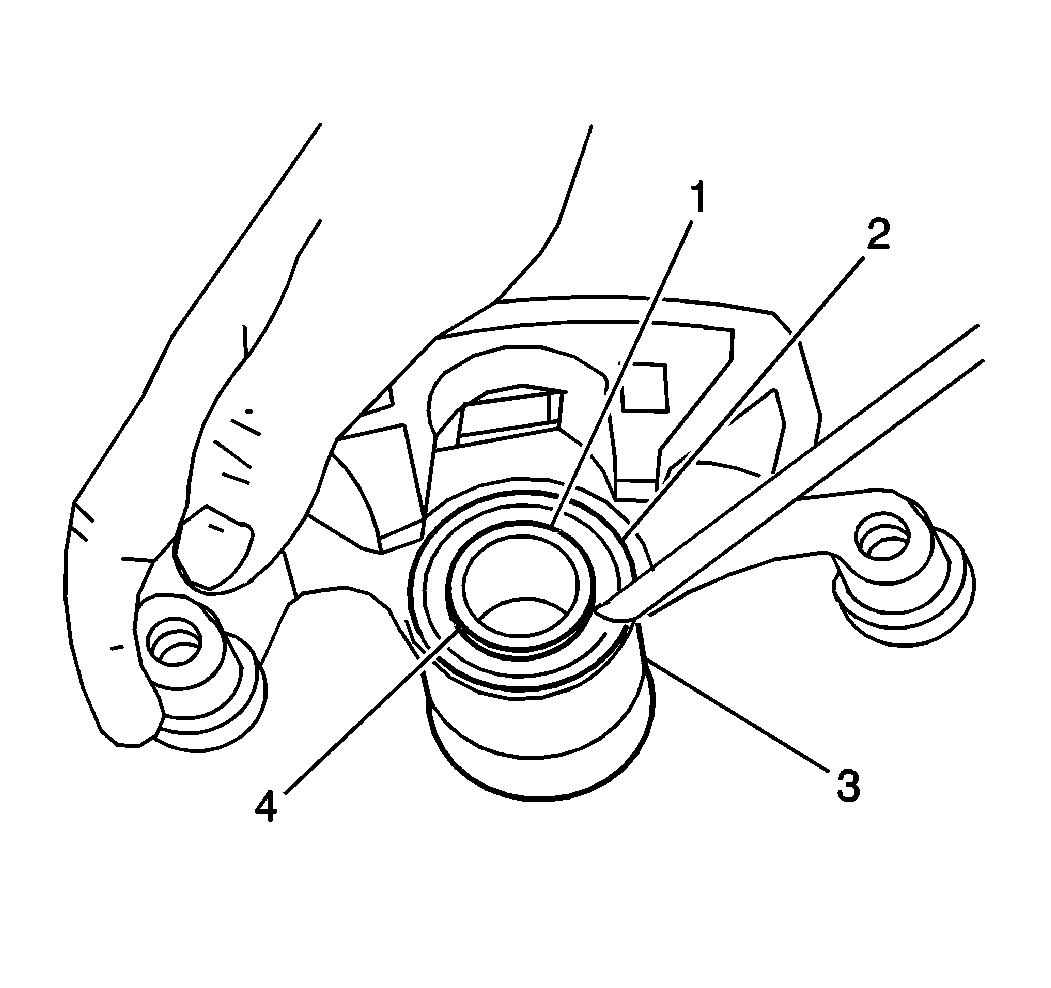
- Remove the boot ring (2) and the piston boot (4). Use a flat-bladed
tool in order to lift one end of the boot
ring. Manipulate the ring out of the caliper groove.
- Remove the piston seal from the groove in the caliper body. Use
a small wooden or plastic tool in order to manipulate the piston seal out
of the caliper bore groove.
- Remove the bleeder valve cap and the bleeder valve from the caliper
housing.
- Inspect the caliper bore and the seal grooves for the following
conditions. Use a crocus cloth in order to polish out light corrosion:
- Replace the caliper housing if corrosion in and around the seal
groove cannot be cleaned with a crocus cloth. Do not hone the caliper bore.
- Inspect the boots for the follwing conditions:
- Replace any damaged boots.
- Inspect the caliper bolts for corrosion or damage. Replace any
corroded bolts. Do not attempt to polish away corrosion.
- Inspect the seal groove in the caliper bore for nicks or burrs.
Replace the caliper if the seal groove is damaged.
- Clean all the parts in clean, denatured alcohol.
- Dry all the parts with filtered, non-lubricated compressed air.
- Blow out all the passages in the caliper housing and the bleeder
valve. Use filtered, non-lubricated compressed air.
Assembly Procedure
Notice: Use the correct fastener in the correct location. Replacement fasteners
must be the correct part number for that application. Fasteners requiring
replacement or fasteners requiring the use of thread locking compound or sealant
are identified in the service procedure. Do not use paints, lubricants, or
corrosion inhibitors on fasteners or fastener joint surfaces unless specified.
These coatings affect fastener torque and joint clamping force and may damage
the fastener. Use the correct tightening sequence and specifications when
installing fasteners in order to avoid damage to parts and systems.
- Install the bleeder
valve and the bleeder valve cap to the caliper housing.
Tighten
Tighten the bleeder valve to 11 N·m(97 lb in).
- Install a new lubricated piston seal into the caliper bore grooves.
Lubricate the seal with clean brake fluid. Ensure that the piston seal is
not twisted.
- Install the piston boot onto the piston.
- Lubricate the piston with clean brake fluid.
- Install the piston and the boot into the bore of the caliper.
- Install the piston ring.
| 6.1. | Ensure that the outside edge of the piston boot is seated smoothly
in the counterbore of the caliper body. |
| 6.2. | Manipulate the piston ring into the groove near the open end of
the caliper bore. Do not pinch the piston boot between the piston ring and
the caliper body. |
| 6.3. | Lift the inner edge of the piston boot next to the piston. Press
out any trapped air. Ensure that the boot lies flat. |
- Install the caliper. Refer to
Rear Brake Caliper Replacement
.


