For 1990-2009 cars only
Exhaust Manifold Replacement Left Front
Removal Procedure
- Disconnect the battery ground (negative) cable. Refer to Battery Negative Cable Disconnection and Connection in Engine Electrical.
- Carefully disconnect the throttle body air inlet duct.
- Remove the right engine mount strut bracket. Refer to Engine Mount Strut Bracket Replacement .
- Remove the AIR pipe if equipped. Refer to Secondary Air Injection Check Valve and Check Valve Pipe Replacement - Bank 1 in Engine Controls - 3.4L.
- Remove the thermostat bypass pipe. Refer to
- Remove the exhaust crossover pipe heat shield. Refer to Exhaust Crossover Replacement .
- Remove the exhaust crossover pipe nuts to the left exhaust manifold. Refer to Exhaust Crossover Replacement .
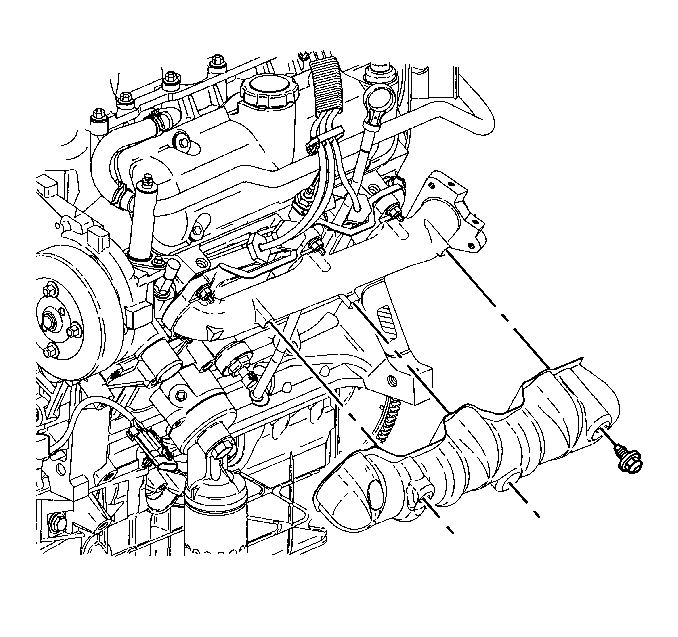
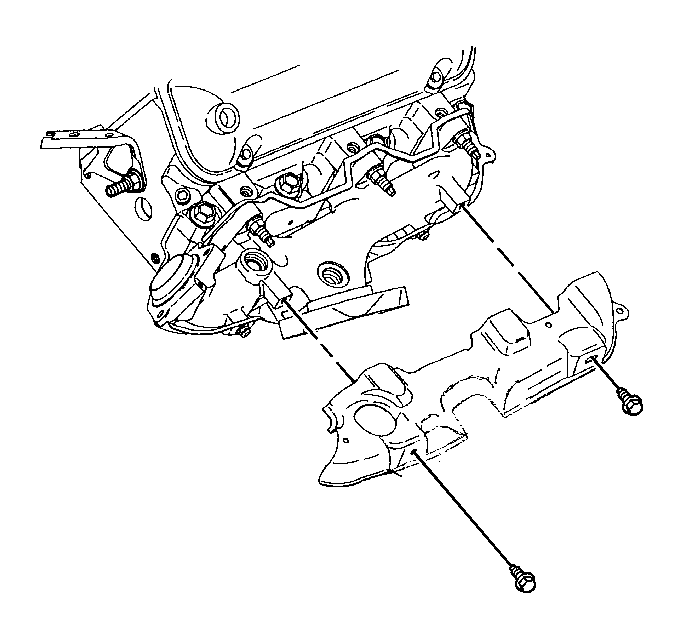
- Remove the left exhaust manifold heat shield bolts.
- Remove the left exhaust manifold heat shield.
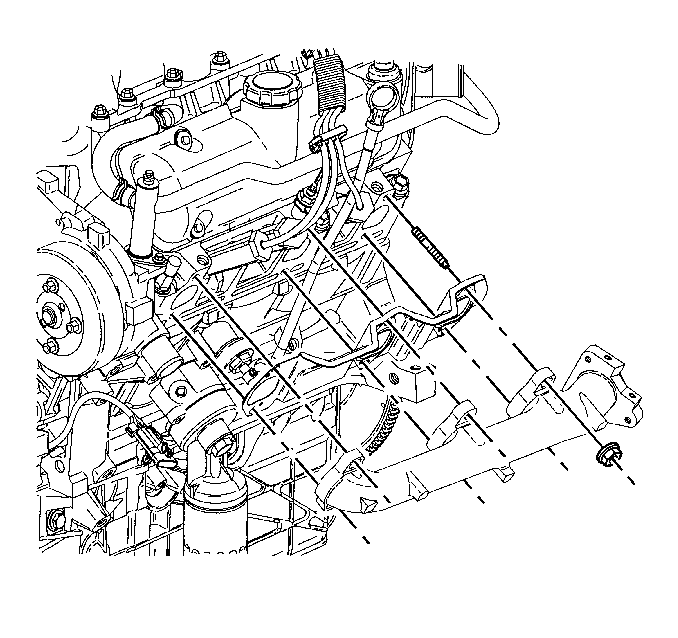
- Remove the left exhaust manifold nuts.
- Remove the left exhaust manifold.
- Remove the left exhaust manifold gasket.
- Clean the left exhaust manifold to the left cylinder head sealing surfaces. Refer to Exhaust Manifold Clean and Inspect .
Installation Procedure
- Install the left exhaust manifold gasket.
- Install the left exhaust manifold. Refer to Exhaust Manifold Installation (Left Side) .
- Install the left exhaust manifold heat shield. Refer to Exhaust Manifold Installation (Left Side) .
- Install the exhaust crossover pipe nuts to the left exhaust manifold. Refer to Exhaust Crossover Replacement .
- Install the exhaust crossover pipe heat shield. Refer to Exhaust Crossover Replacement .
- Install the AIR pipe if equipped. Refer to Secondary Air Injection Check Valve and Check Valve Pipe Replacement - Bank 2 in Engine Controls - 3.4L.
- Install the right engine mount strut bracket. Refer to Engine Mount Strut Bracket Replacement .
- Carefully install the throttle body air inlet duct.
- Connect the battery ground (negative) cable. Refer to Battery Negative Cable Disconnection and Connection in Engine Electrical.


Exhaust Manifold Replacement Right Rear
Removal Procedure
- Disconnect the battery ground (negative) cable. Refer to Battery Negative Cable Disconnection and Connection in Engine Electrical.
- Disconnect the throttle body air inlet duct. Refer to Air Cleaner Assembly Replacement in Engine Controls - 3.4L.
- Remove the AIR check valve/pipe if equipped. Refer to Secondary Air Injection Check Valve and Check Valve Pipe Replacement - Bank 2 in Engine Controls - 3.4L.
- Remove the exhaust crossover pipe heat shield. Refer to Exhaust Crossover Replacement .
- Remove the exhaust crossover pipe nuts to the right exhaust manifold. Refer to Exhaust Crossover Replacement .
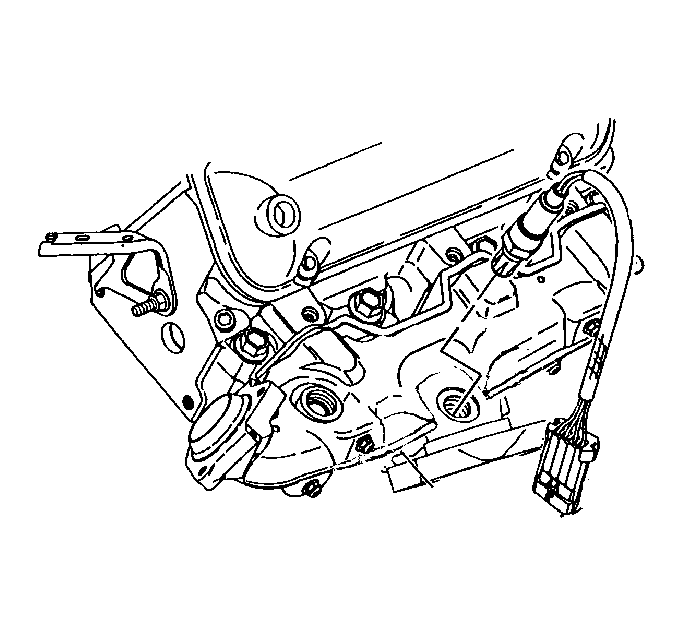
- Disconnect the oxygen sensor wiring harness connector.
- Raise and suitably support the vehicle. Refer to Lifting and Jacking the Vehicle in General Information.
- Disconnect the three-way catalytic converter pipe from the right exhaust manifold. Refer to Catalytic Converter Replacement in Engine Exhaust.
- Remove the exhaust gas recirculation (EGR) valve from the intake manifold. Refer to Exhaust Gas Recirculation Valve Replacement in Engine Controls - 3.4L.
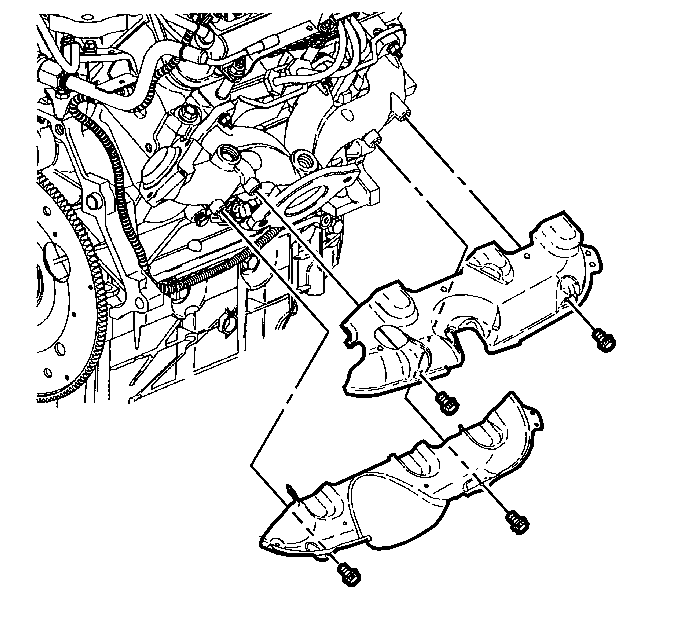
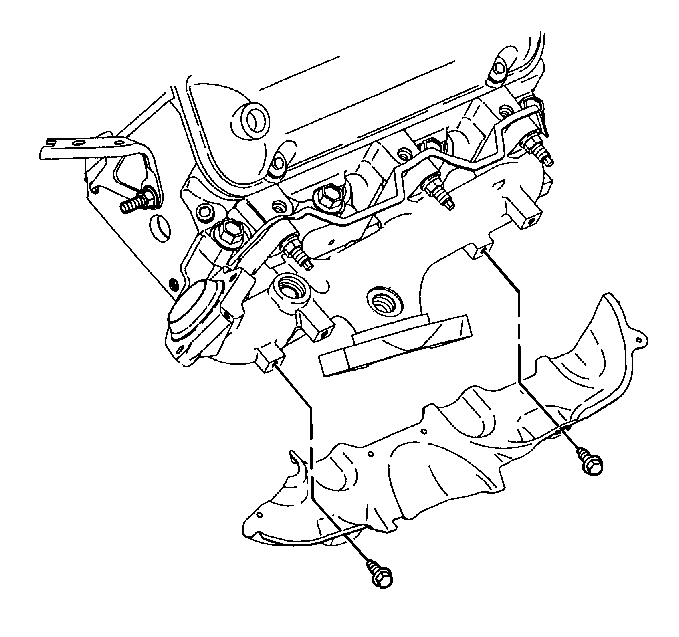
- Remove the right exhaust manifold upper heat shield bolts.
- Remove the right exhaust manifold upper heat shield.
- Remove the right exhaust manifold lower heat shield bolts.
- Remove the right exhaust manifold lower heat shield.
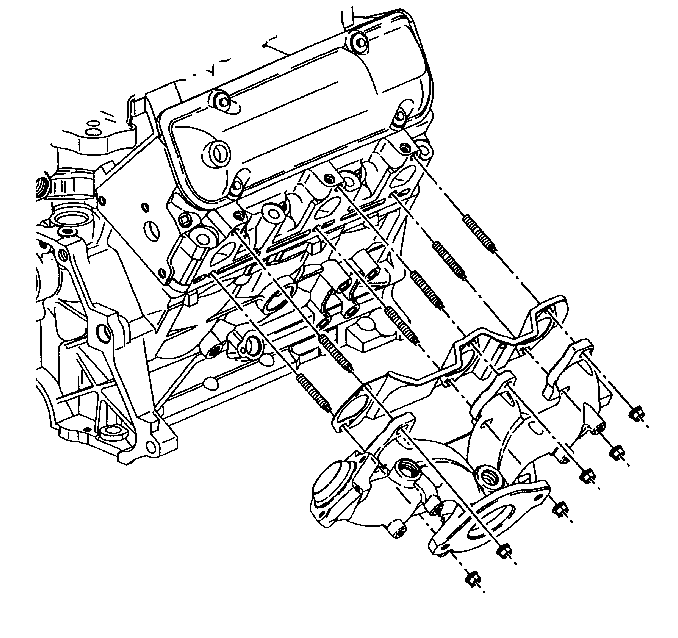
- Remove the right exhaust manifold nuts.
- Remove the right exhaust manifold.
- Remove the right exhaust manifold gasket.
- Clean the right exhaust manifold to the right cylinder head sealing surfaces. Refer to Exhaust Manifold Clean and Inspect .
- If replacing the right exhaust manifold remove the EGR valve pipe.
- If replacing the right exhaust manifold remove the heated oxygen sensor (HO2S). Refer to Heated Oxygen Sensor Replacement in Engine Controls - 3.4L.
Installation Procedure
- If removed, install the heated oxygen sensor (HO2S). Refer to Heated Oxygen Sensor Replacement in Engine Controls - 3.4L.
- If removed, install the exhaust gas recirculation (EGR) valve pipe.
- Install the right exhaust manifold gasket. Install the right exhaust manifold. Refer to Exhaust Manifold Installation (Right Side) .
- Install the right exhaust manifold heat shields. Refer to Exhaust Manifold Installation (Right Side) .
- Install the EGR valve to the intake manifold. Refer to Exhaust Gas Recirculation Valve Replacement in Engine Controls - 3.4L.
- Install the three-way catalytic converter pipe to the right exhaust manifold. Refer to Catalytic Converter Replacement in Engine Exhaust.
- Lower the vehicle.
- Connect the oxygen sensor wiring harness connector.
- Install the exhaust crossover pipe nuts to the right exhaust manifold. Refer to Exhaust Crossover Replacement .
- Install the exhaust crossover pipe heat shield. Refer to Exhaust Crossover Replacement .
- Install the AIR check valve/pipe if equipped. Refer to Secondary Air Injection Check Valve and Check Valve Pipe Replacement - Bank 2 in Engine Controls - 3.4L.
- Install the throttle body air inlet duct. Refer to Air Cleaner Assembly Replacement in Engine Controls - 3.4L.
- Connect the battery ground (negative) cable. Refer to Battery Negative Cable Disconnection and Connection in Engine Electrical.


