Clicking/Creaking Noise from Front of Vehicle (Apply Penetrating Threadlocker)

| Subject: | Clicking/Creaking Noise from Front of Vehicle (Apply Penetrating Threadlocker) |
| Models: | 2000-2005 Chevrolet Impala, Monte Carlo |
This bulletin is being revised to add the 2005 model year. Please discard Corporate Bulletin Number 02-08-61-001A (Section 08 - Body and Accessories).
Important: While continuous improvements to the frame/cradle assembly have been implemented to minimize noise, in certain circumstances a noise may be evident to the customer. The procedure in this bulletin can be used on all model year vehicles to correct the noise.
Condition
Some owners may comment on a clicking/creaking type noise coming from the front of the vehicle. This noise condition is most apparent during stationary or low speed turning maneuvers and may be audible from outside the vehicle and/or in the vehicle passenger compartment.
Cause
This condition maybe the result of small relative movement between the contacting surfaces of various brackets, crossmembers and side rails that are welded together to form the frame/cradle assembly. This slight movement occurs when the assembly is subjected to certain types of load conditions and in some instances may cause a clicking/creaking type noise. The specific areas/contact points on the frame assembly that may cause this condition are indicated below:
| • | Steering gear brackets to rear crossmember |
| • | Right/left rear body mount bracket to rear crossmember and right/left side rails |
Correction
Apply penetrating grade threadlocker using the 12 ml syringe applicator provided in J 45960, Frame Noise Service Kit, to the locations on the frame assembly and in the manner indicated in the service procedure below. When applying material, it should be flowed onto the designated surfaces or into the designated points in such a manner to ensure adequate and complete coverage. On both horizontal and vertical welds, the threadlocker material should be applied in such a manner that the material flows down over the welds. Care must be taken to ensure that material has been applied to the ends of each of the welds. The technician must ensure that the areas/surfaces indicated are properly covered. To minimize material waste, utilize a small clean container/pan to catch dripping material for reuse. During application of material, technicians should wear appropriate eye and hand protection.


- Raise the vehicle and suitably support the vehicle. Refer to Vehicle Lifting and Jacking in the General Information sub-section of the Service Manual.
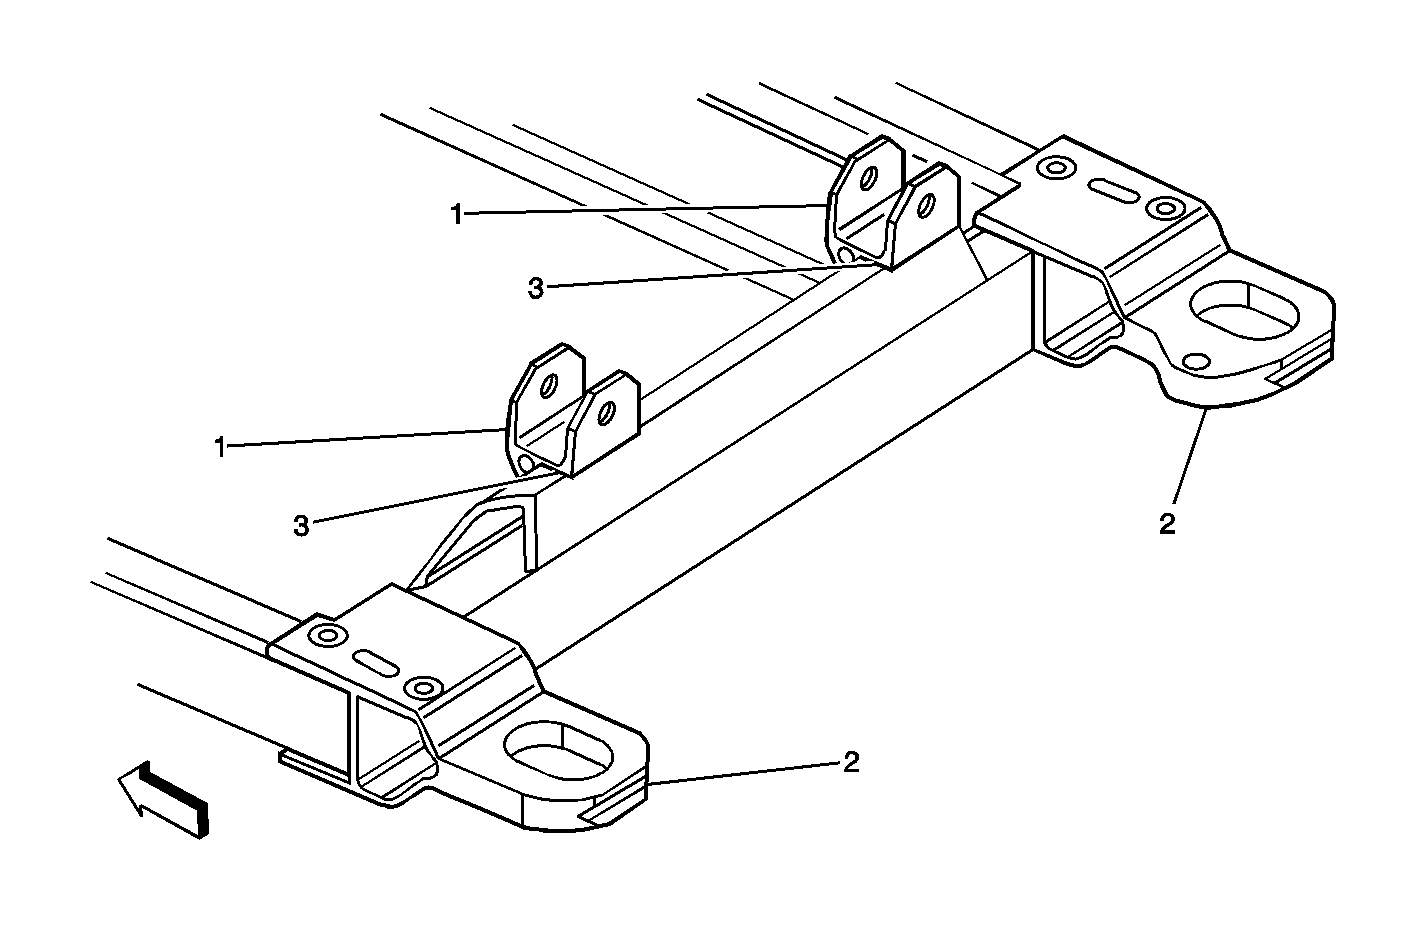
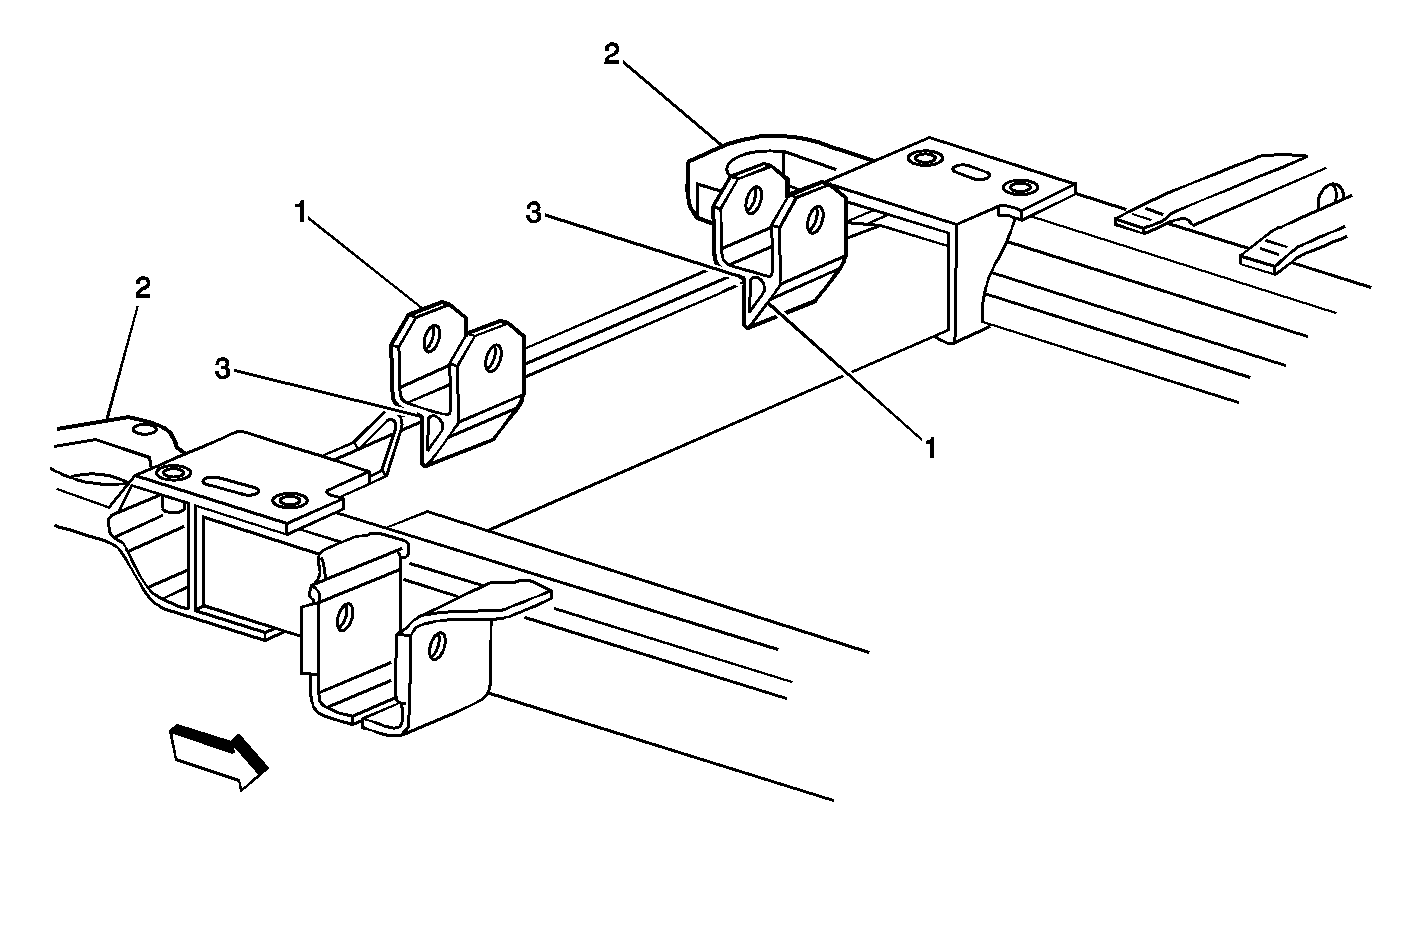
- Using Brake Parts Cleaner, P/N 12346139 (in Canada, use P/N 10953463) or equivalent, thoroughly clean the exterior surfaces of the frame in the area of the steering gear mounting brackets (1) and both the rear body mount brackets (2) ensuring all dust, dirt and oil are removed.
- Utilizing a heat gun and clean rags, completely dry off the areas of the frame that were cleaned.
- On the top surface of the frame rear crossmember at location (3), pool approximately 1/4 ml of threadlocker material on each side of both the steering gear brackets (1).
- Slowly, apply the threadlocker material to each of the four welds on both of the steering gear attaching brackets (1).
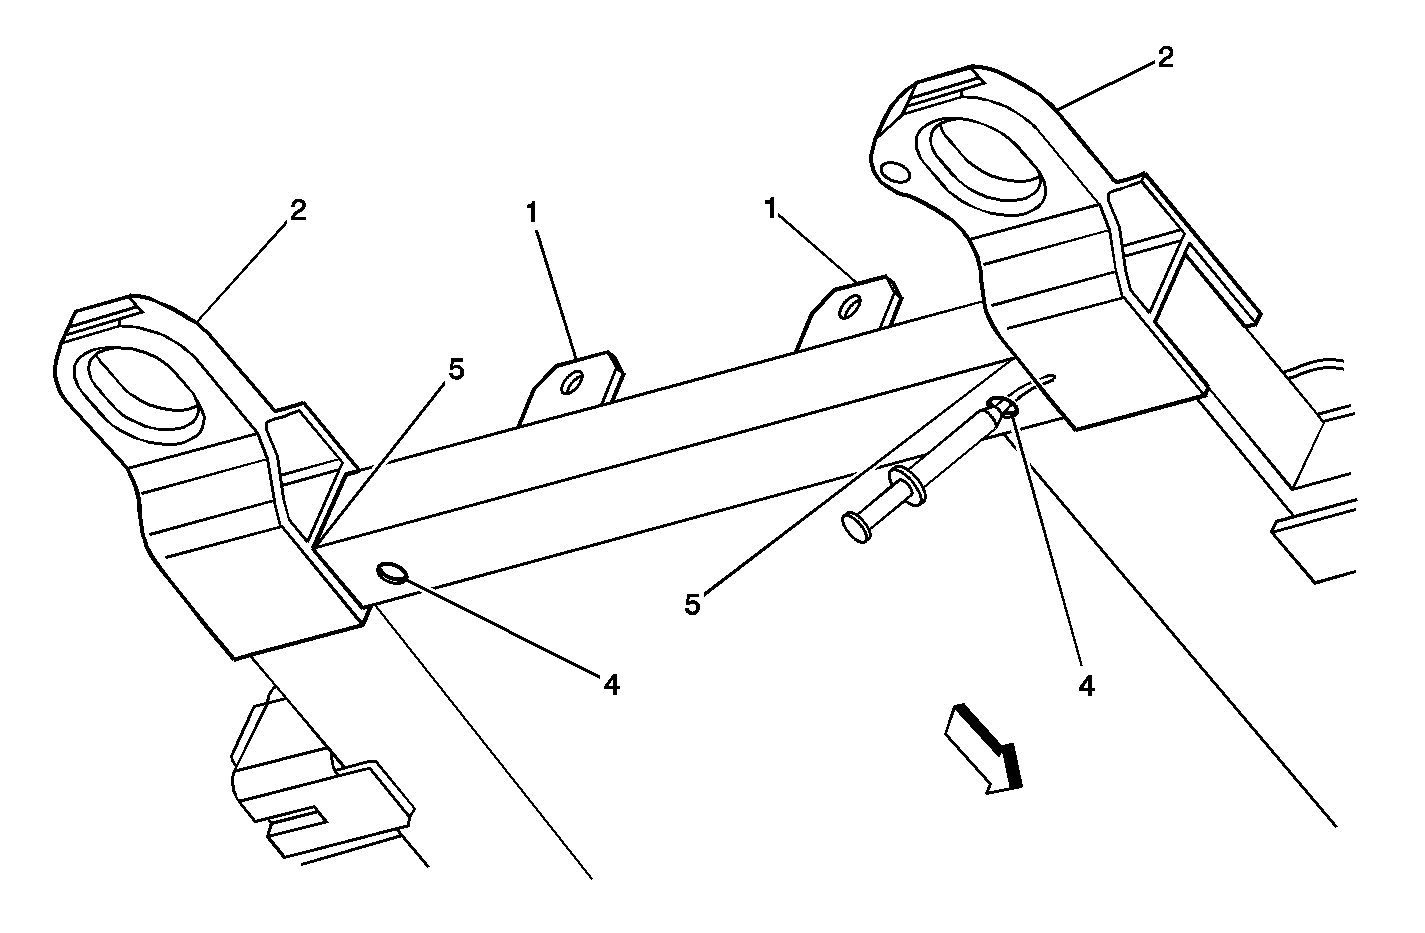
- Locate the two holes (4) in the lower surface of the rear crossmember.
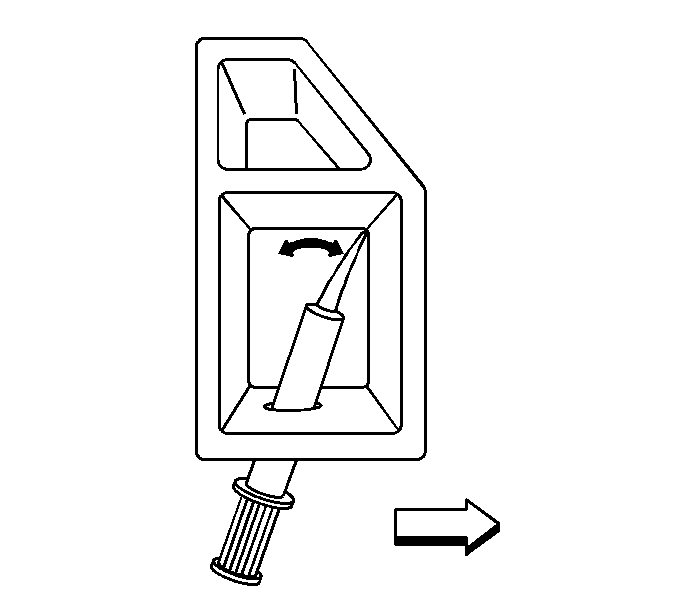
- With syringe positioned through each hole (4) and aimed at the upper outboard corners, pivot the syringe while rapidly depressing the plunger and apply approximately 6 ml of threadlocker material per hole.
- At the location (5) where there is a gap between the rear body mount brackets and the frame rear crossmember, insert the syringe tip and inject approximately 10 ml of threadlocker material into each gap.
- Slowly, apply material to each of the ten welds that secure the rear right and left side body mount brackets (2) to the frame side rails and rear crossmember.
- Lower the vehicle.
- Start the vehicle and turn the steering wheel "lock to lock" 25 times.
- Turn the vehicle off and let it remain stationary in a warm/dry environment for 24 hours prior to returning vehicle to the owner.
Important: Do not spray the Brake Parts Cleaner between the steering gear mounting brackets (1) and the frame (3). The Brake Parts Cleaner may dilute the threadlocker.
Important: Some early built vehicles may not have vertical welds on the steering gear attaching brackets. On these vehicles, the technician must flow material down the bracket on each side where the bracket contacts the rear crossmember.
Important: Do not perform the following step on abrasive/aggressive type surfaces such as rough concrete. Tire flat spotting/scuffing could occur.
Parts Information
Part Number | Description |
|---|---|
J45960 | Frame Noise Service Kit |
Kits are available from Kent Moore and can be ordered by calling 1-800-345-2233. The cost of the kit should be submitted as a net item on warranty claims.
Warranty Information
For vehicles repaired under warranty, use:
Labor Operation | Description | Labor Time |
|---|---|---|
E1860 | Frame Assembly - Repair | 0.6 hr |
