For 1990-2009 cars only
Removal Procedure
Important: Clean the fuel and evaporative emission (EVAP) connections and surrounding areas prior to disconnecting the lines in order to avoid possible system contamination.
- Relieve the fuel system pressure. Refer to Fuel Pressure Relief .
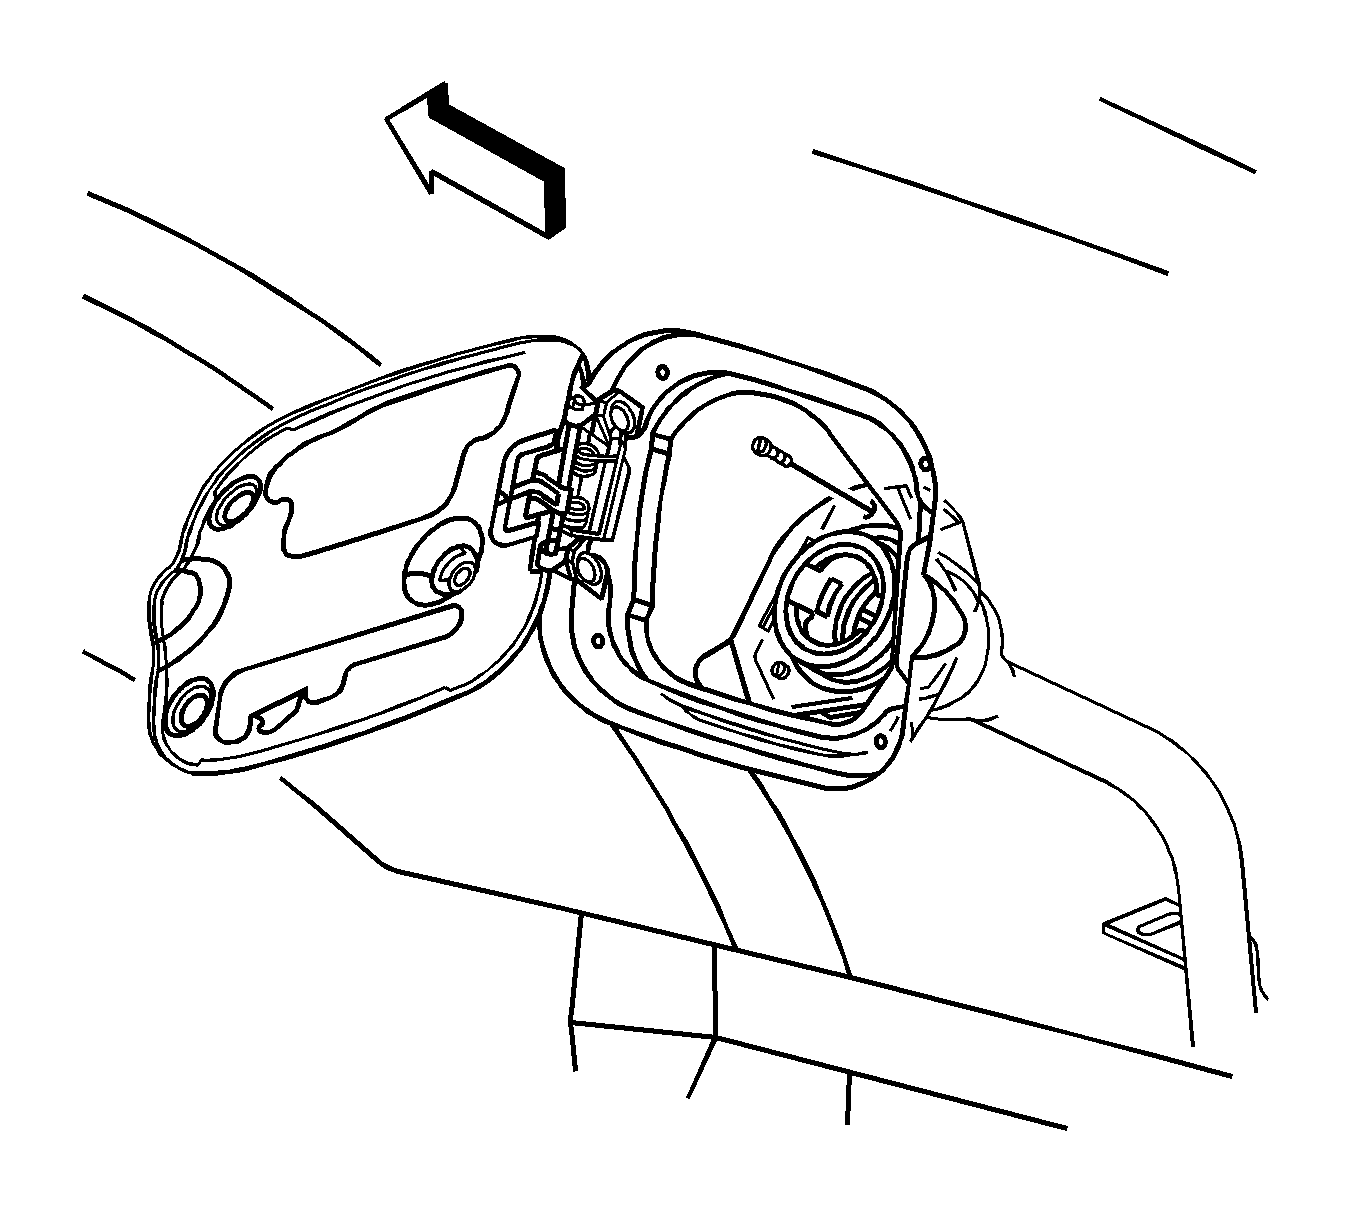
- Remove the fuel fill pipe screws from the fuel filler pocket.
- Raise and support the vehicle. Refer to Lifting and Jacking the Vehicle .
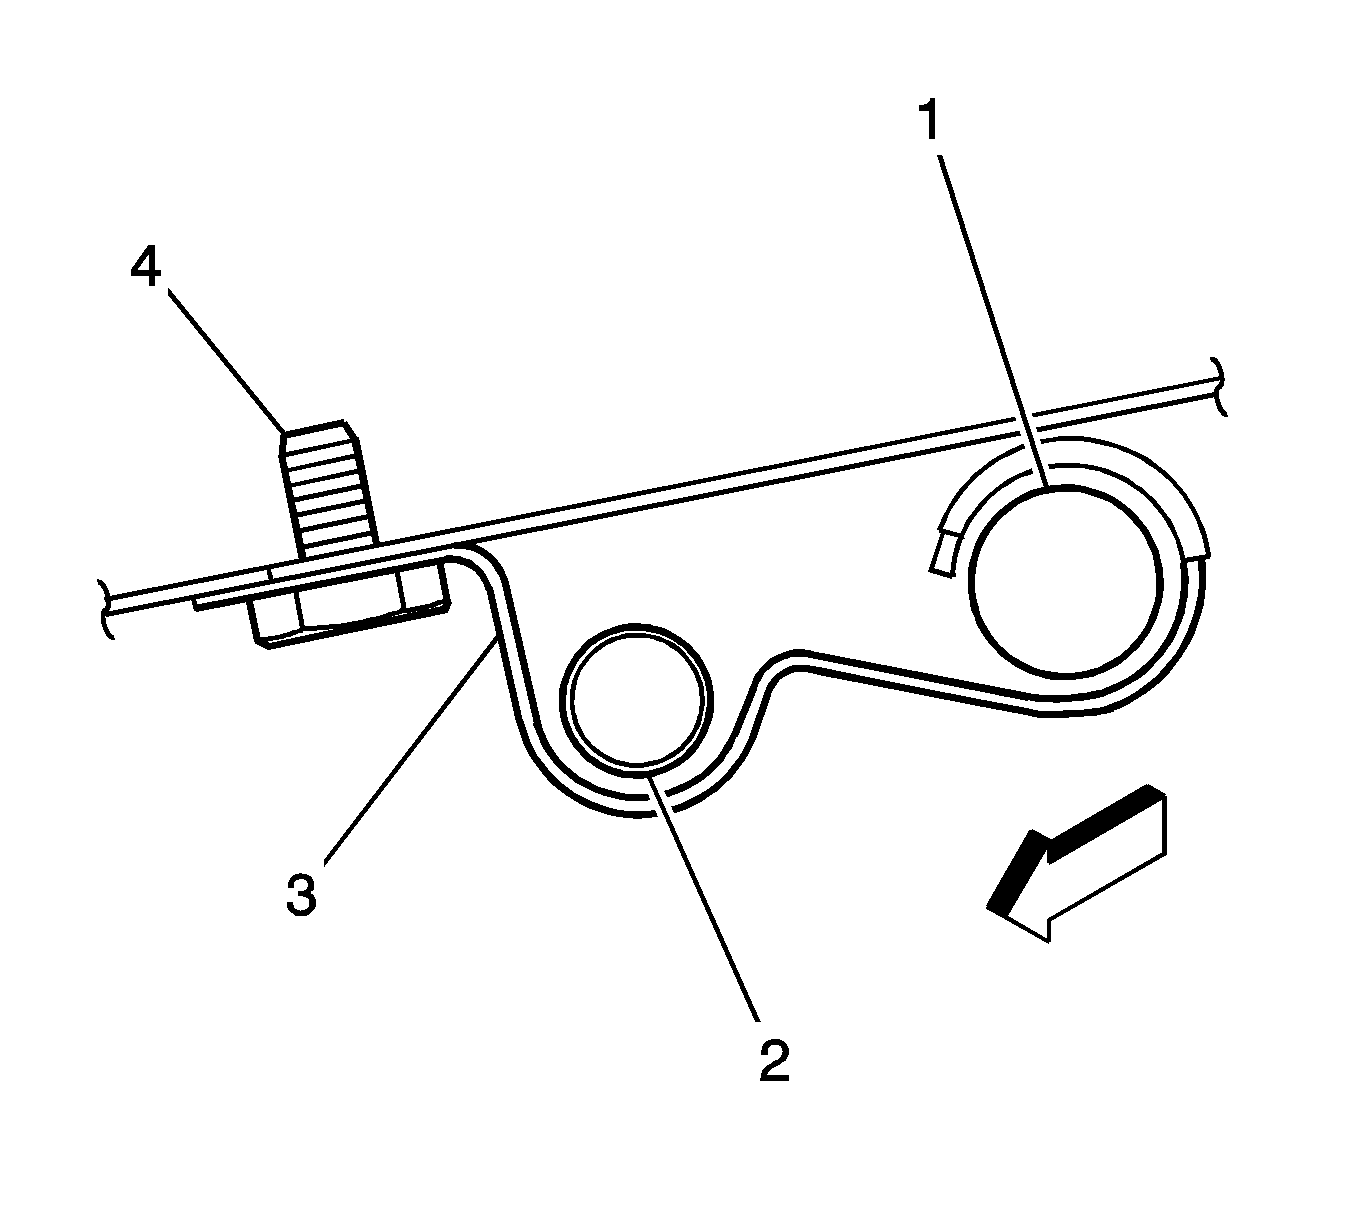
- Remove the fill pipe bracket bolt (4) from the underbody rail.
- Remove the EVAP line (2) from the bracket (3).
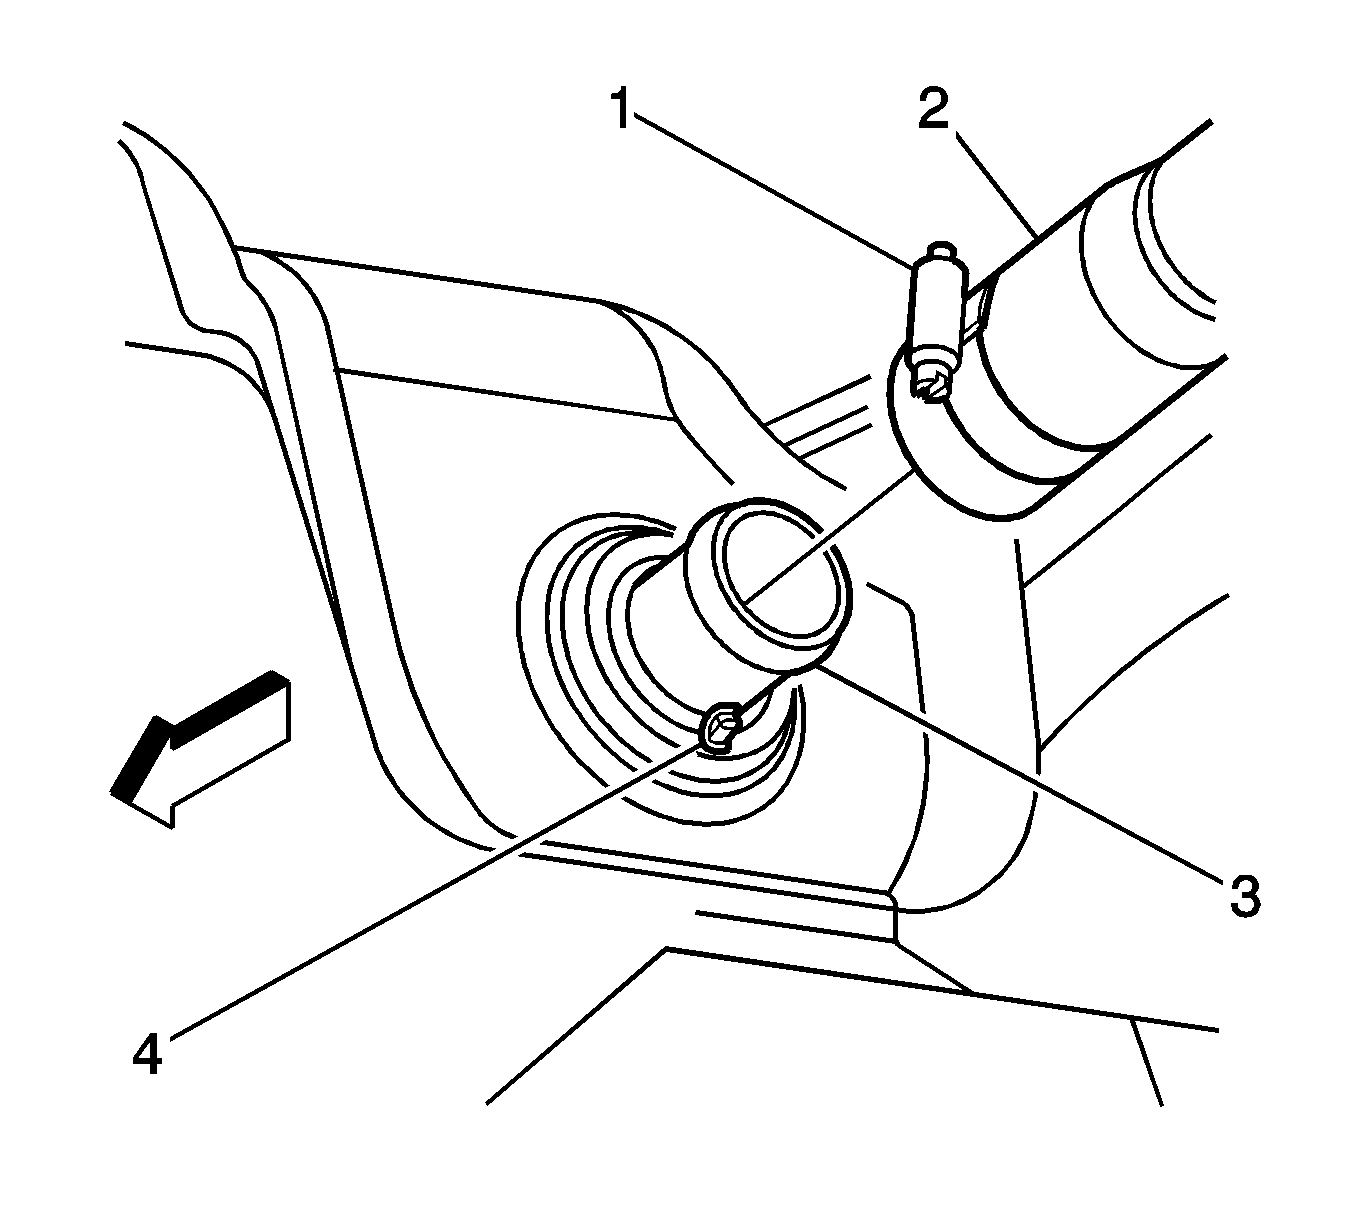
- Loosen the fuel fill pipe clamp (1) at the fuel tank.
- Remove the fuel fill pipe hose (2) from the fuel tank (3).
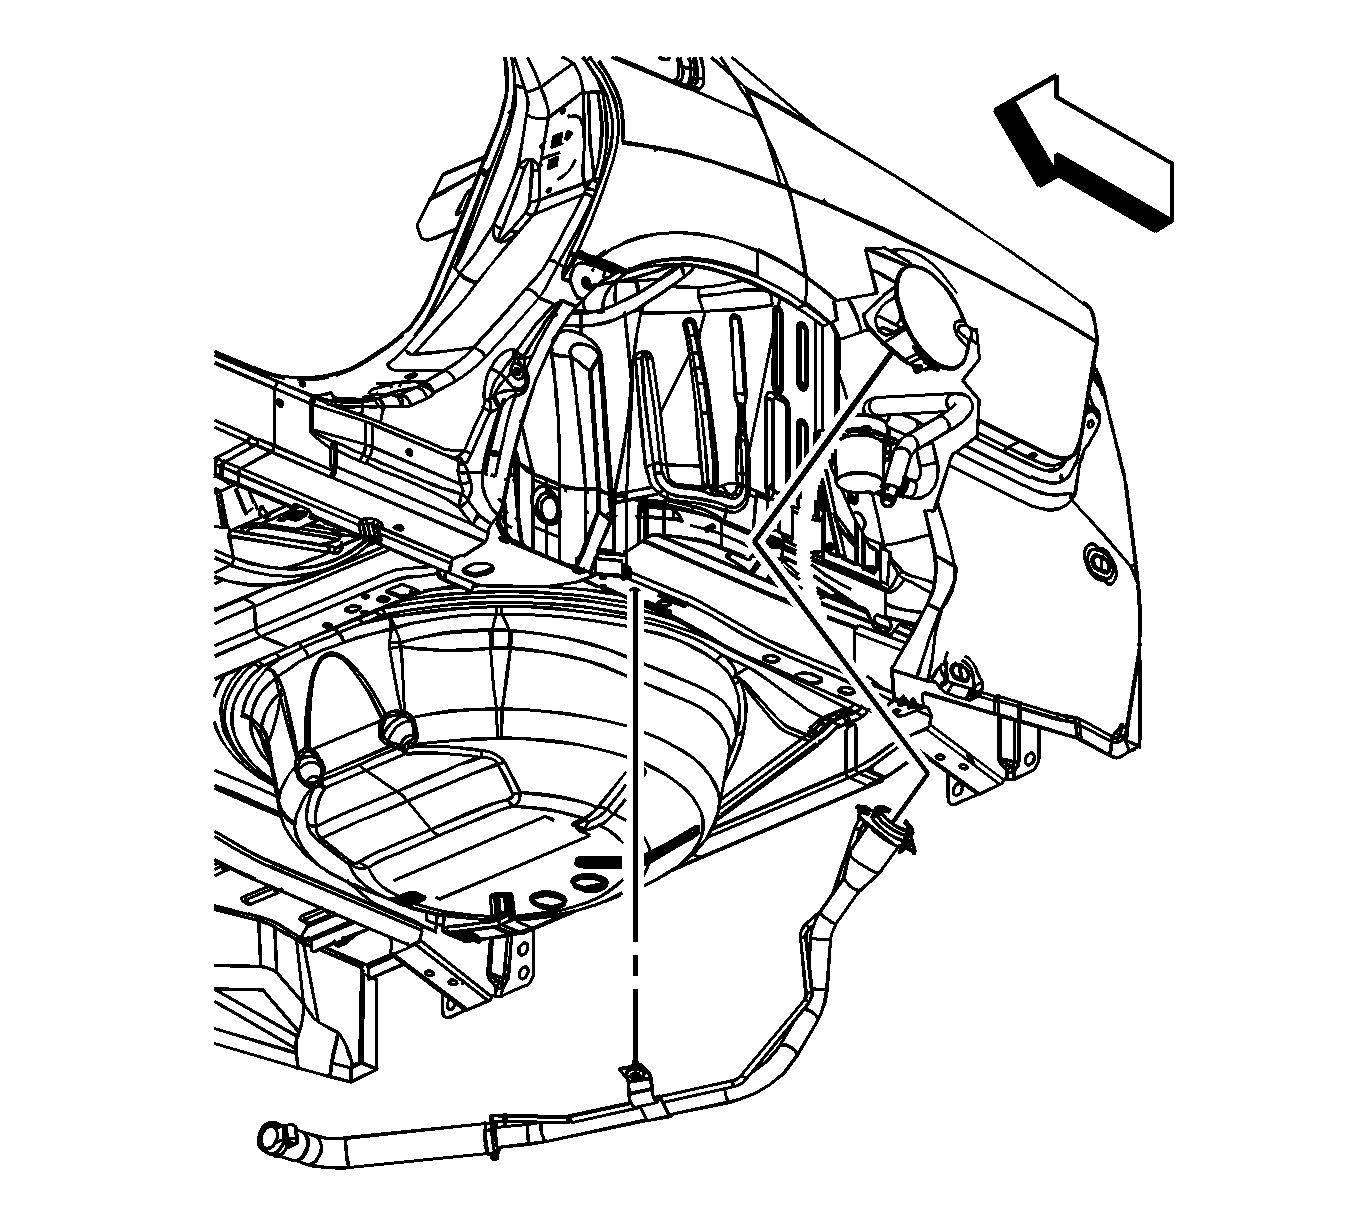
- Disconnect the vent pipe quick connect fitting from the fuel tank vent pipe quick connect fitting. Refer to Plastic Collar Quick Connect Fitting Service .
- Remove the fuel tank fill pipe.


Installation Procedure
- Install the fuel tank fill pipe.
- Install the fuel tank fill pipe hose (2) onto the fuel tank (3)
- Connect the vent pipe quick connect fitting to the fuel tank vent pipe quick connect fitting. Refer to Plastic Collar Quick Connect Fitting Service .
- Tighten the fuel fill pipe clamp (1) at the fuel tank.
- Install the EVAP line (2) to the bracket (3).
- Install the fill pipe bracket bolt (4) to the underbody rail.
- Lower the vehicle.
- Install the fuel fill pipe screws to the fuel filler pocket.


Notice: Refer to Fastener Notice in the Preface section.
Tighten
Tighten the clamp to 2.5 N·m (22 lb in).

Tighten
Tighten the bolt to 13 N·m (115 lb in).

Tighten
Tighten the screws to 2.5 N·m (22 lb in).
