For 1990-2009 cars only
Removal Procedure
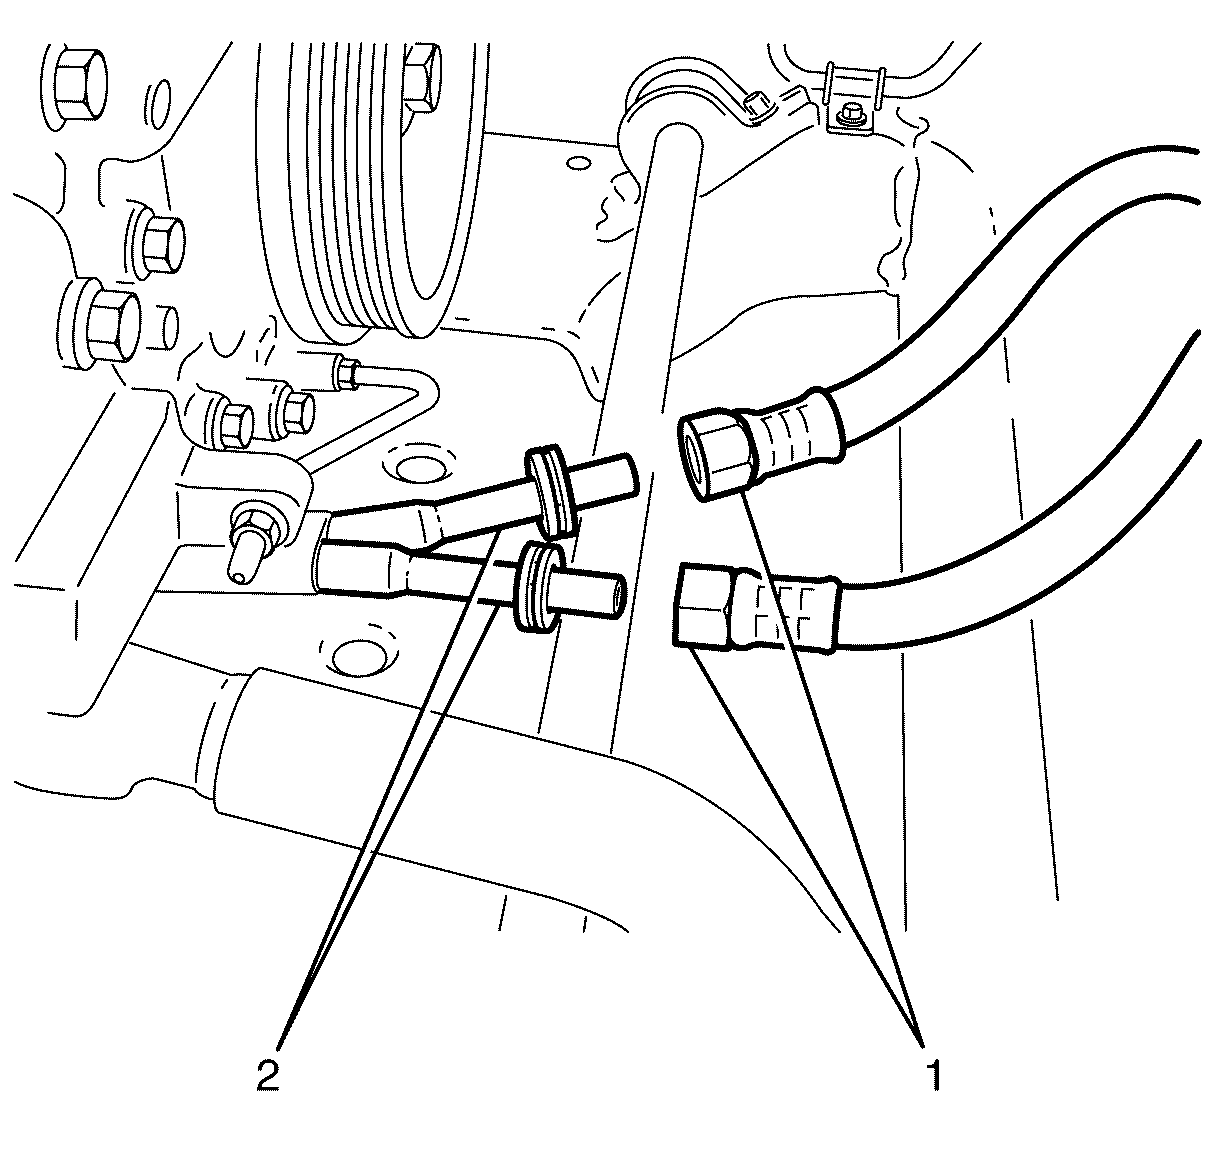
- Disconnect the automatic transmission cooler pipe (2) from the flexible hose (1) at the quick connect fitting using tool AU525.
- Raise and support the vehicle. Refer to Lifting and Jacking the Vehicle.
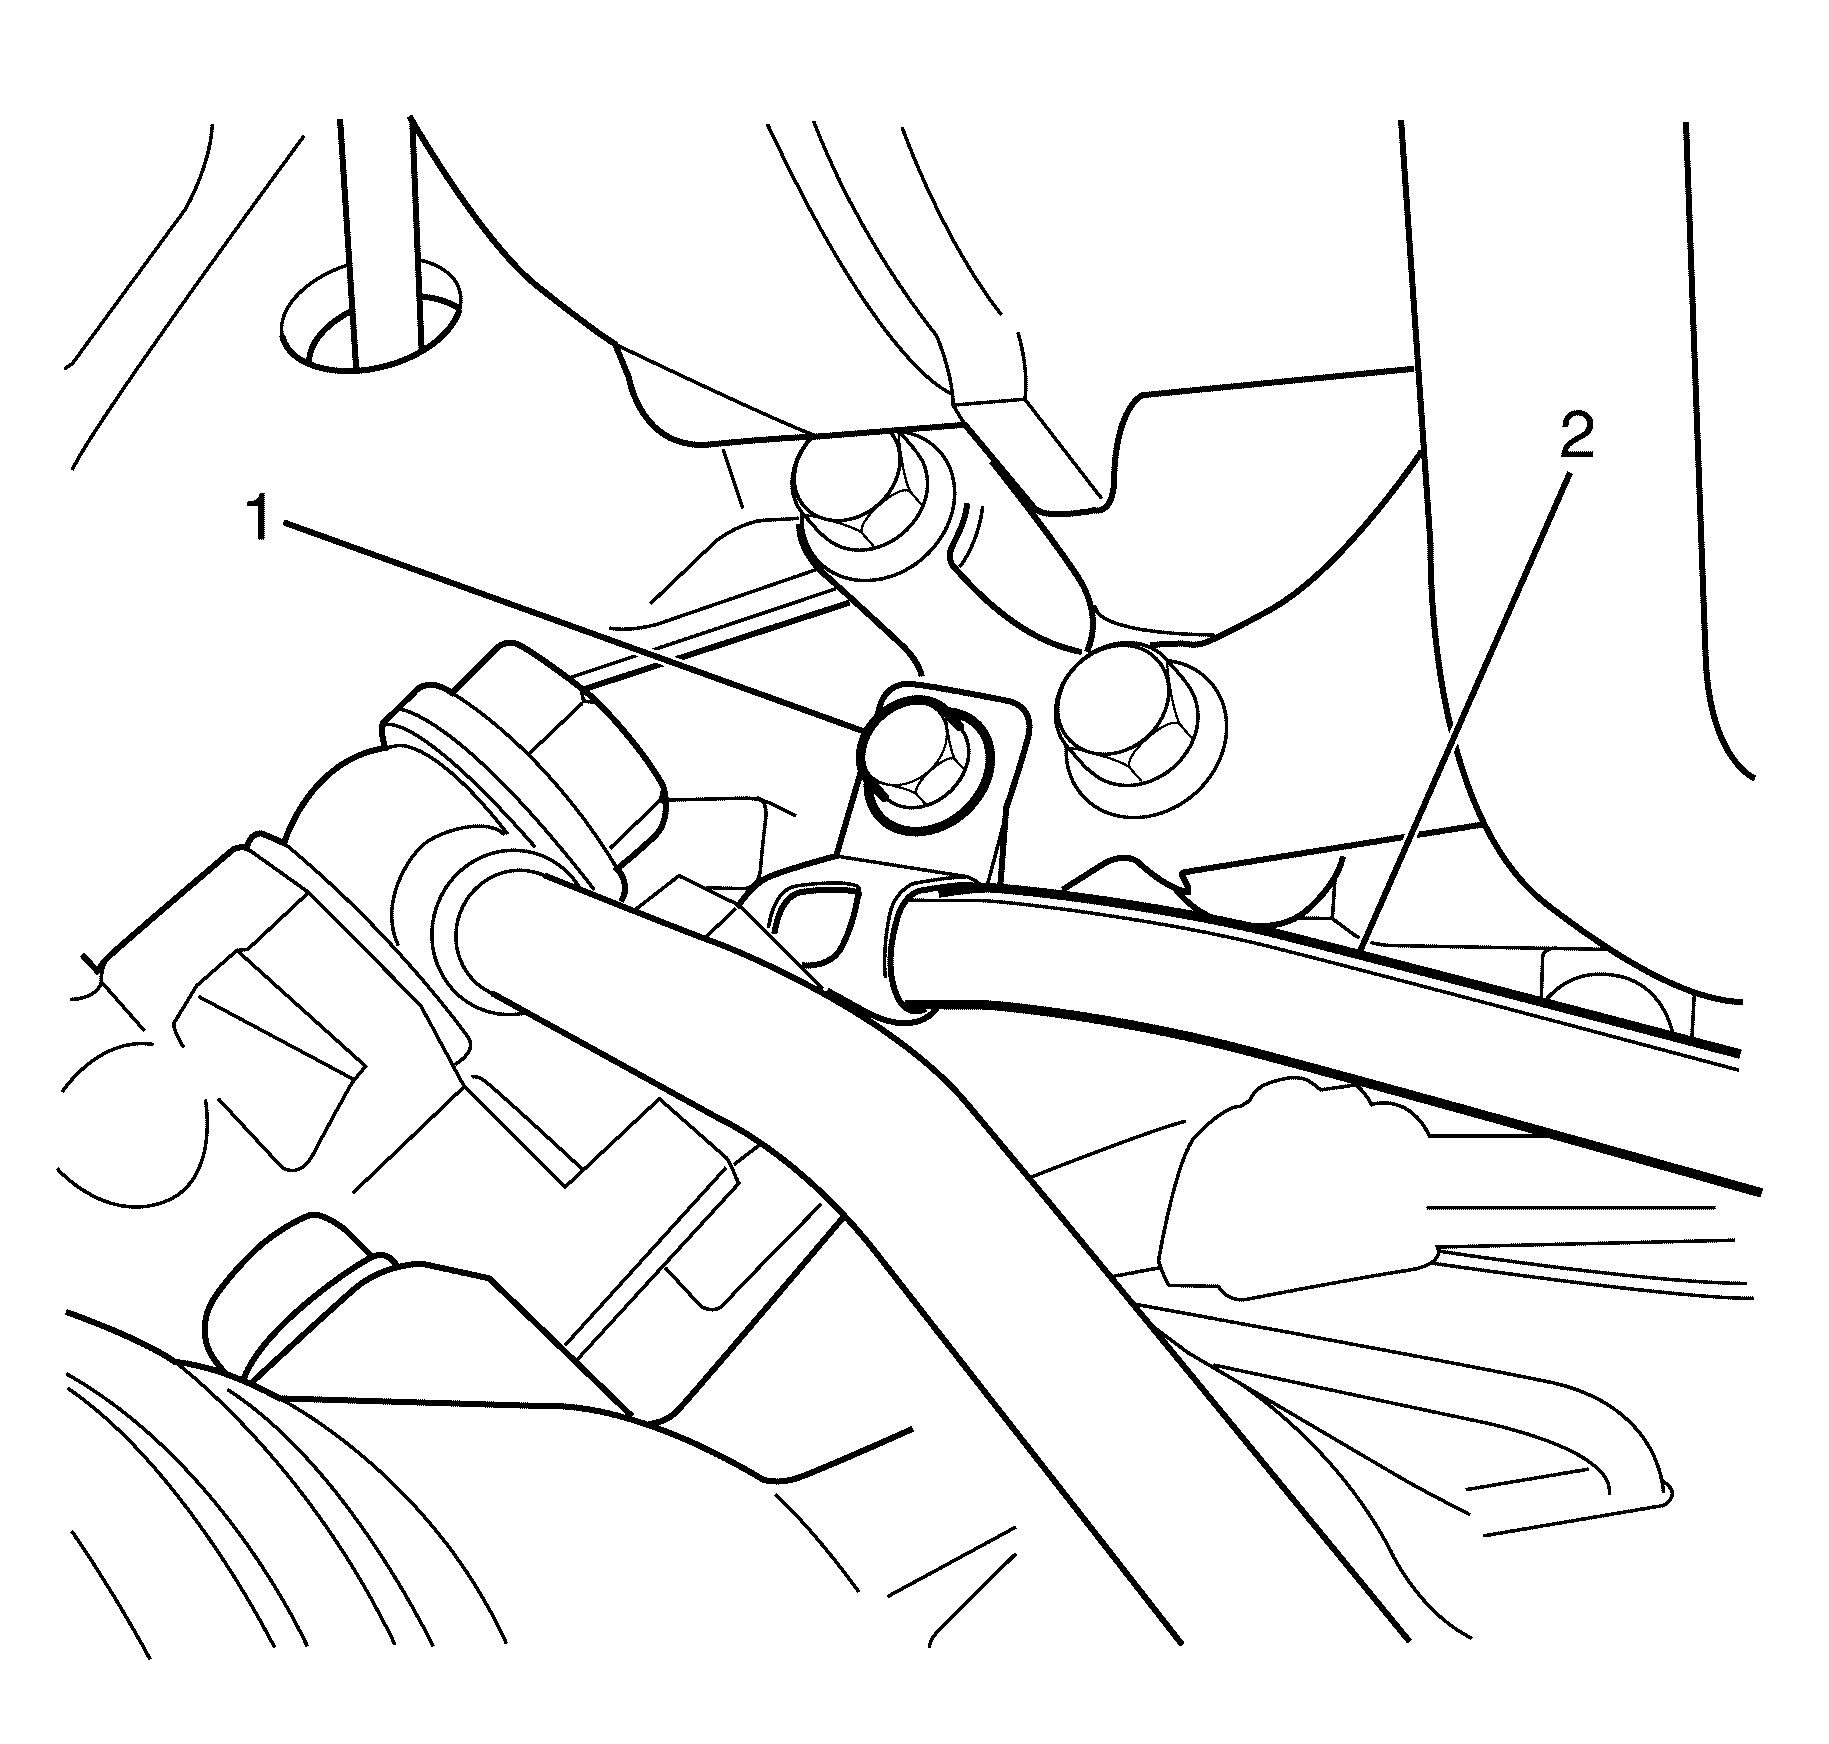
- Remove the automatic transmission cooler pipe clamp to A/C bracket retaining bolt (1).
- Position the automatic transmission cooler pipes (2) aside.
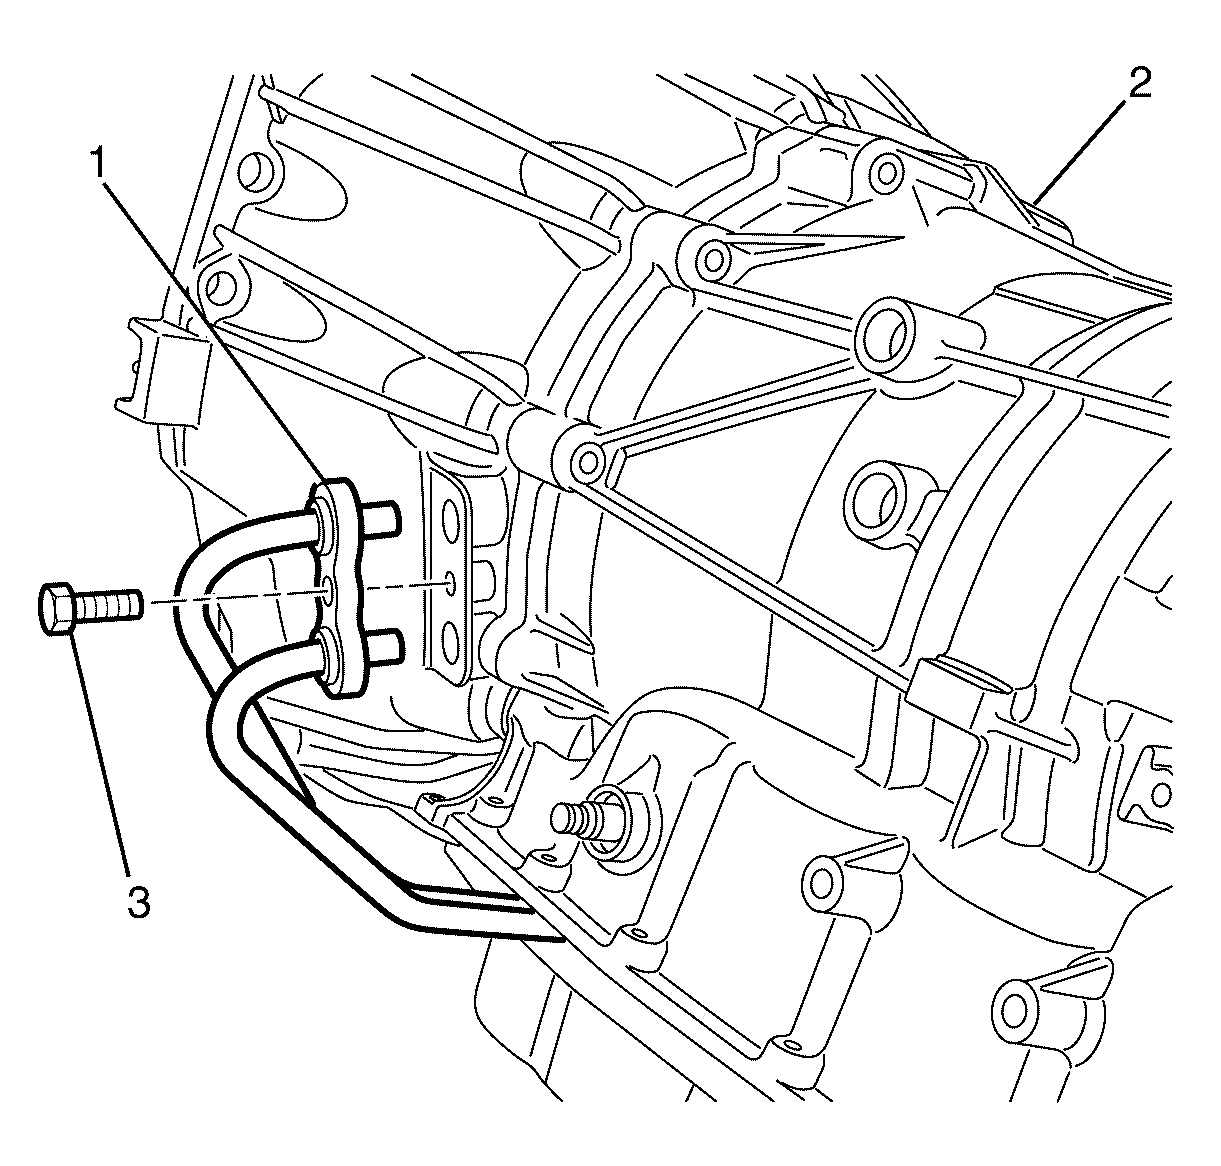
- Remove the automatic transmission cooler pipe retaining bolt (3).
- Remove the automatic transmission cooler pipes (1) from the transmission (2).
- Remove the automatic transmission cooler pipes from the vehicle.

| • | Open release tool AU525 then close and clip around the hose to be disconnected. |
| • | While holding the flexible hose (1) push the hose inwards with one hand, then pull back to separate from the steel hose piping (2). |
| • | Repeat for the second fitting. |


Installation Procedure
- Install the automatic transmission cooler pipes to the vehicle.
- Install the automatic transmission cooler pipes (1) to the transmission (2).
- Install the automatic transmission cooler pipe retaining bolt (3).
- Position the automatic transmission cooler pipes (2) to the engine.
- Install the automatic transmission cooler pipe clamp to A/C bracket retaining bolt (1).
- Lower the vehicle
- Align both flexible hose's (1) with both steel cooler lines (2).
- Hold the cooler line (2) and connect the flexible hose (1) by pushing together. Repeat procedure for other hose.
- Check automatic transmission fluid level. Refer to Transmission Fluid Check.

Tighten
Tighten the bolt to 20 N·m (15 lb ft).

Tighten
Tighten the bolt to 22 N·m (16 lb ft).

Important: The flexible hoses are not serviced separately. Therefore if the hose's require replacement, then the hose and radiator to hose cooler hose assembly must be fitted.
Important: Listen for an audible click to confirm fitting.
Important: When adding or changing transmission fluid only use recommended automatic transmission fluid.
