Mainshaft
Tools Required
| • | J 36513 Split Plate. |
| • | J 39442 Press Adapter. |
| • | J 39443 Split Plate. |
| • | J 39473 Mainshaft Bearing Installer. |
- Install the input shaft in the adapter plate.
- Install the mainshaft on the input shaft.
- Using a feeler gauge measure the gap between the 4th speed gear blocking ring and the 4th speed gear.
- Replace the 4th speed gear friction cone and blocking ring when the gap is less than 0.38 mm (0.010 in).
- Using the J 36513 close the split plate only enough to support the gear teeth, and the J 39442 :
- If an O-ring is present on the mainshaft, remove and discard the O-ring.
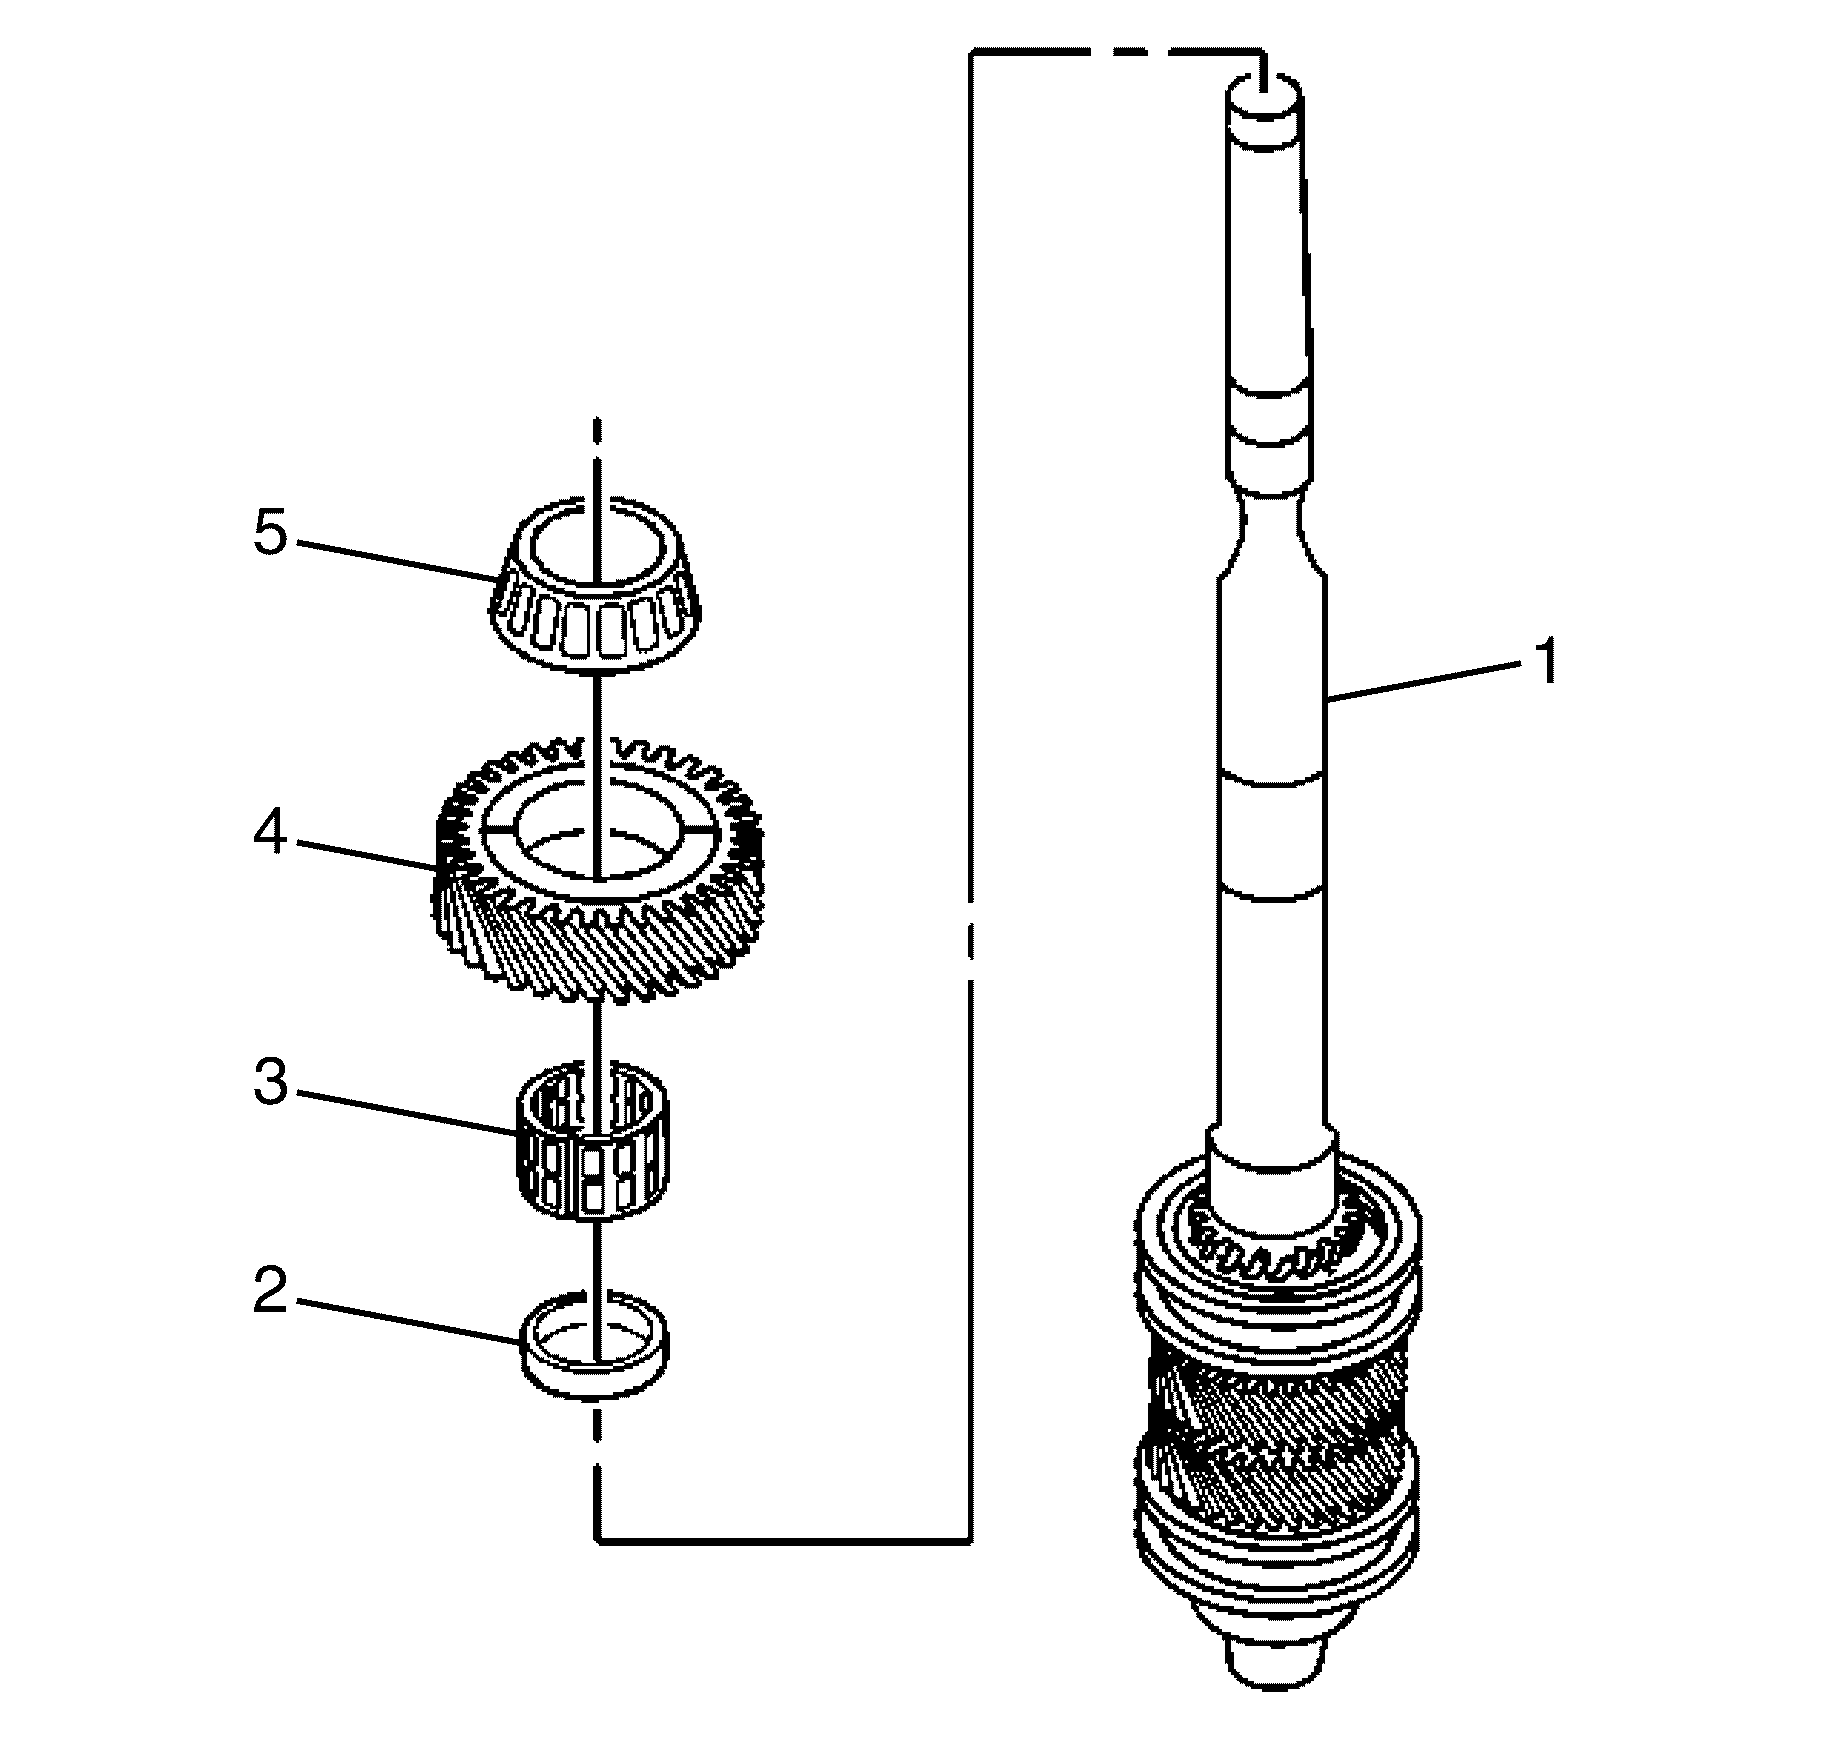
- Remove the mainshaft tapered bearing (5) from the mainshaft (1) by sliding off.
- Remove the 1st speed gear (4) from the mainshaft (1) by sliding off.
- Remove the 1st speed gear caged needle bearing (3) from the mainshaft (1).
- Remove the 1st speed gear bearing spacer (2) from the mainshaft (1).
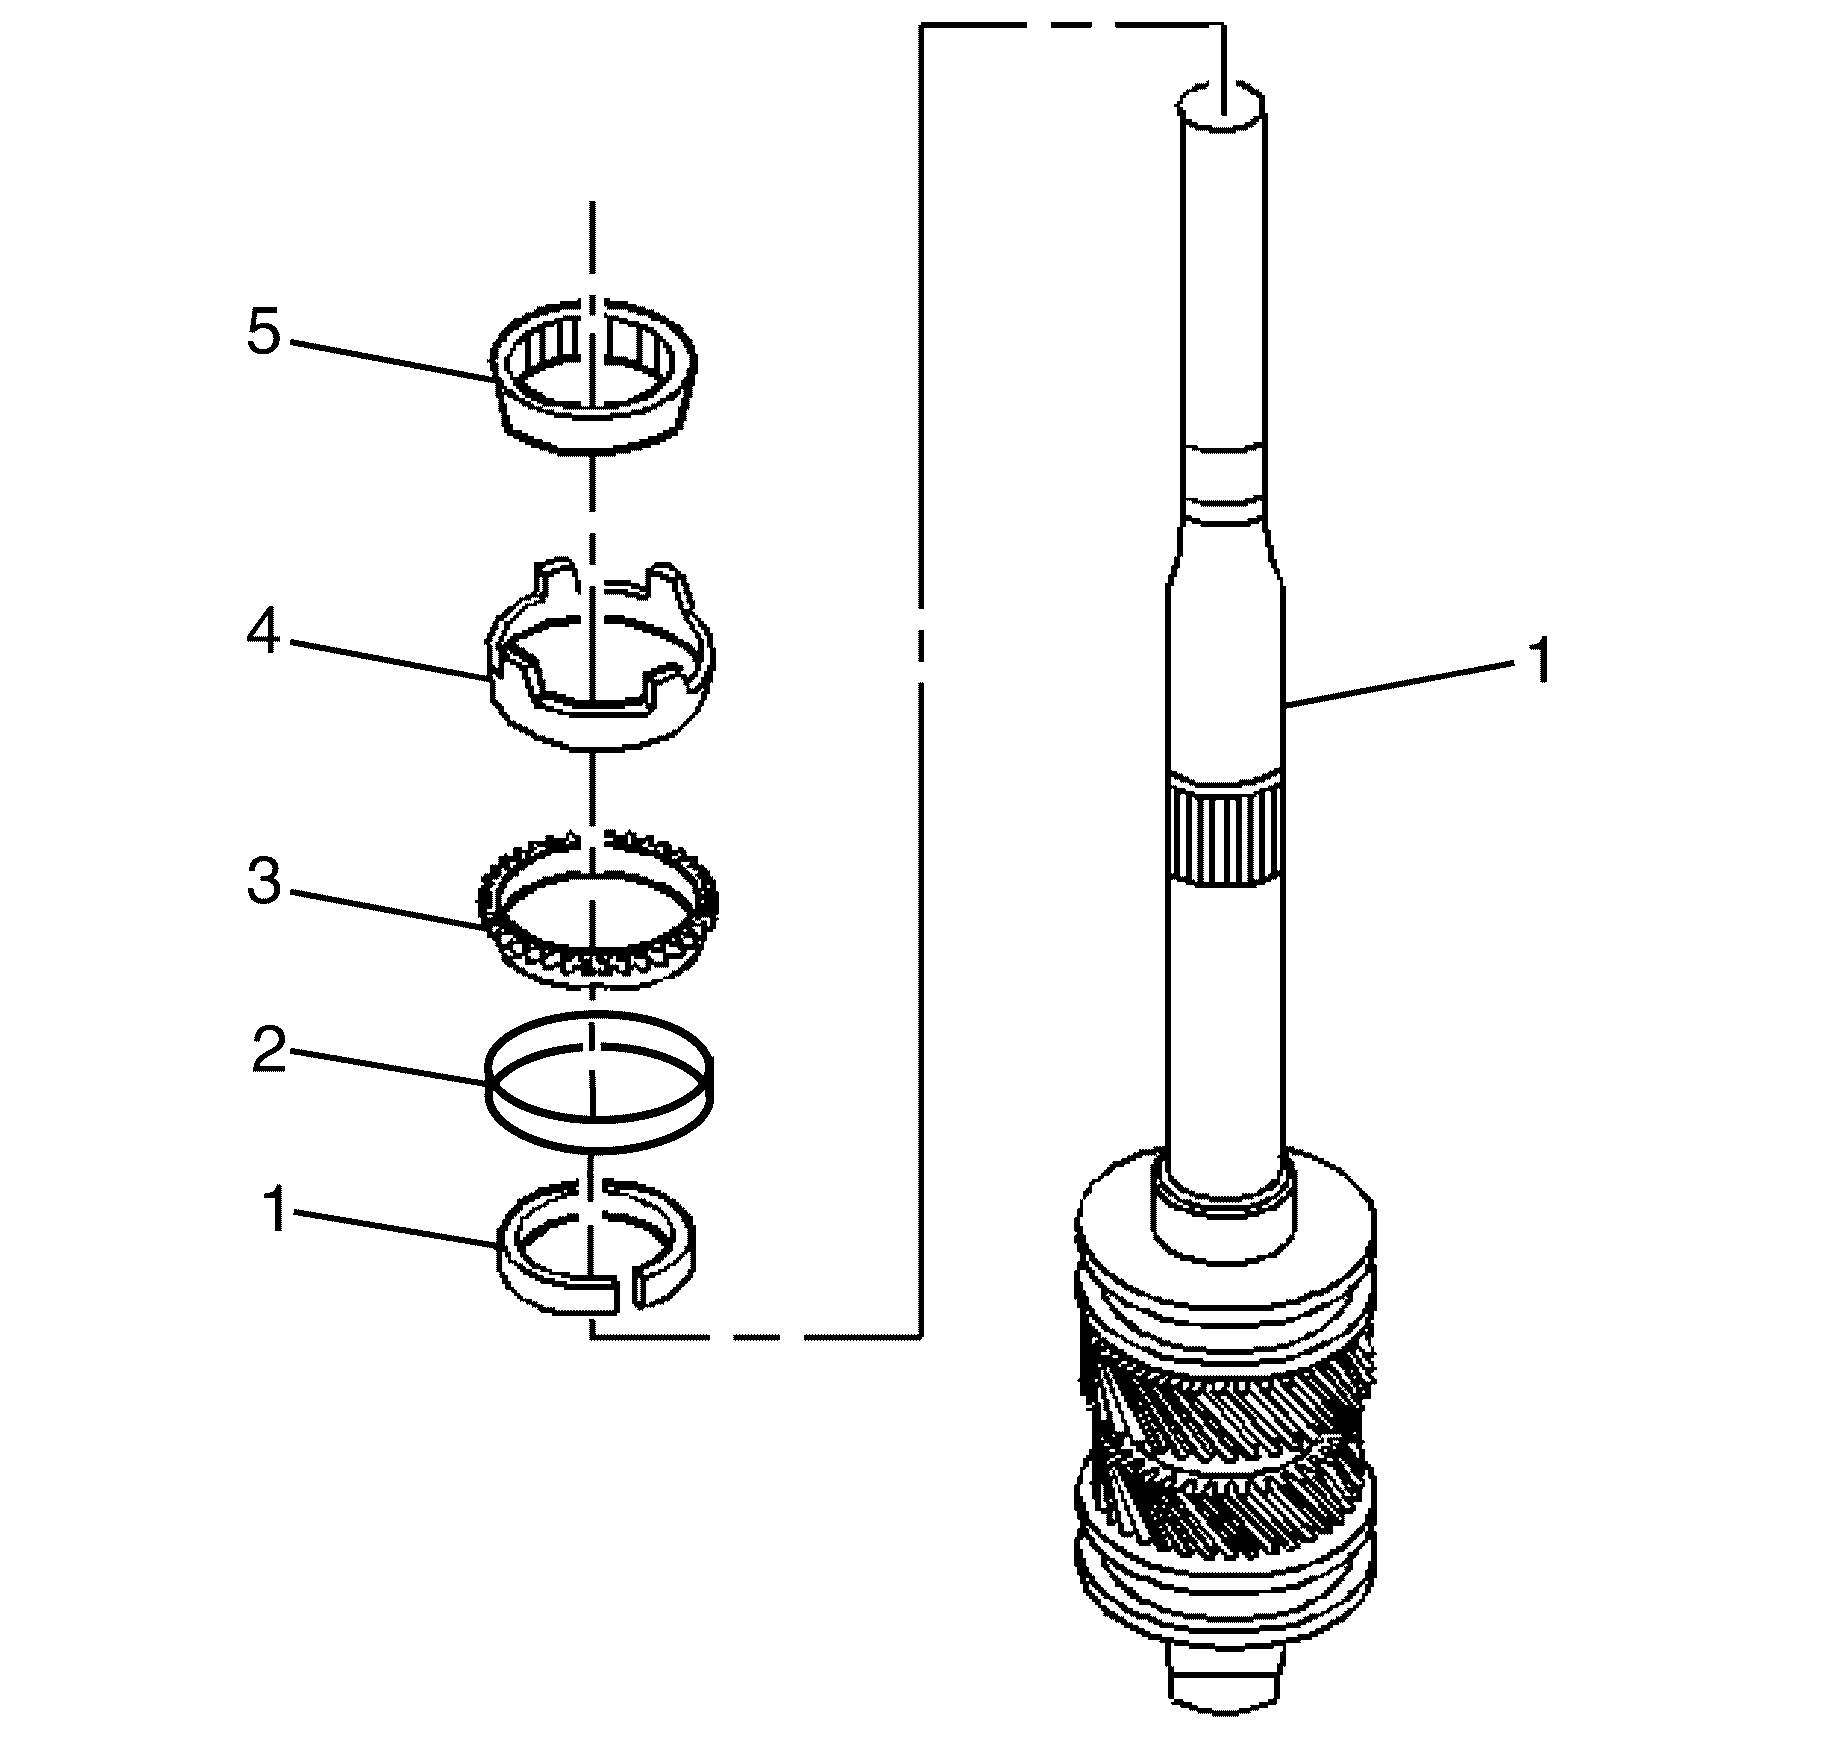
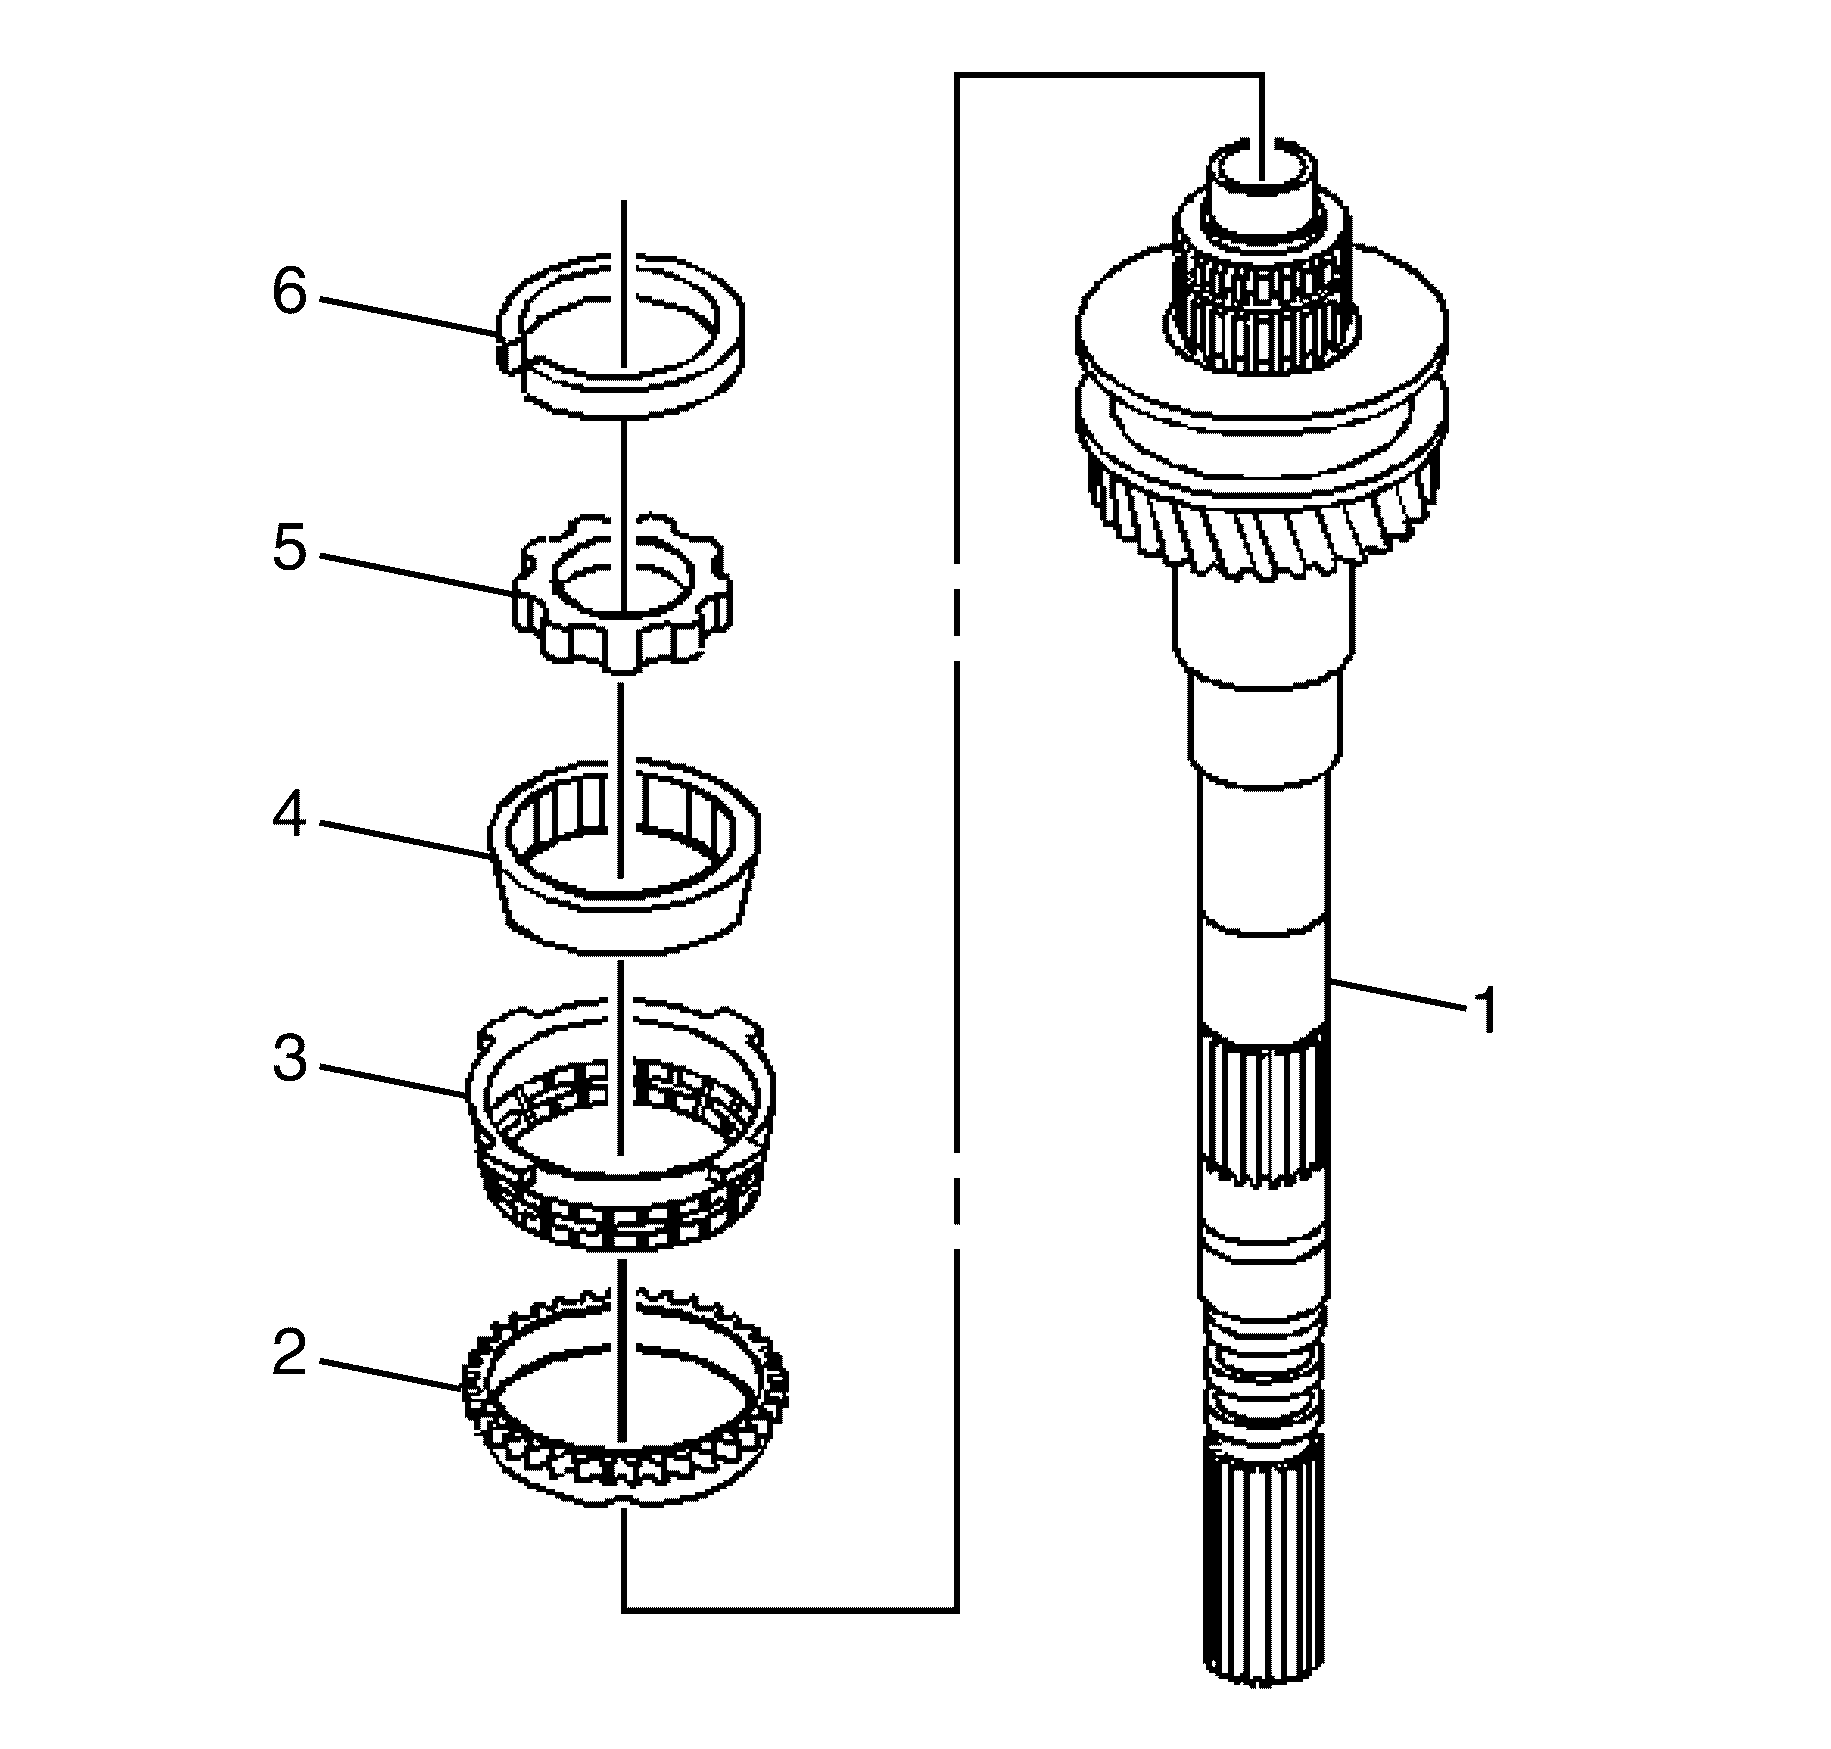
- Remove the split washer retainer (2) from the mainshaft (1).
- Remove the split washers (3) from the mainshaft (1).
- Remove the 1st speed gear inner cone (4) from the mainshaft (1).
- Remove the 1st speed gear friction cone (5) from the mainshaft (1).
- Remove the 1st speed gear blocking ring (6) from the mainshaft (1).
- Scribe a mark on the synchronizer hub and on the sleeve. This will help you to reinstall the parts in the same position.
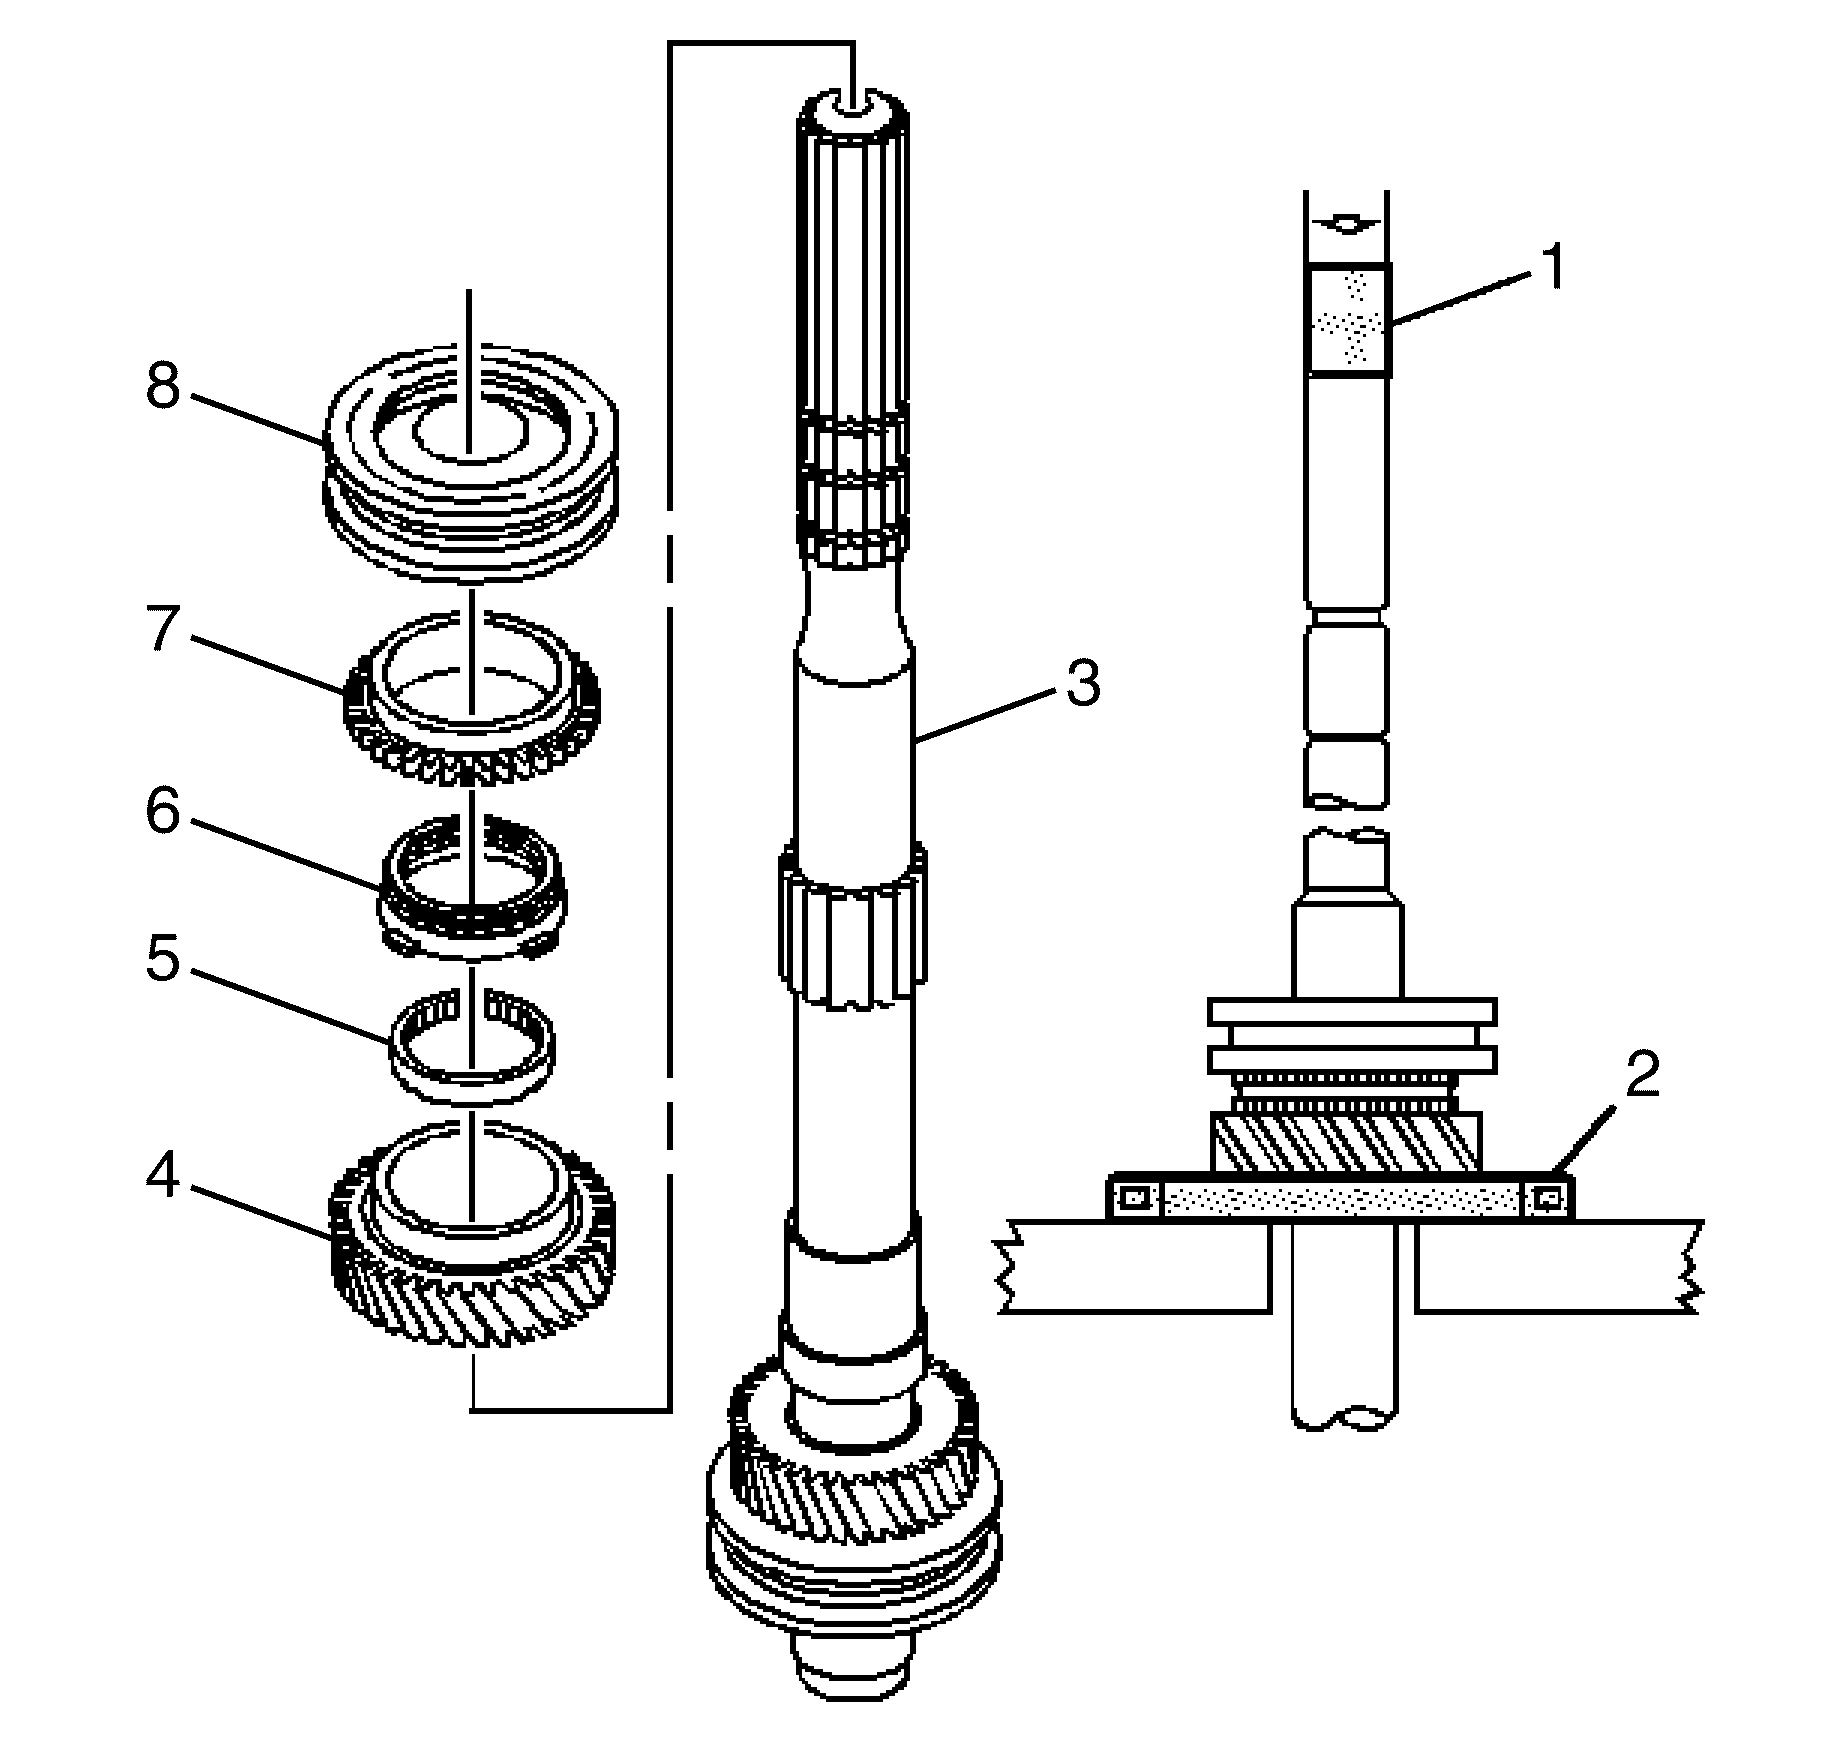
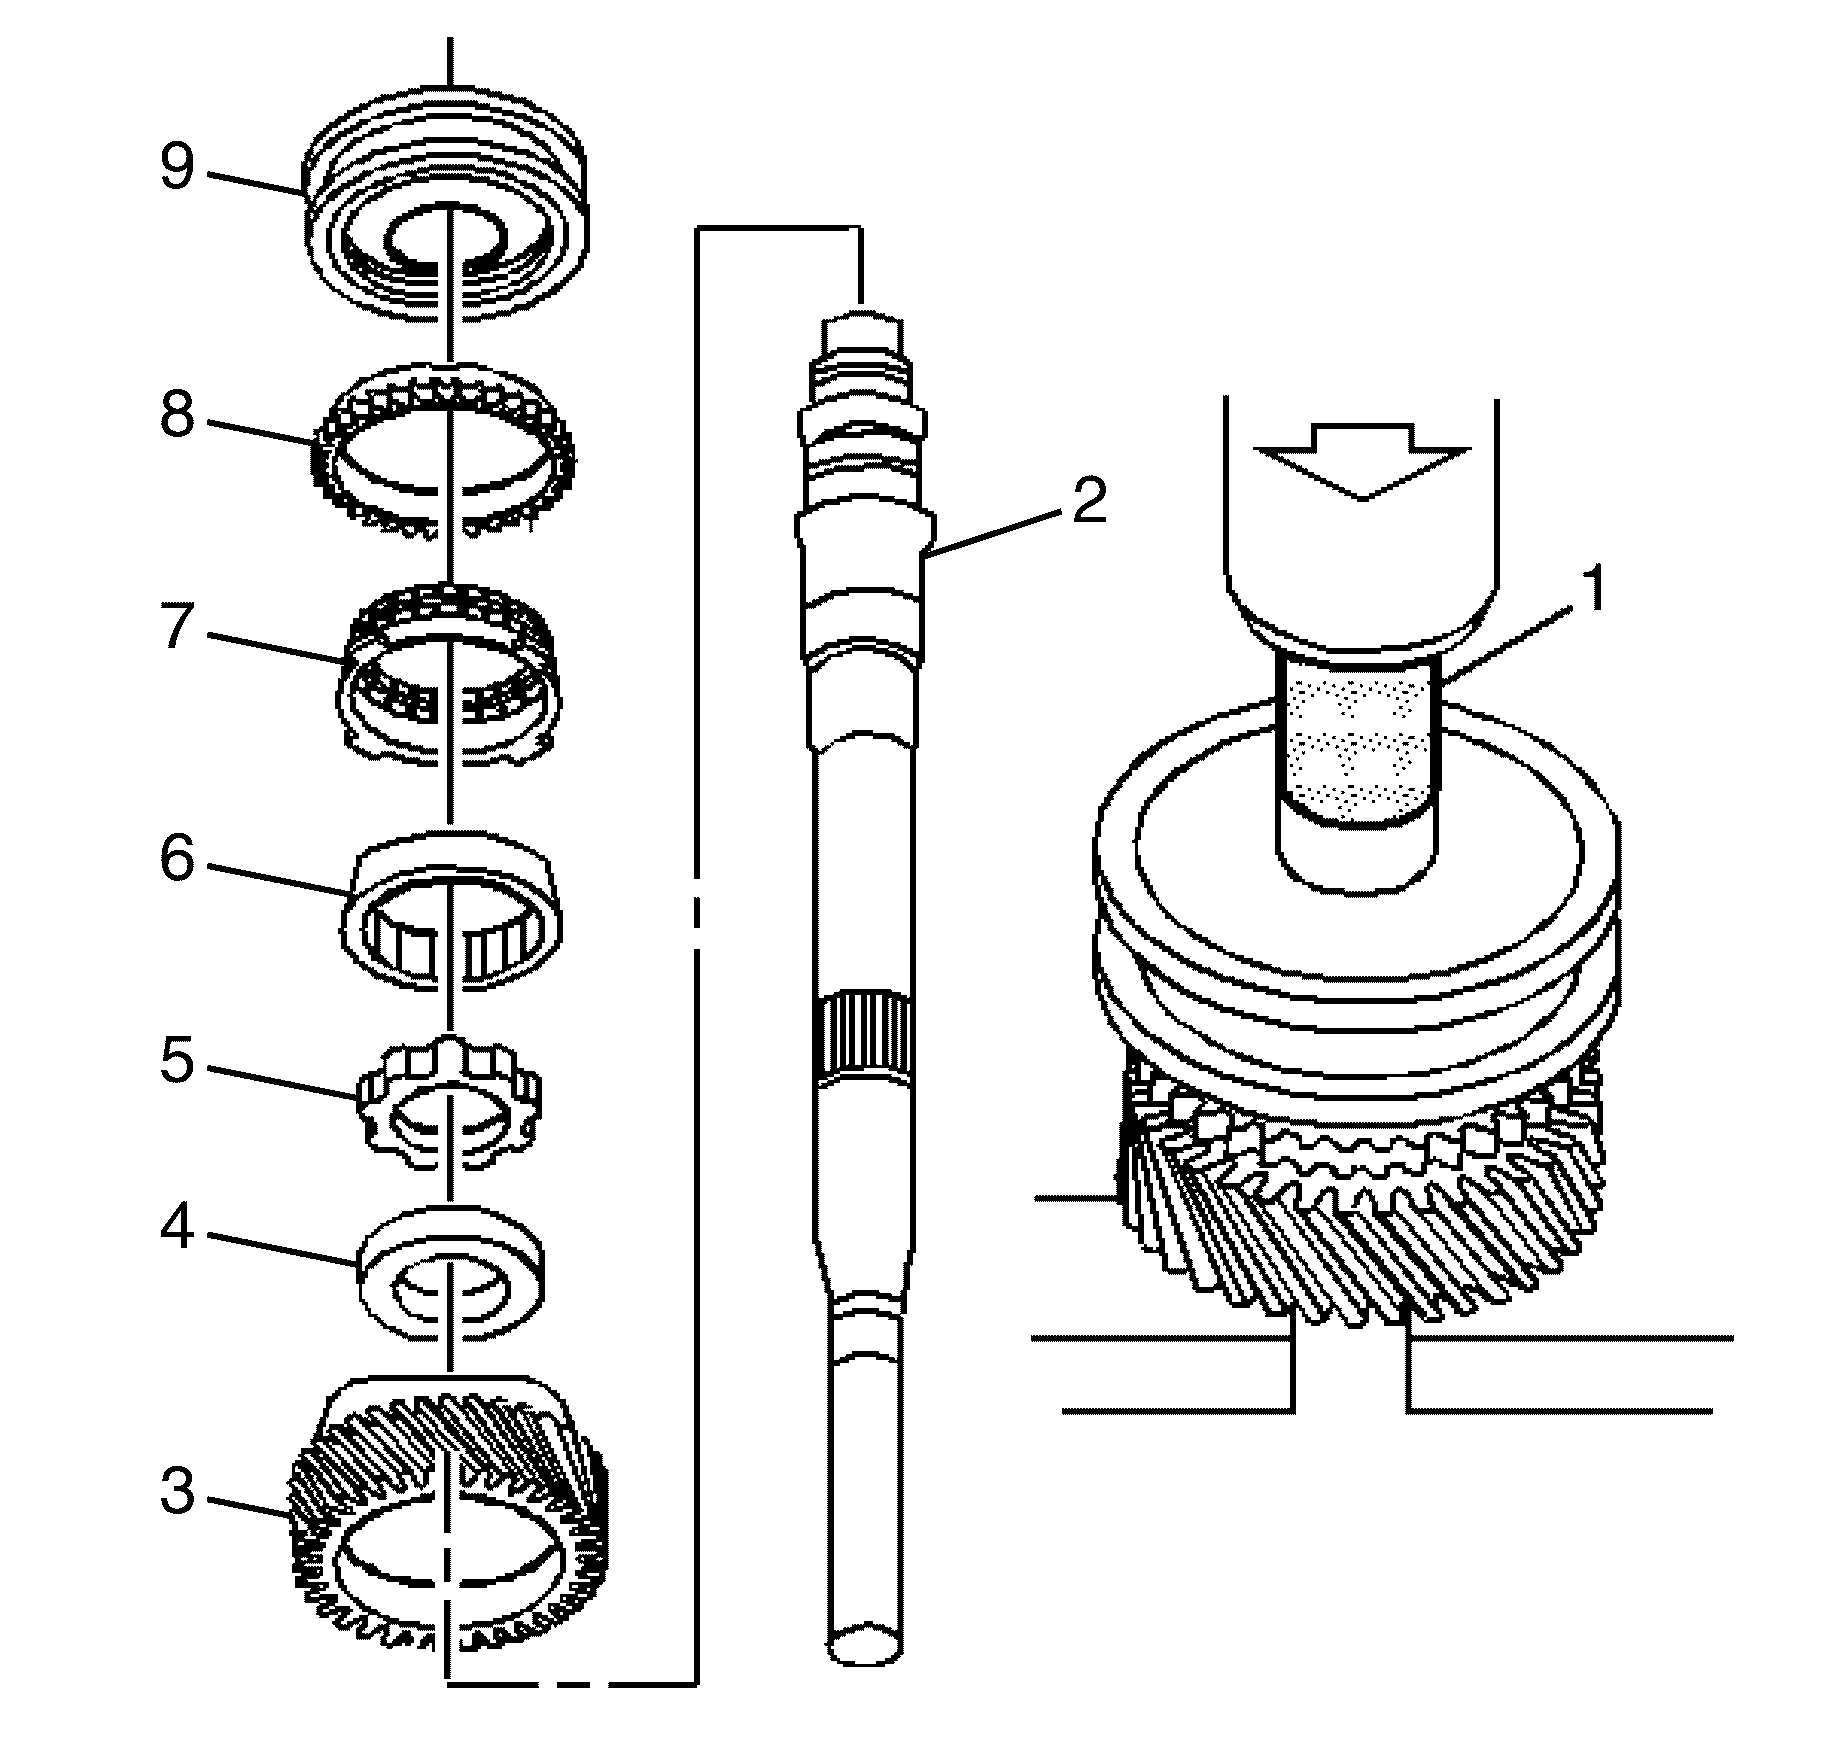
- Remove the 2nd speed gear (4). The 1st/2nd speed synchronizer assembly (8), the 2nd speed gear blocking ring (7), the 2nd speed gear friction cone (6), and the 2nd speed gear inner cone (5) will press off with the 2nd speed gear (4). Use the J 36513 (2) in an inverted position, J 39442 (1) and a hydraulic press.
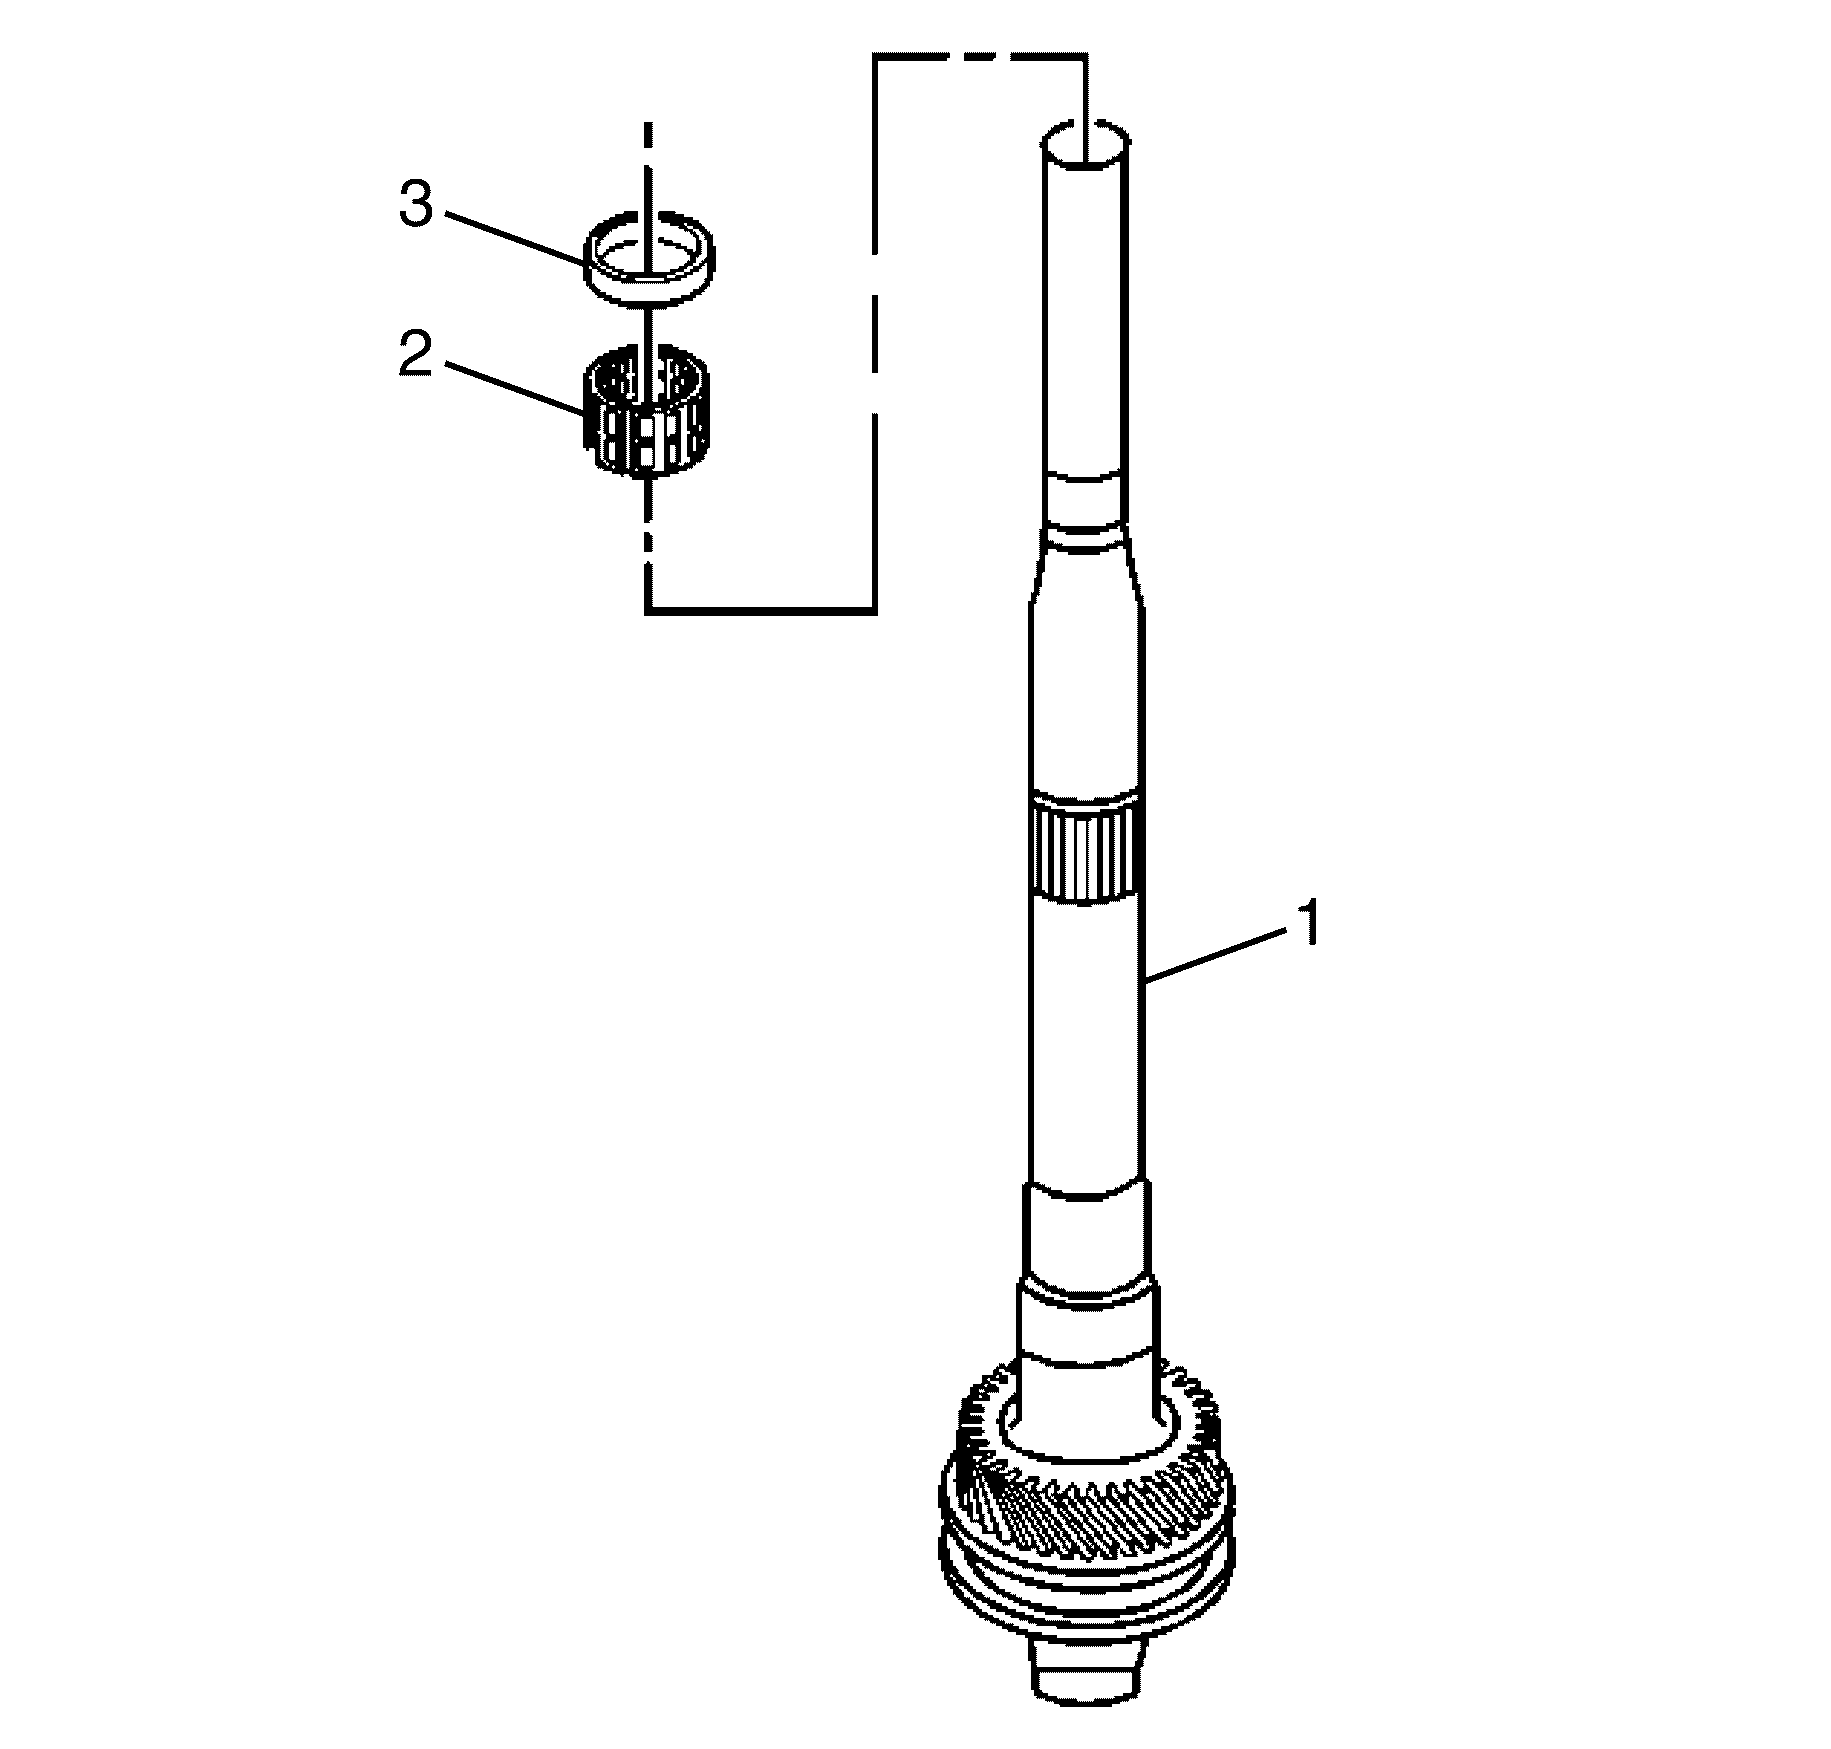
- Remove the 2nd speed gear spacer (3) from the mainshaft (1).
- Remove the caged needle bearing (2) from the mainshaft (1).
- Remove the mainshaft small tapered bearing (1). Use the J 39442 (3), the J 39443 (2), and a hydraulic press.
- Remove the circlip (6) from the mainshaft (1).
- Remove the 4th gear thrust washer (5) from the mainshaft (1).
- Remove the 4th gear inner cone (4) from the mainshaft (1).
- Remove the 4th gear friction cone (3) from the mainshaft (1).
- Remove the 4th gear blocking ring (2) from the mainshaft (1).
- Scribe a mark on the synchronizer hub and on the sleeve. This will help you to reinstall the parts in the same position.
- Use the J 39473 (1), V-blocks, and a hydraulic press to remove the 3rd speed gear (3). The 3rd/4th speed synchronizer assembly (9), the 3rd speed gear blocking ring (8), the 3rd speed gear friction cone (7), the 3rd speed gear inner cone (6), thrust washer (5), and spacer (4) will press off with the 3rd speed gear (3).
- Remove the 3rd speed gear caged needle bearing (2) from the mainshaft (1).
Important: Measure the 4th speed gear synchronizer wear gap before disassembling the mainshaft.
Important: Do not mix any of the sychromesh blocker rings or any sychromesh components.
Notice: Refer to General Repair Instructions in the Preface section.
Important: The O-ring is only used by the manufacturer to assist in assembly. It serves no other purpose and can be discarded after removal. This O-ring is not a serviceable item.
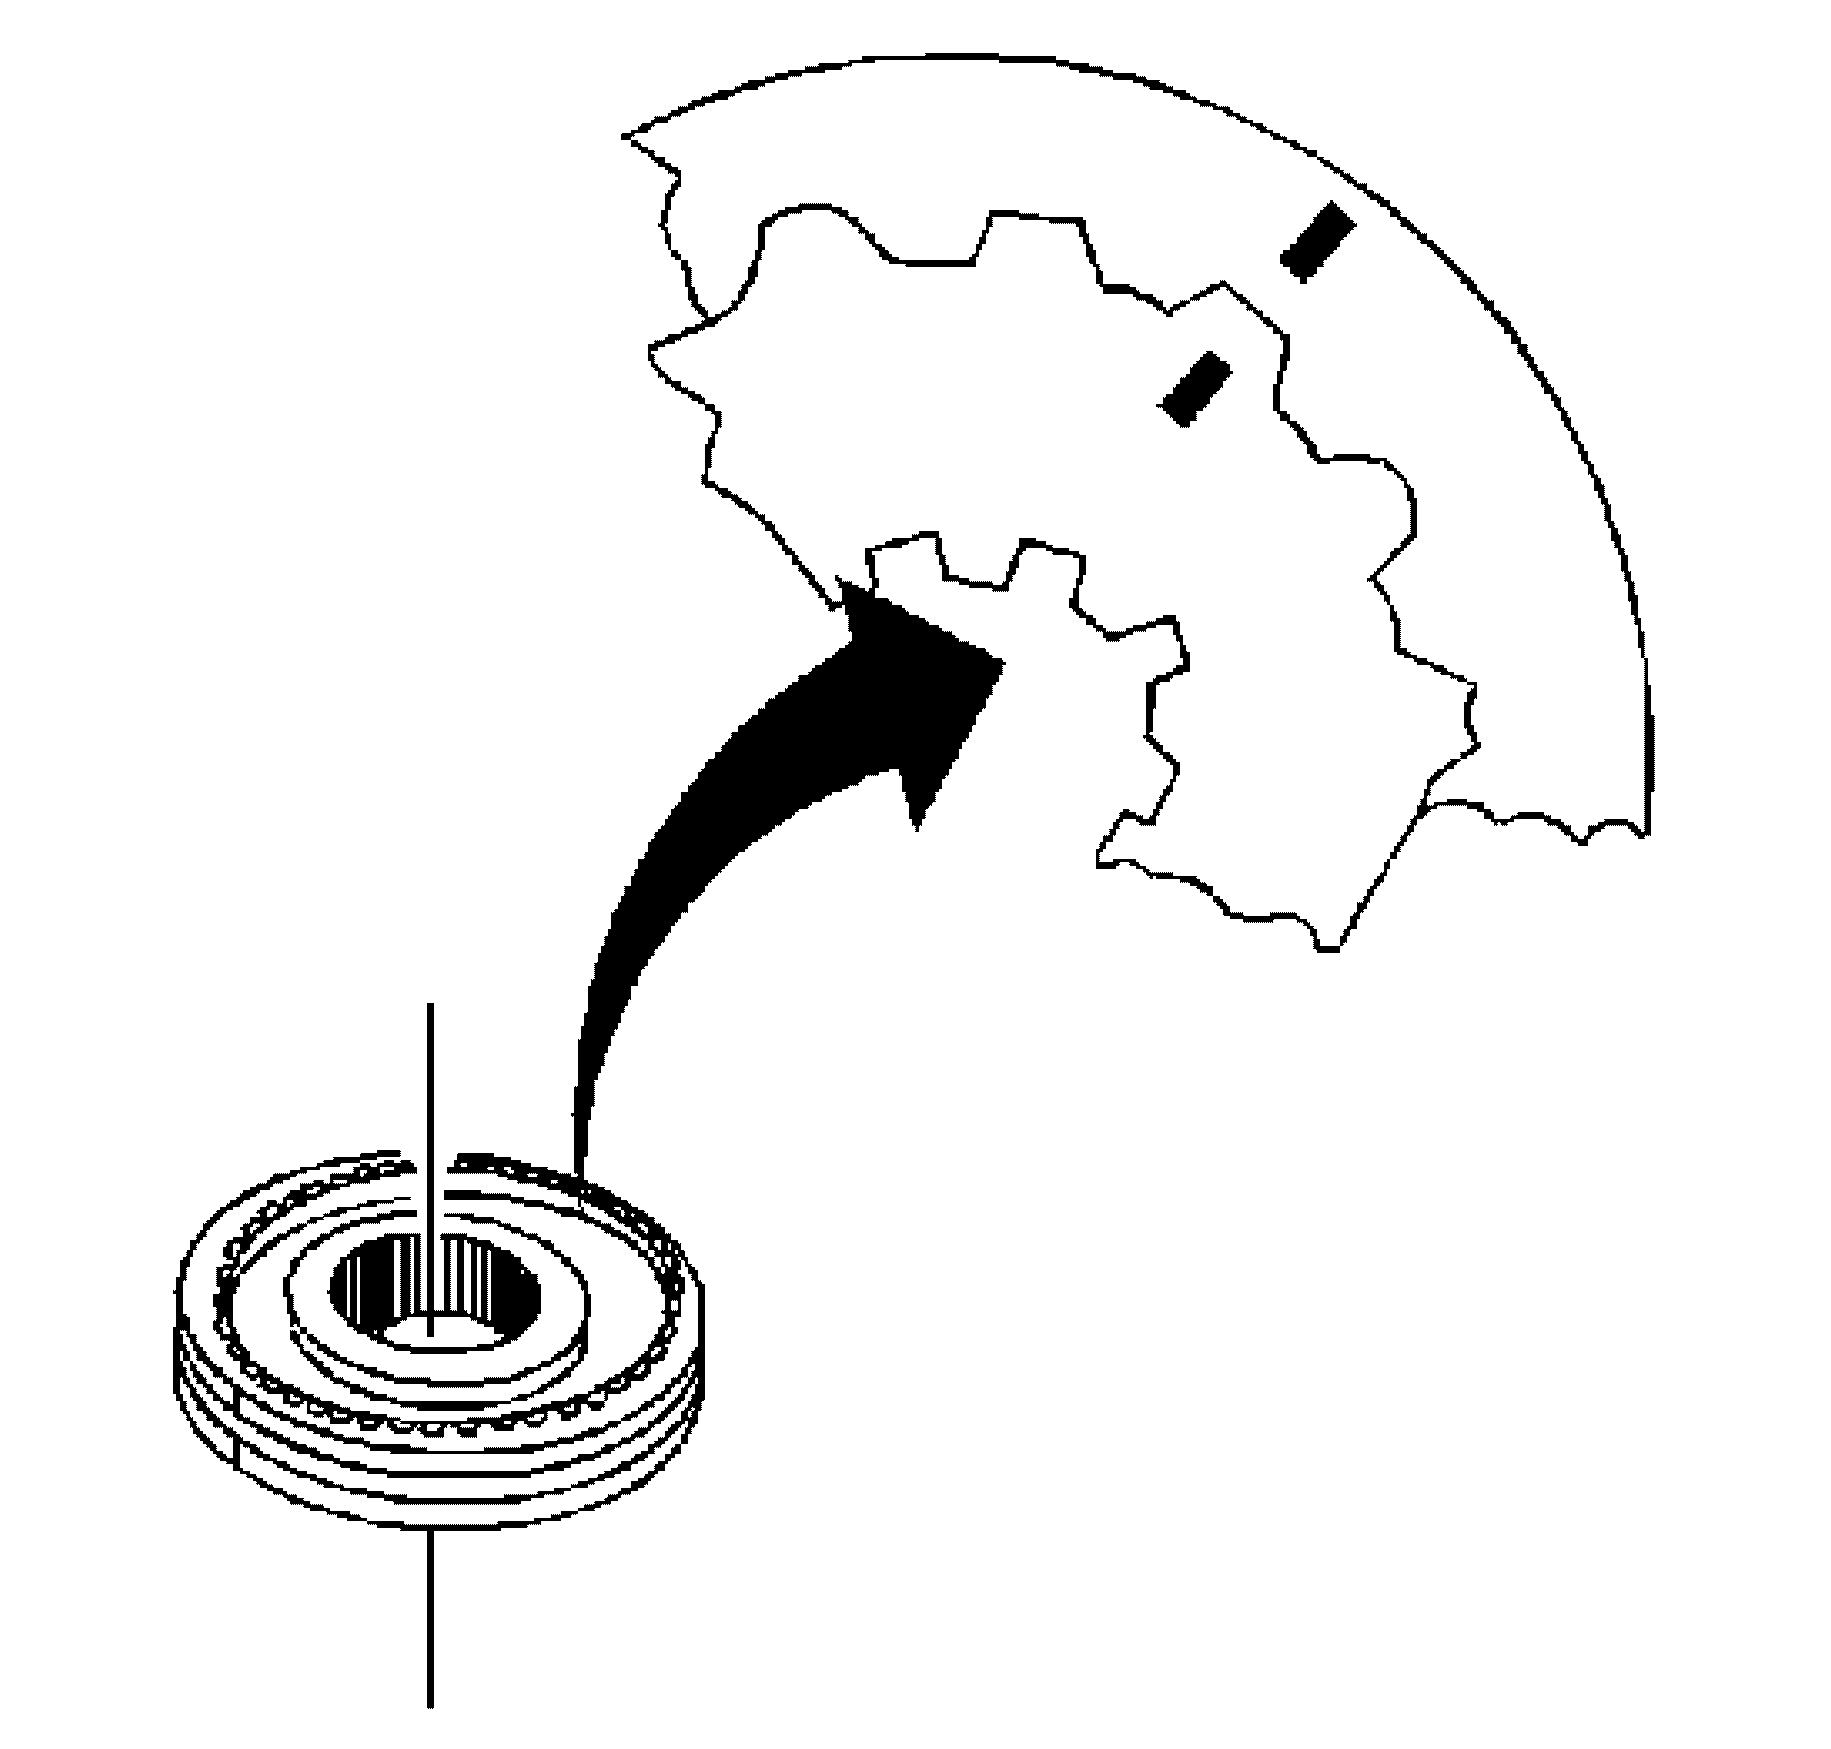
Important: The synchronizer hubs and sliding sleeves are a selected assembly. Keep these parts together as originally assembled.
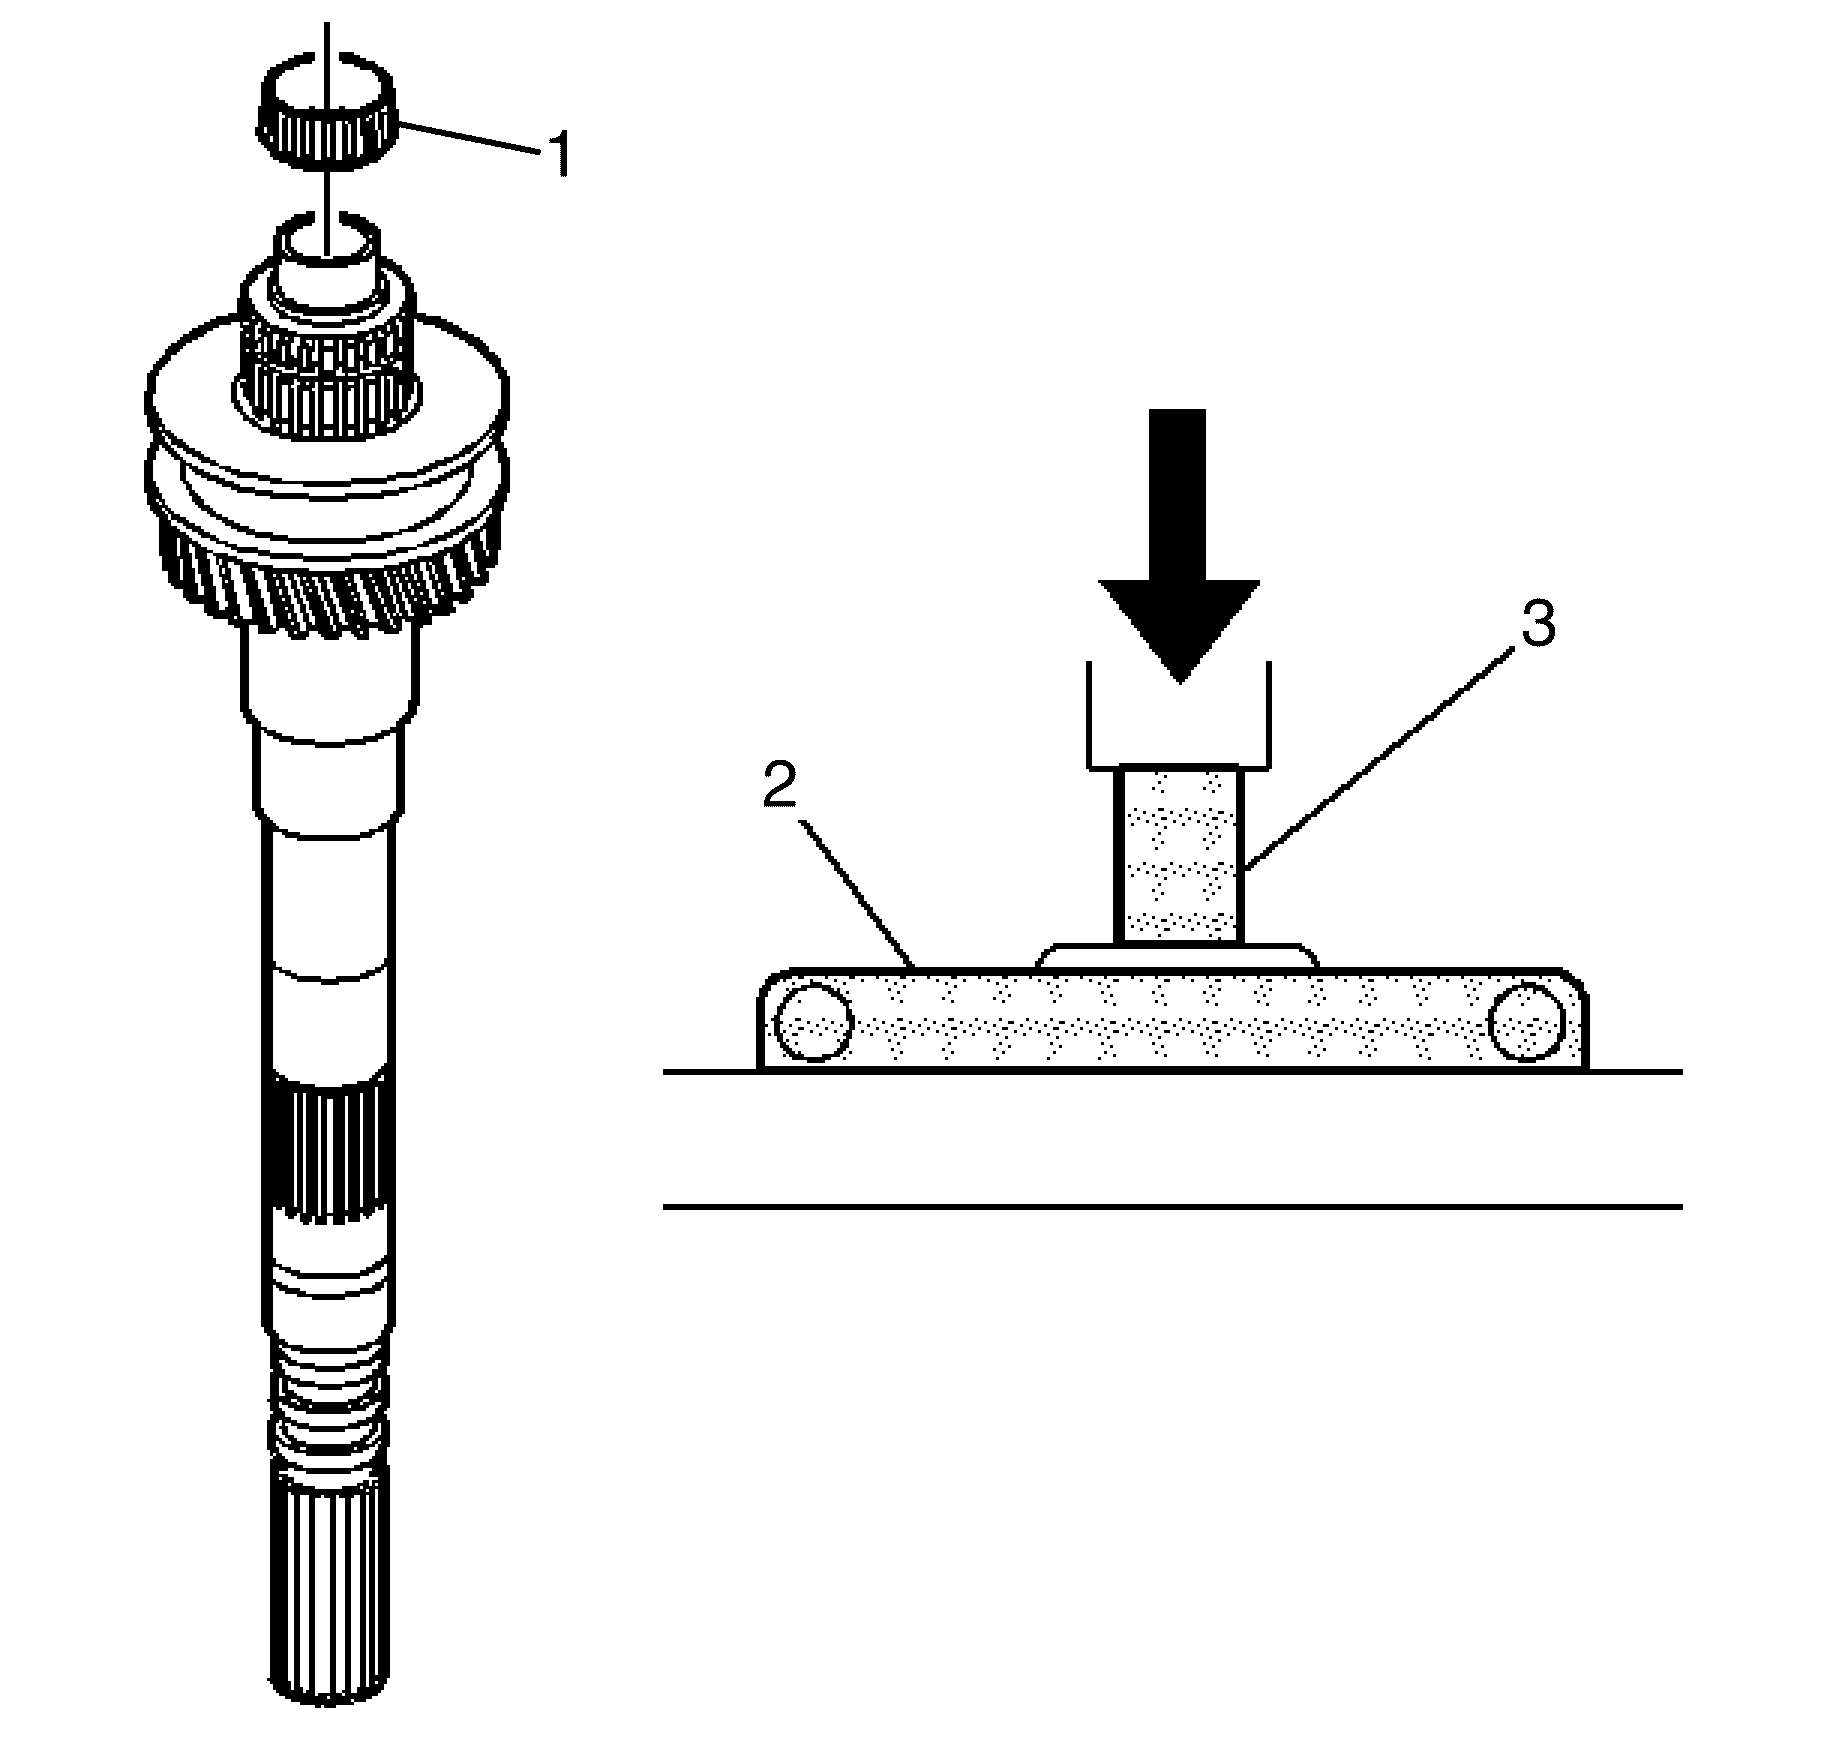
Discard the small tapered bearing.

Important: The synchronizer hubs and sliding sleeves are a selected assembly. Keep these parts together as originally assembled.
Input Shaft
Tools Required
| • | J-22912-01 Split Plate. |
| • | J 23907 Slide Hammer. |
| • | J 39594 Bearing Race Remover. |
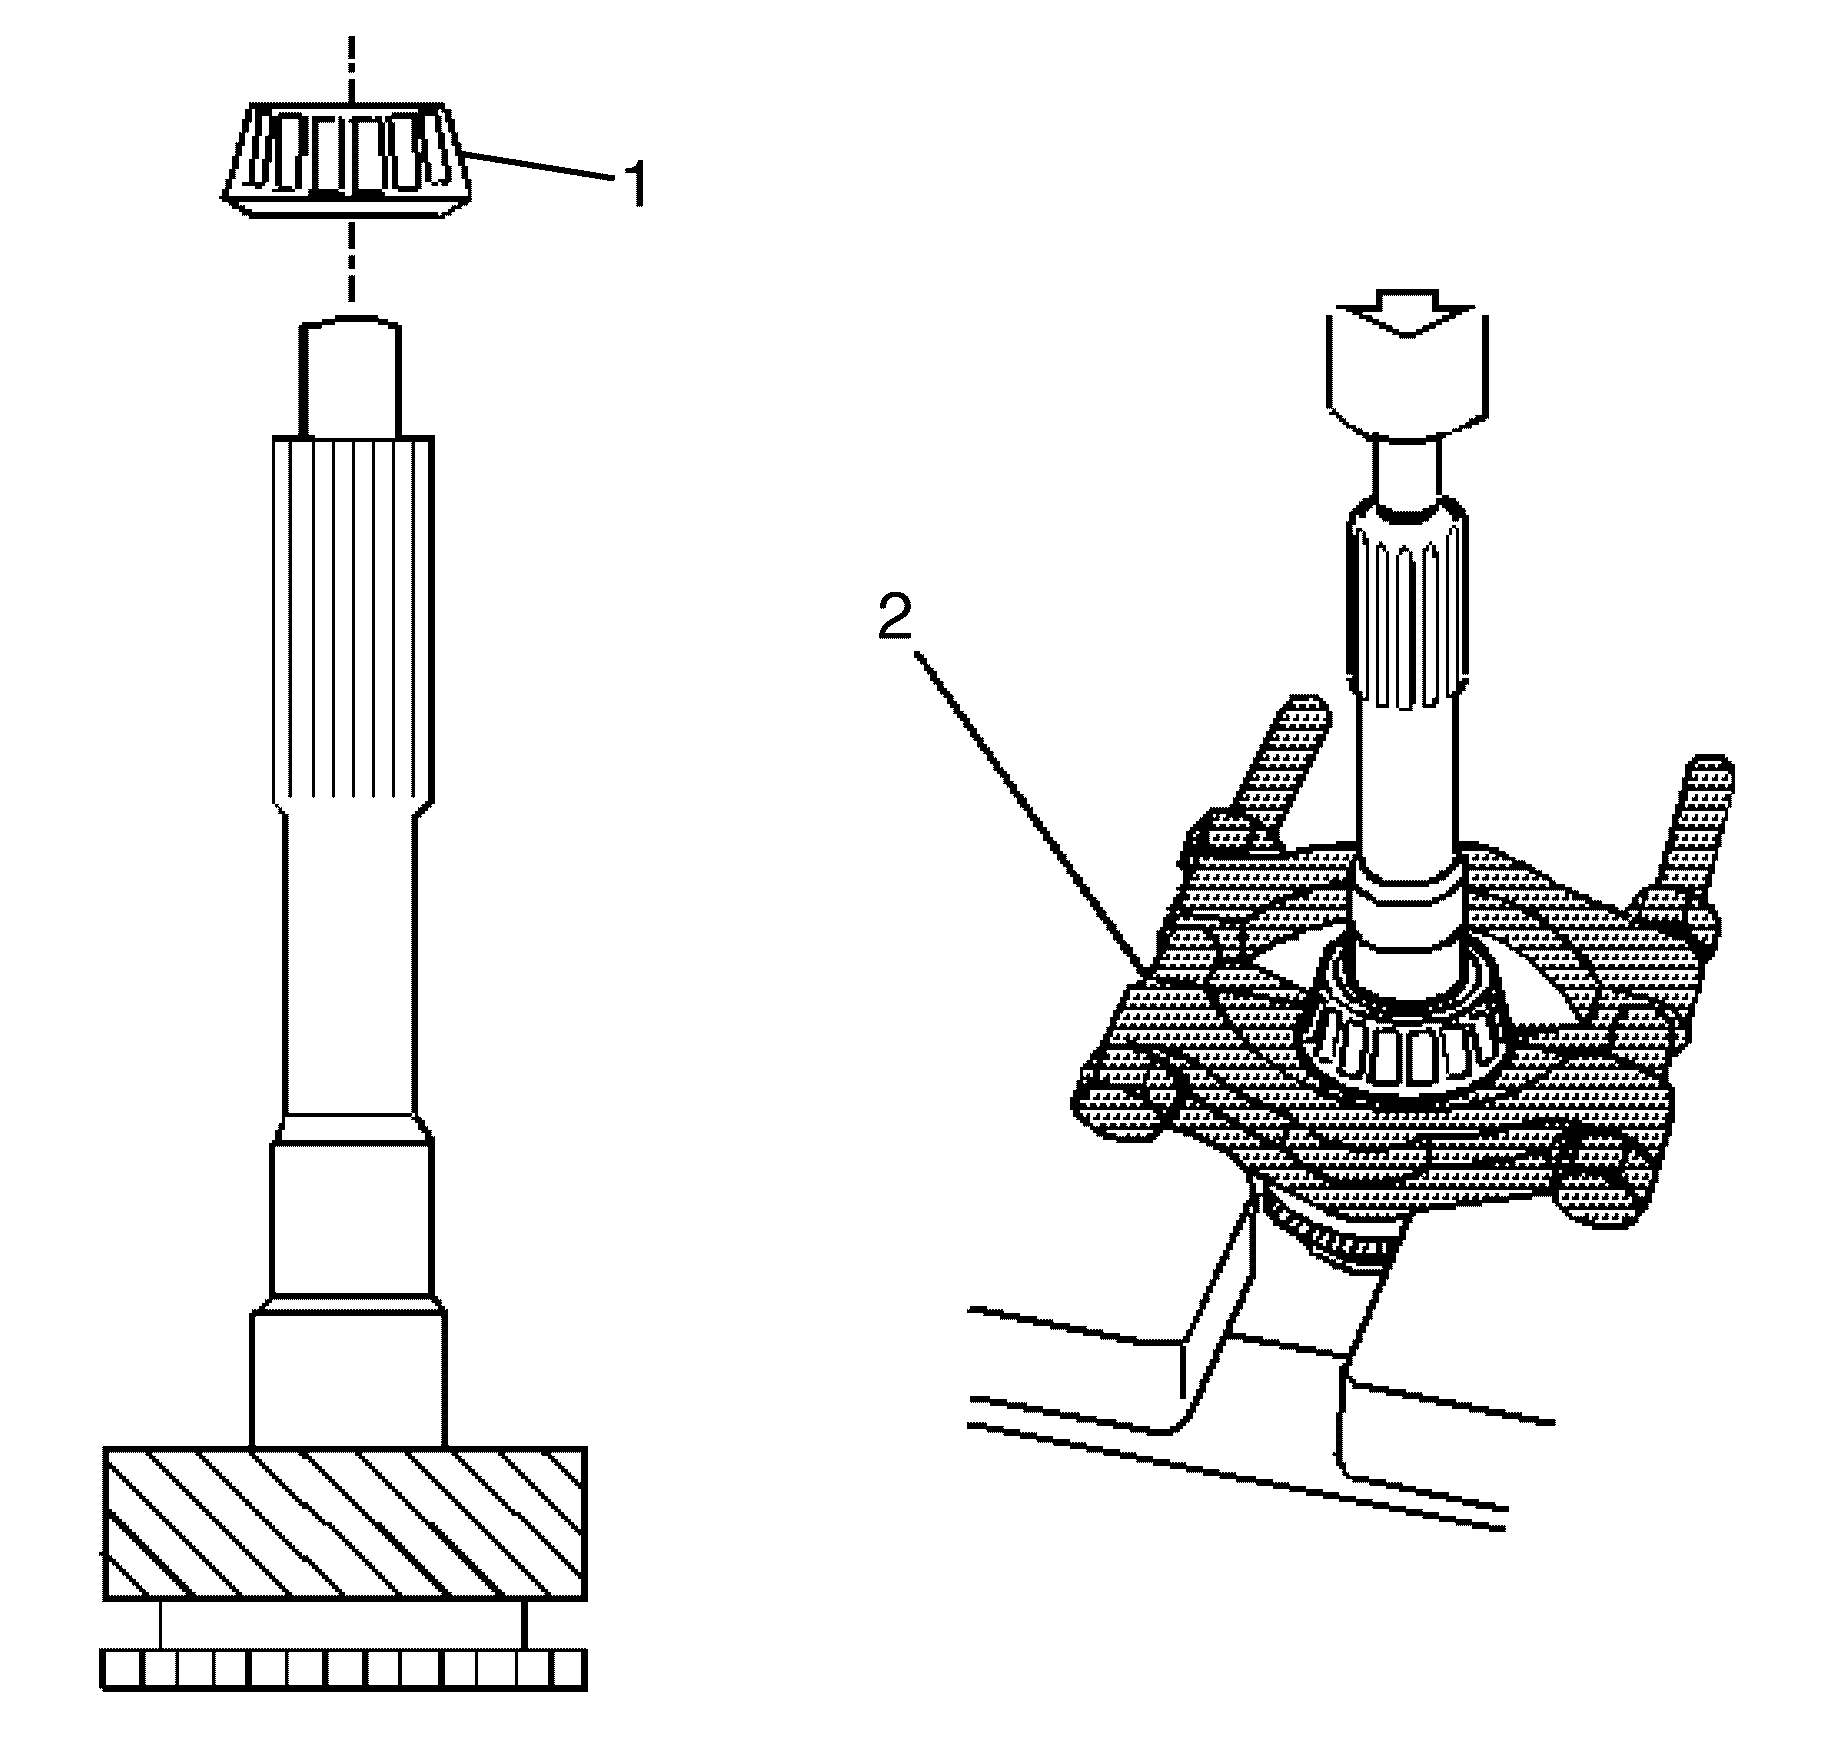
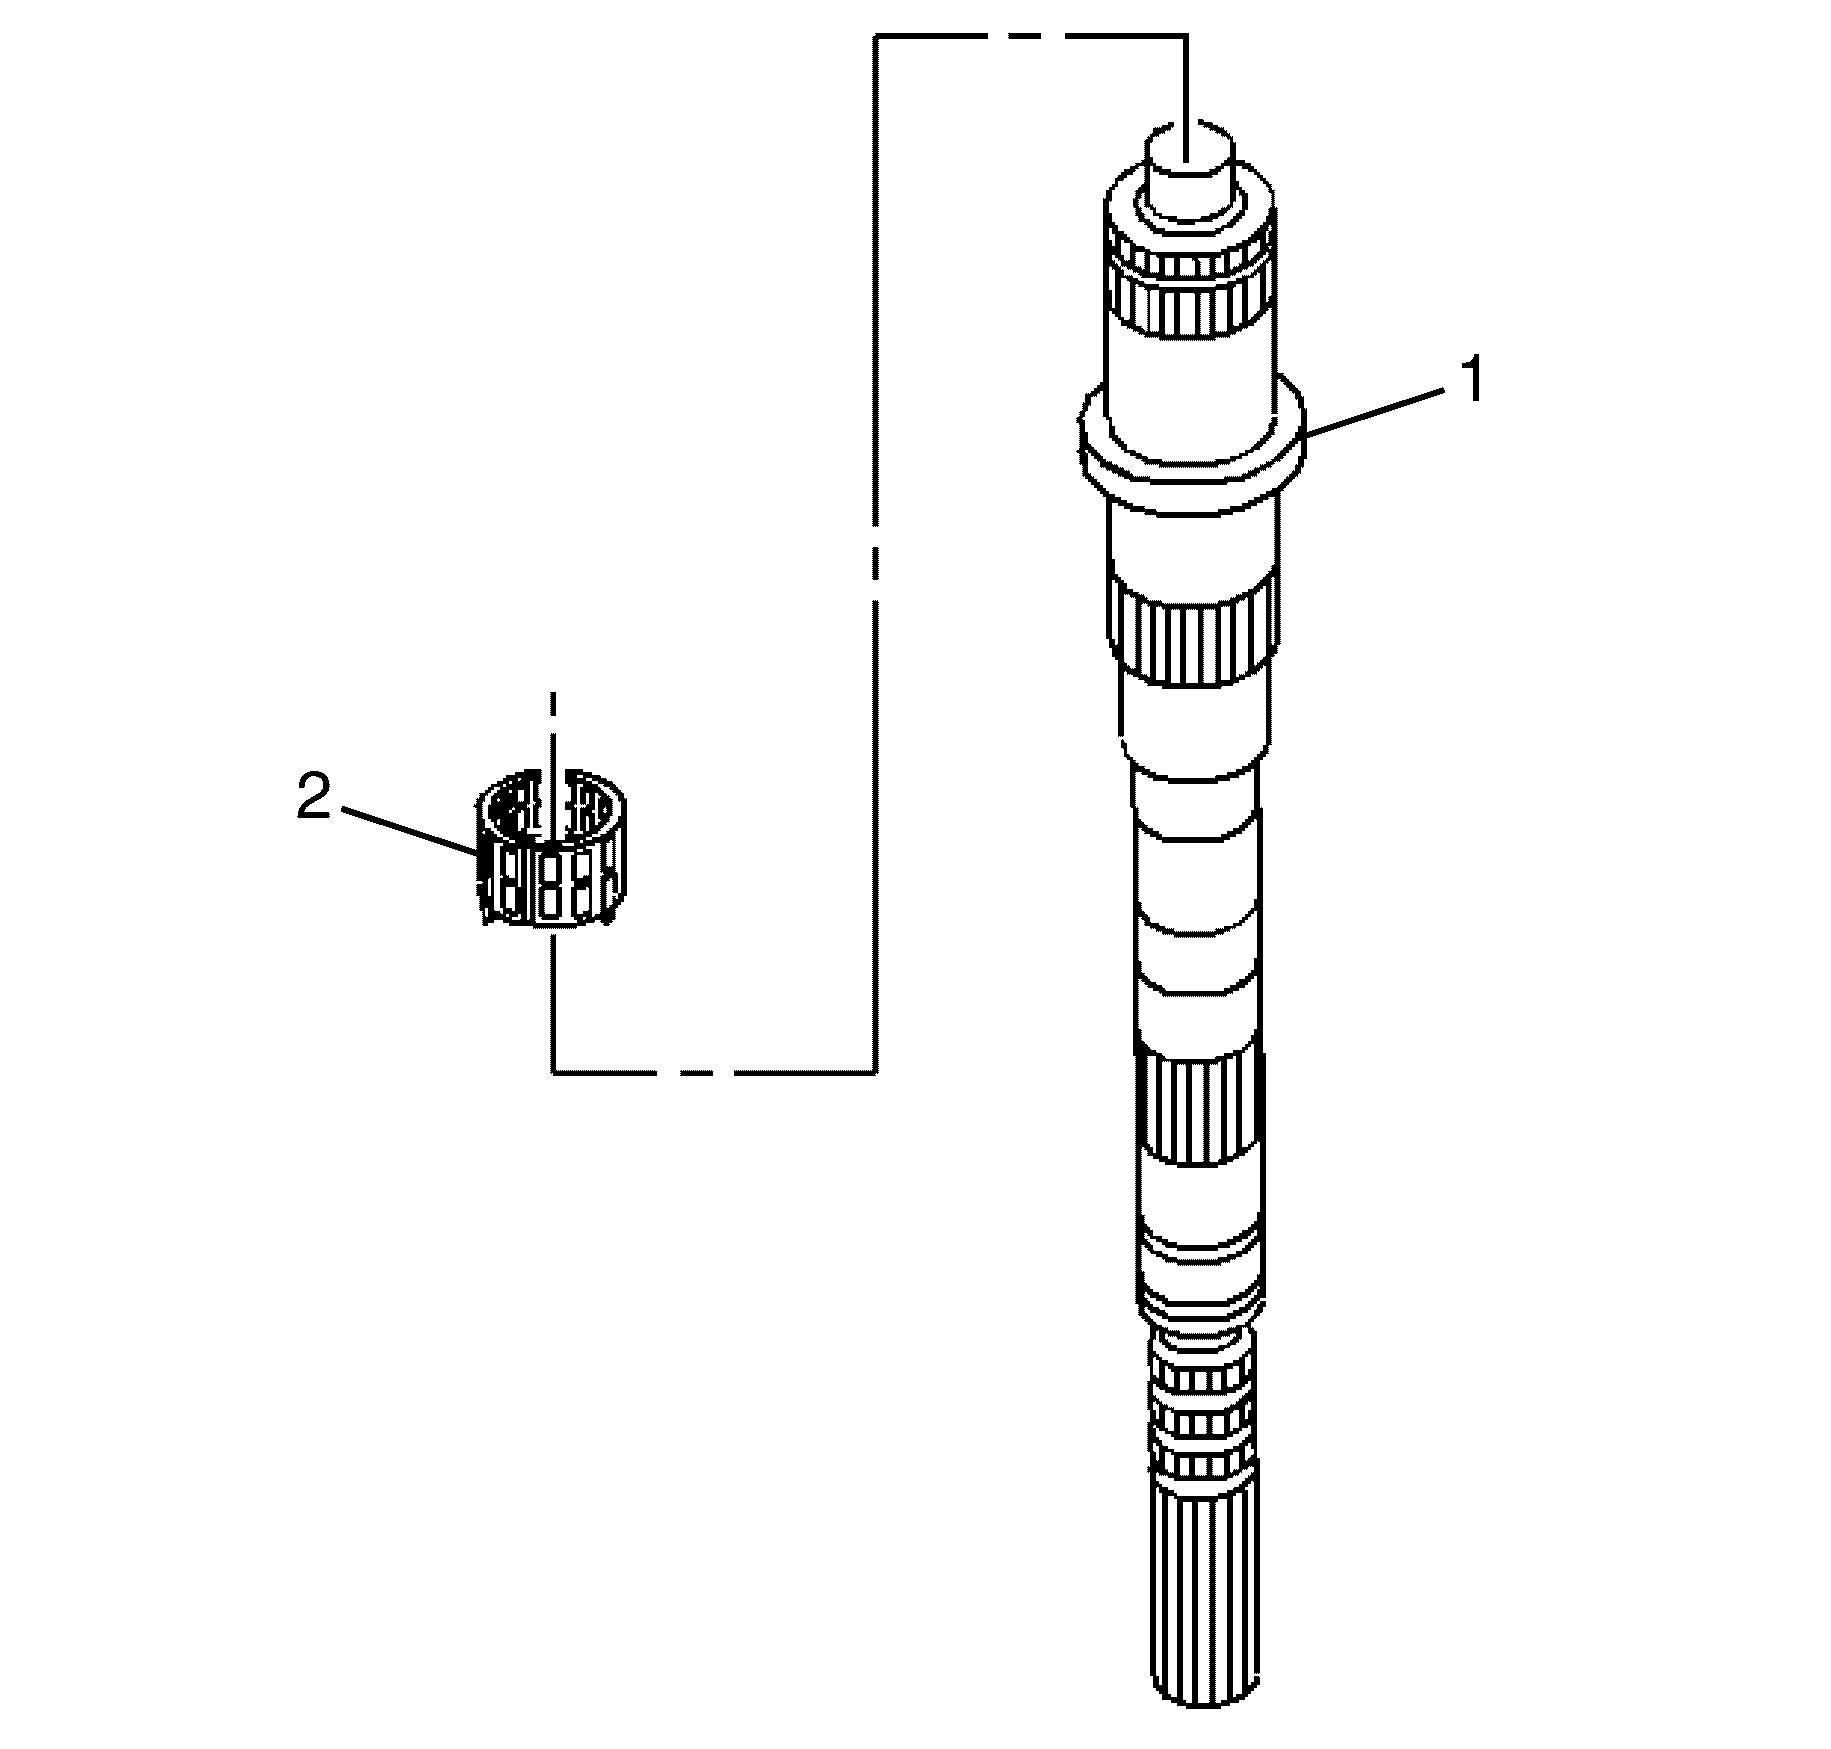
- Remove the tapered bearing (1) using the J-22912-01 (2) and a hydraulic press.
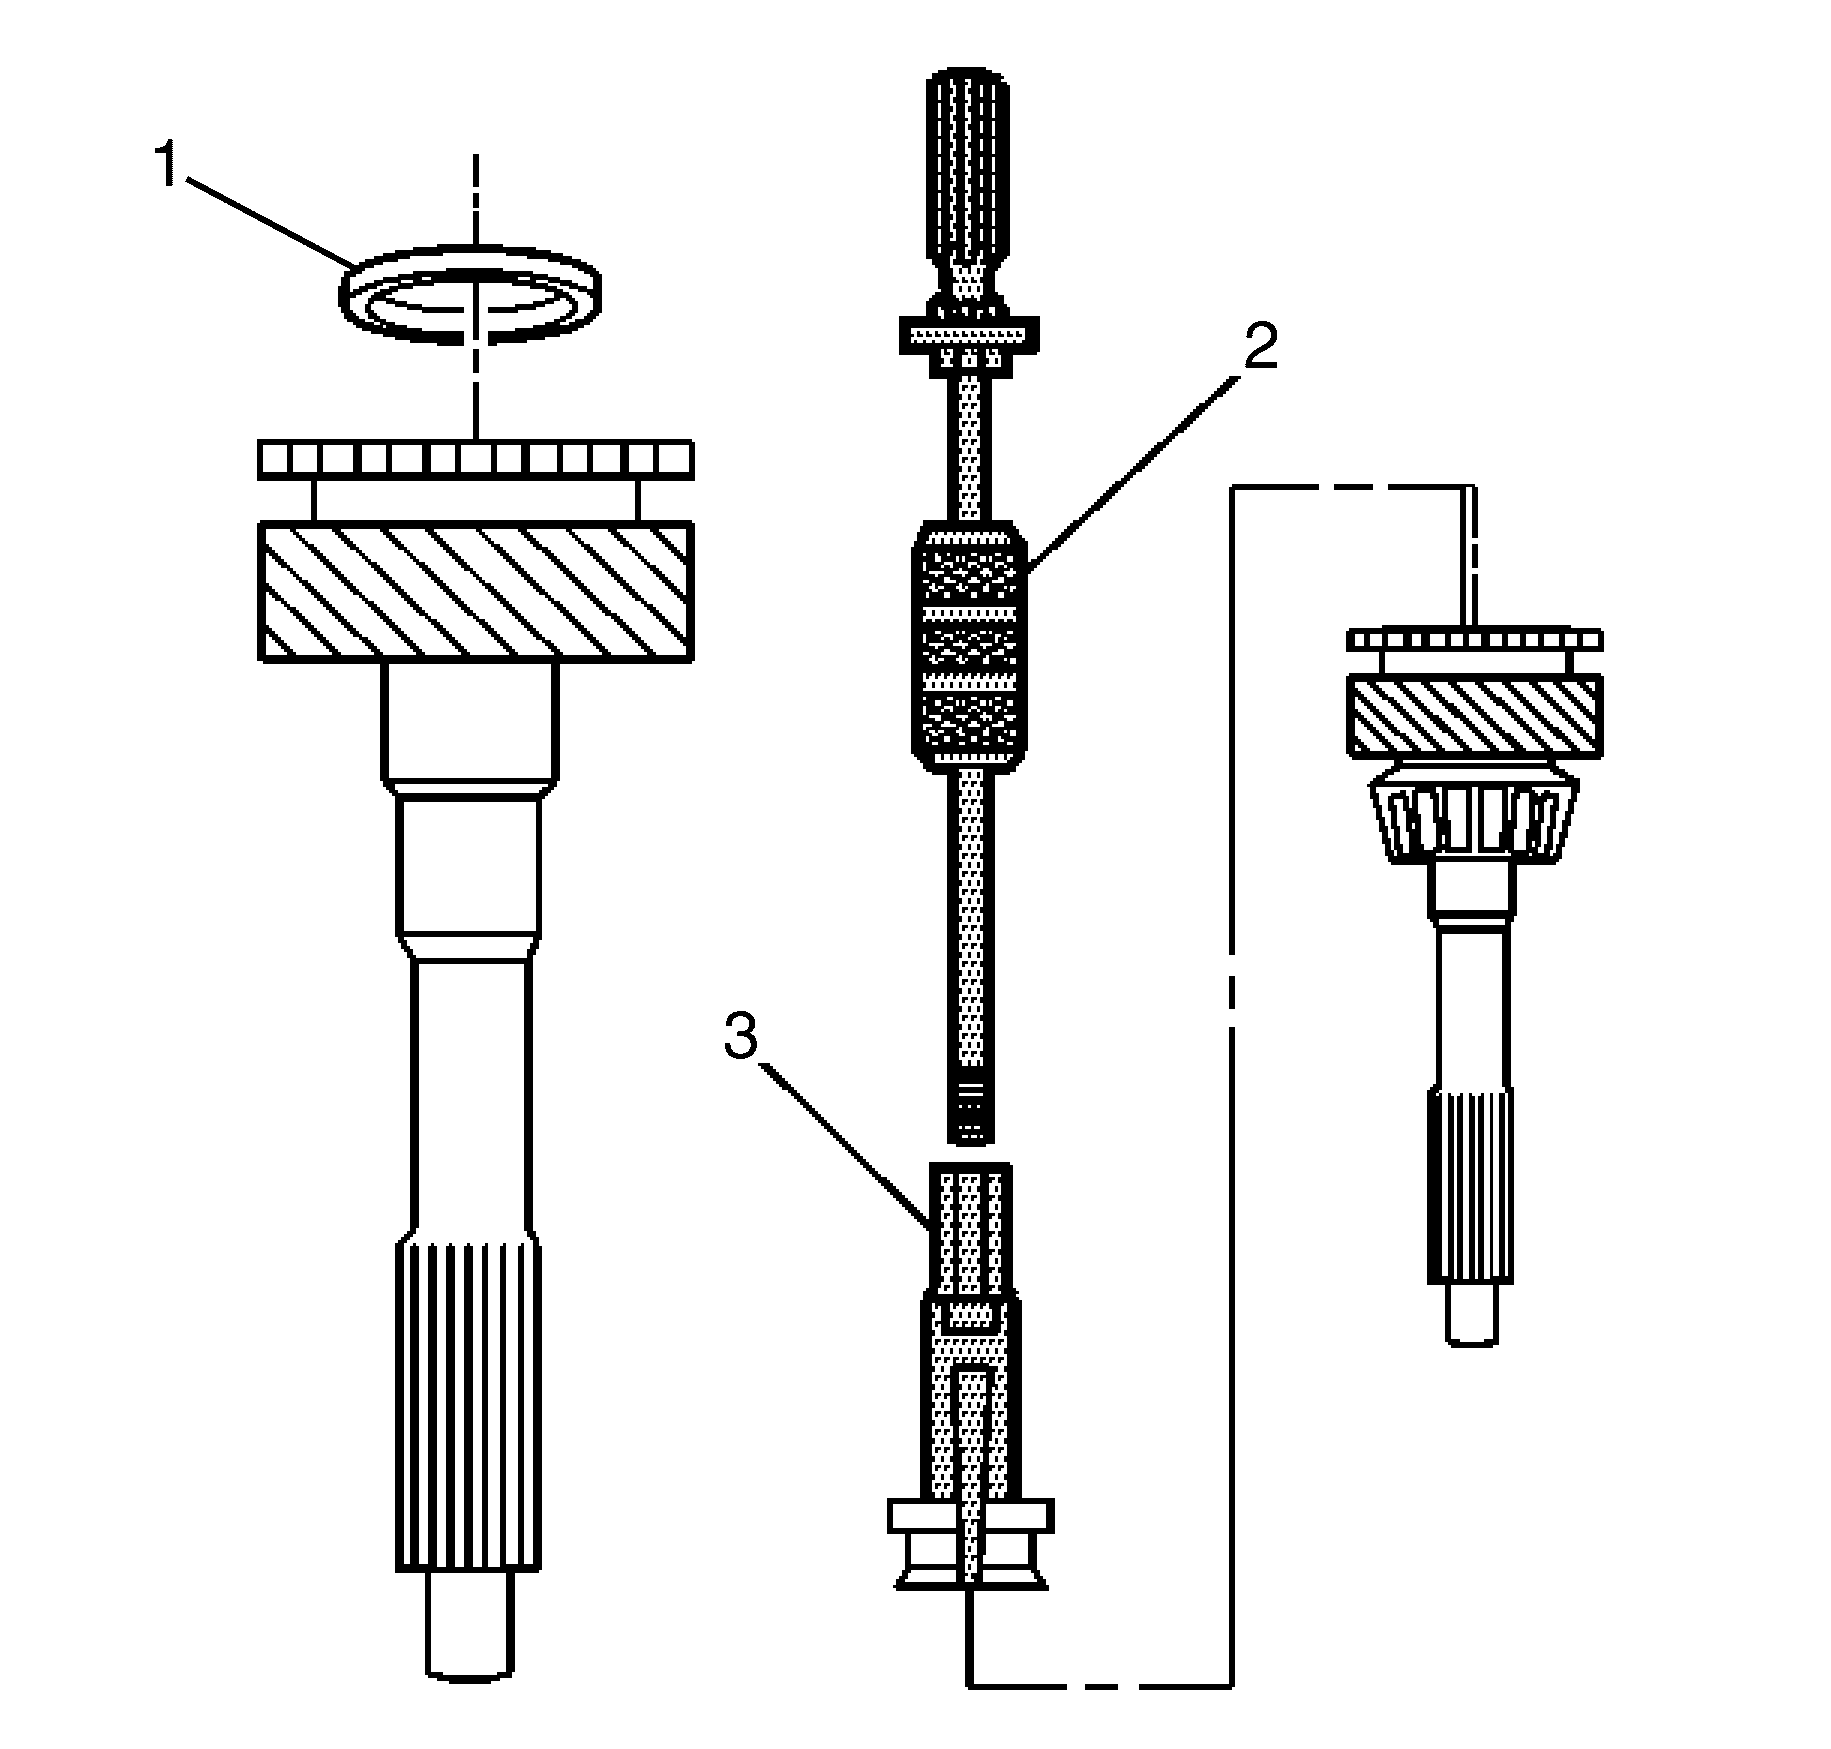
- Remove the bearing race (1) using the J 23907 (2) and the J 39594 (3).
Important: Do not replace the tapered bearing or the bearing race unless inspection shows that the bearing or the race are damaged.
