For 1990-2009 cars only
Input Shaft, Mainshaft, and Countershaft
Tools Required
| • | J 8001 Dial Indicator Set |
| • | J 39444-1 Countershaft End Play Rod |
- Lubricate all components as assembly progresses, using J 36850 .
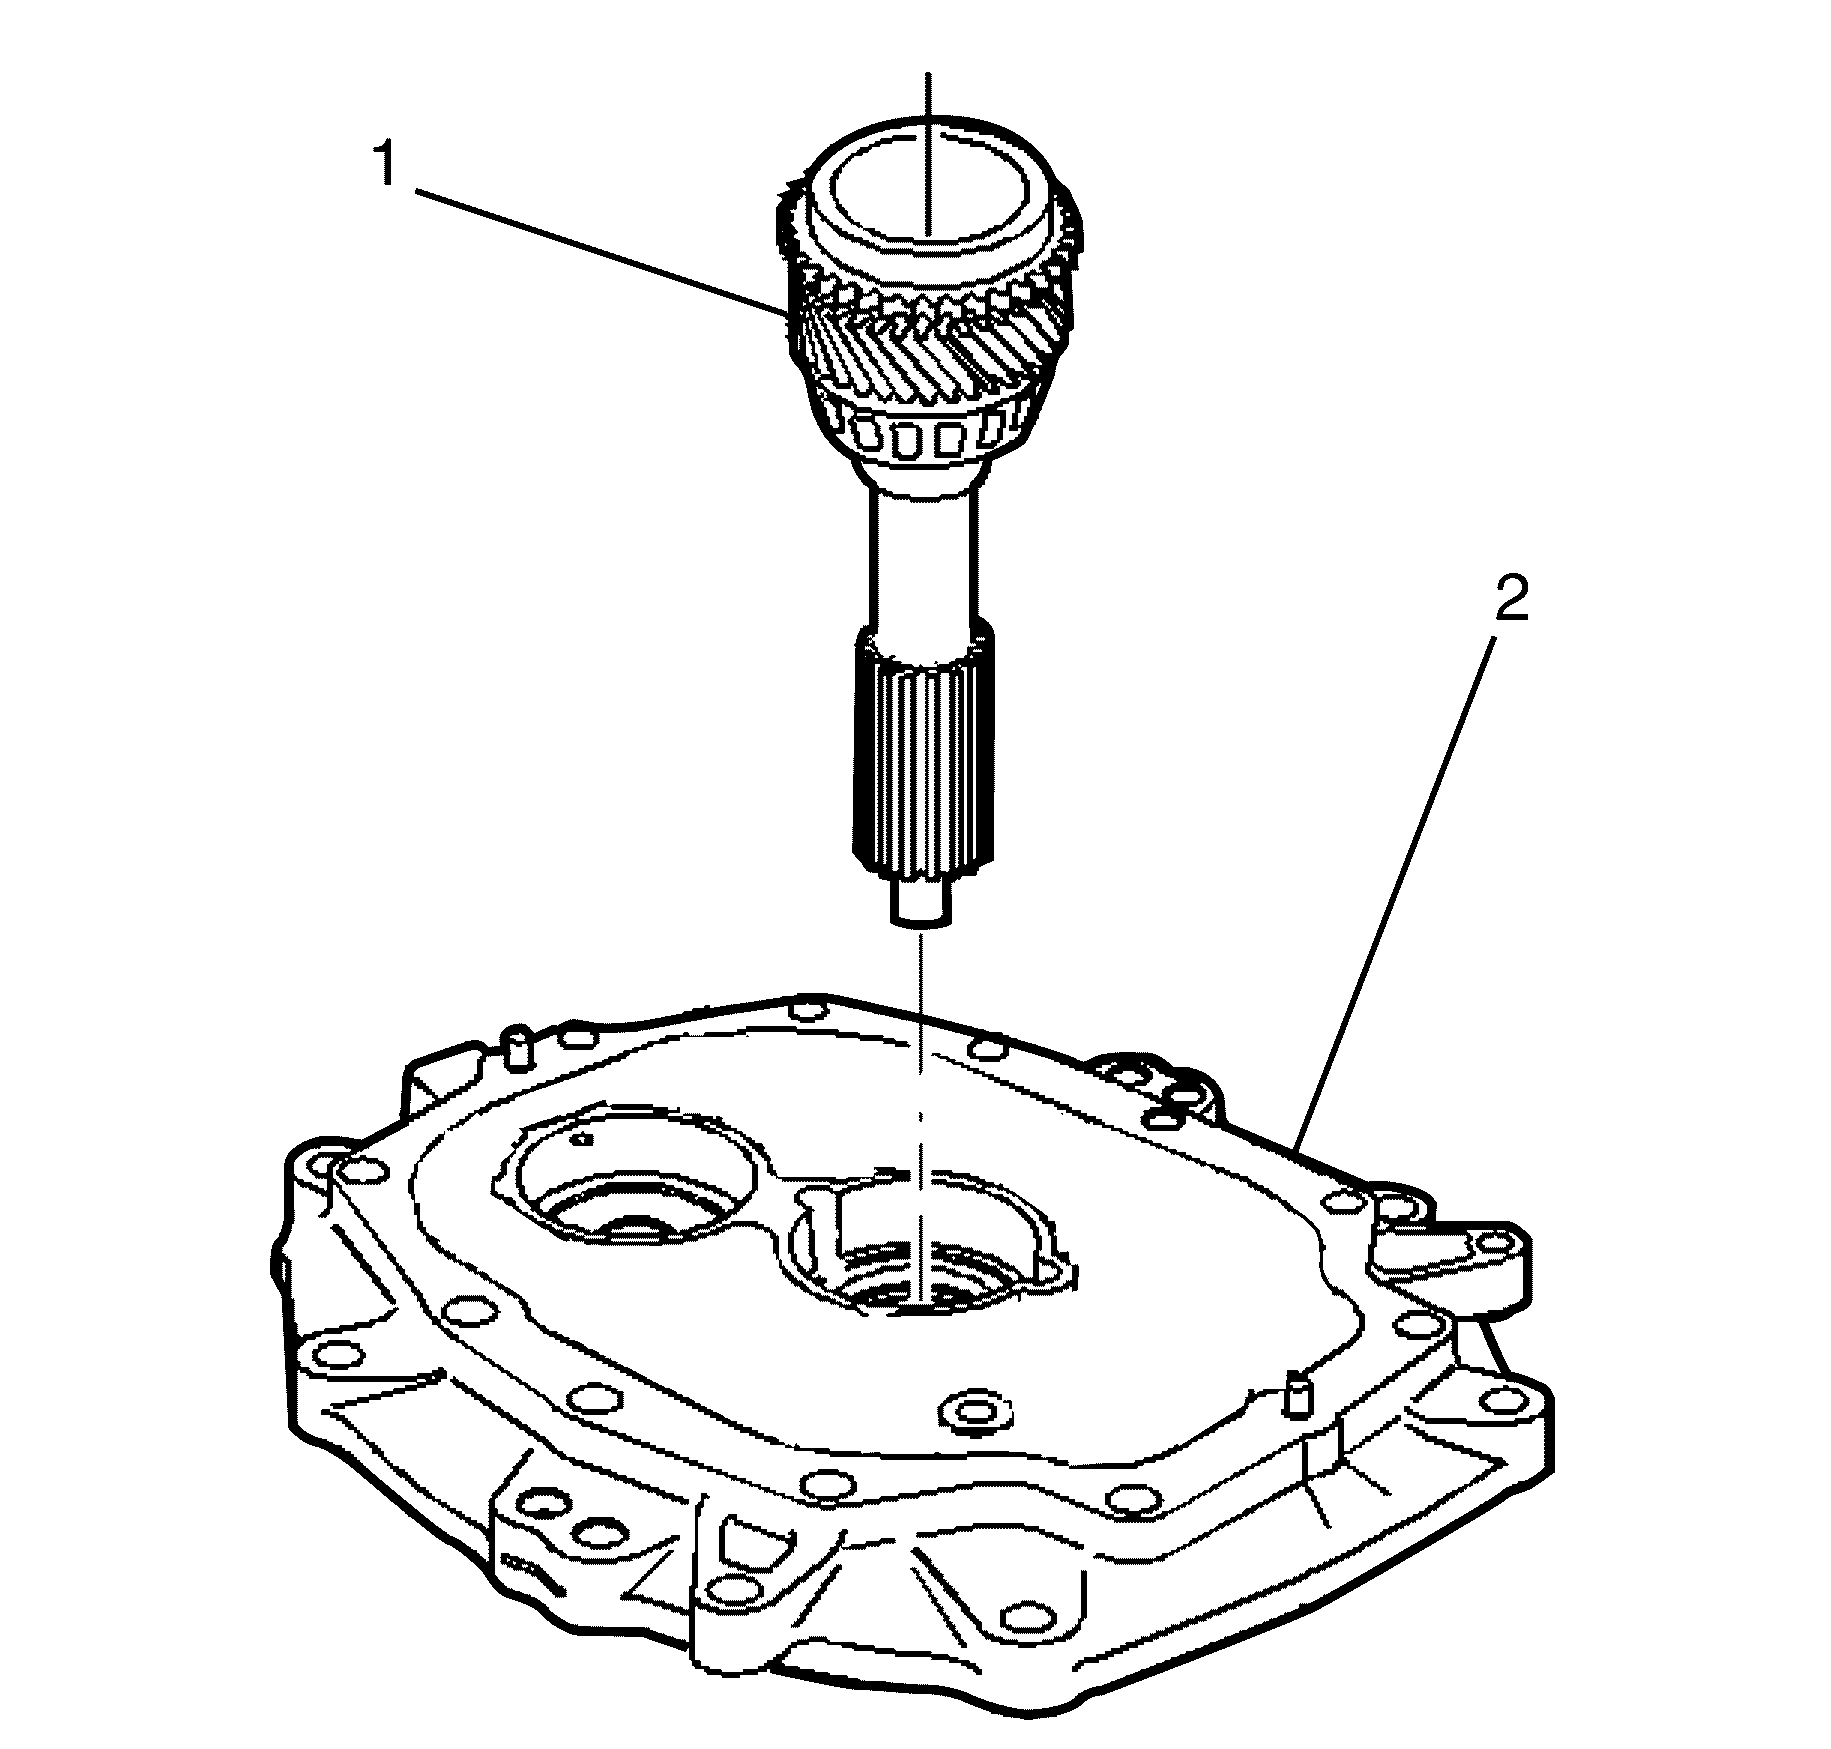
- Install the input shaft (1) in the adapter plate (2).
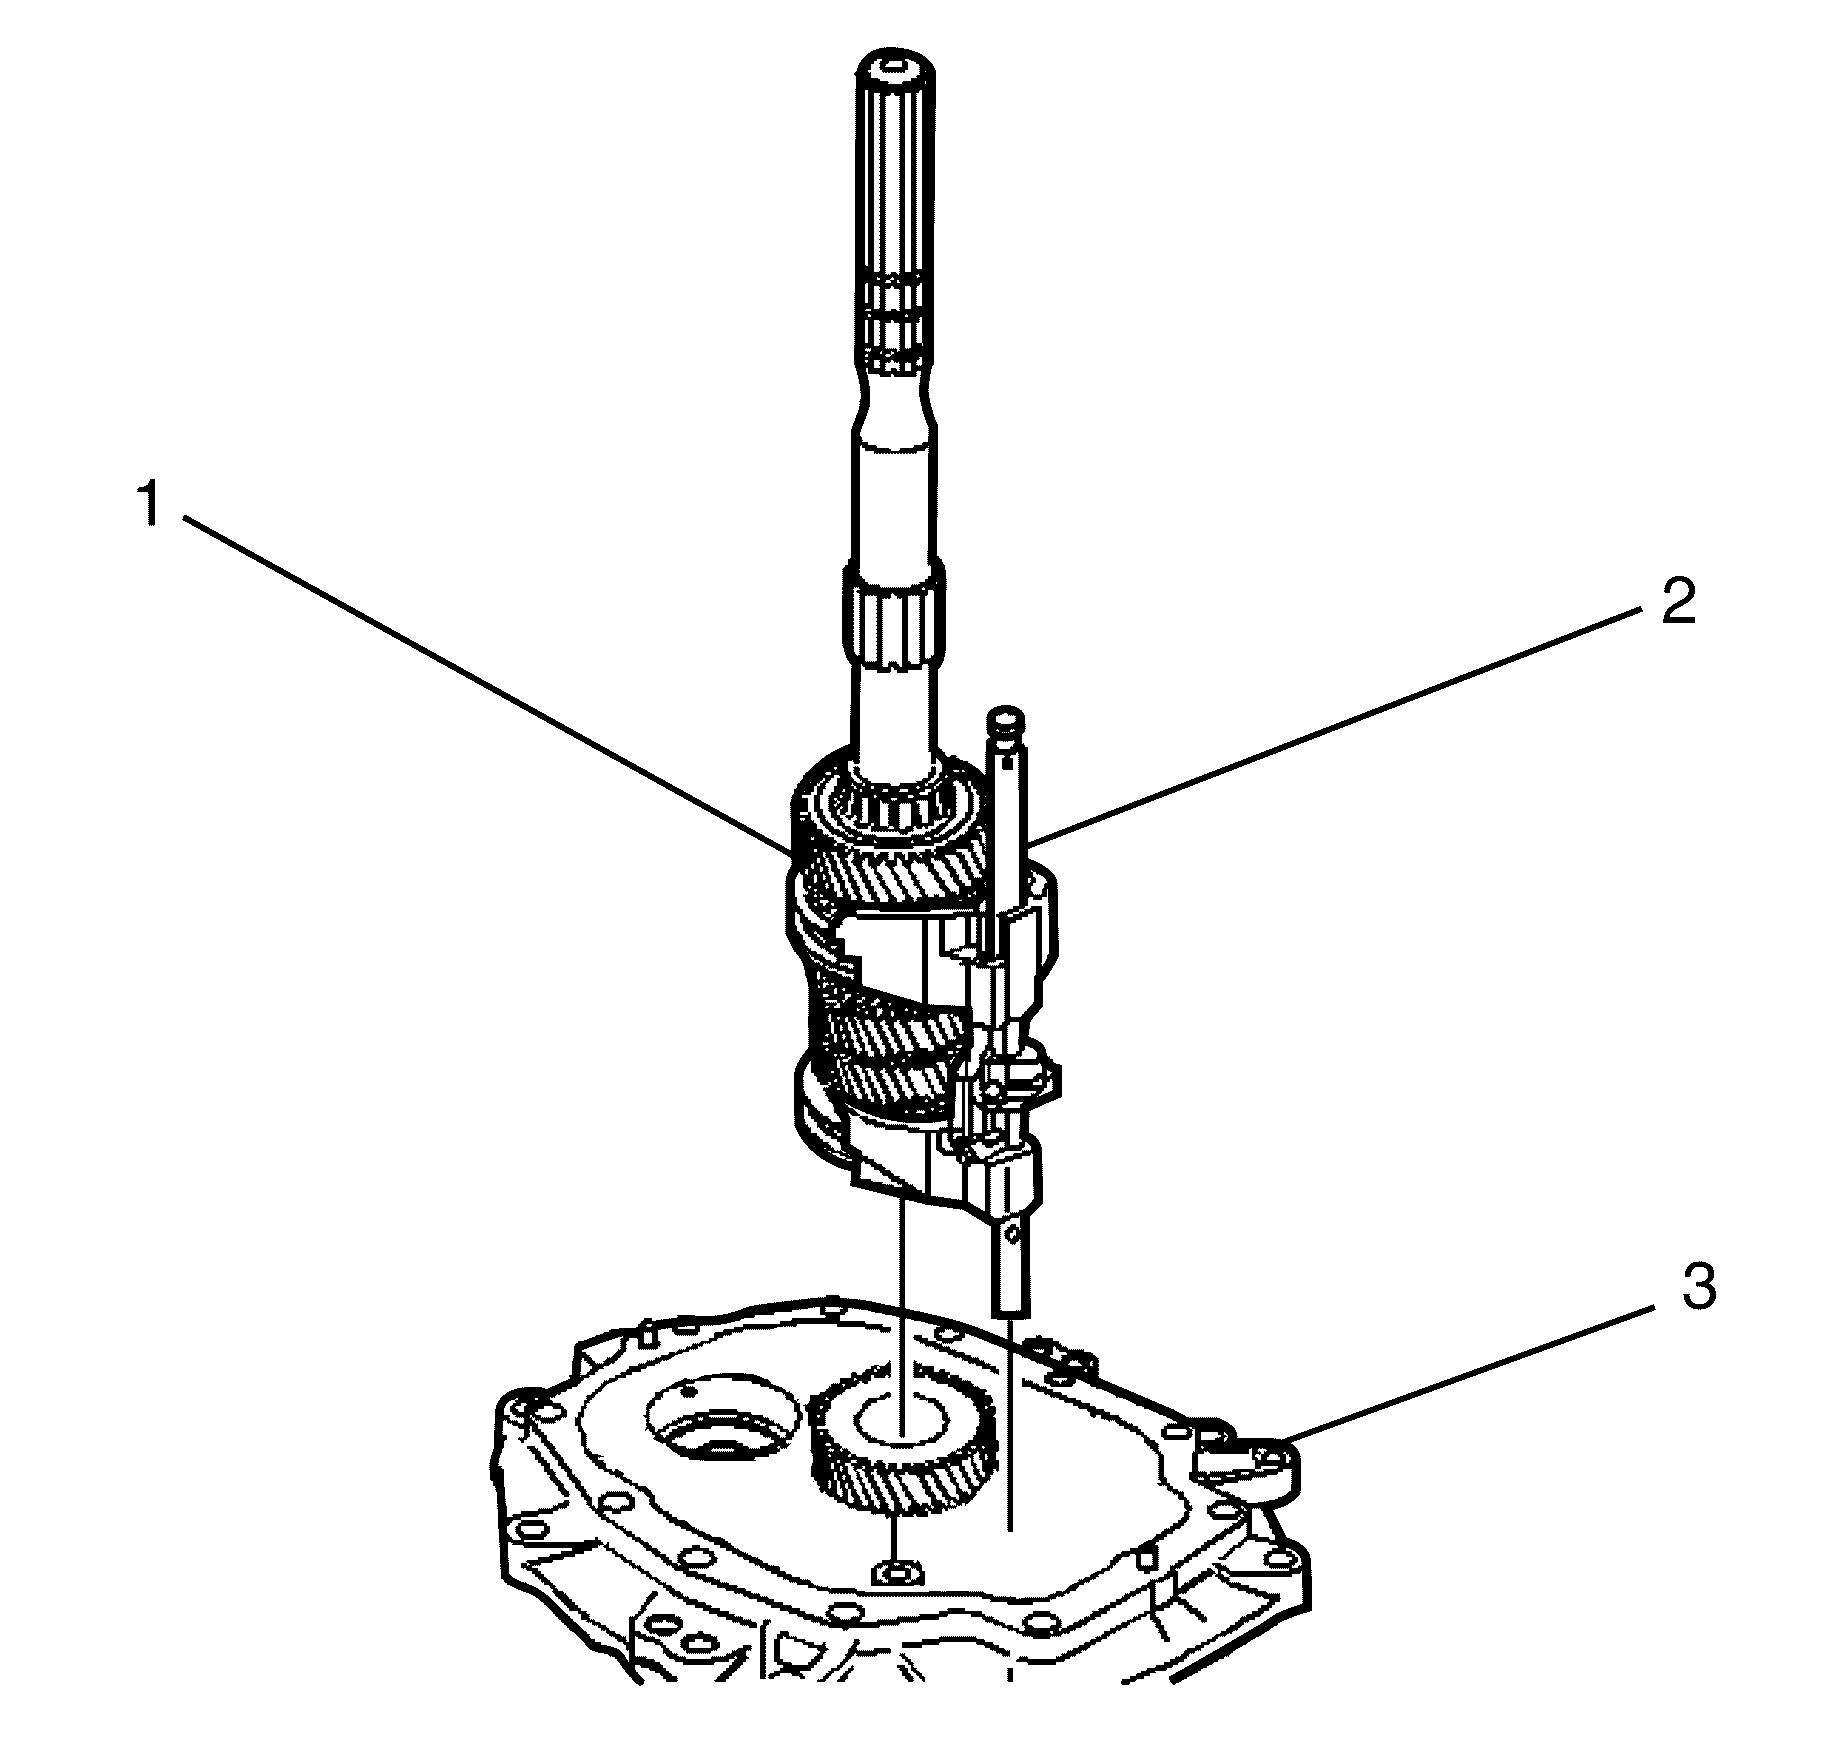
- Assemble the shift shaft (2) to the mainshaft (1).
- Install the neutral return roll pin (3) to the shift shaft (2).
- Install the mainshaft (1) and the shift shaft (2) assembly into the adapter plate (3).
- Install the countershaft assembly (1) to the adapter plate (3) using the following sequence:
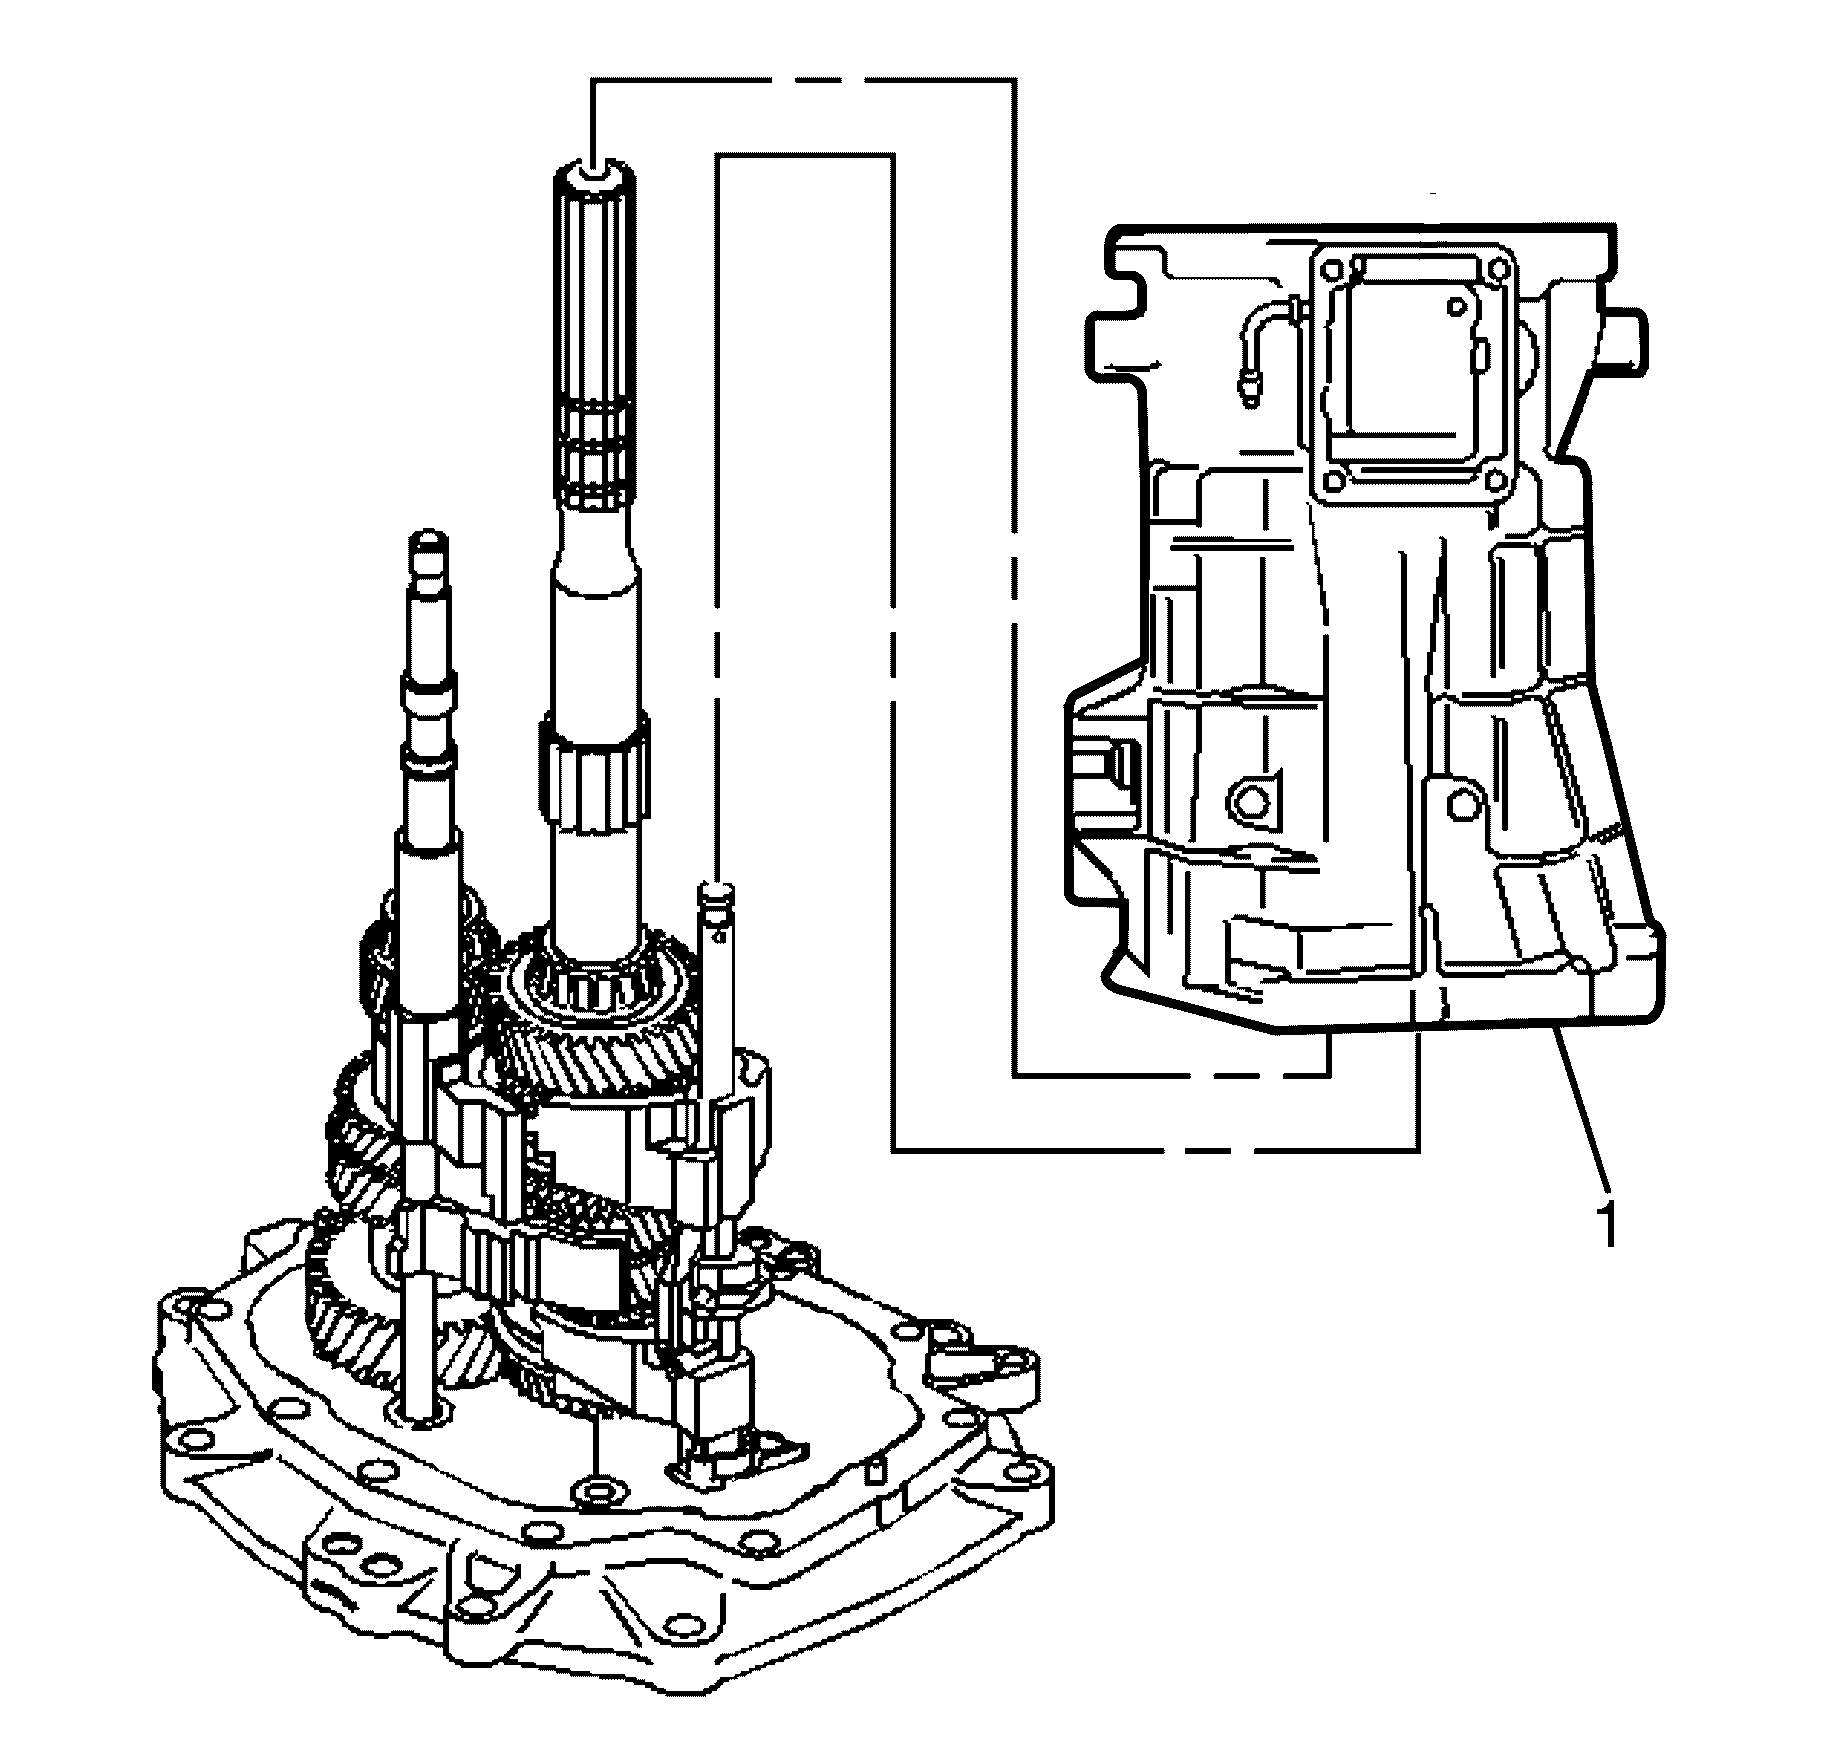
- Install the transmission case (1).
- Install the adapter plate to transmission case bolts (1).
- Measure the input shaft/mainshaft end play using the following procedure:
- Select a shim to achieve 0.00-0.05 mm (0.000-0.002 in) preload.
- Remove the J 8001 .
- Remove the adapter plate plug (1).
- Place the tip of the J 8001 on the end of the countershaft.
- Measure the countershaft end play using the following procedure:
- Select a shim to achieve 0.00-0.05 mm (0.000-0.002 in) preload.
- Remove the J 8001 .
- Remove the J 39444-1 .
- Remove the adapter plate to transmission case bolts (2).
- Remove the shift lever guide bolts (1).
- Remove the transmission case (1).
- Remove the countershaft (1) from the adapter plate (3). Lift up the mainshaft (2) enough in order to remove the countershaft (1).
- Remove the mainshaft and the shift shaft components as an assembly (1) from the adapter plate.
- Remove the shift shaft assembly from the mainshaft.
- Remove the input shaft (1) from the adapter plate (2).
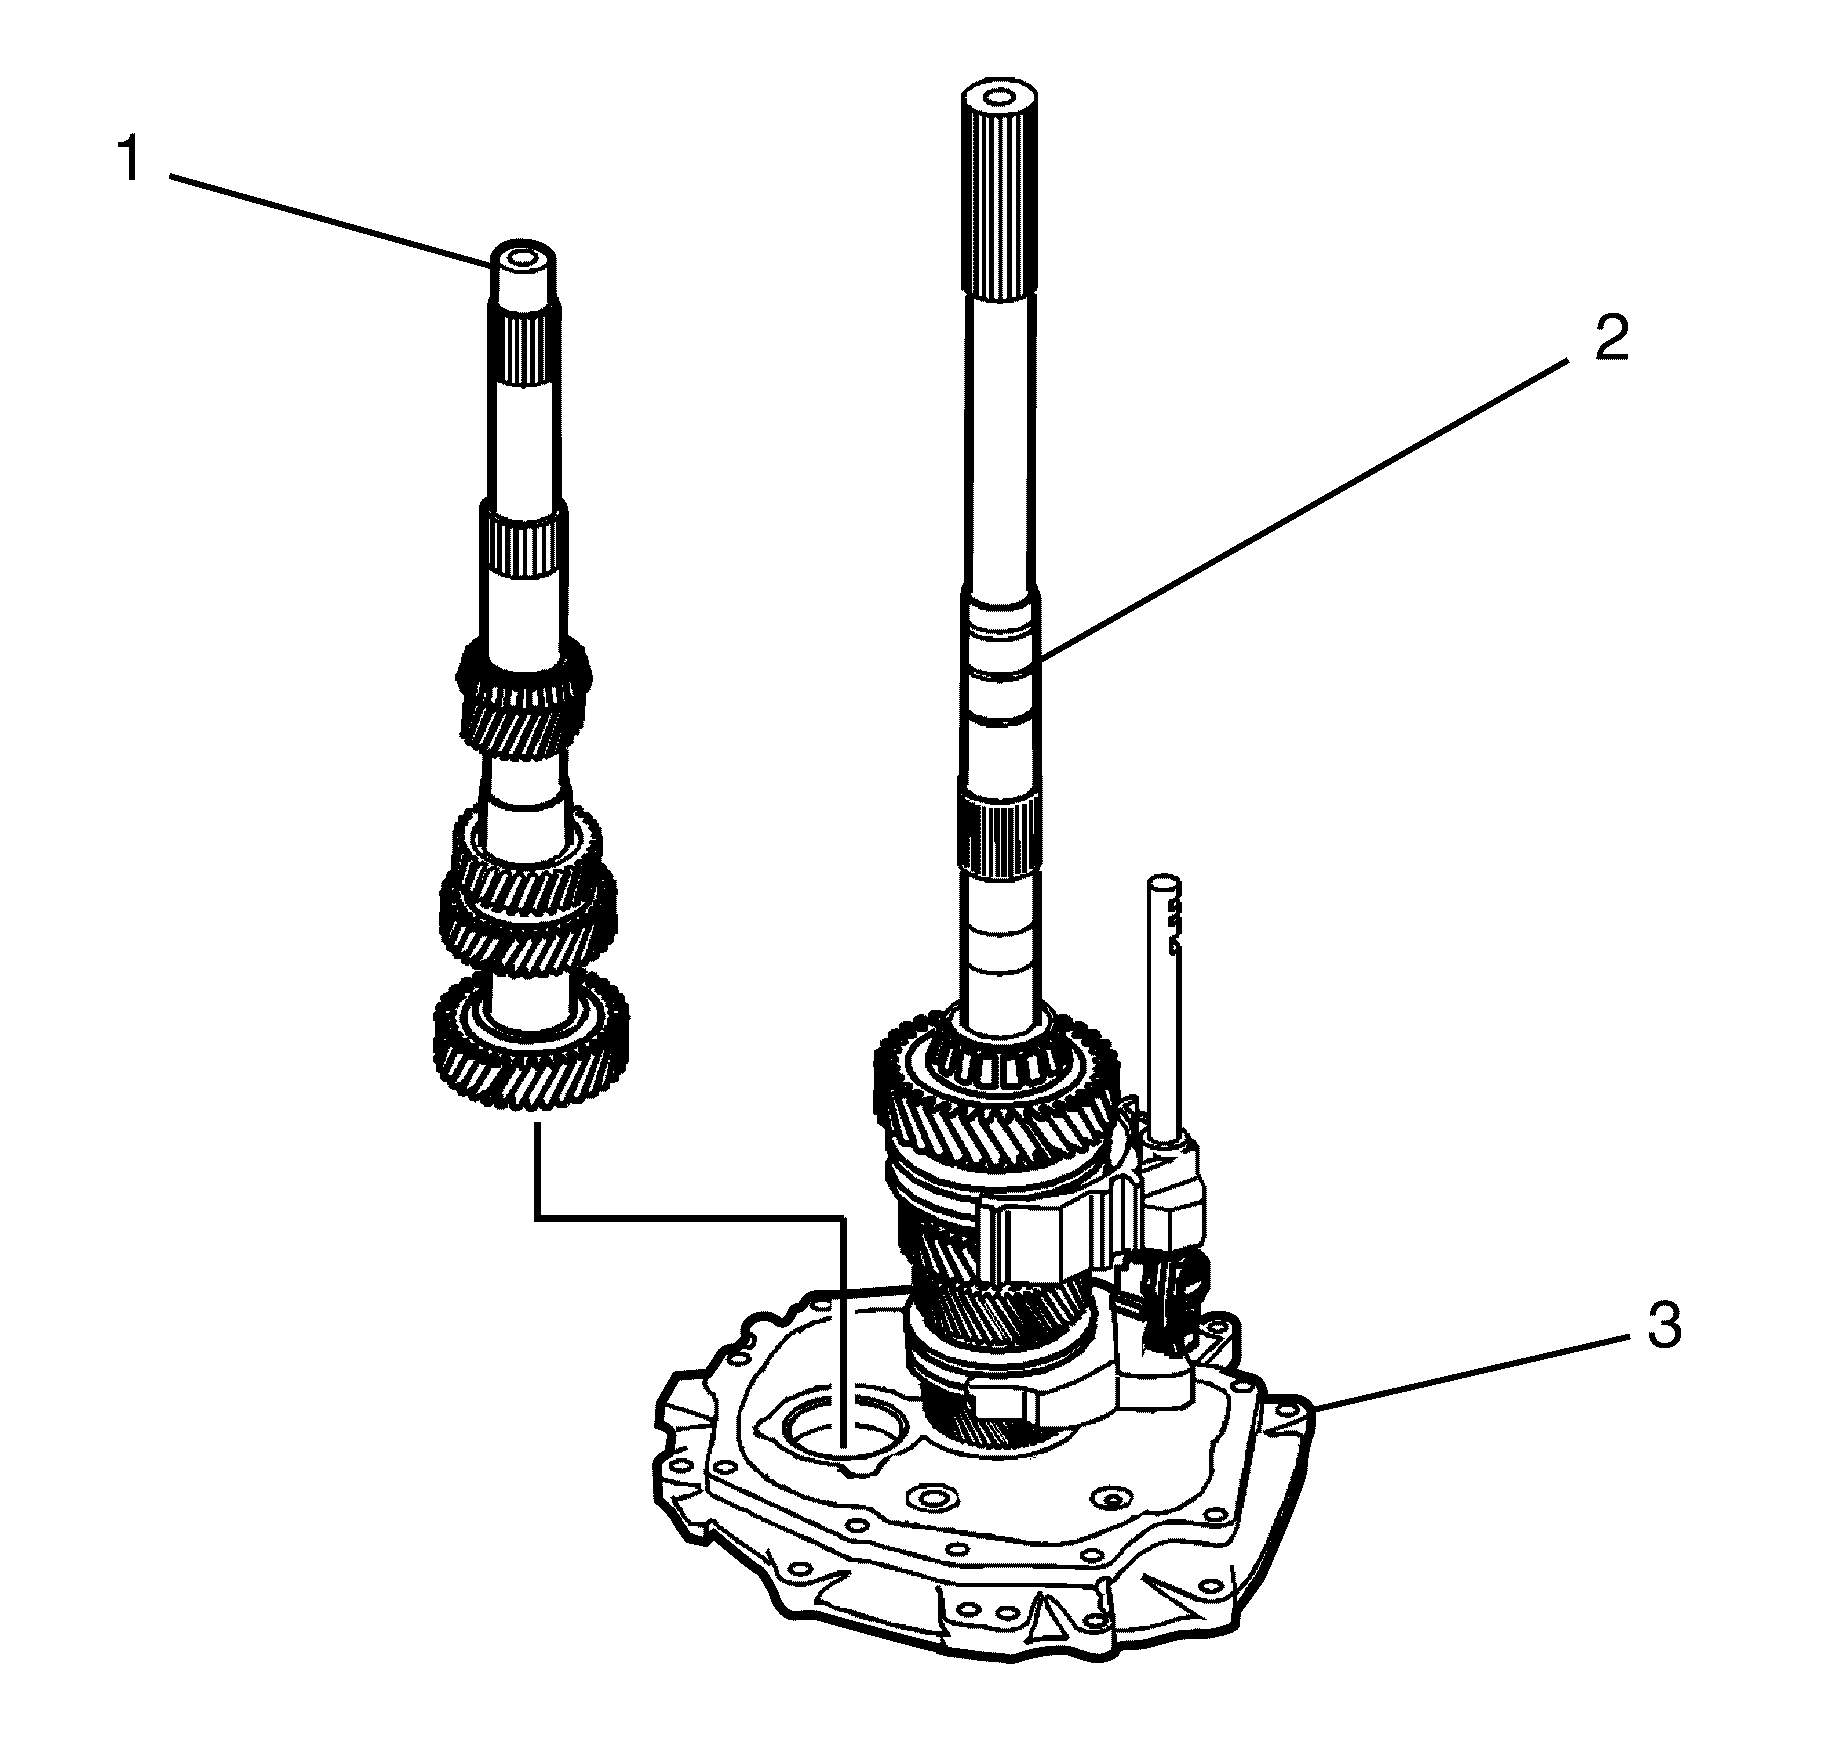
| 6.1. | Lift up the mainshaft assembly (2) enough in order to install the countershaft assembly (1). |
| 6.2. | Install the countershaft assembly (1). |
| 6.3. | Lift the mainshaft assembly (2) enough in order to rotate the input shaft to engage the synchronizer keys with 4th gear blocking ring. |
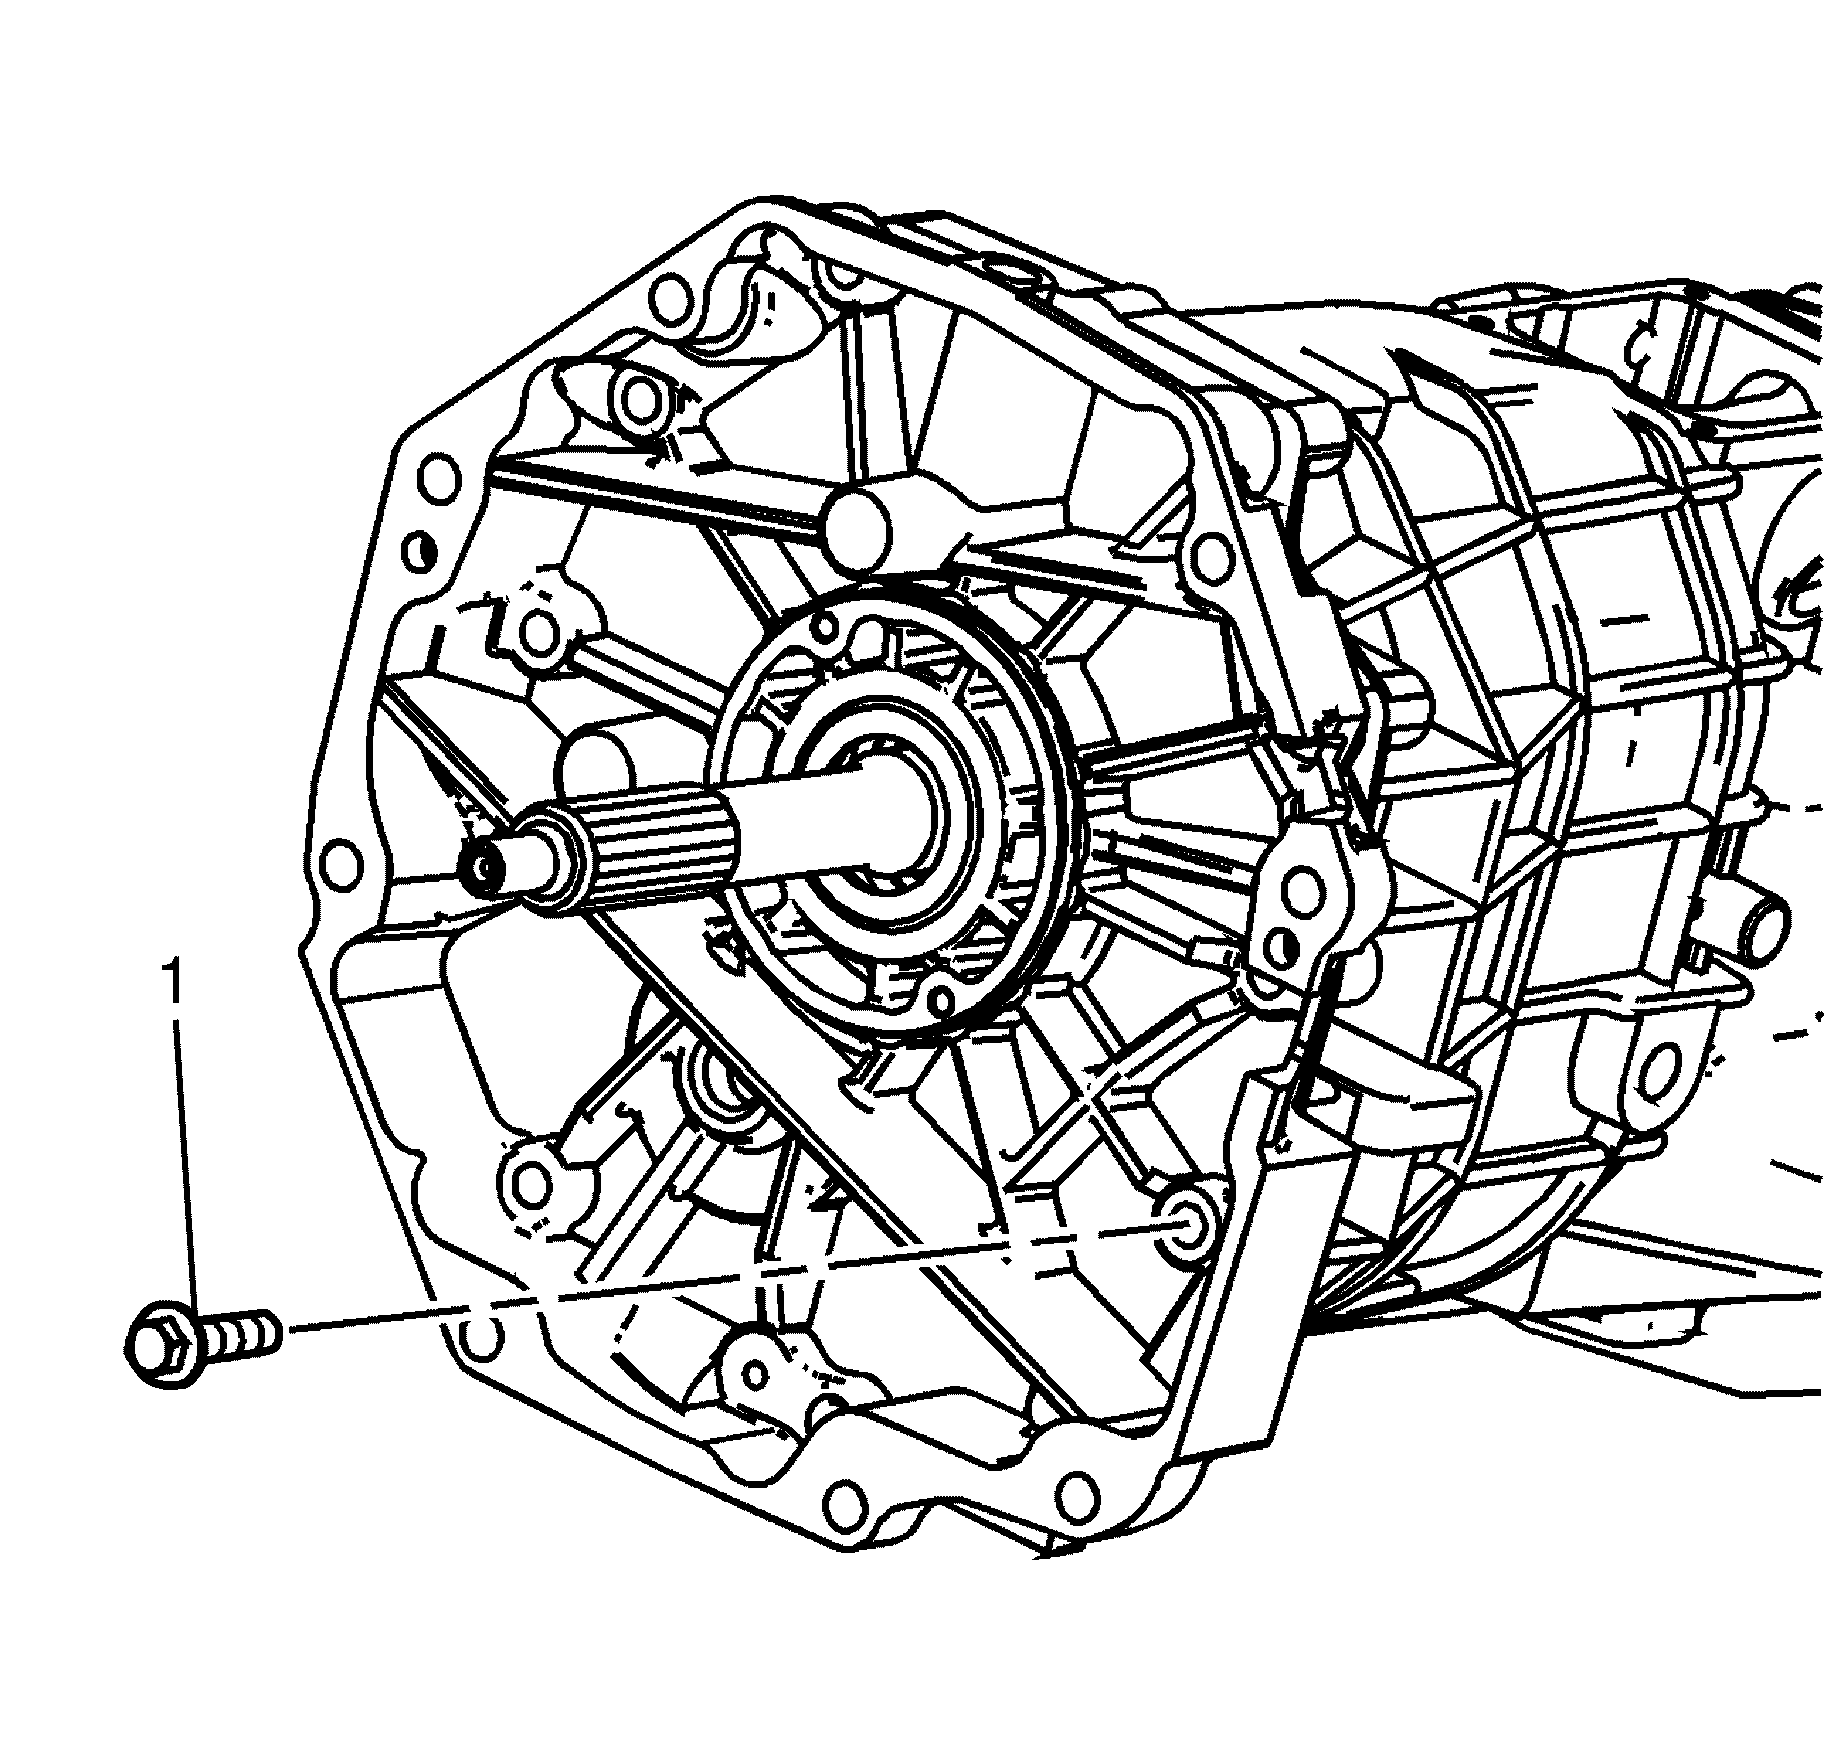
Tighten
Tighten the bolts to 48 N·m (36 Ib ft).
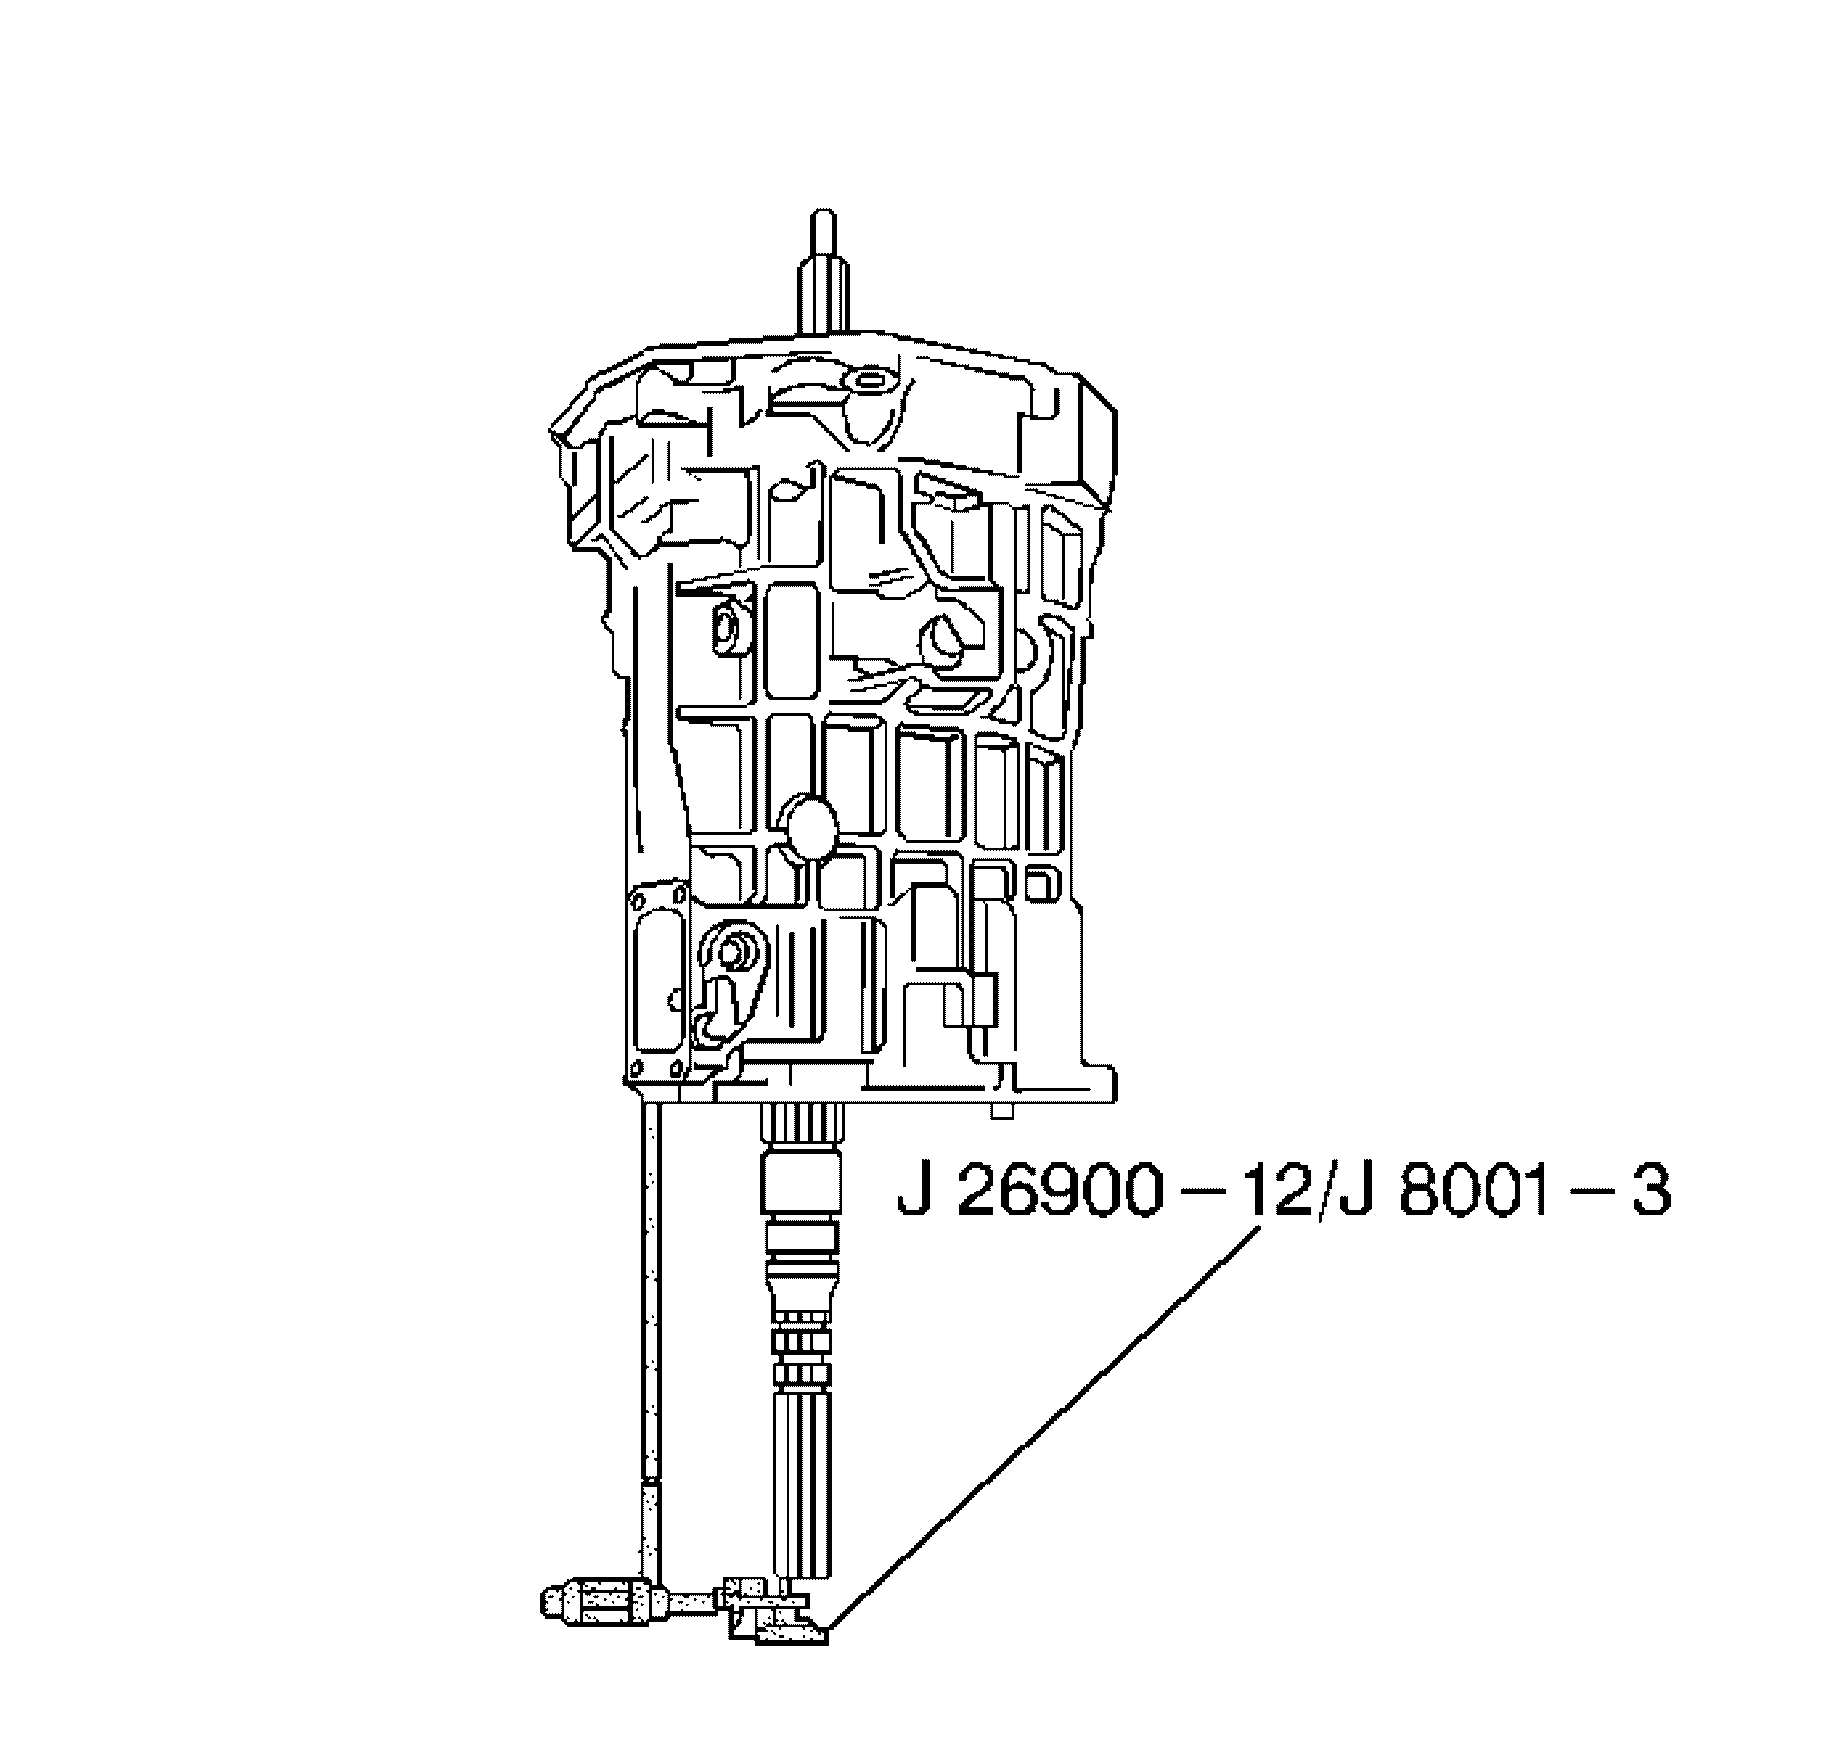
| 9.1. | Place the tip of the J 8001 on the end of the mainshaft. |
| 9.2. | Move the input shaft up and down. |
| 9.3. | Record the measurement. |
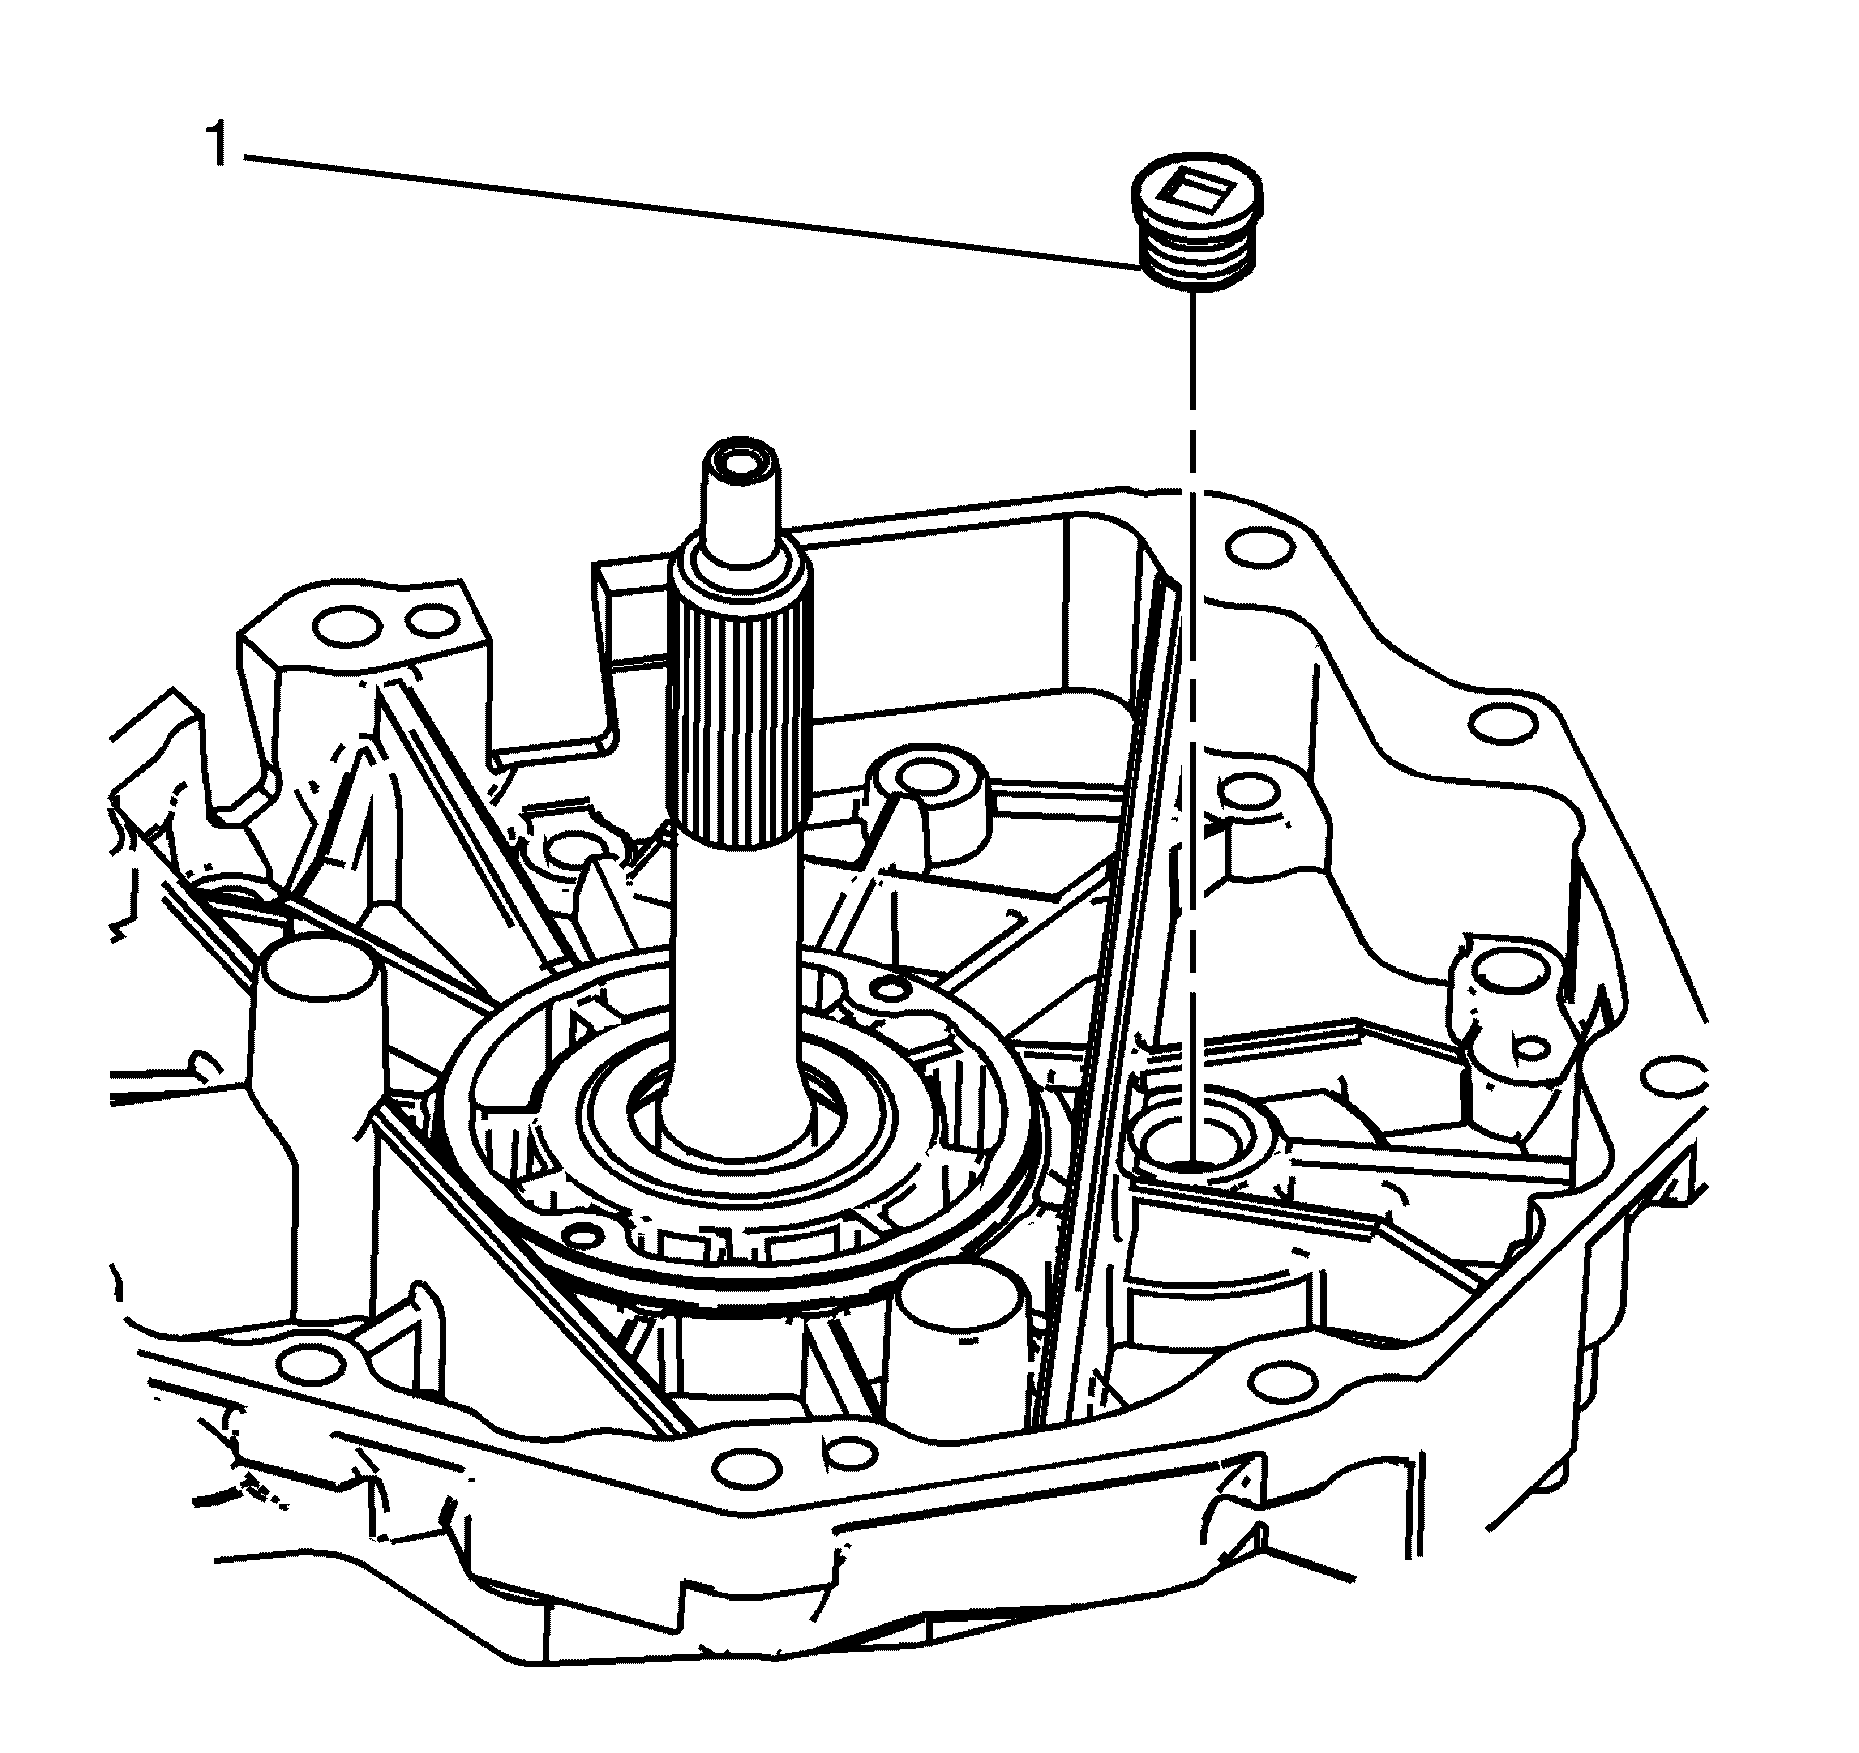
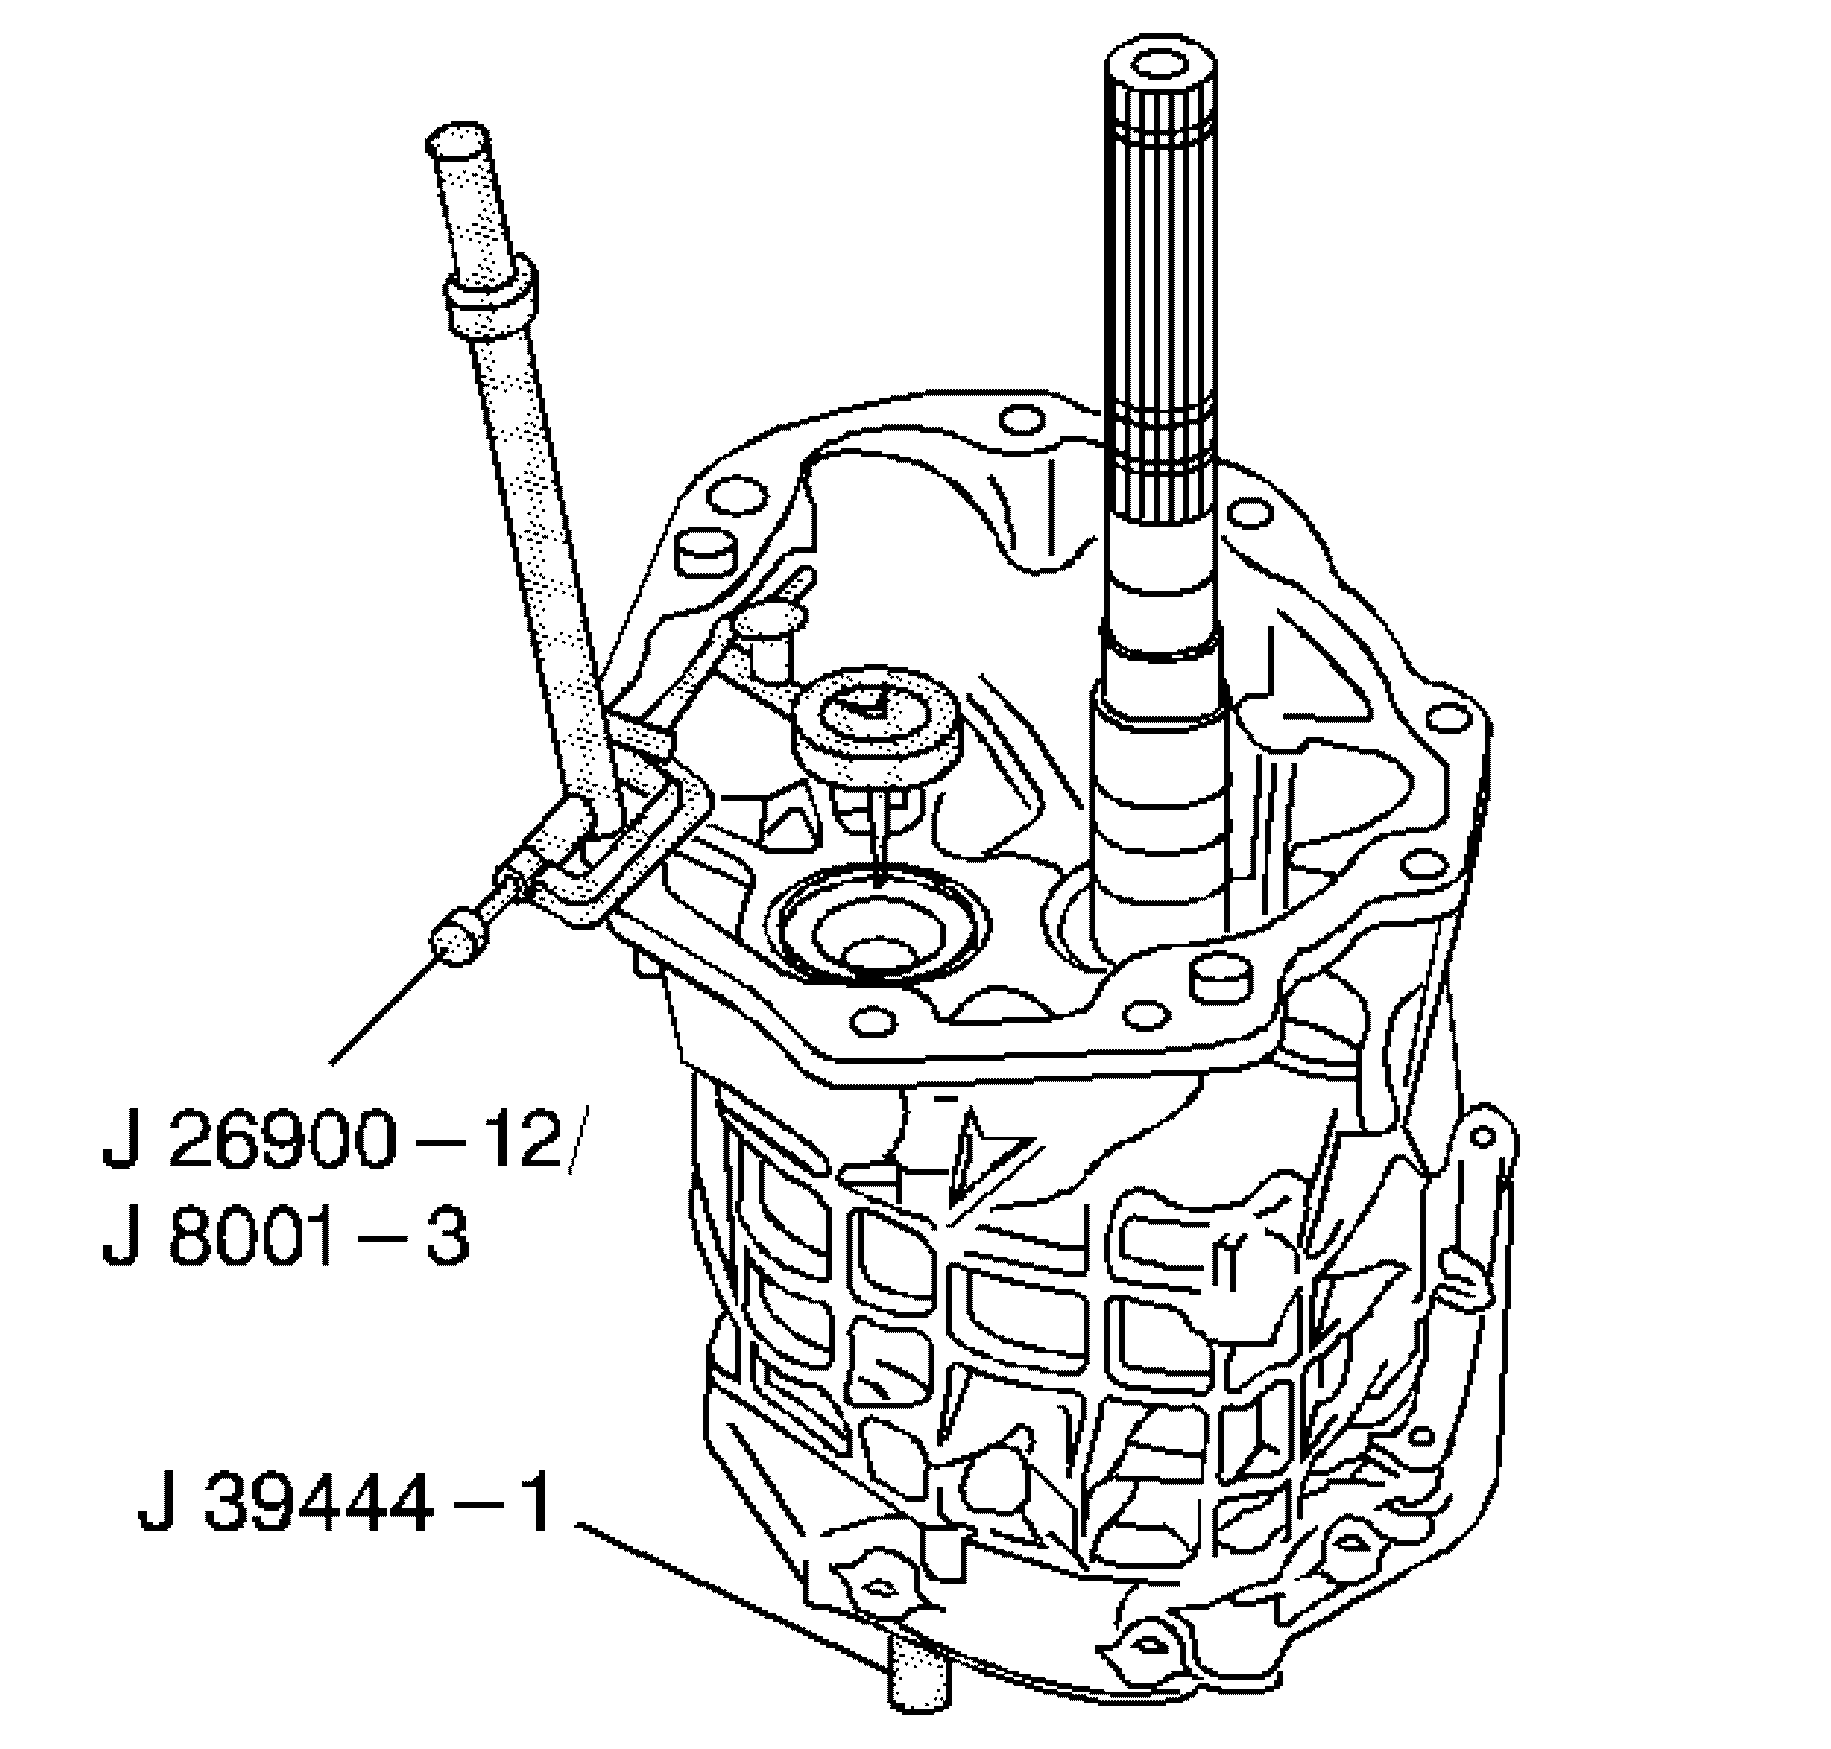
| 14.1. | Install the J 39444-1 through the adapter plate plug hole. Screw the J 39444-1 into the countershaft. |
| 14.2. | Move the countershaft up and down with the countershaft end play rod J 39444-1 . |
| 14.3. | Record the measurement. |
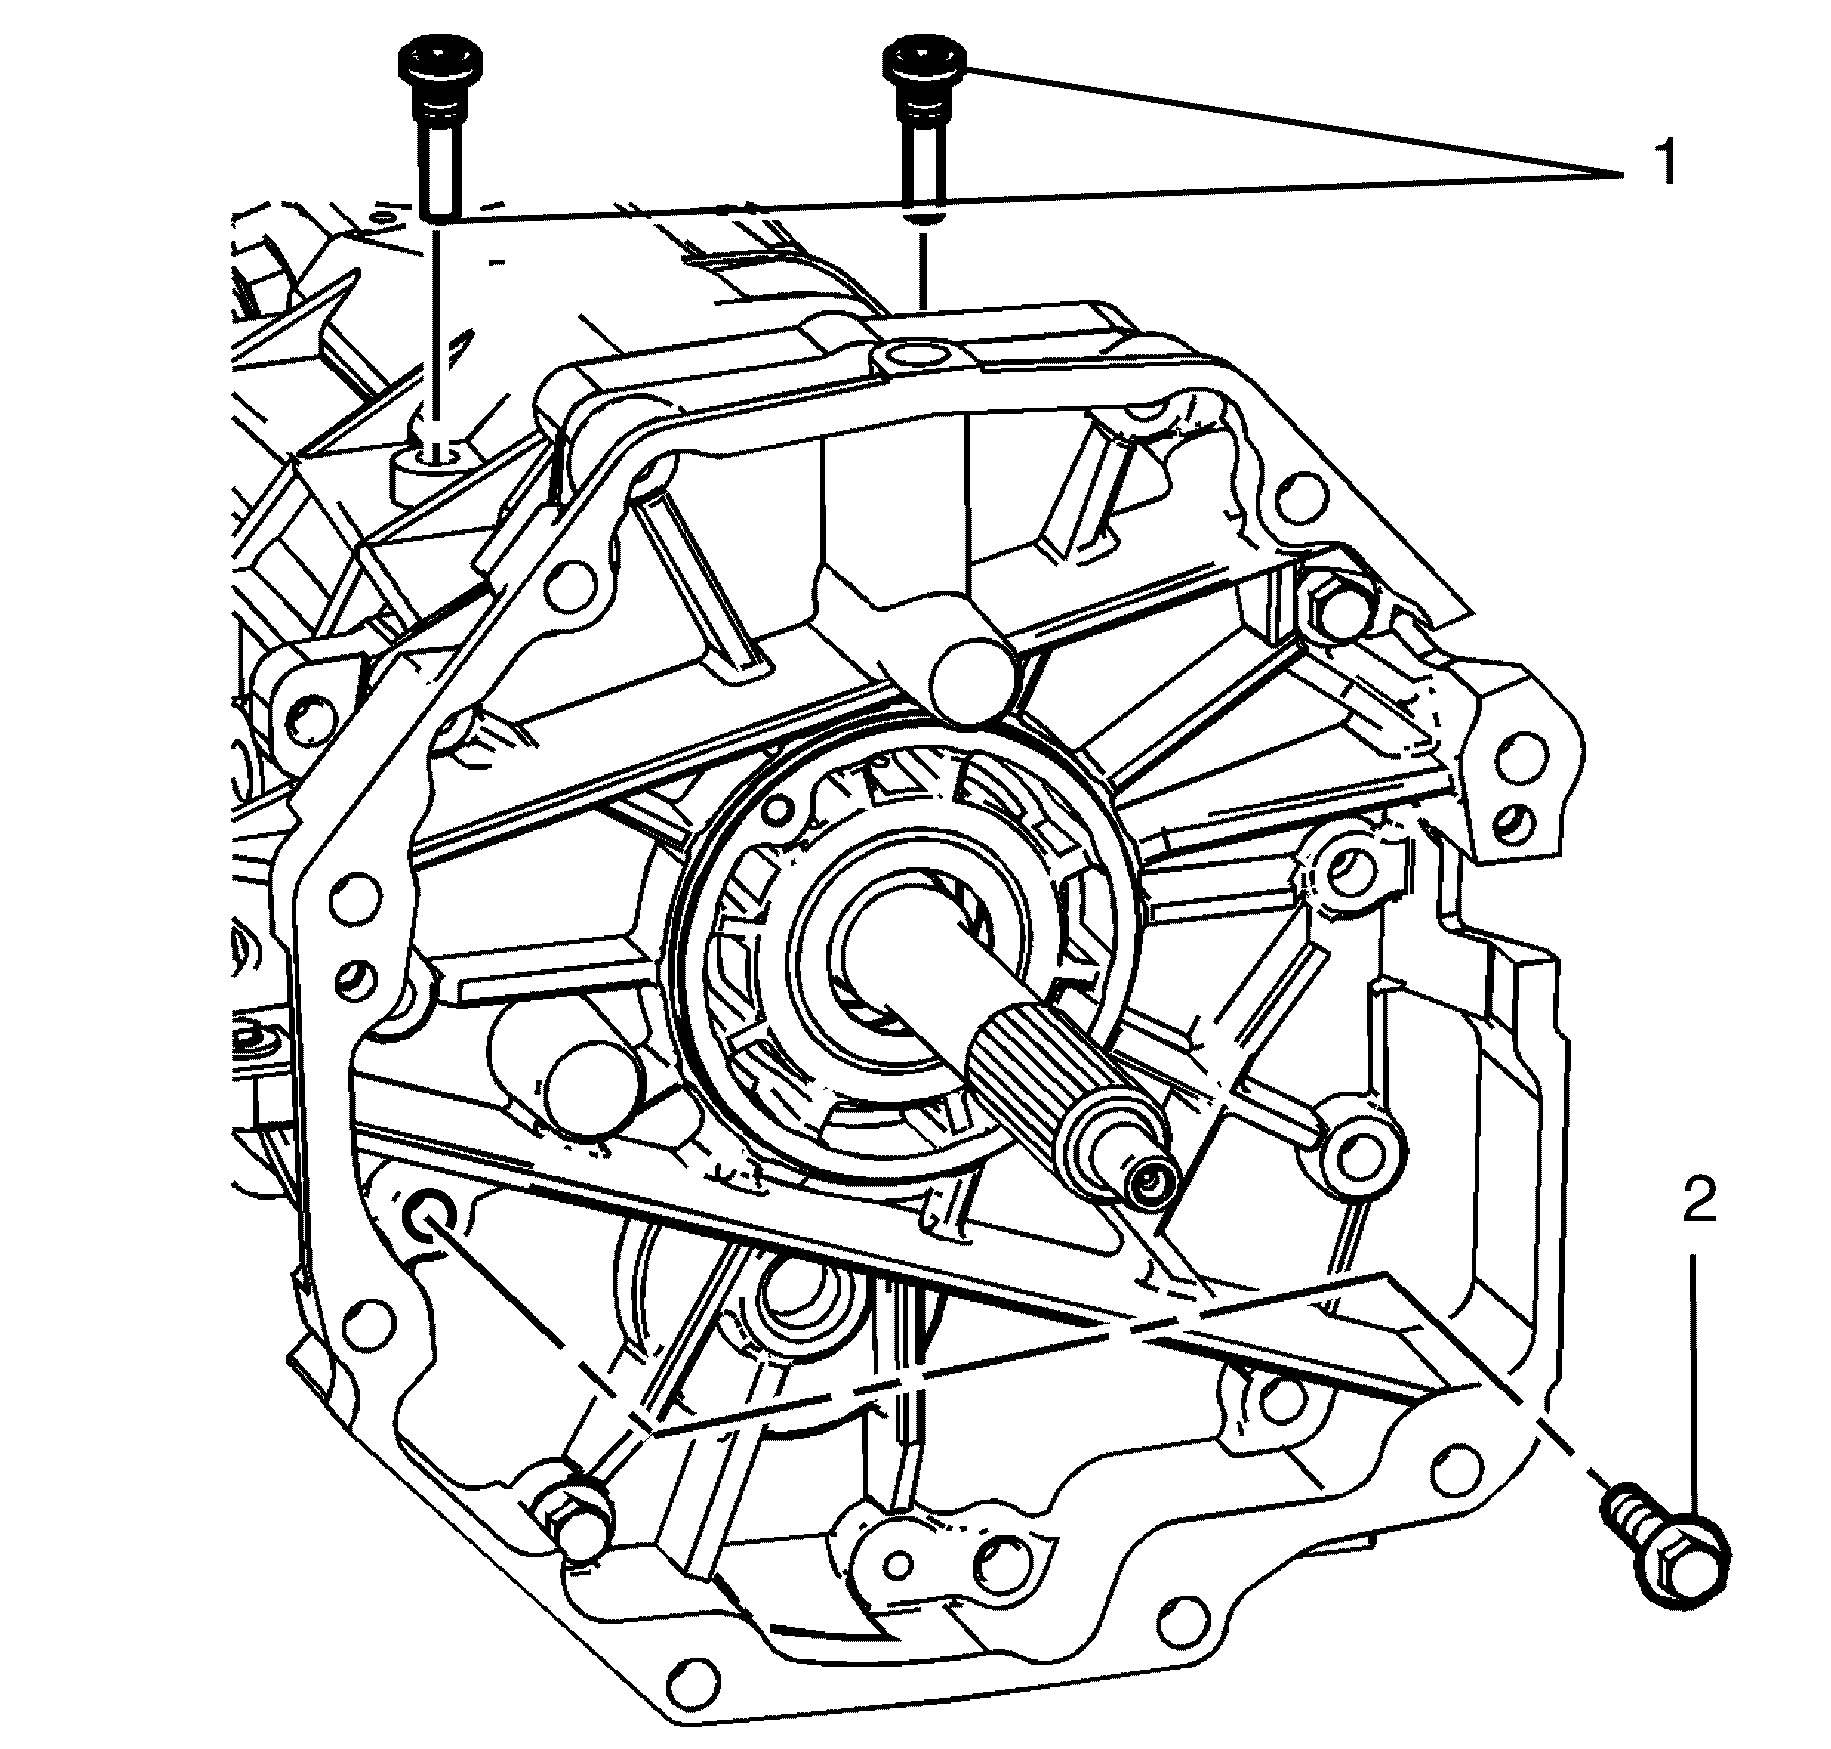


Important: When removing the shift shaft be careful not to lose the dowel pin.

Countershaft
Tools Required
| • | J 8001 Dial Indicator Set |
| • | J 39444-2 Countershaft End Play Rod |
Important: The following procedure cannot be performed accurately until the countershaft shimming procedure has been completed.
- Rotate the transmission in the horizontal position.
- Install the extension housing (2).
- Install the extension housing bolts (1).
- Remove the adapter plate plug (1).
- Measure the countershaft end play using the following procedure:
- Select a shim to achieve 0.05-0.13 mm (0.002-0.005 in) axial play.
- Remove the J 8001 .
- Remove the J 39444-2 .
- Install the adapter plate plug (1).
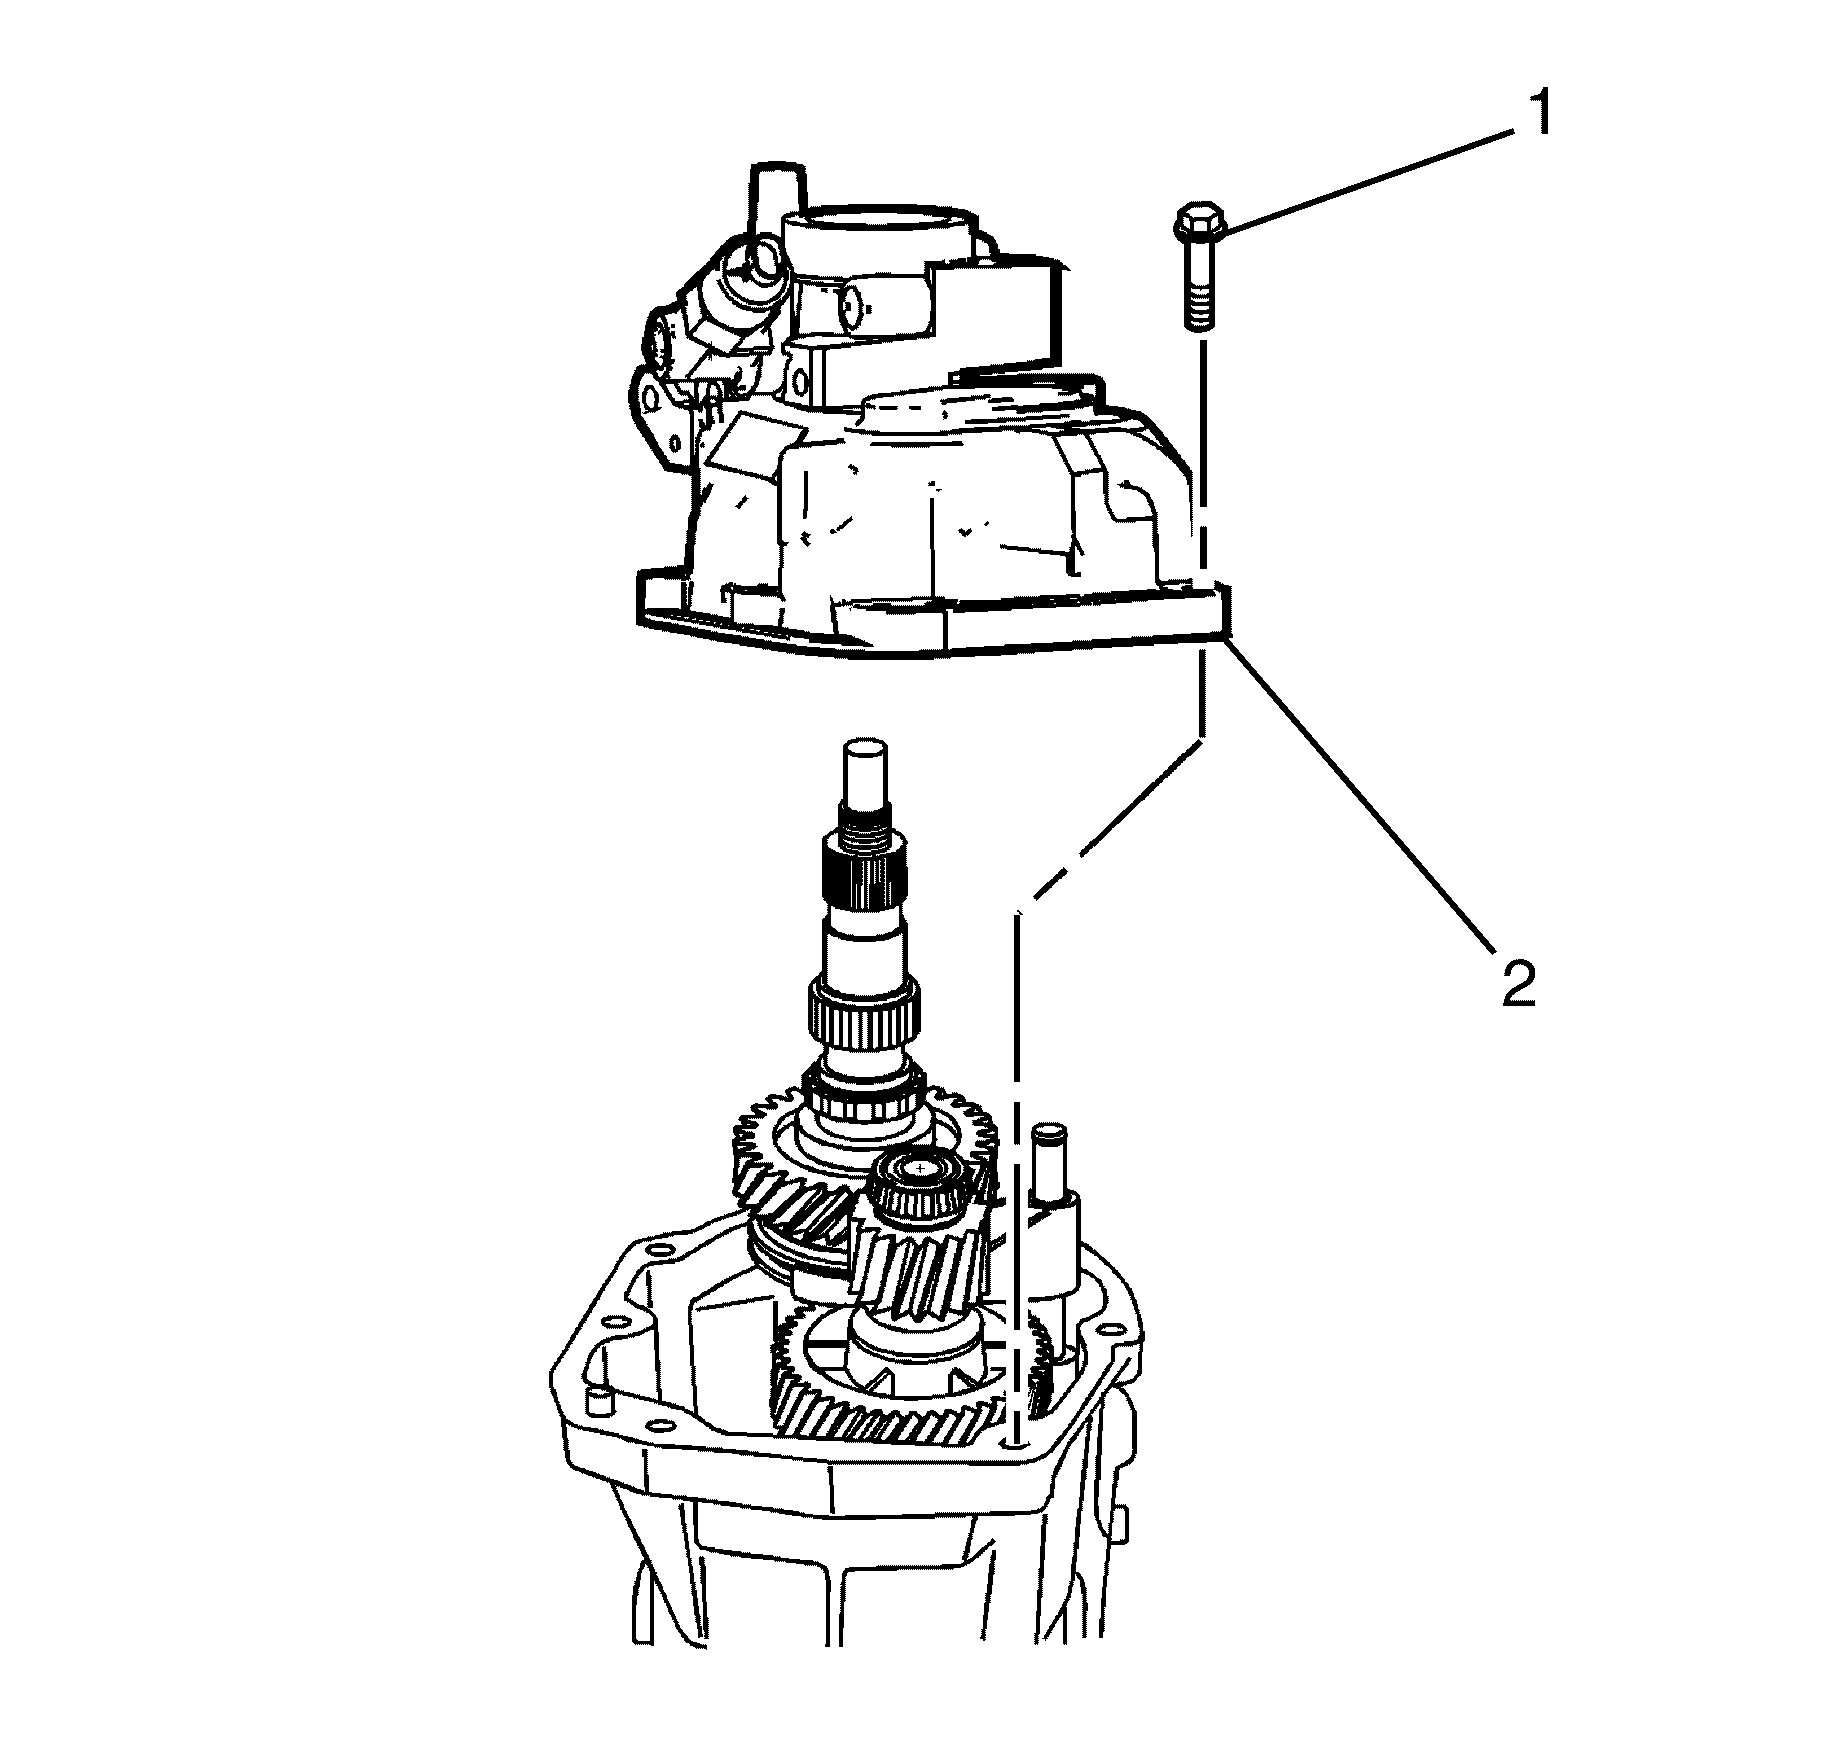
Important: Align the 5th/6th shift shaft to the extension housing bore in order to install the extension housing.
Tighten
Tighten the bolts to 48 N·m (36 lb ft).

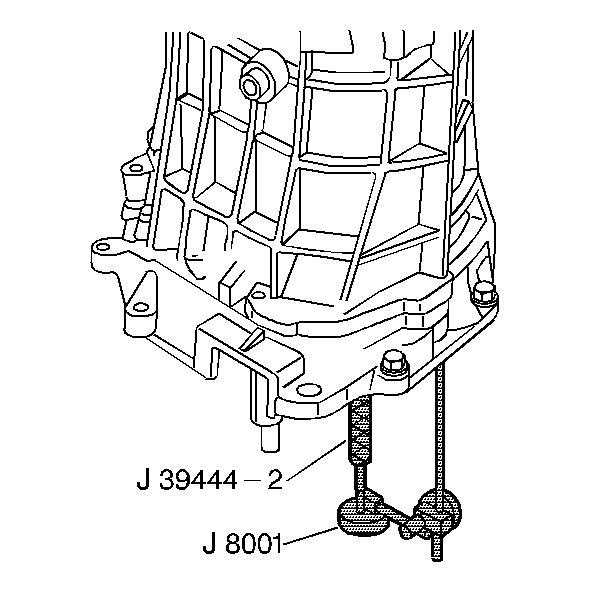
| 5.1. | Install a J 8001 so the tip is on the end of the countershaft end play rod. |
| 5.2. | Rotate the transmission in the vertical position. |
| 5.3. | Move the countershaft up and down using the J 39444-2 . |
| 5.4. | Record the measurement. |

Tighten
Tighten the plug to 27 N·m (20 Ib ft).
