Important: Soak the new clutch discs in automatic transmission fluid for at least 2 hours before installation.
- Inspect the clutch plates for being worn or burnt. Replace the plates if worn or burnt.
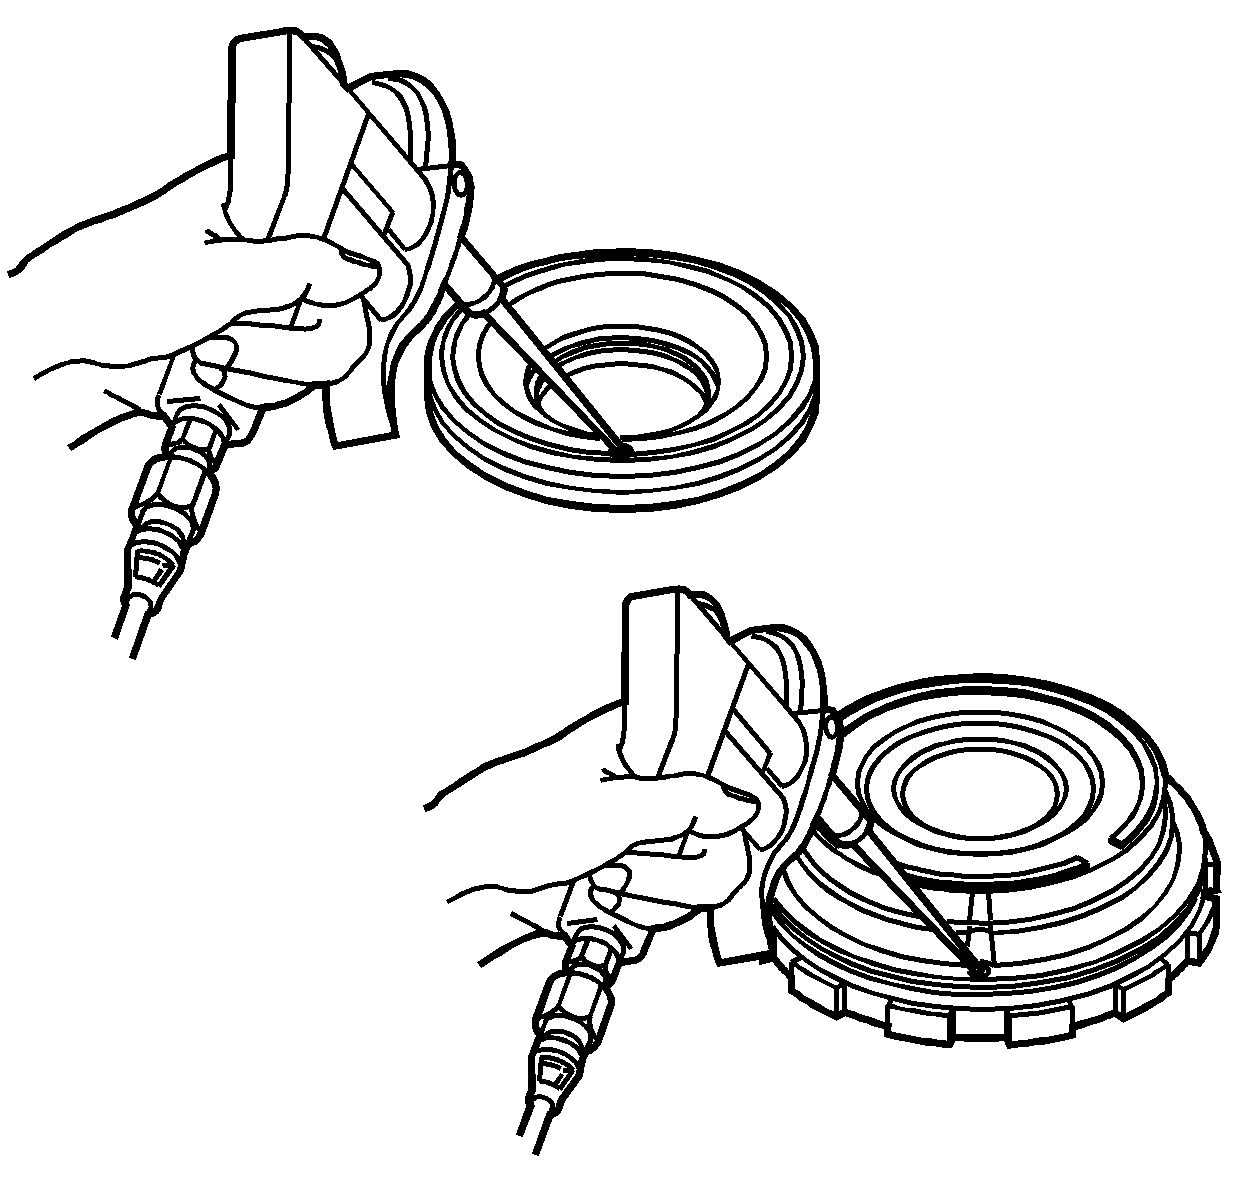
- Shake the piston to be sure the ball check valve is free.
Warning: Wear safety glasses when using compressed air in order to prevent eye injury.
- Apply compressed air to the ball check valve to be sure it is not leaking.
- Inspect the O-ring grooves in the pistons for nicks or scratches.
- Inspect the clutch plate lugs in the forward clutch piston for grooves.
- Replace the piston if faulty.
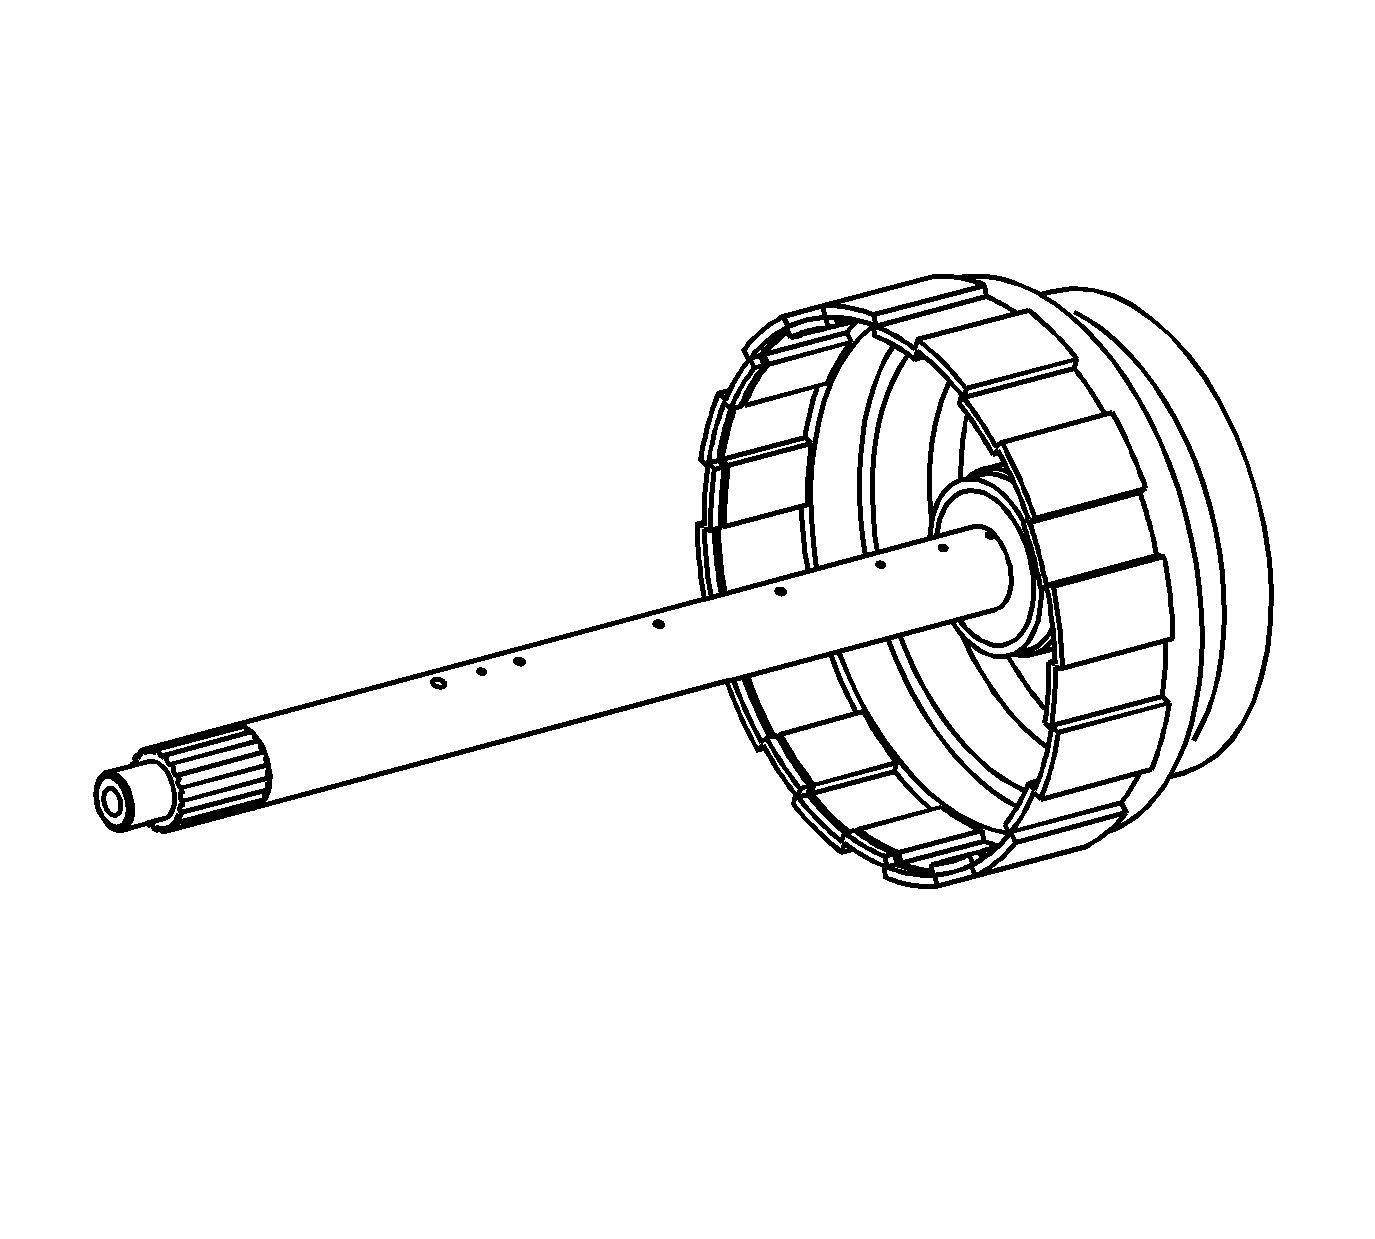
- Clean the forward and direct clutch housing assembly and air dry. Ensure to remove all solvent from the oil passages.
- Inspect the forward and direct clutch housing assembly for the following conditions:
| • | Input shaft bearing and bushing areas for excessive wear or damage |
| • | Rear support bearing surface for excessive wear or damage |
| • | Piston bores for nicks, grooves or excessive wear |
| • | Clutch plate lugs for grooves that will prevent the clutch plates from sliding |
- Replace the forward and direct clutch housing if any of the above conditions are found.
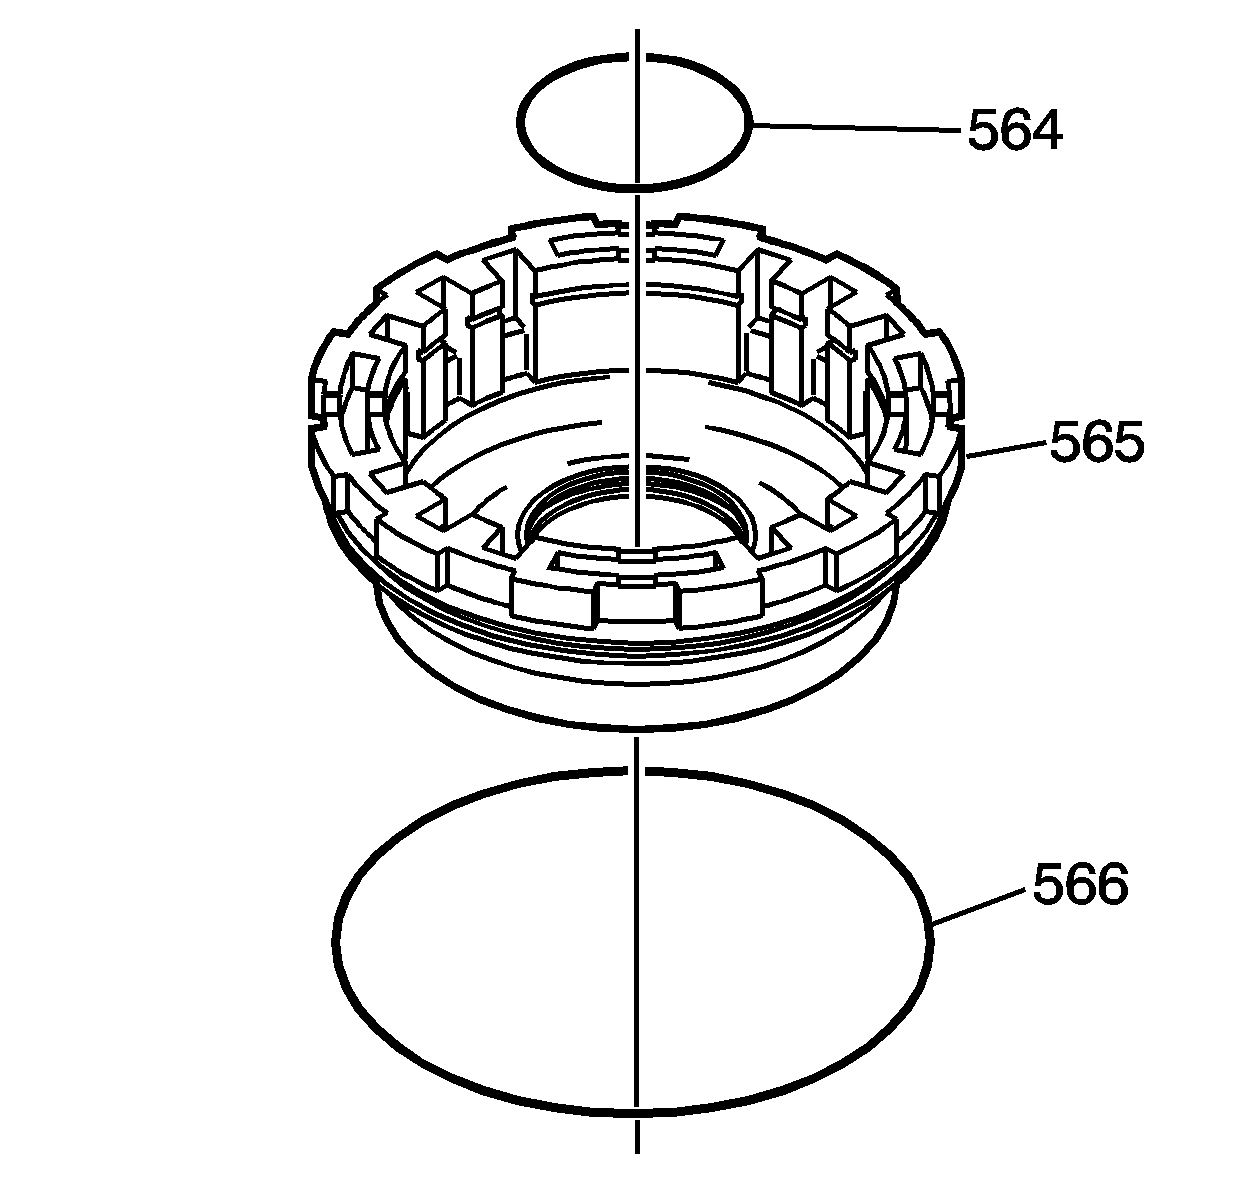
- Apply automatic transmission fluid to the new forward clutch piston seals.
- Install the forward clutch piston inner seal (564) and the forward clutch piston outer seal (566) onto the forward clutch piston (565).
- Apply automatic transmission fluid to the inner surface of the forward clutch drum.
Note: Do not damage the forward clutch piston seals.
- Press, by hand, the forward clutch piston (565) into the forward and direct clutch housing assembly - with input shaft.
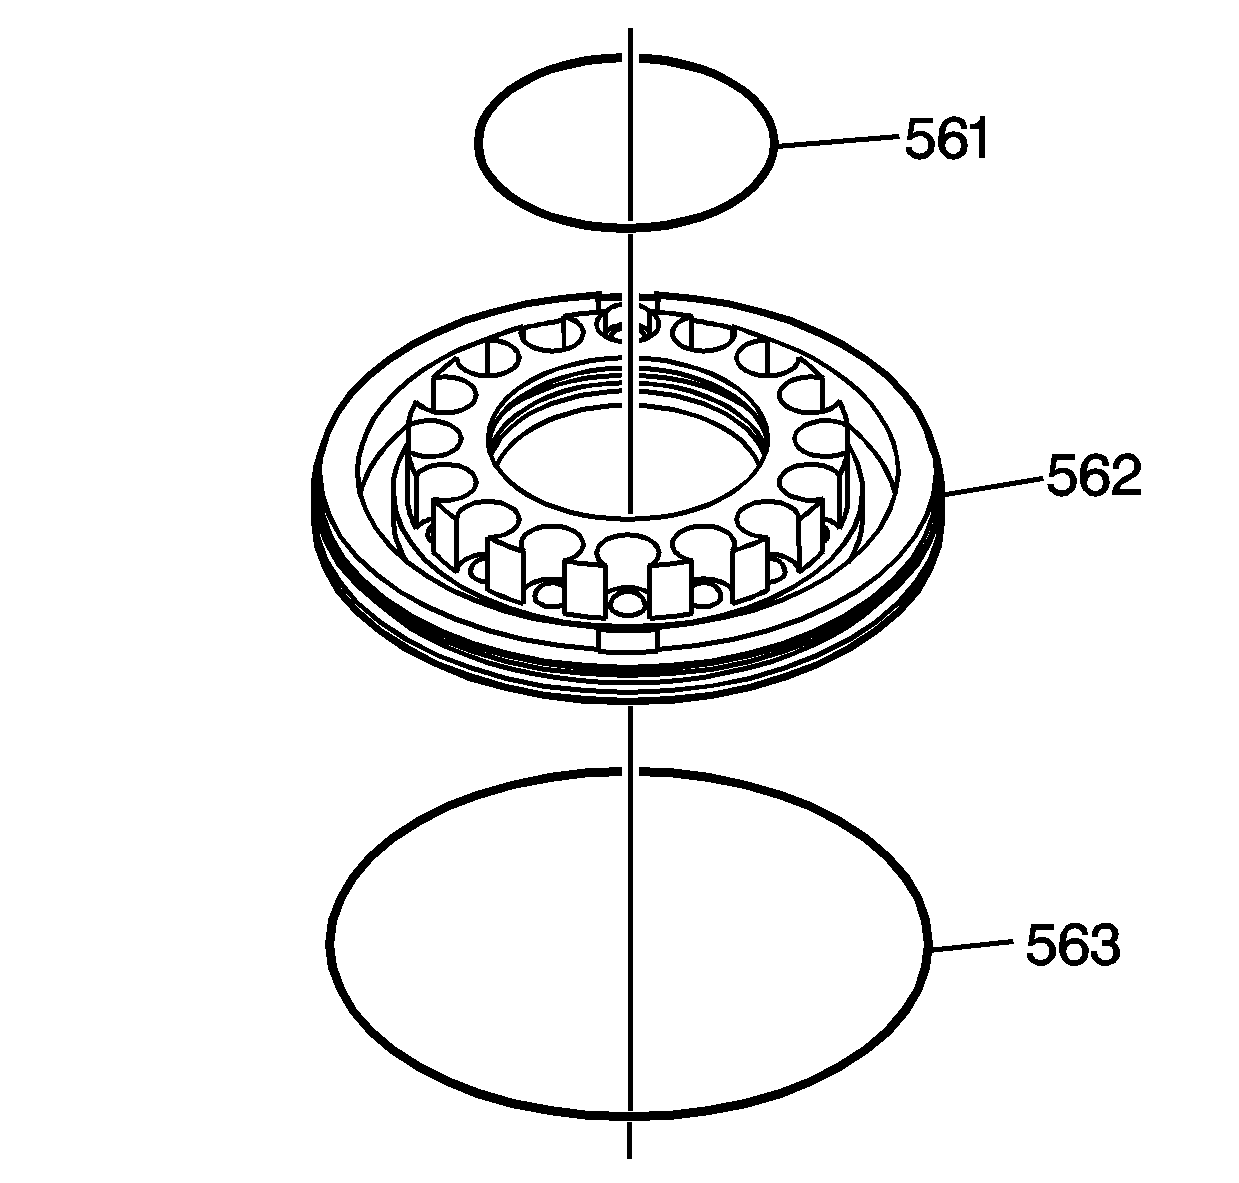
- Apply automatic transmission fluid to the new direct clutch piston seals.
- Install the direct clutch piston inner seal (561) and the direct clutch piston outer seal (563) onto the direct clutch piston (562).
- Apply automatic transmission fluid to the inner surface of the forward clutch piston.
Note: Do not damage the direct clutch piston seals.
- Press, by hand, the direct clutch piston (562) into the forward clutch piston.
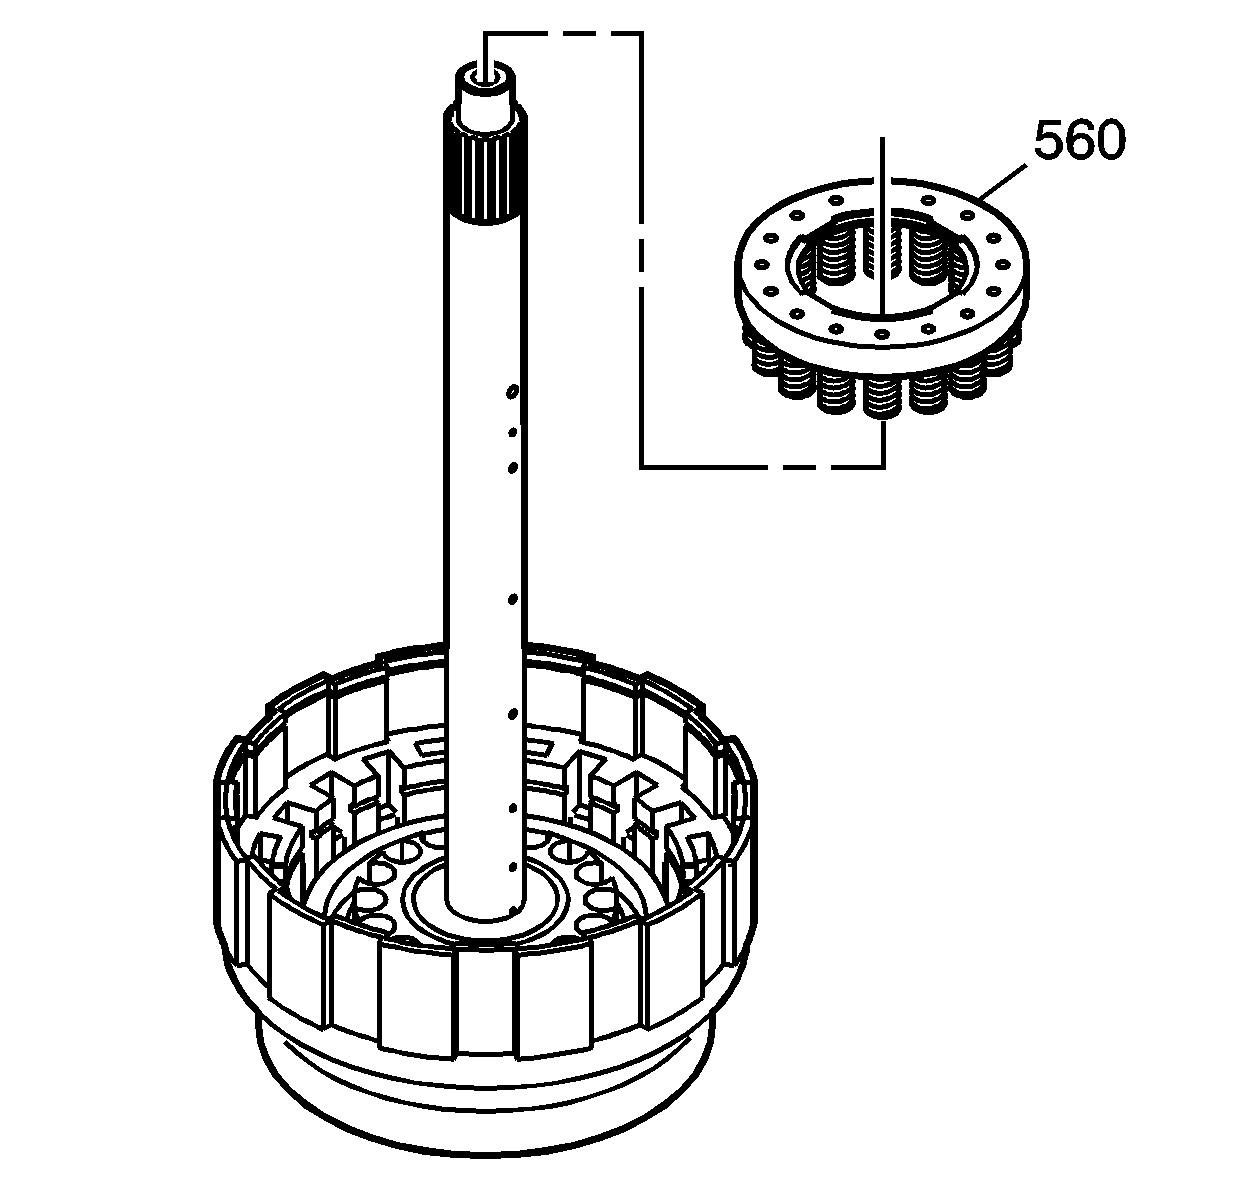
- Install the direct clutch spring assembly (560) onto the direct clutch piston, indexing the springs into the holes in the direct clutch piston.
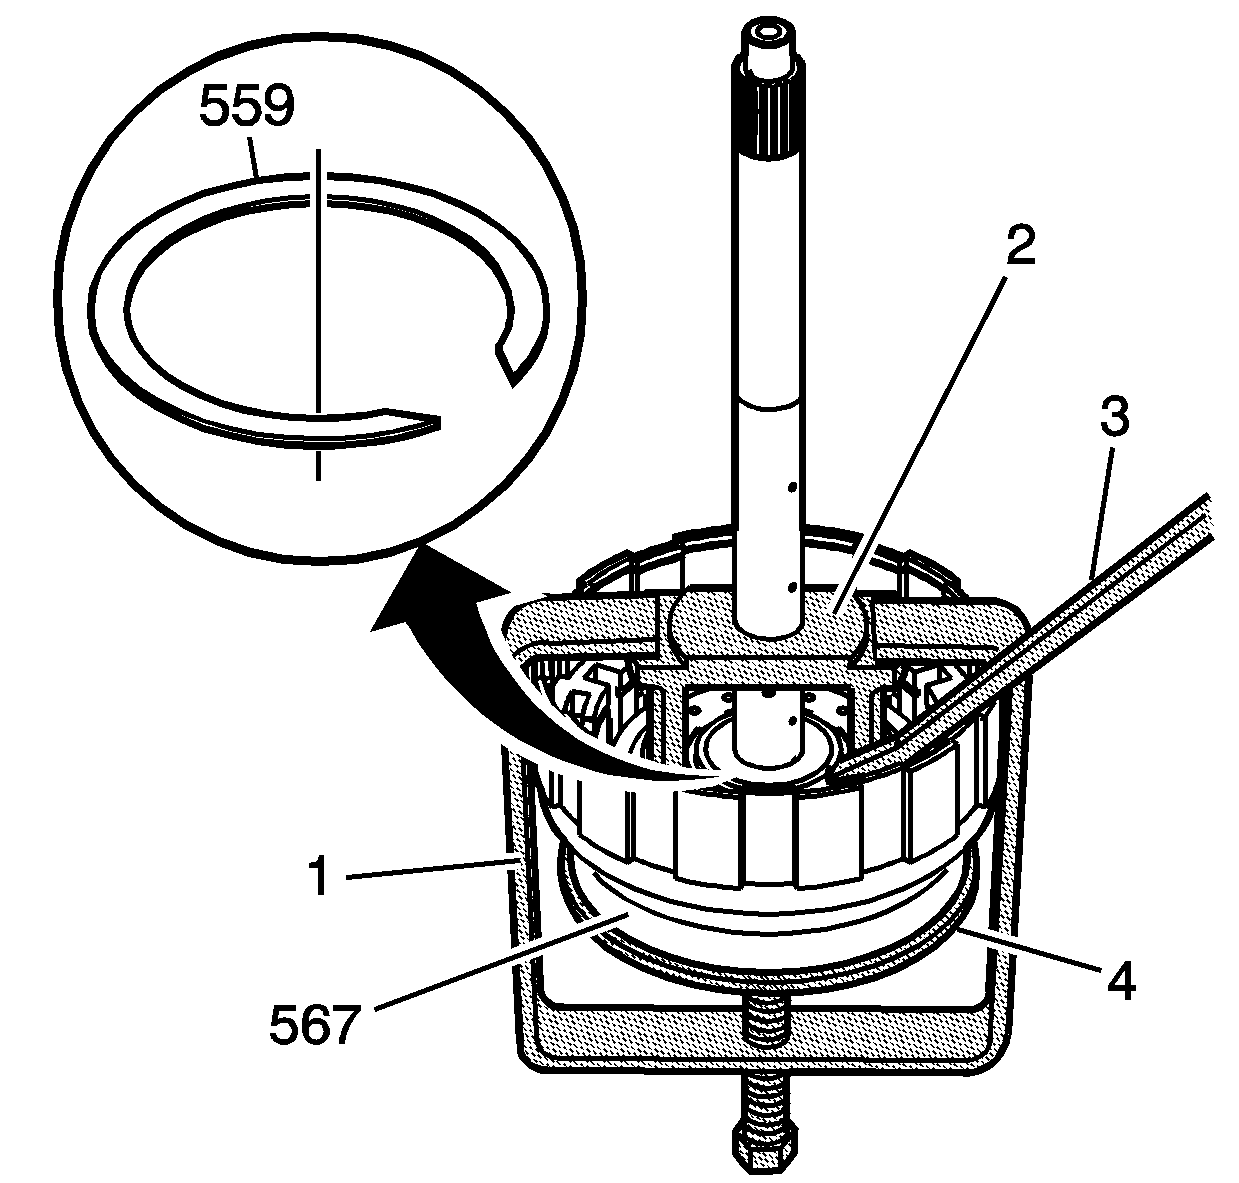
Note: Do not align the end gap of the direct clutch spring retaining ring (559) with the spring retainer claw.
- Install the direct clutch spring retaining ring (559).
| 19.1. | Place the
J 25024-A (1) in a vise with the forcing screw on the bottom and backed out. |
| 19.2. | Place the
J 45186 (2) over the shaft of the forward direct clutch housing and input shaft assembly (567). |
| 19.3. | Place the J 21420-2 (4) from the
J 23327 on top of the forcing screw of
J 25024-A (1). |
| 19.4. | With the forcing screw, compress the clutch spring to allow the installation of the retaining ring. |
| 19.5. | Use
J 28585 (3) or snap ring pliers to install the retaining ring. |
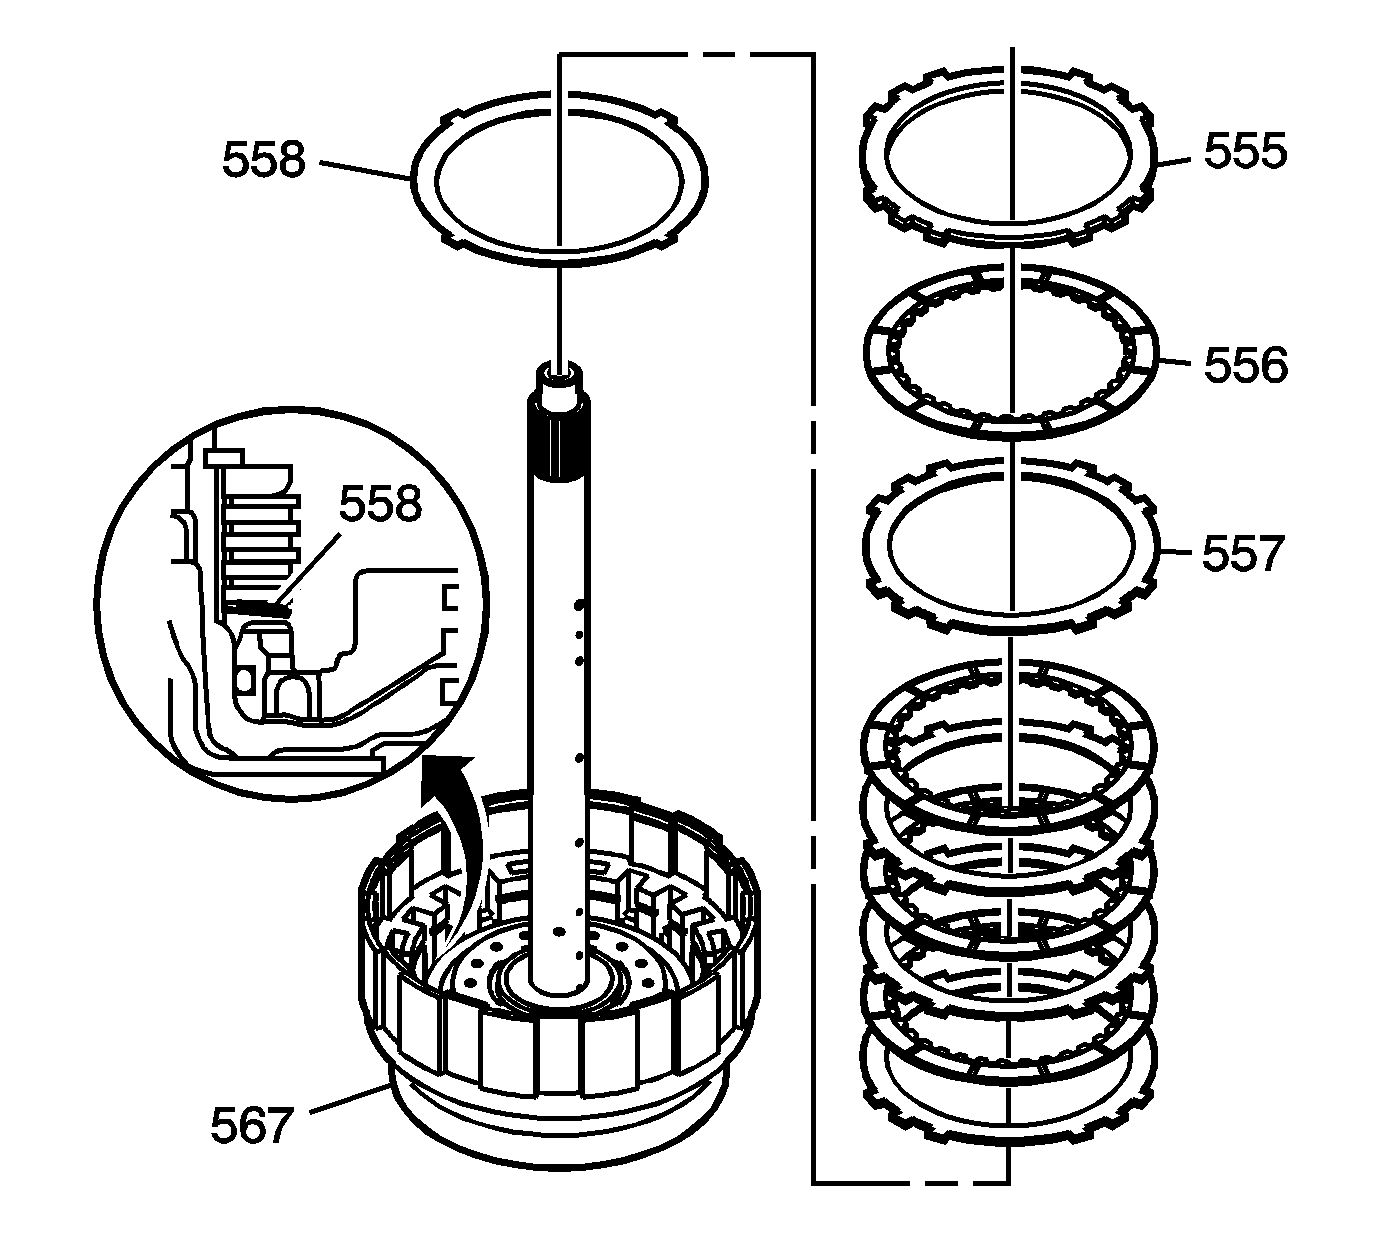
Note: Make sure the direct clutch apply plate is facing the correct direction.
- Install the direct clutch apply plate (558). The plate is convex shaped.
- Install the 4 direct clutch steel plates (557) and the 4 direct clutch fiber plates (556).
- Install the direct clutch backing plate (555).
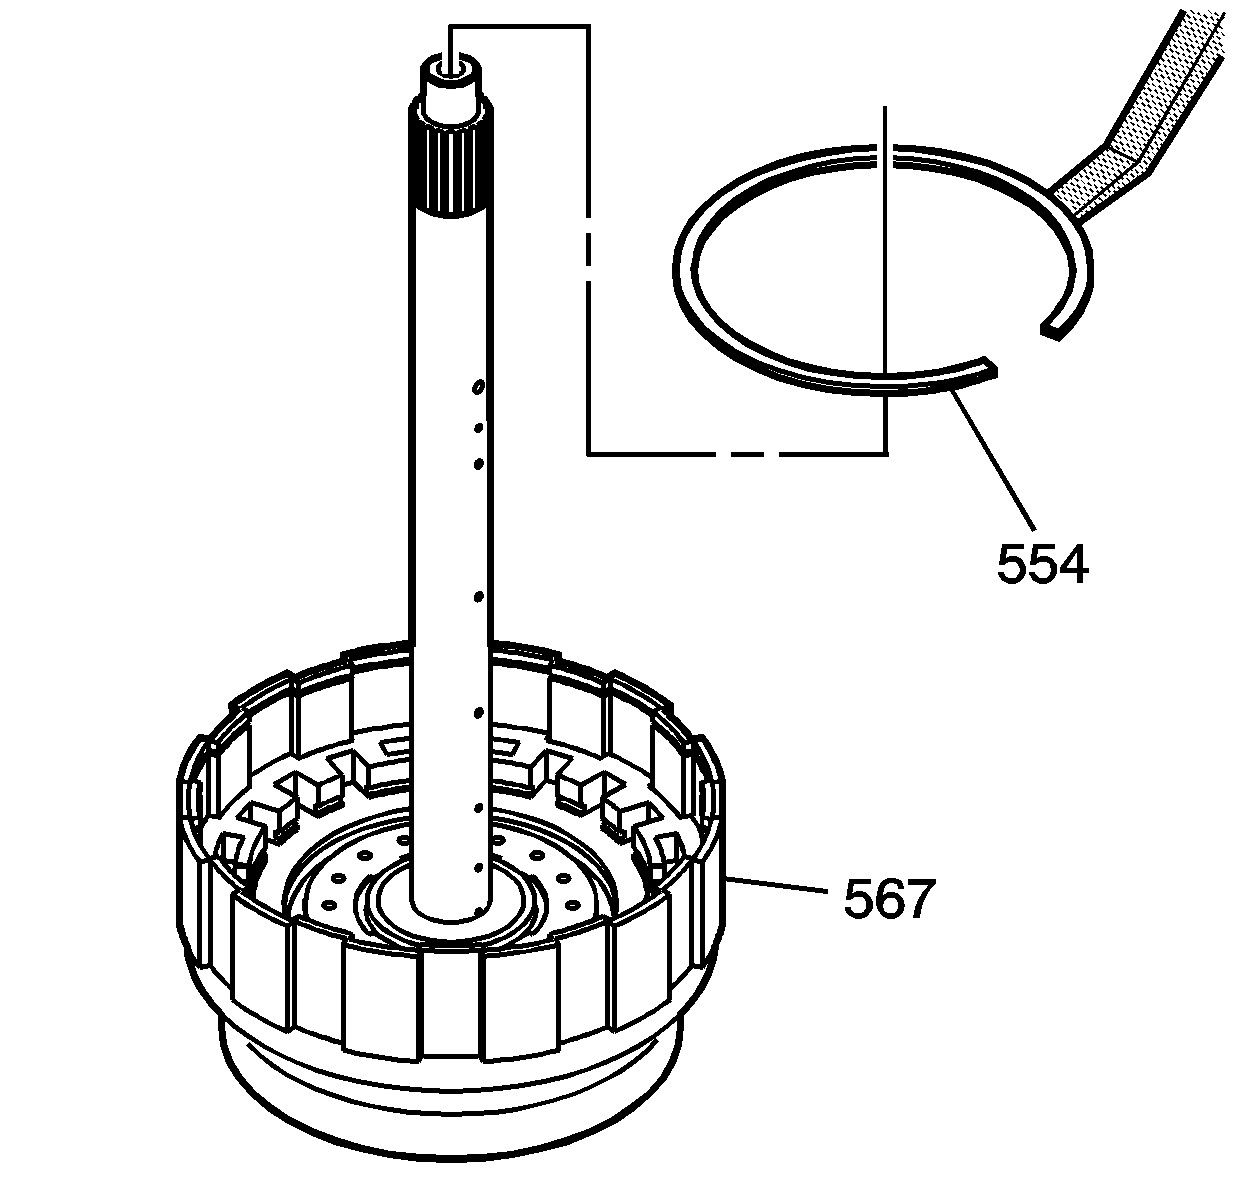
Note: Make sure that the end gap of the direct clutch backing plate retaining ring (554) is not aligned with any of the cut-outs.
- Install the direct clutch backing plate retaining ring (554) into the groove in the forward and direct clutch housing assembly - with input shaft (567) using
J 28585 .
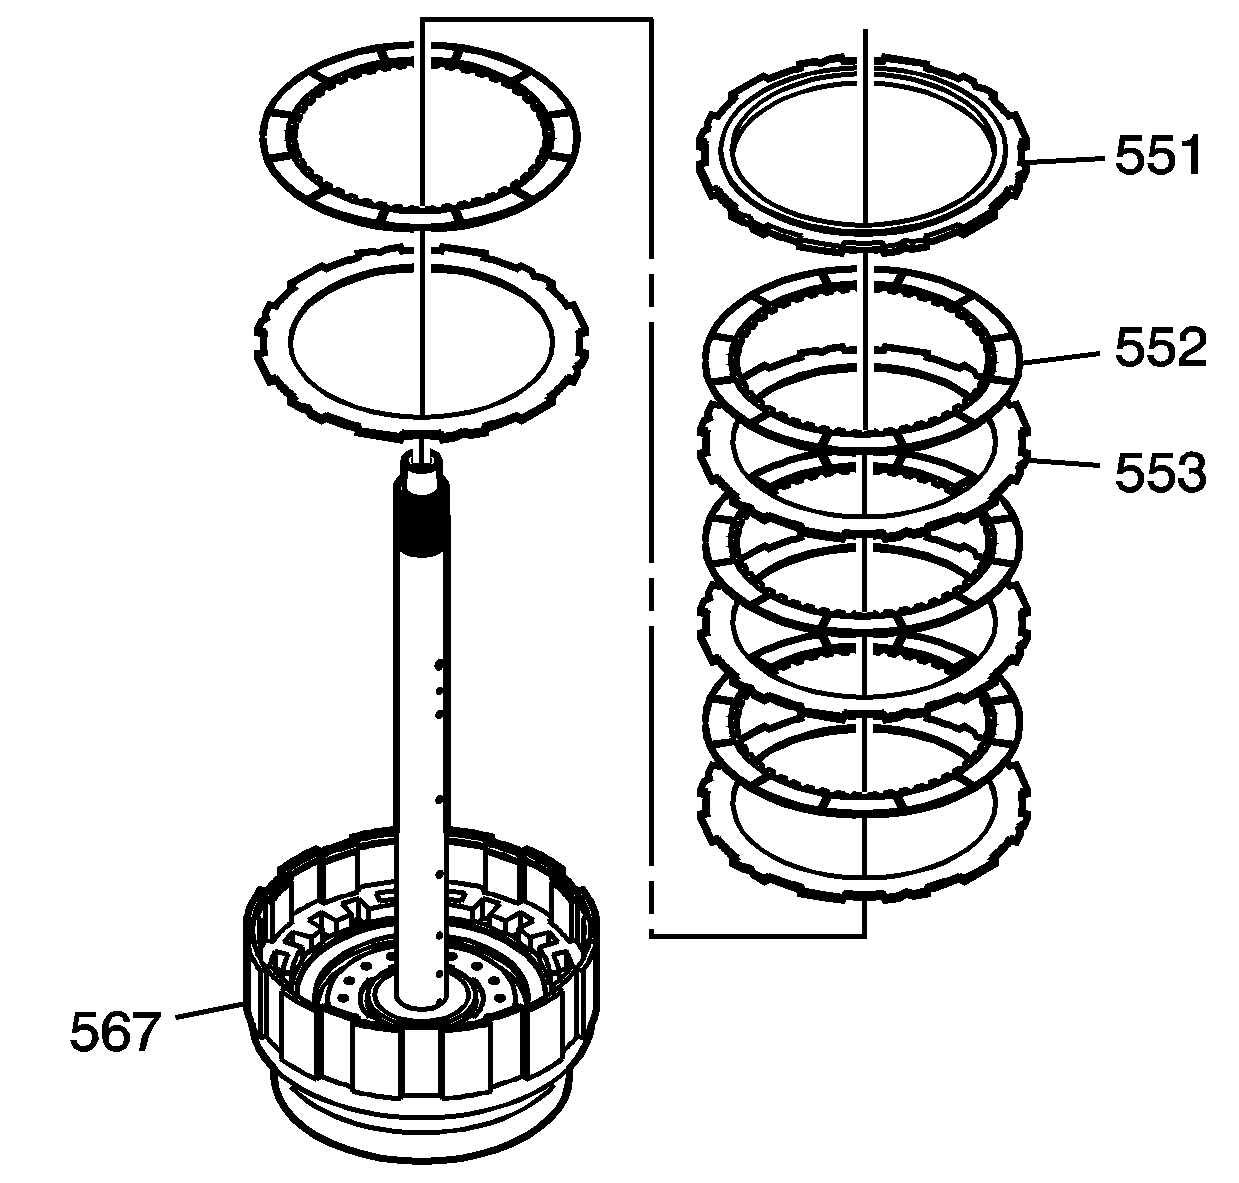
- Install the 4 forward clutch steel plates (553) and the 4 forward clutch fiber plates (552).
- Install the forward clutch backing plate (551).
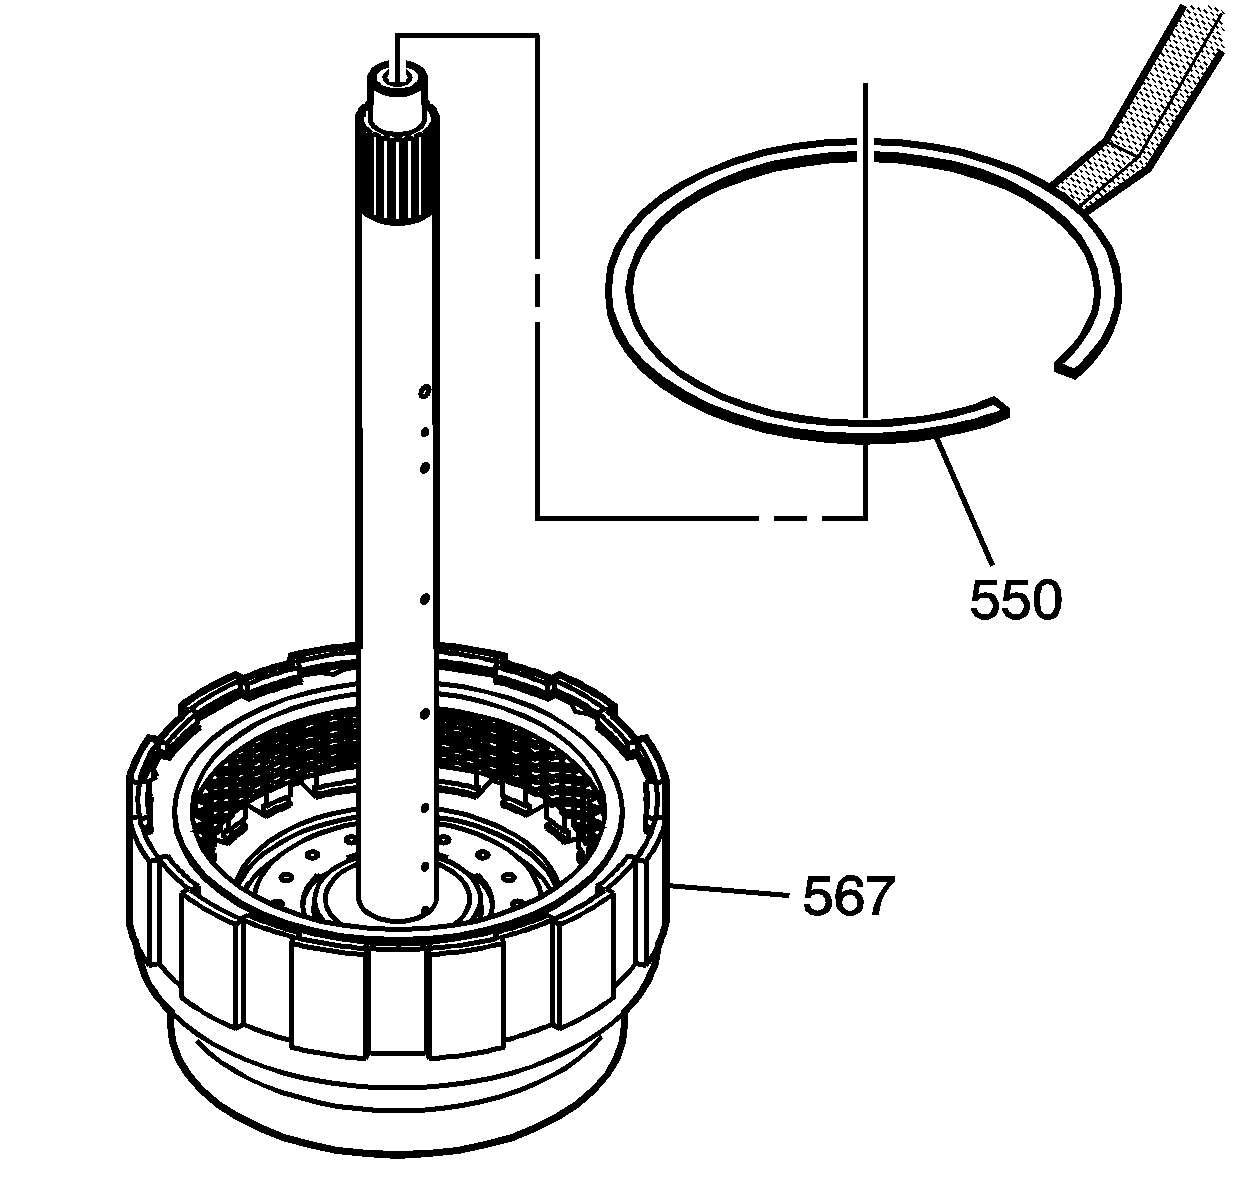
Note: Make sure that the end gap of the forward clutch backing plate retaining ring (550) is not aligned with any of the cut-outs.
- Install the forward clutch backing plate retaining ring (550) into the groove in the forward and direct clutch housing assembly - with input shaft (567) using
J 28585 .
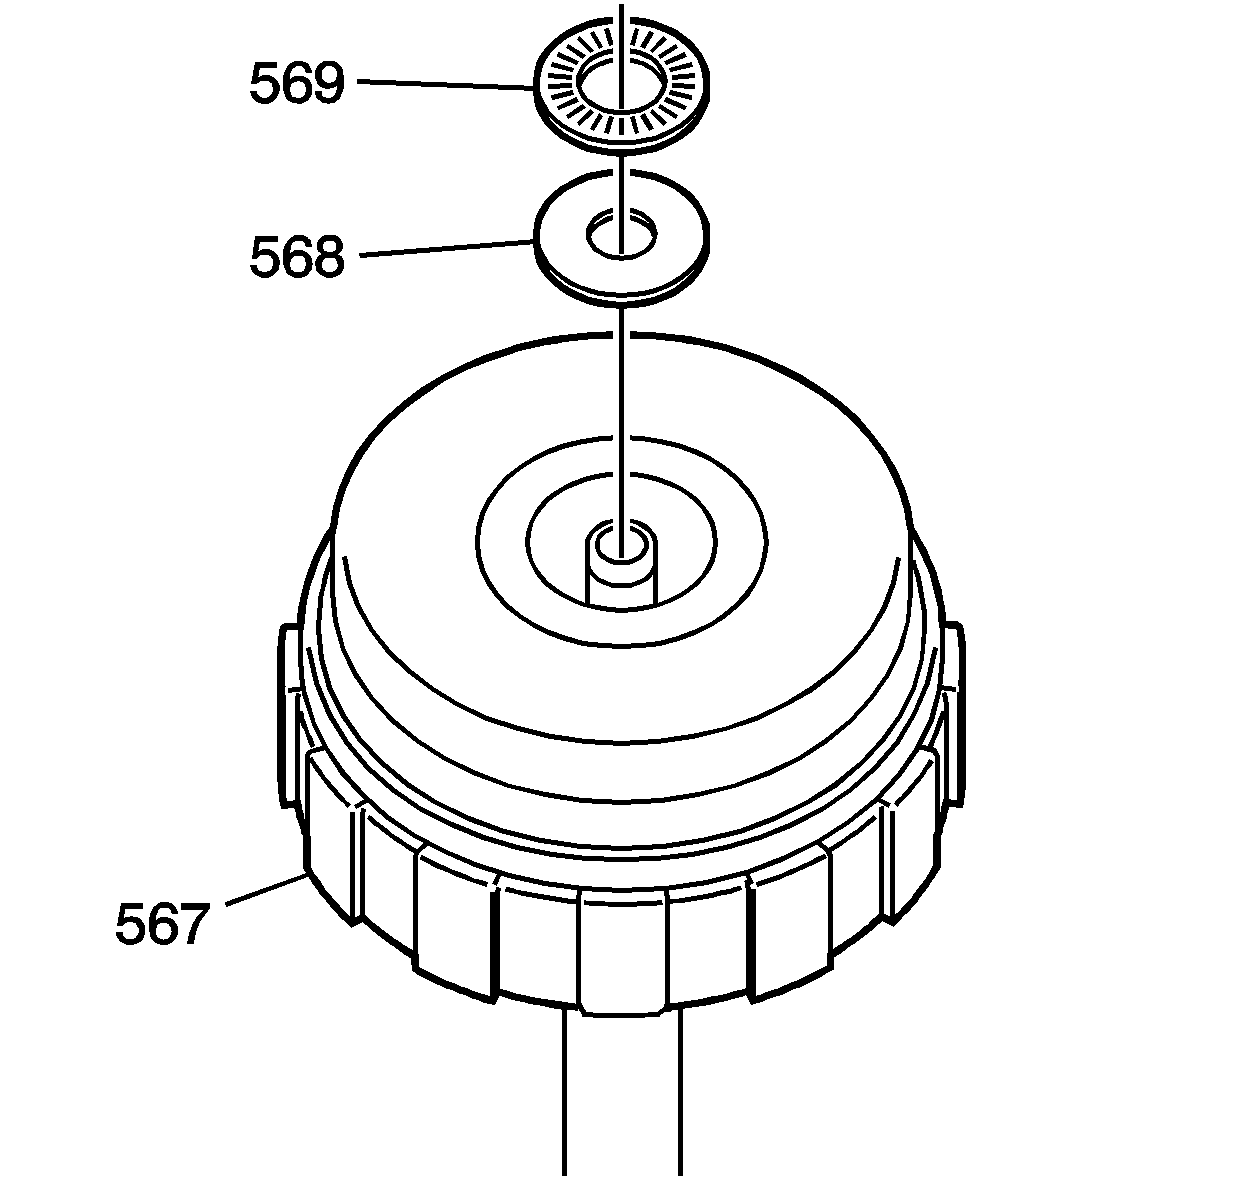
- Install the forward clutch housing thrust bearing race (568) 0.81 mm (0.032 in) thickness and the forward clutch housing thrust bearing (569).
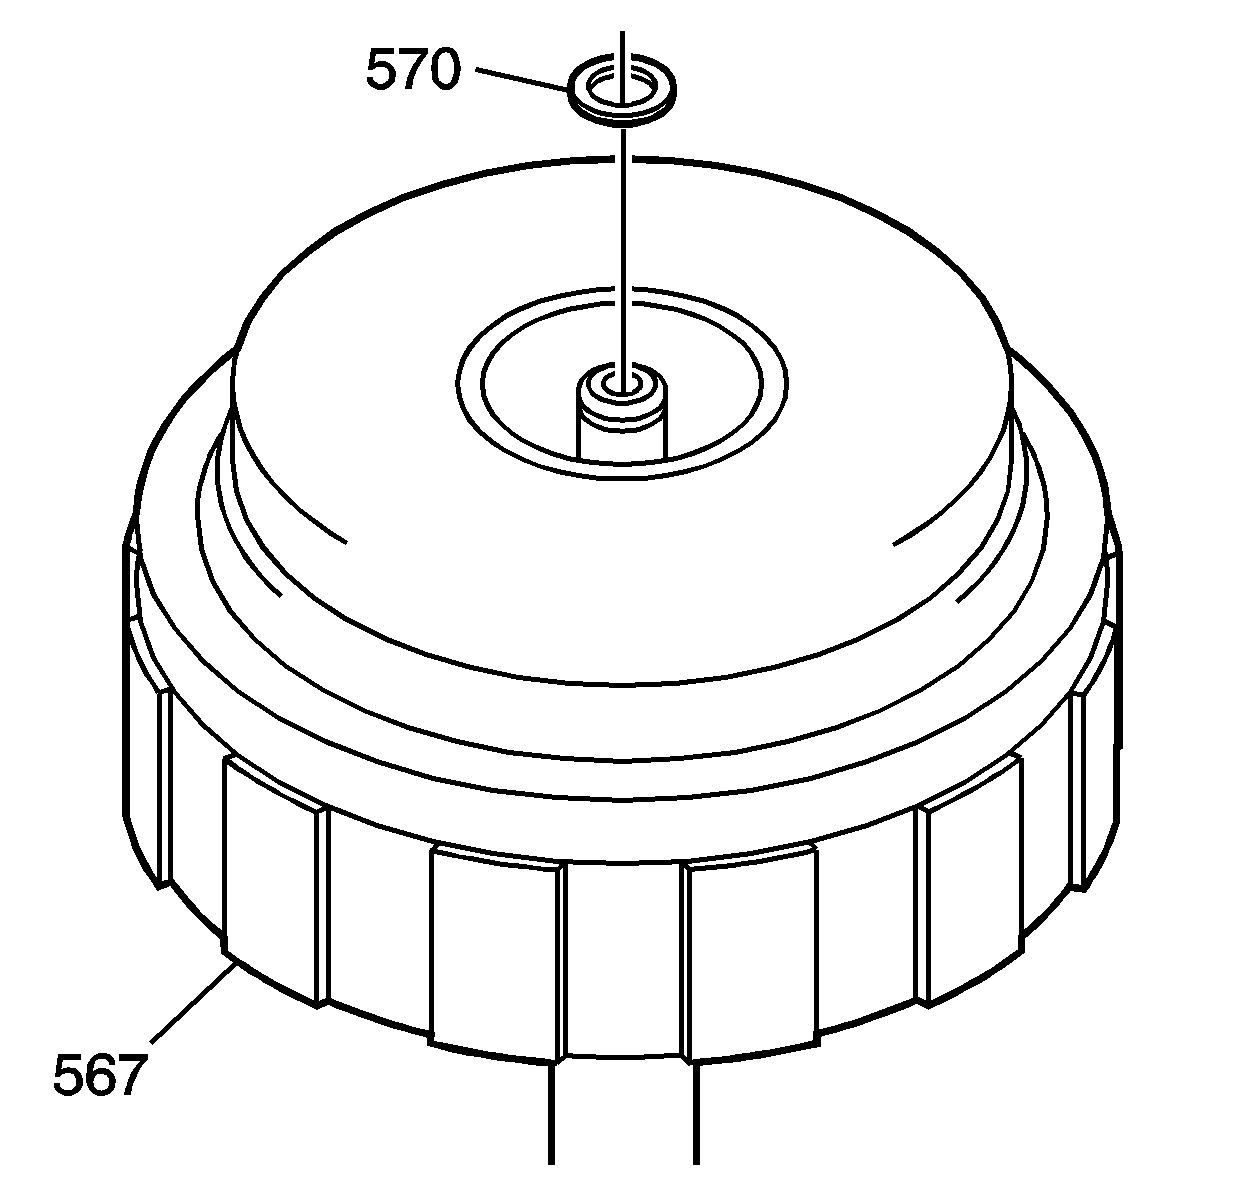
- Apply automatic transmission fluid to the new input shaft O-ring seal (570).
- Install the new input shaft O-ring seal (570) into the groove of the forward and direct clutch housing assembly - with input shaft (567).


