For 1990-2009 cars only
Starter Replacement 1.4L/1.6L
Removal Procedure
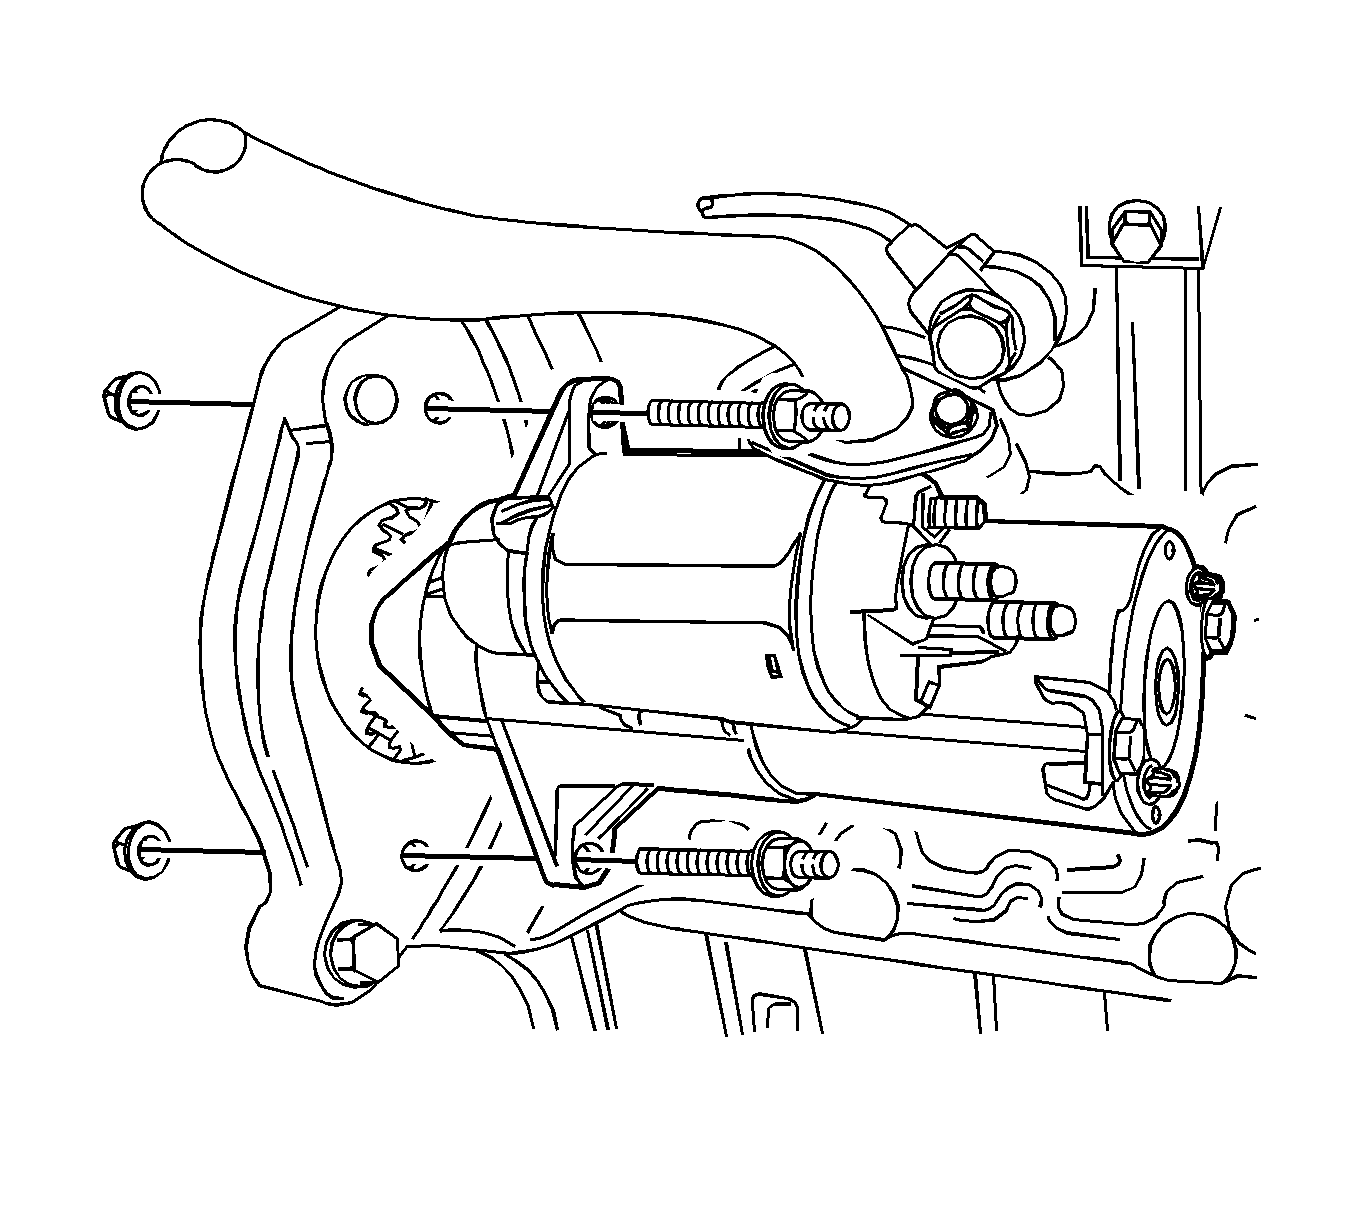
- Remove the nut which secures the starter ground wire to the lower mounting stud and remove the ground wire.
- Remove the lower starter stud/weld nut assembly.
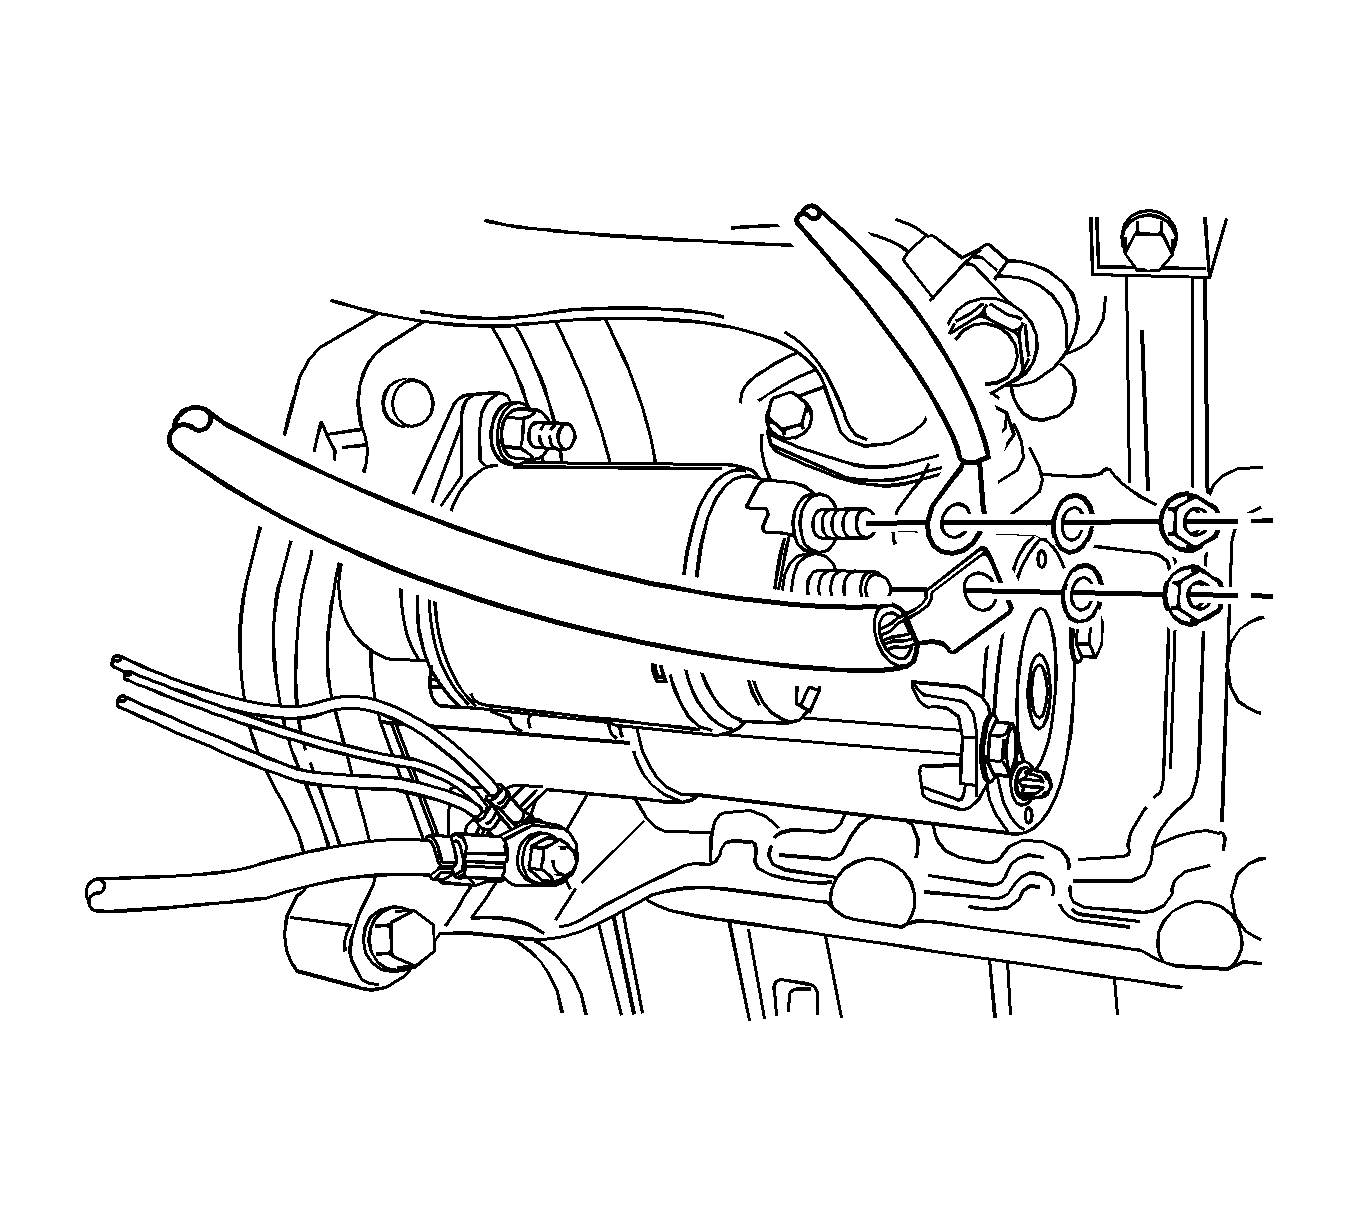
- Remove the starter solenoid nuts to disconnect the electrical cable.
- Remove the starter assembly.


Installation Procedure
- Place the starter assembly in position using an assistant to prop up the starter to aid in screwing in the upper stud with the weld nut.
- Install the upper and the lower starter mounting bolts.
- Position the starter electrical wire on the solenoid terminals and the ground wire on the lower stud.
- Install the starter solenoid nuts and the ground wire nut.

Caution: Refer to Fastener Caution in the Preface section.
Tighten
Tighten the starter mounting studs to 23 N·m (16 lb ft).

Tighten
| • | Tighten the starter solenoid terminal-to-battery cable terminal nut to 12 N·m (106 lb in). |
| • | Tighten the starter solenoid terminal-to-ignition solenoid terminal nut to 6 N·m (53 lb in). |
| • | Tighten the starter lower mounting stud ground wire nut to 12 N·m (106 lb in). |
Starter Replacement 1.8L/2.0L
Removal Procedure
- Remove the nut which secures the starter ground wire to the lower mounting stud and remove the ground wire.
- Remove the starter-to-engine block mounting bolt and the starter-to-transmission mounting bolt.
- Remove the starter solenoid nuts to disconnect the electrical cable.
- Remove the starter assembly.


Installation Procedure
- Place the starter assembly in position using an assistant to prop up the starter to aid in screwing in the upper stud with the weld nut.
- Install the starter mounting bolts.
- Position the starter electrical wire on the solenoid terminals and the ground wire on the lower stud.
- Install the starter solenoid nuts and the ground wire nut.

Caution: Refer to Fastener Caution in the Preface section.
Tighten
| • | Tighten the starter-to-engine block mounting bolt to 21 N·m (15 lb ft). |
| • | Tighten the starter-to-engine transaxle mounting bolt to 21 N·m (15 lb ft). |

Tighten
| • | Tighten the starter solenoid terminal-to-battery cable terminal nut to 12 N·m (106 lb in). |
| • | Tighten the starter solenoid terminal-to-ignition solenoid terminal nut to 6 N·m (53 lb in). |
| • | Tighten the starter lower mounting stud ground wire nut to 12 N·m (106 lb in). |
Starter Replacement 2.0L Diesel
Removal Procedure
- Disconnect the battery negative cable.
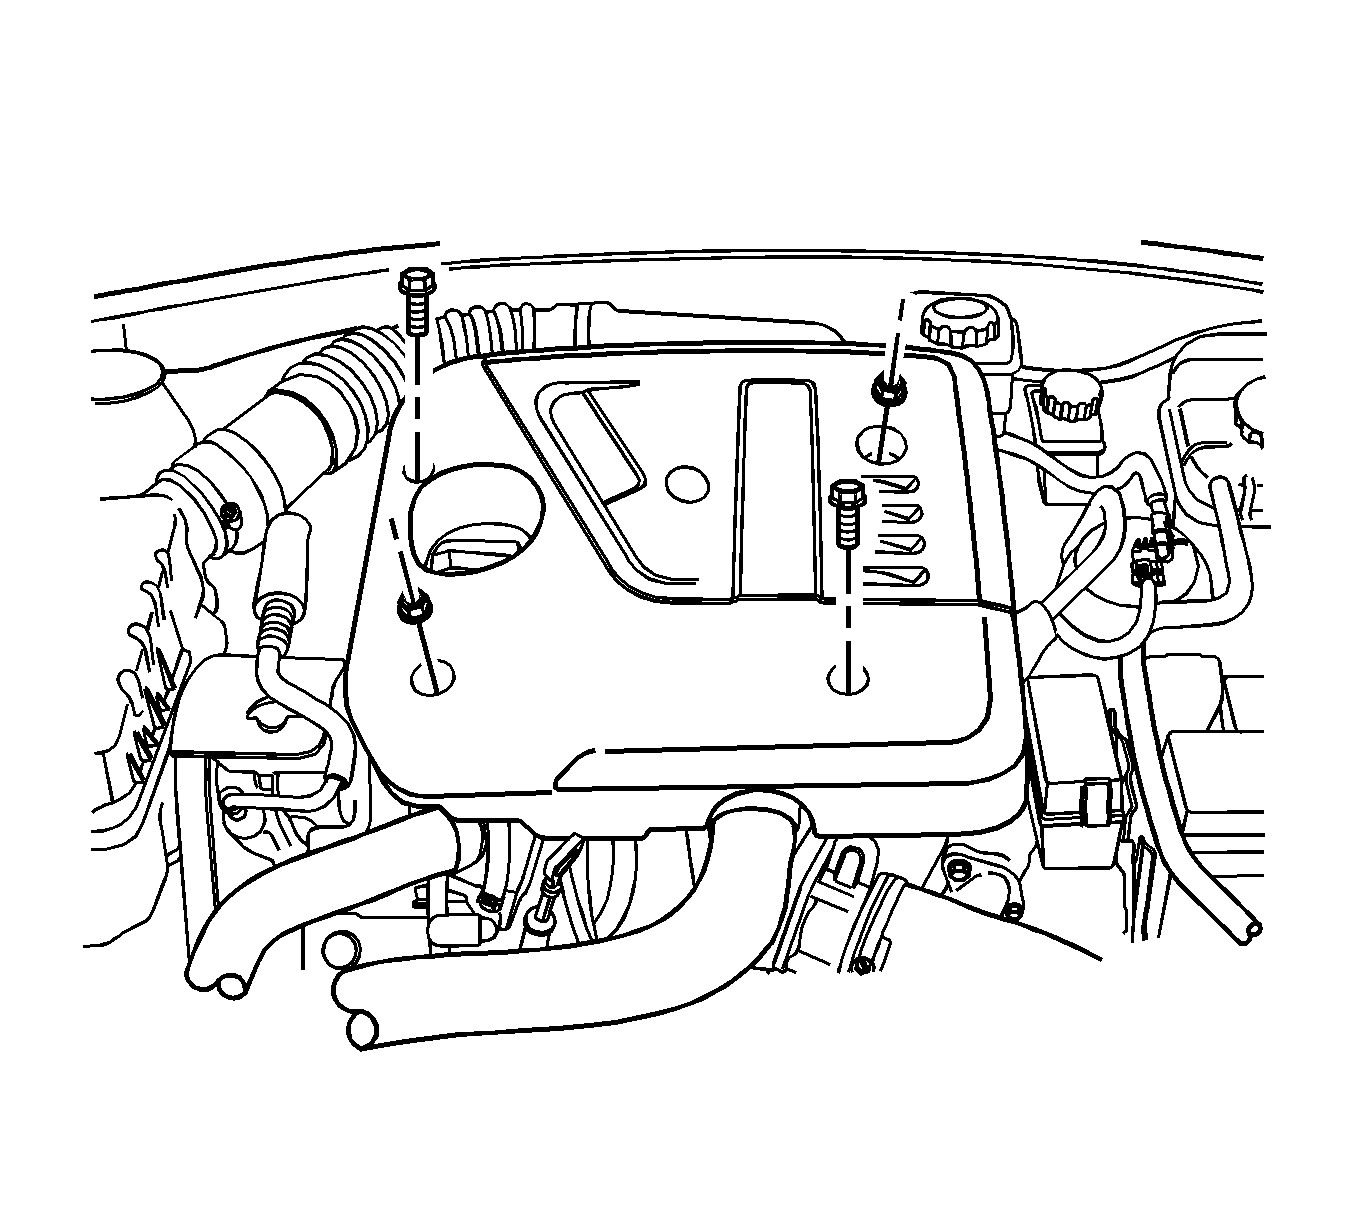
- Remove the engine cover. Refer to Engine Cover Replacement.
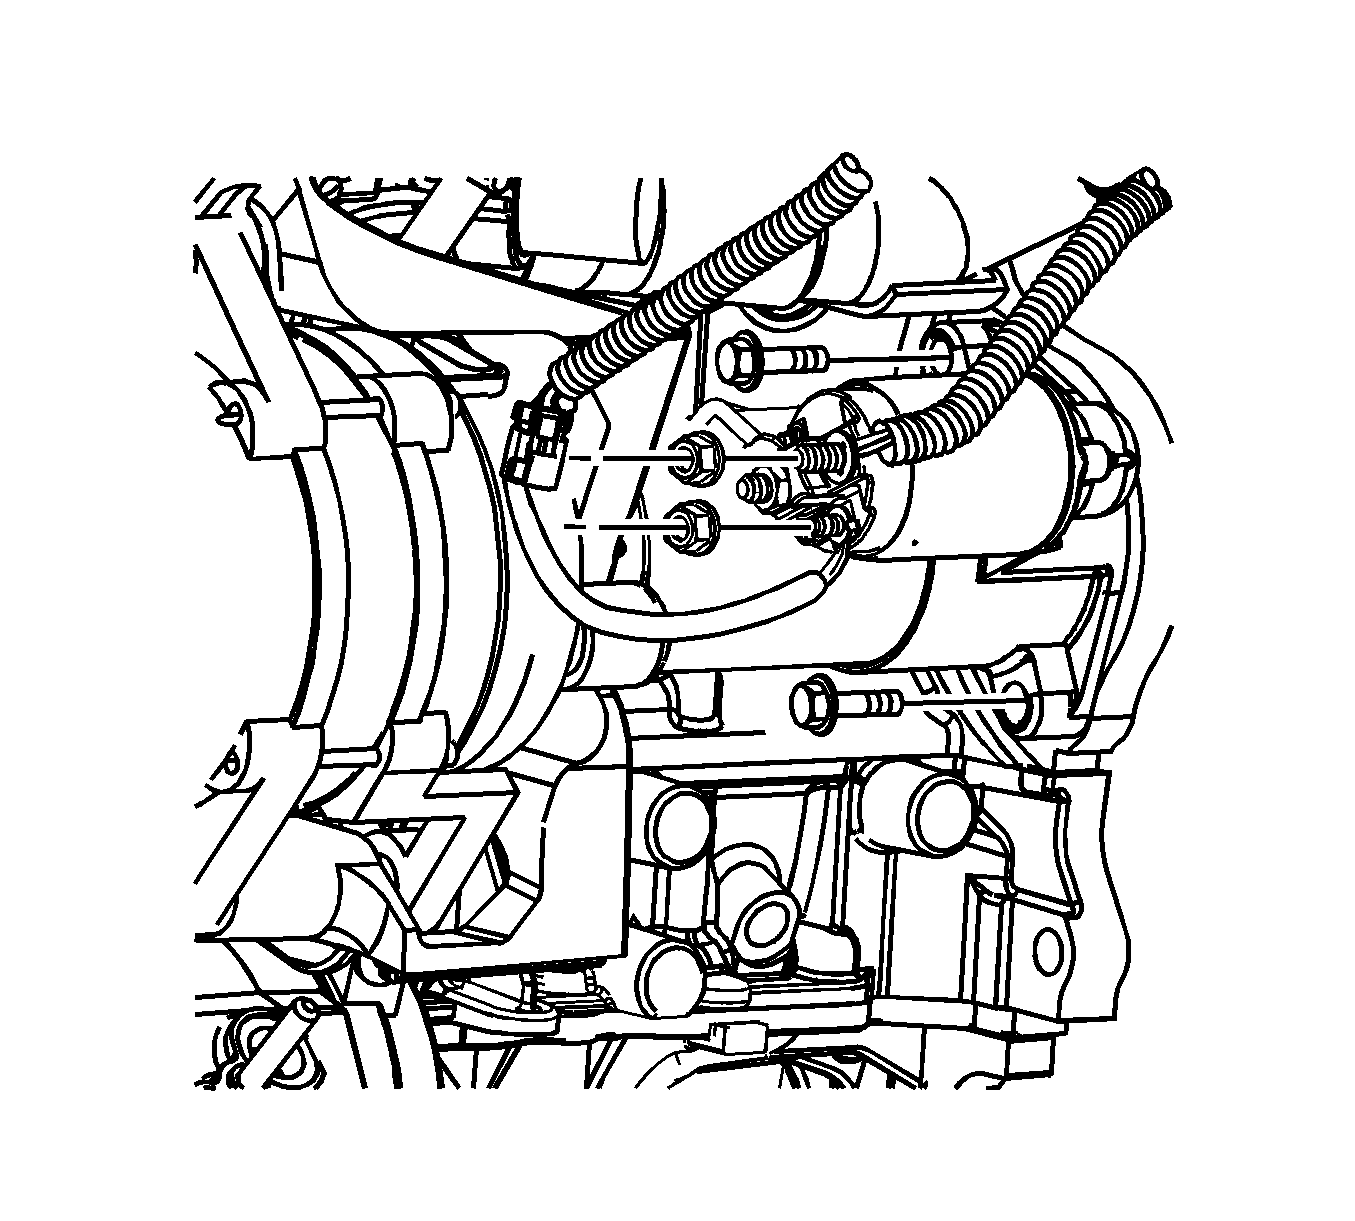
- Remove the nuts which secure the battery lead wire and the generator lead wire from the starter solenoid terminals.
- Remove the starter-to-engine block mounting bolts.
- Remove the starter assembly.
Warning: Refer to Battery Disconnect Warning in the Preface section.


Installation Procedure
- Install the starter mounting bolts.
- Install the starter solenoid nut.
- Install the engine cover. Refer to Engine Cover Replacement.
- Connect the negative battery cable.
Caution: Refer to Fastener Caution in the Preface section.

Tighten
Tighten the starter-to-engine block mounting bolt to 45 N·m (33.2 lb ft).
Tighten
Tighten the starter solenoid terminal-to-battery lead wire nut to 15 N·m (11 lb ft).

