Removal Procedure
Caution: Provide additional support when a vehicle is on a hoist in the following
ways:
• Before removing parts, support the opposite end. This helps prevent
the vehicle from slipping off. • Before removing major components, chain the vehicle frame to the
hoist pads at the same end as the removal. This helps avoid a tip-off.
Notice: The fuel tank equipped with ORVR components require special handling. Follow all instructions for servicing the fuel tank as specified in the service procedures. Damage to the fuel system components and the failure to meet the Federal Regulations may result from incorrect servicing of the fuel tank.
- Relieve fuel system pressure. Refer to Fuel Pressure Relief .
- Drain the fuel tank. Refer to Fuel Tank Draining .
- Remove the rear seat bottom cushion. Refer to Rear Seat Cushion Replacement in Body and Accessories.
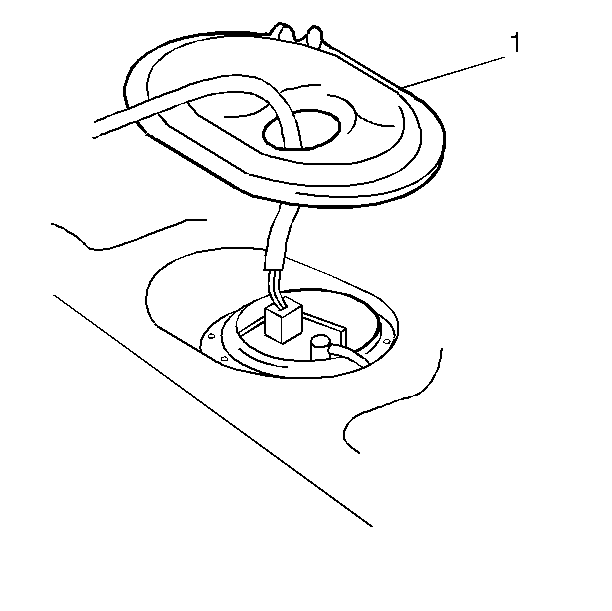
- Remove the fuel sender assembly access panel (1) from the rear seat floor (the panel is held in place by a butyl caulk seal).
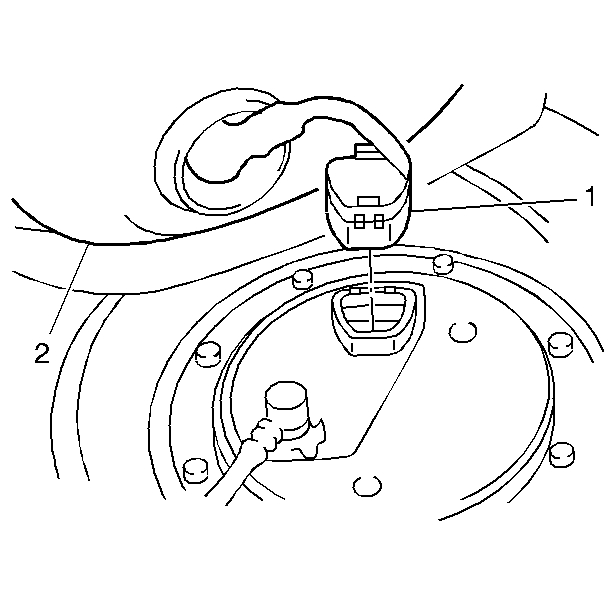
- Disconnect the fuel sender assembly electrical connector (1).
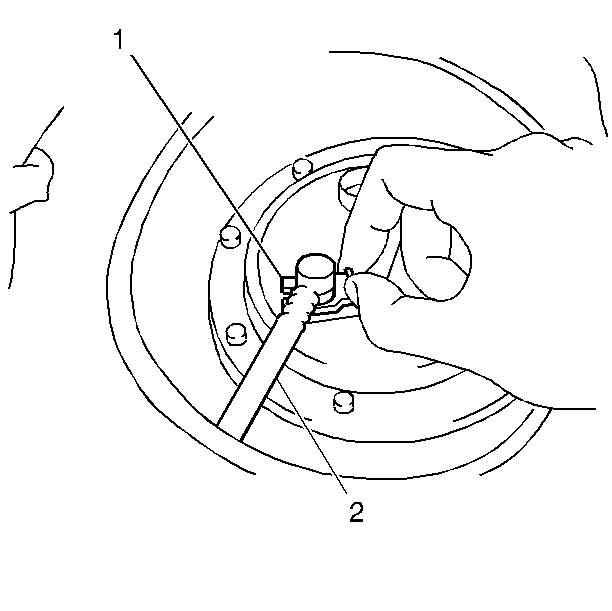
- Remove the fuel line fitting retaining clip (1).
- Disconnect the fuel line (2) from the fuel sender assembly.
- Raise and suitably support the vehicle. Refer to Lifting and Jacking the Vehicle in General Information.
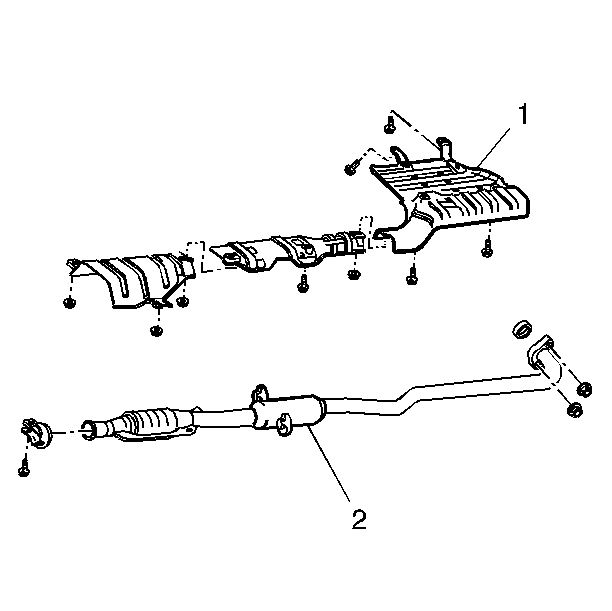
- Remove the catalytic converter and intermediate pipe assembly (2) from the vehicle. Refer to Catalytic Converter Replacement in Engine Exhaust.
- Remove the four screws and the one nut from the rear exhaust heat shield (1).
- Remove the rear exhaust heat shield (1) from the underbody.
- Remove the four bolts securing the parking brake cables to the underbody.
- Remove the fuel filler hose (2) from the fuel tank (5).
- Disconnect the fuel tank breather hose (3) from the fuel tank.
- Disconnect the ORVR vapor hose (1) from the fuel filler pipe assembly.
- Disconnect the fuel limiter vent valve (FLVV) hose (1) from the EVAP canister port (2) by pinching both sides of the FLVV hose connector.
- Remove the four bolts (4) and the two fuel tank straps from vehicle.
- Lower the fuel tank from vehicle.


Installation Procedure
- Raise the fuel tank (5) to vehicle underbody.
- Install the two fuel tank straps to the vehicle.
- Secure the fuel tank straps with the four bolts (4).
- Install the FLVV hose to the EVAP canister.
- Install the fuel filler hose (2) to the fuel tank (5).
- Install the fuel breather hose (3) to the fuel tank.
- Install the ORVR hose (1) to the fuel filler pipe assembly.
- Secure the parking brake cables to underbody with the four bolts.
- Tighten the four parking brake cable bolts.
- Install the rear exhaust heat shield (1) to the vehicle underbody with the four screws and one nut.
- Install the catalytic converter and intermediate pipe assembly (2) to the vehicle. Refer to Catalytic Converter Replacement in Engine Exhaust.
- Lower the vehicle.
- Connect the fuel sender assembly electrical connector (1).
- Connect the fuel line (2) to the fuel sender assembly.
- Install the fuel line retaining clip (1) to the fuel line connection.
- Inspect the fuel sender assembly access panel (1) butyl caulk seal.
- Replace any missing butyl caulk as necessary.
- Install the fuel sender assembly access panel (1) to the rear seat floor.
- Install the rear seat bottom cushion to vehicle. Refer to Rear Seat Cushion Replacement in Body and Accessories.
- Refill the fuel tank.
- Connect the negative battery cable.
- Pressurize the fuel system and check for any fuel leaks.
Notice: Use the correct fastener in the correct location. Replacement fasteners must be the correct part number for that application. Fasteners requiring replacement or fasteners requiring the use of thread locking compound or sealant are identified in the service procedure. Do not use paints, lubricants, or corrosion inhibitors on fasteners or fastener joint surfaces unless specified. These coatings affect fastener torque and joint clamping force and may damage the fastener. Use the correct tightening sequence and specifications when installing fasteners in order to avoid damage to parts and systems.
Tighten
Tighten the fuel tank strap bolts to 39 N·m (29 lb ft).
Tighten
Tighten the parking brake cable bolts to 6 N·m (53 lb in).
Tighten
Tighten the negative battery cable terminal retainers to 15 N·m
(11 lb ft).
