Tools Required
Removal Procedure
Caution: Unless directed otherwise, the ignition and start switch must be in the OFF or LOCK position, and all electrical loads must be OFF before servicing
any electrical component. Disconnect the negative battery cable to prevent an electrical spark should a tool or equipment come in contact with an exposed electrical terminal. Failure to follow these precautions may result in personal injury and/or damage to
the vehicle or its components.
- Disconnect
the negative battery cable.
- Drain the cooling system. Refer to
Cooling System Draining and Filling
in Engine Cooling.
- Remove the windshield washer fluid reservoir mounting bolt.
- Disconnect the windshield washer pump connector.
- Disconnect the windshield washer pump fluid line.
- Plug the pump outlet
- Remove the windshield washer fluid reservoir.
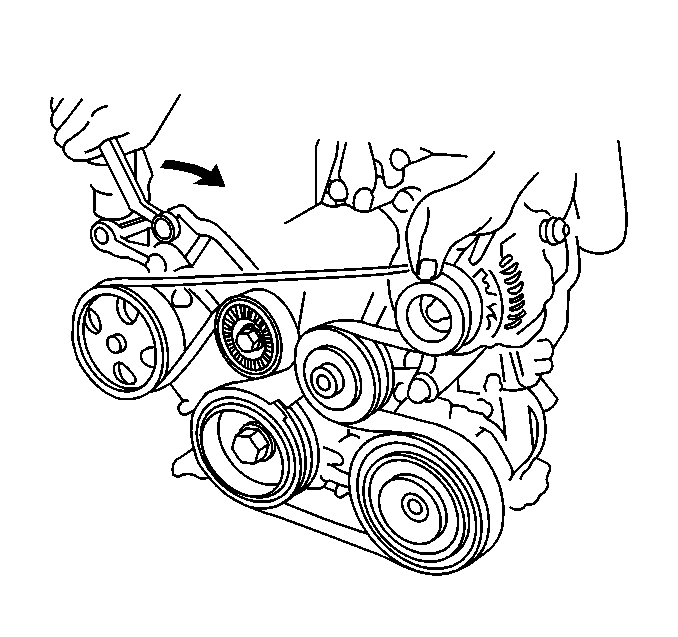
- Remove the accessory drive
belt. Refer to
Drive Belt Replacement
.
- Remove the generator from the engine.
Refer to
Generator Replacement
in
Engine Electrical.
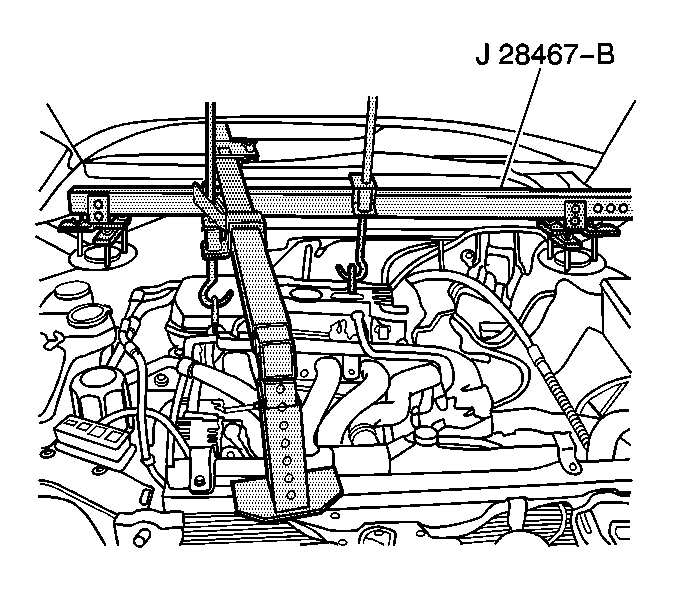
- Install the engine support
fixture J 28467-B. Refer to
Engine Support Fixture
.
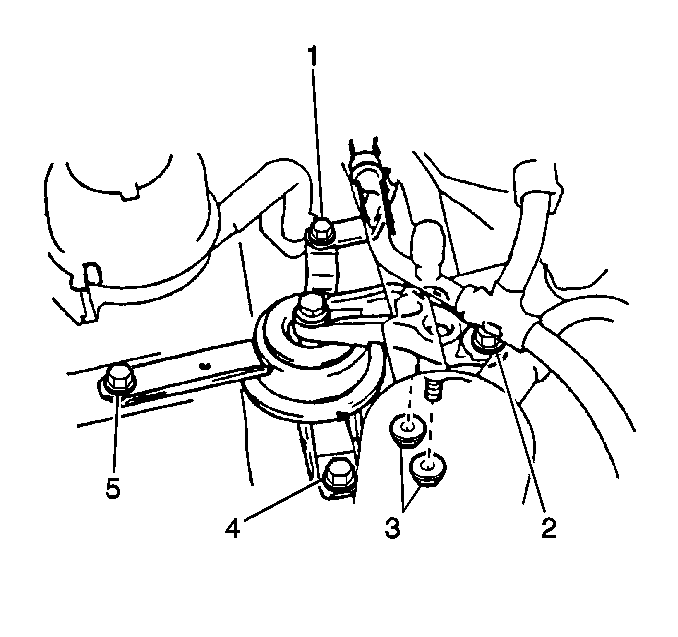
- Remove the following fasteners
from the right side engine mount:
- Loosen the A/C receiver pinch clamp.
- Lift the A/C receiver in order to access the right side engine
mount.
- Remove the right side engine mount.
- Remove the cylinder head cover. Refer to
Cylinder Head Cover Replacement
.
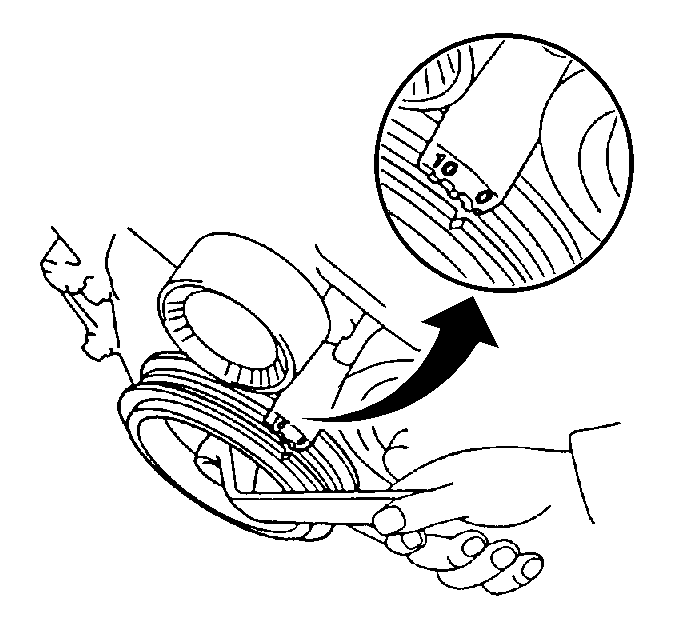
- Set the number one piston
to the top dead center position.
- Align the camshaft timing sprockets.
- Disconnect the power steering oil pressure switch connector.
- Raise the vehicle. Support the vehicle. Refer to
Lifting and Jacking the Vehicle
in General Information.
- Remove the right side lower engine splash shield.
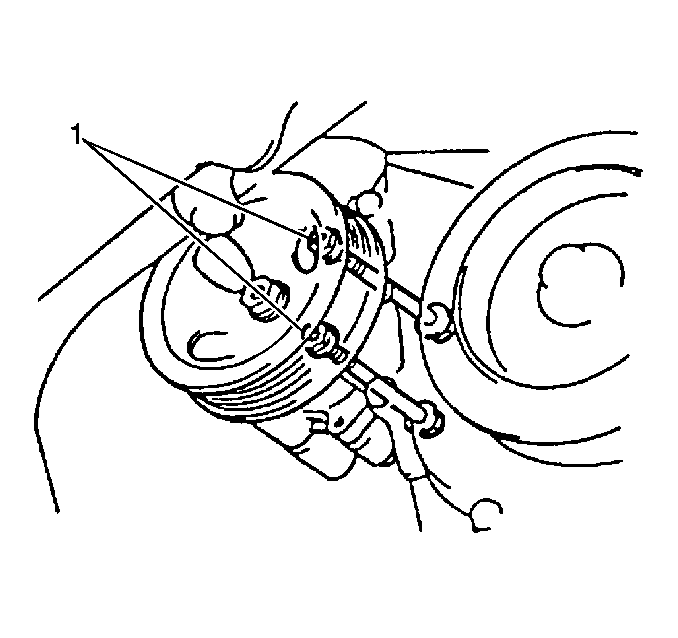
- Remove the two power steering
pump through bolts and the nuts (1).
- Remove the power steering pump from the mounting surface.
Move the pump to the side.
- Remove the accessory drive
belt. Refer to
Drive Belt Replacement
.
- Raise and suitably support the vehicle. Refer to
Lifting and Jacking the Vehicle
in General Information.
- Remove the right splash shield.
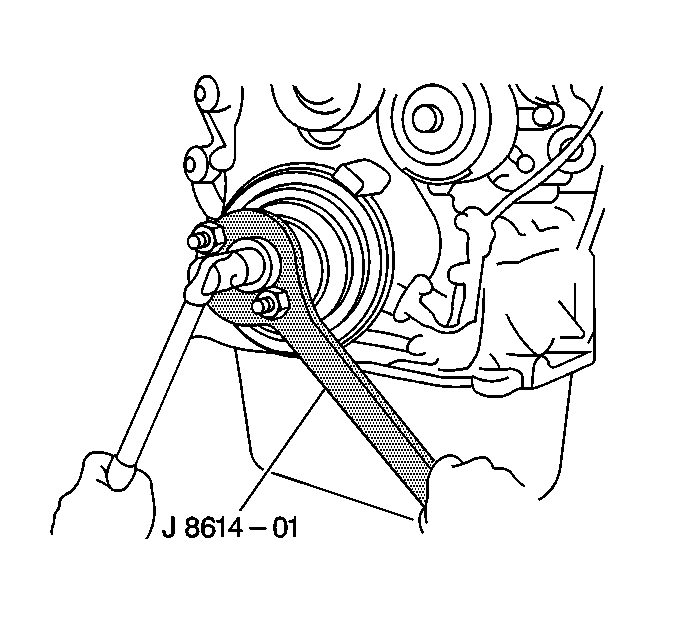
- Remove the crankshaft pulley retaining bolt using J 8614-01
to prevent crankshaft rotation when
loosening the bolt.
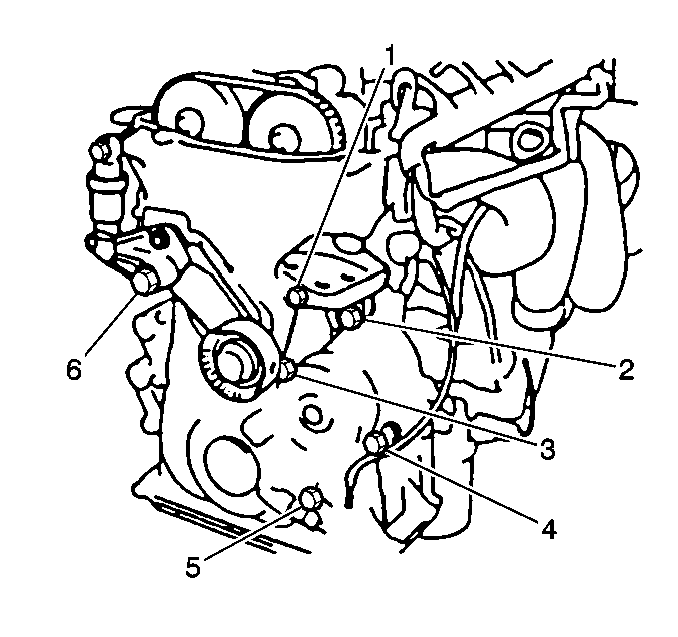
- Remove the following components:
| • | The crankshaft position sensor bolt (5) |
- Lower the vehicle.
- Remove the following components from the mounting surface:
| • | The drive belt tensioner bolt |
| • | The drive belt tensioner nut |
| • | The drive belt tensioner |
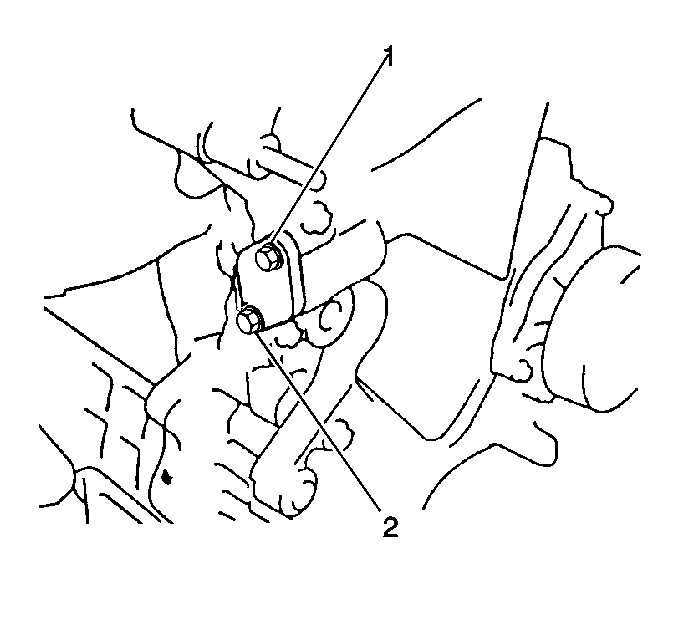
- Remove the timing chain
tensioner bolts (1, 2).
- Remove the timing chain tensioner.
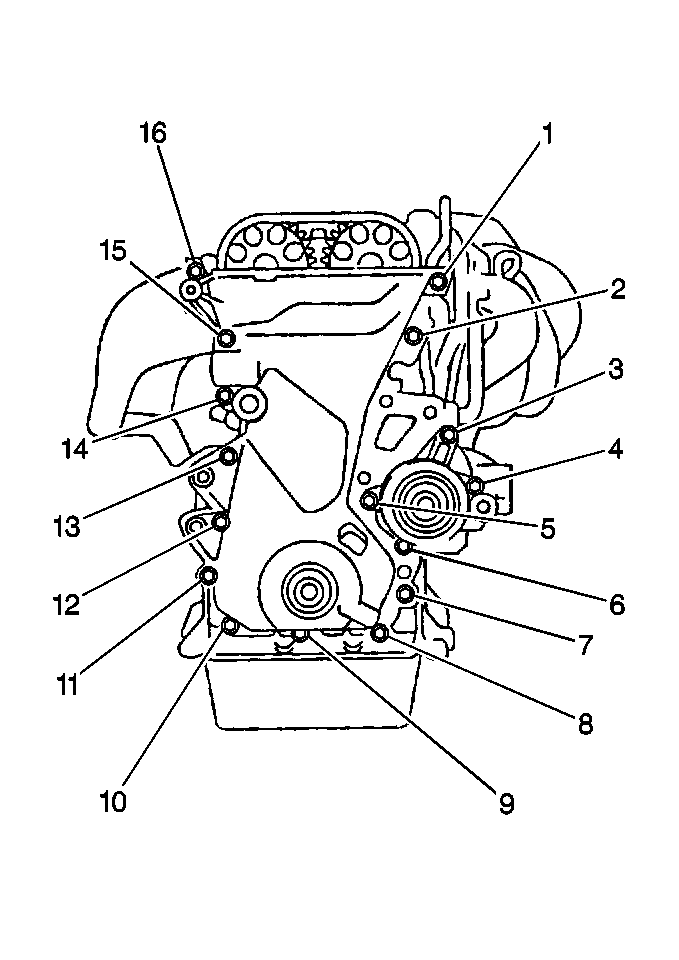
- Remove the following fasteners:
| • | The timing chain cover bolts (1-14) |
| • | The timing chain cover nuts (15) |
- Remove the timing chain cover.
Installation Procedure
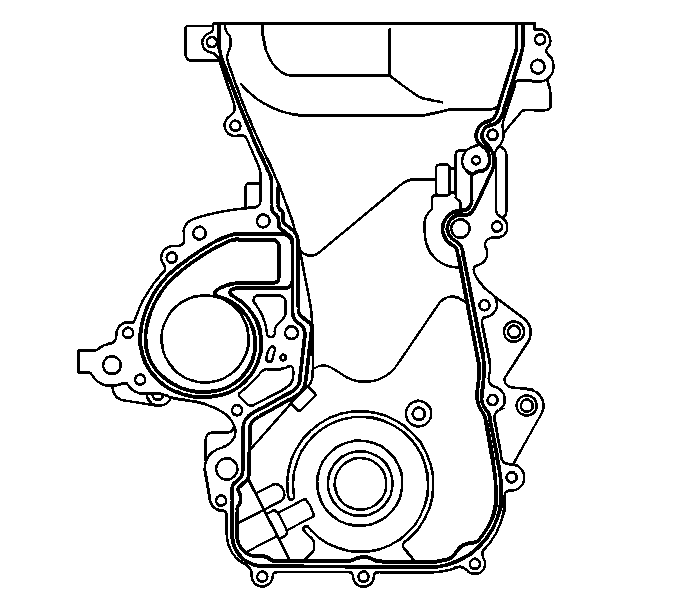
- Apply a continuous bead of
GM P/N 12346240 or an equivalent to the timing chain cover mating
surface.

Notice: Use the correct fastener in the correct location. Replacement fasteners
must be the correct part number for that application. Fasteners requiring
replacement or fasteners requiring the use of thread locking compound or sealant
are identified in the service procedure. Do not use paints, lubricants, or
corrosion inhibitors on fasteners or fastener joint surfaces unless specified.
These coatings affect fastener torque and joint clamping force and may damage
the fastener. Use the correct tightening sequence and specifications when
installing fasteners in order to avoid damage to parts and systems.
- Install the timing
chain cover.
Use the following fasteners in order to secure the cover:
Tighten
| • | Tighten the timing chain cover nut and bolts (10 mm (0.394 in)
head) to 10 N·m (89 lb in).
|
| • | Tighten the timing chain cover nut and bolts (12 mm (0.394 in)
head) to 18 N·m (14 lb ft).
|
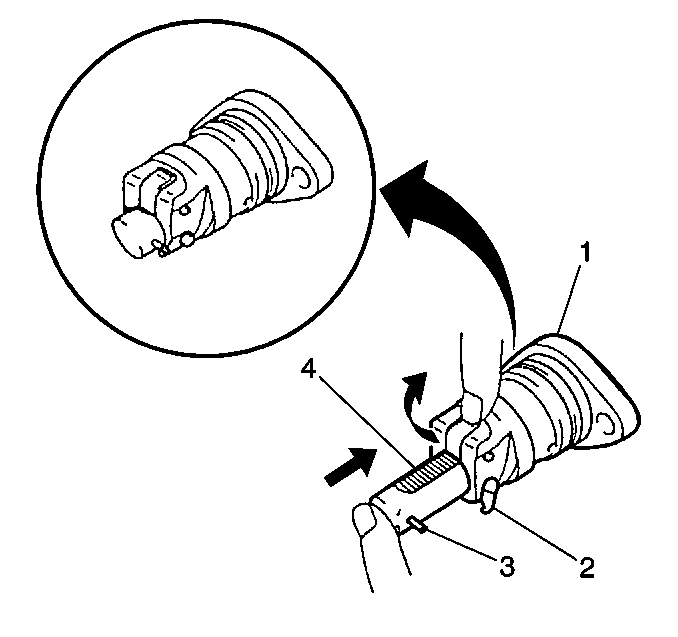
- Use the following steps
in order to install the timing chain tensioner:
| 3.1. | Fully depress the plunger (4). |
| 3.2. | Apply the hook (2) to the pin (3). |
| 3.3. | Install the timing chain tensioner. |
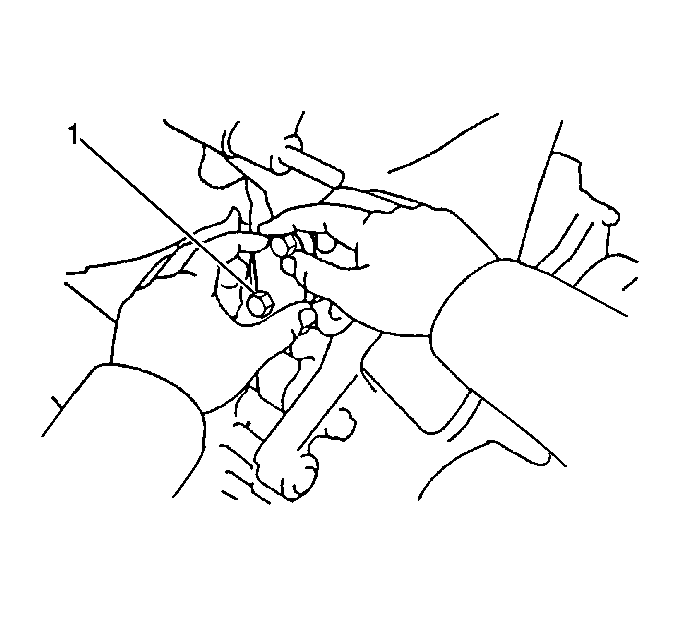
- Install the timing chain
tensioner. Secure the timing chain tensioner using two bolts (1).
Tighten
Tighten the timing chain tensioner bolts to 10 N·m (89 lb in).

- Install the right side
engine mounting bracket. Secure the bracket using three bolts.
Tighten
Tighten the engine mounting bracket bolts to 54 N·m (40 lb ft).
- Install the drive belt tensioner. Secure the tensioner using one
bolt and one nut.
Tighten
| • | Tighten the bolt to 69 N·m (51 lb ft). |
| • | Tighten the nut to 29 N·m (21 lb ft). |
- Raise and properly support the vehicle. Refer to
Lifting and Jacking the Vehicle
in General Information.
- Install the crankshaft position sensor. Secure the sensor using
one bolt (5).
Tighten
Tighten the crankshaft position sensor bolt to 12 N·m (106 lb in).
- Lubricate the front seal
and the sealing surface of the crankshaft pulley with Chassis Grease GM P/N 1051344
or equivalent.
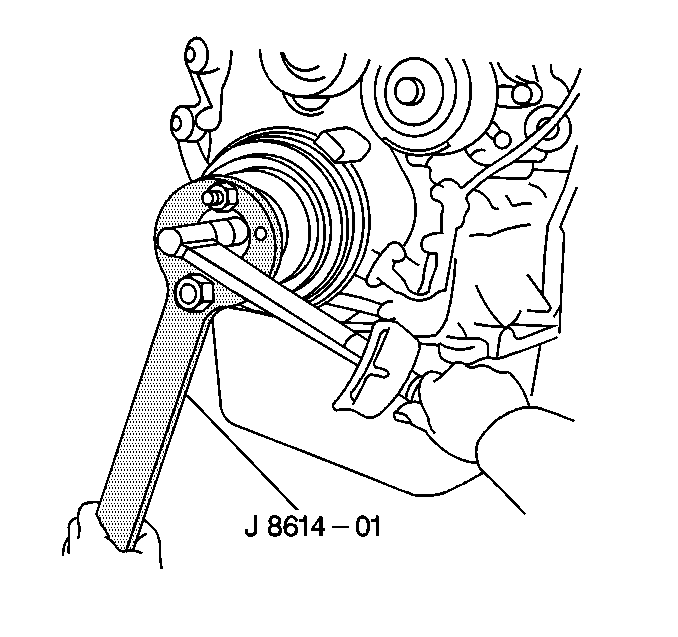
- Install the crankshaft pulley onto the crankshaft indexing keyway.
- Install the crankshaft pulley retaining bolt using J 8614-01
to prevent crankshaft rotation when
tightening the bolt.
Tighten
Tighten the bolt to 142 N·m (105 lb ft).

- Install the power steering
pump.
- Use the following fasteners in order to secure the power steering
pump:
Tighten
Tighten the power steering pump bolts to 37 N·m (27 lb ft).
- Install the right side lower engine splash shield.
- Lower the vehicle.
- Connect the power steering oil pressure switch connector.
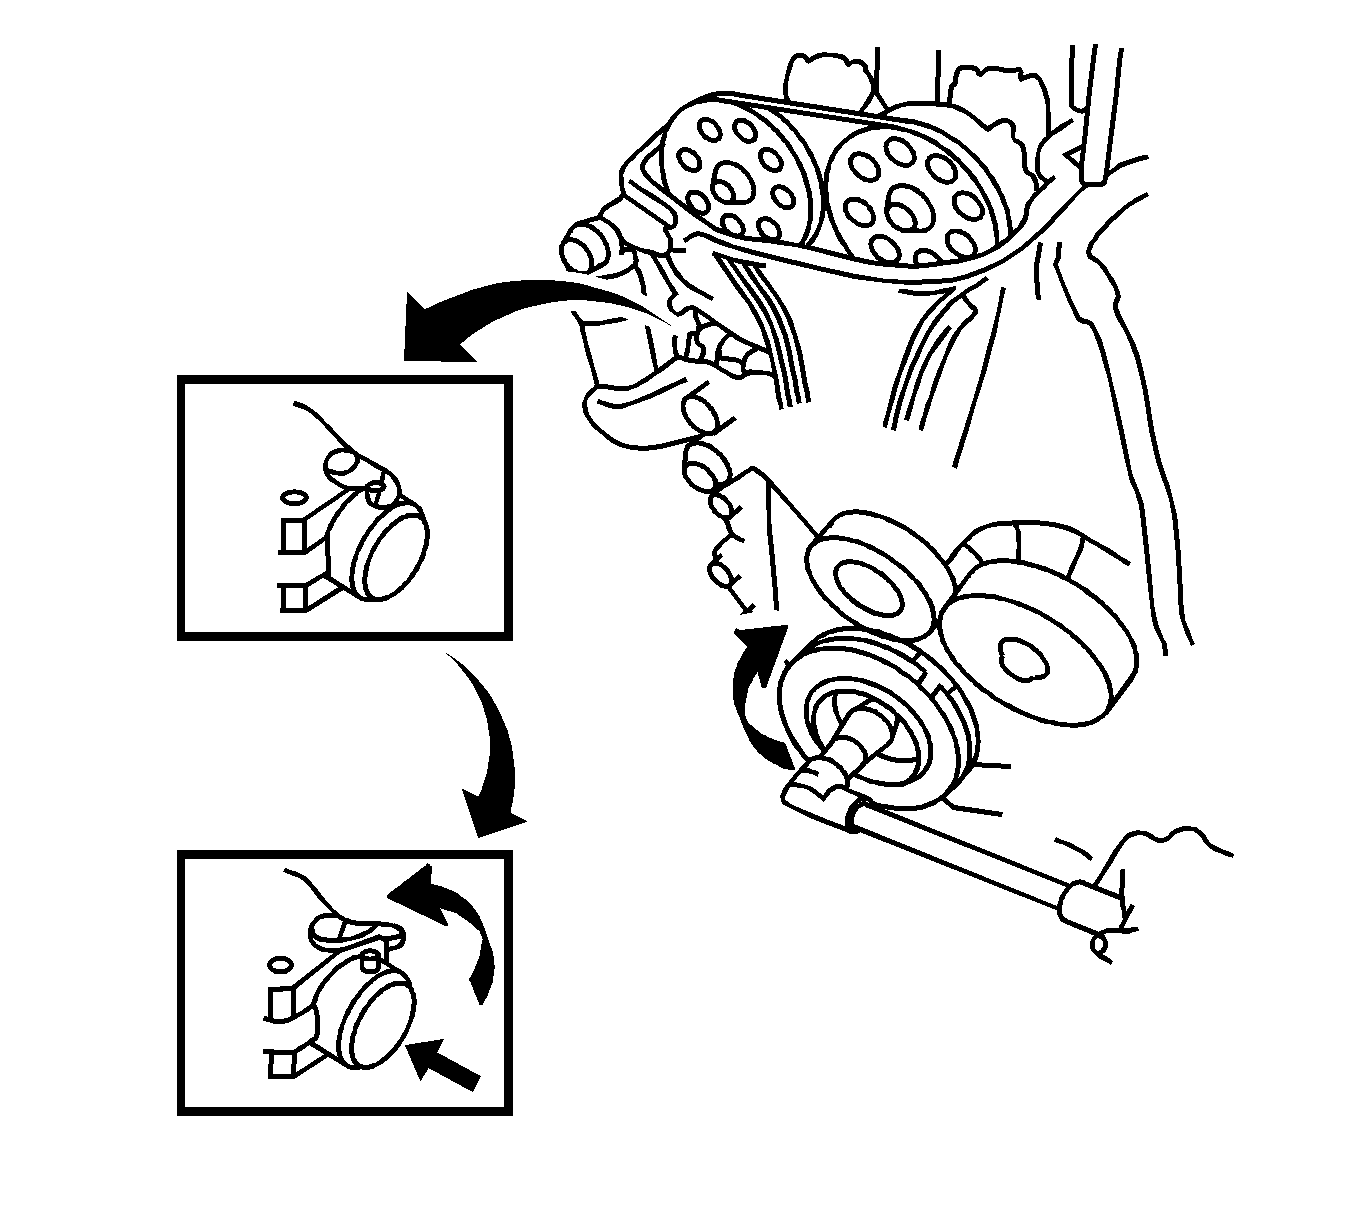
- Rotate the crankshaft
clockwise one revolution. Ensure that the plunger on the timing chain tensioner
has released.
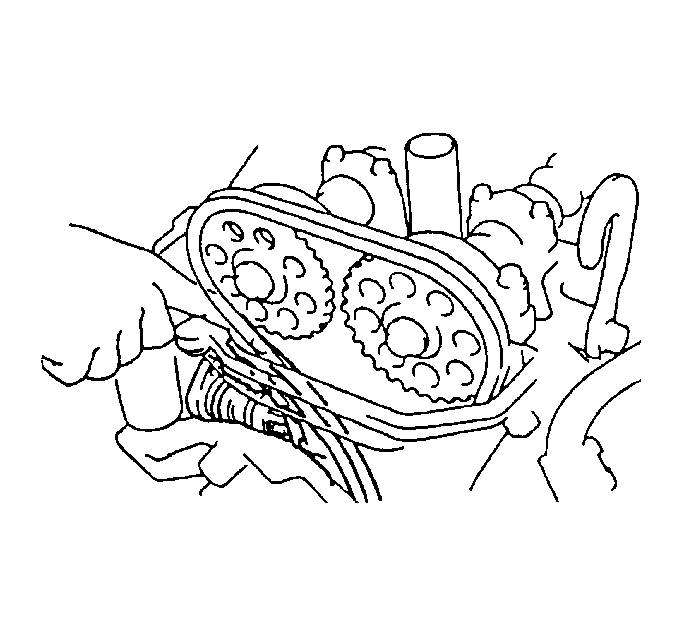
- Complete the following
steps if the plunger does not release:
| 18.1. | Use a screwdriver or your finger in order to press the timing
chain dampener into the timing chain tensioner. |
| 18.2. | Release the hook from the pin. |
| 18.3. | Verify proper timing chain alignment after the plunger has released. |
- Install the cylinder head cover. Refer to
Cylinder Head Cover Replacement
.

- Install the right side
engine insulator.
- Use the following fasteners in order to secure the insulator:
Tighten
| • | Tighten the right side engine mount bolts (1,2,4) to 54 N·m
(40 lb ft).
|
| • | Tighten the right side engine insulator nuts (3) to 54 N·m
(40 lb ft).
|
- Lower the A/C receiver.
Tighten the pinch clamp.

- Remove the engine support
fixture J 28467-B.
- Install the generator. Refer to
Generator Replacement
in Engine Electrical.
- Remove the plug from the windshield washer reservoir.
- Connect the windshield washer fluid line.
- Connect the windshield washer pump connector.
- Install the windshield washer reservoir. Secure the reservoir
using one bolt.
- Fill the cooling system. Refer to
Cooling System Draining and Filling
in Engine Cooling.
- Connect the negative battery cable.
Tighten
Tighten the battery cable bolt to 15 N·m (11 lb ft).


