Caution: Unless directed otherwise, the ignition and start switch must be in the OFF or LOCK position, and all electrical loads must be OFF before servicing
any electrical component. Disconnect the negative battery cable to prevent an electrical spark should a tool or equipment come in contact with an exposed electrical terminal. Failure to follow these precautions may result in personal injury and/or damage to
the vehicle or its components.
- Disconnect the negative battery cable.
- Remove the knee bolster. Refer to
Knee Bolster Replacement
in Instrument Panel Gages, and Console.
- Remove the following components from the I/P carrier:
| • | The left side air ventilation duct |
| • | The left side air outlet duct |
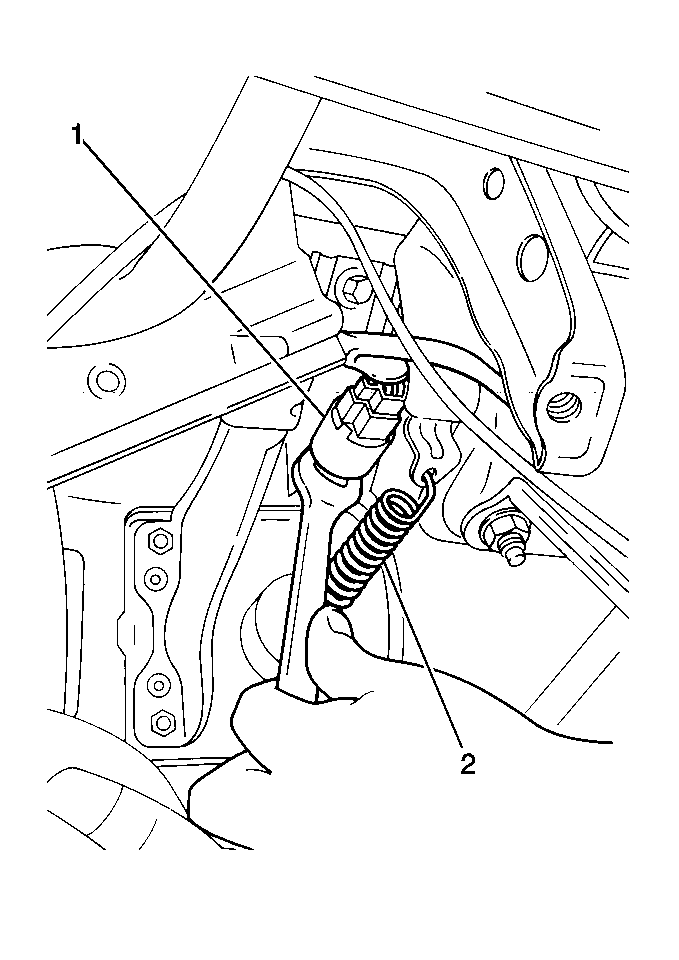
- Disconnect the stoplamp switch electrical connector.

- Loosen the locknut for
the stoplamp switch (1).
- Connect the stoplamp switch electrical connector.
- Connect the negative battery cable.

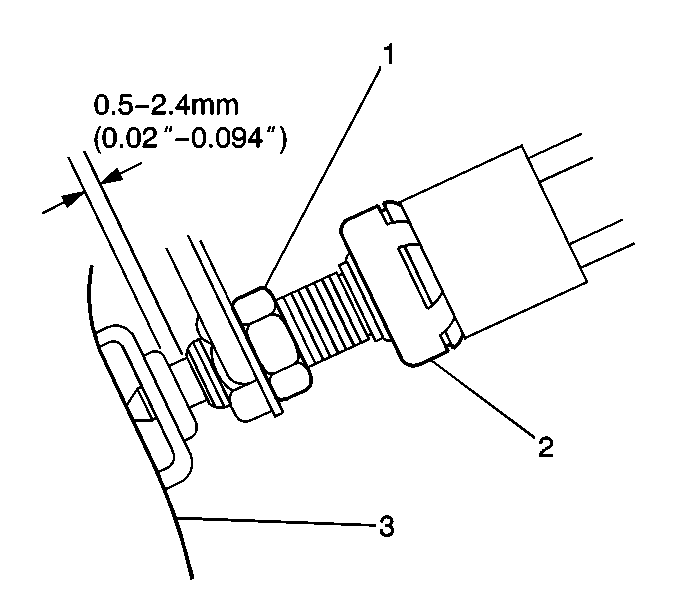
- Turn the stoplamp switch (2)
until the switch lightly contacts the pedal stopper.
- Turn the stoplamp switch back one turn.
- Verify the distance between the end of the stoplamp switch plunger
and the end of the threaded portion of the stoplamp switch is within 0.5-2.4 mm
(0.02-0.094 in).
Notice: Use the correct fastener in the correct location. Replacement fasteners
must be the correct part number for that application. Fasteners requiring
replacement or fasteners requiring the use of thread locking compound or sealant
are identified in the service procedure. Do not use paints, lubricants, or
corrosion inhibitors on fasteners or fastener joint surfaces unless specified.
These coatings affect fastener torque and joint clamping force and may damage
the fastener. Use the correct tightening sequence and specifications when
installing fasteners in order to avoid damage to parts and systems.
- Tighten the locknut (1)
for the stoplamp switch.
Tighten
Tighten the locknut to 10 N·m (89 lb in).
- Inspect the brake pedal height. Adjust the brake pedal height
if necessary. Refer to
Brake Pedal Travel Measurement and Inspection
.
- Inspect the operation of the brake lights in order to verify the
adjustment of the stoplamp switch.
| • | If the brake lights illuminate when the assistant depresses the
brake pedal, the operation is normal. |
| • | If the brake lights do not illuminate when the assistant releases
the brake pedal, the operation is normal. |
- Install the left side air outlet duct to the I/P. Secure the outlet
duct with the screw.
- Install the left side air ventilation duct to the I/P. Secure
the ventilation duct with the plastic retainer.
- Install the knee bolster. Refer to
Knee Bolster Replacement
in Instrument Panel, Gauges, and Console.


