Removal Procedure
- Raise and support the vehicle. Refer to Lifting and Jacking the Vehicle in General Information.
- Remove the tire and wheel assembly from the vehicle. Refer to Tire and Wheel Removal and Installation in Tires and Wheels.
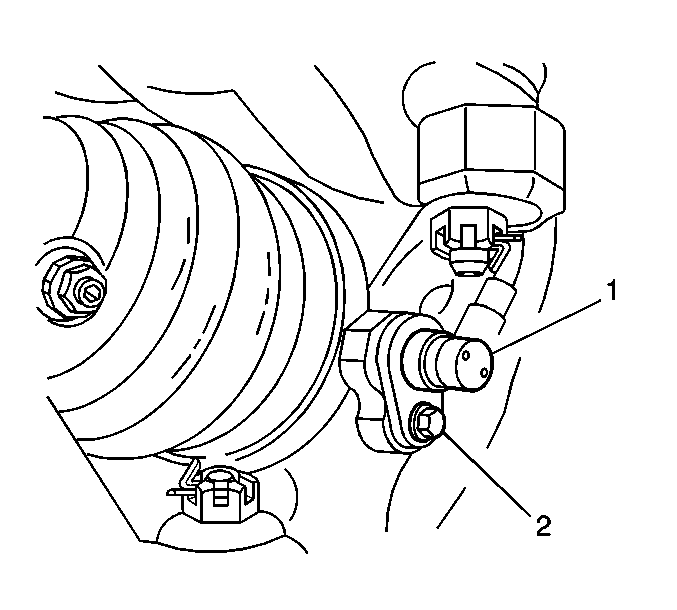
- If the vehicle has an Antilock Brake System (ABS), remove the bolt for the ABS wheel speed sensor (2) and the sensor (1) from the steering knuckle. Position the sensor to the side.
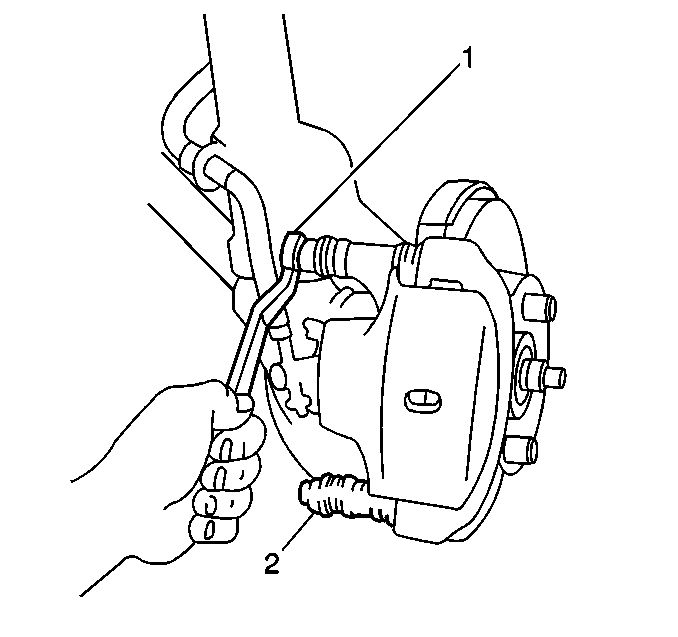
- Compress the front brake caliper with a C-clamp.
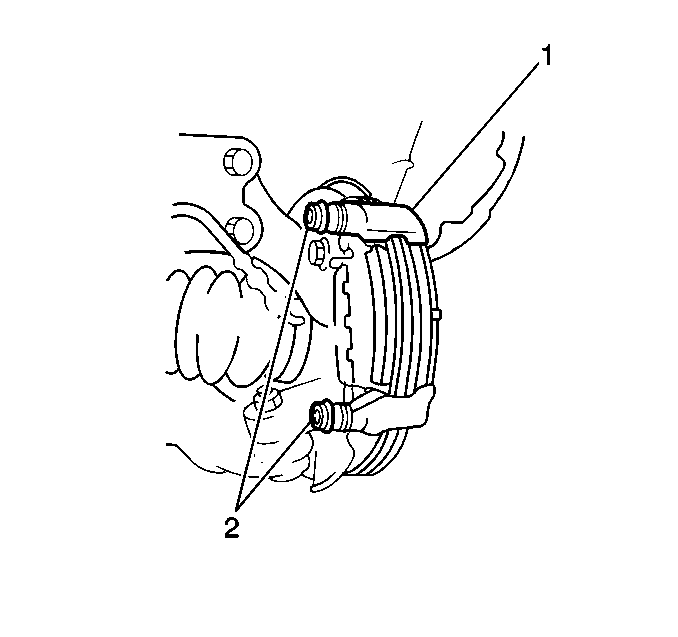
- Remove the 2 caliper guide pin bolts (1,2).
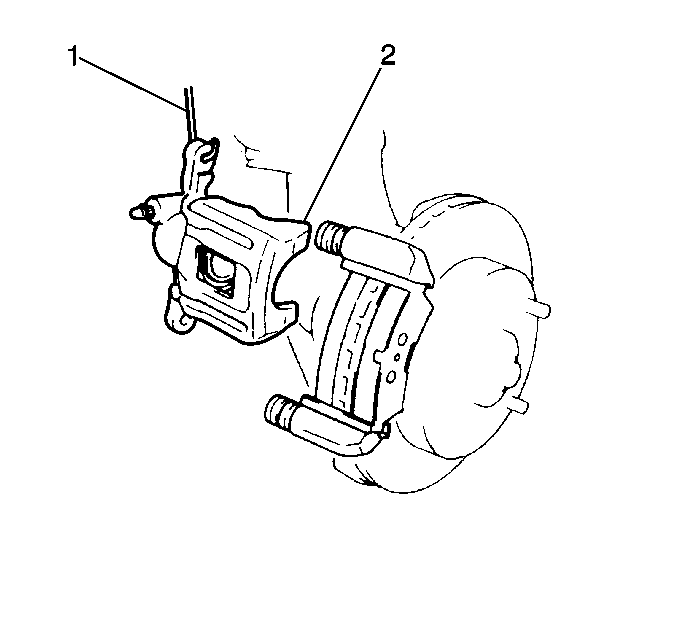
- Remove the caliper housing (2) from the caliper bracket. Suspend the caliper housing with a wire (1) in order to prevent damage to the brake hose.
- Remove the following components from the vehicle:
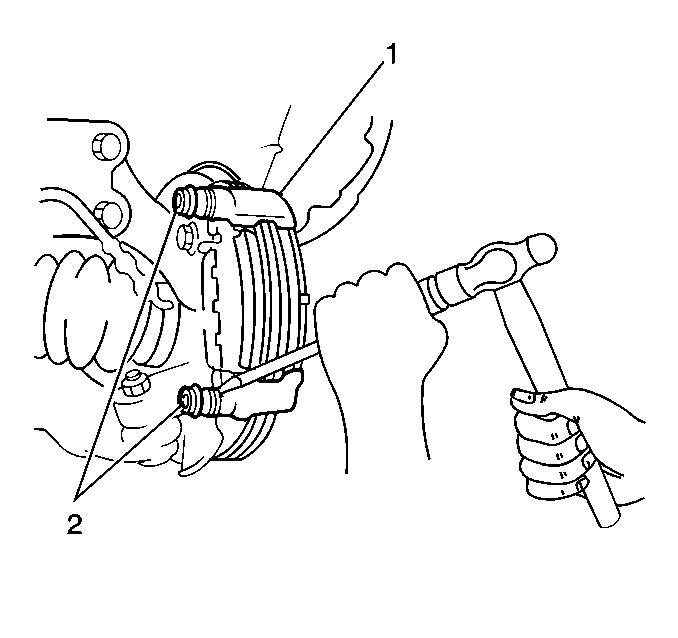
- Remove the following from the caliper bracket (1):
Notice: Do not allow the brake components to hang from the flexible brake hoses. Damage to the brake hoses could result.
| • | The 2 caliper bracket mounting bolts |
| • | The caliper bracket (1) |
| • | The 2 caliper guide pins |
| • | The 2 caliper guide pin seals (2) |
| • | The caliper bolt sleeve |
Installation Procedure
- Lubricate the 2 new guide pin seals (2) with Lubriplate® Lubricant, GM P/N 12346293, or an equivalent lubricant meeting the requirements of NLGI #2 Category LB or GC-LB.
- Use a 19 mm socket and a hammer in order to install the 2 new guide pin seals (2) to the caliper bracket (1). Verify that the metal plate portion of the guide pin seal fits snugly on the caliper bracket.
- Lubricate the 2 guide pins with Lubriplate® Lubricant, GM P/N 12346293, or an equivalent lubricant meeting the requirements of NLGI #2 Category LB or GC-LB.
- Lubricate the caliper bolt sleeve with Lubriplate® Lubricant, GM P/N 12346293, or an equivalent lubricant meeting the requirements of NLGI #2 Category LB or GC-LB.
- Insert the guide pin with the caliper bolt sleeve into the upper portion of the caliper bracket.
- Insert the guide pin without the caliper bolt sleeve into the lower portion of the caliper bracket.
- Install the caliper bracket to the vehicle. Install the 2 caliper bracket mounting bolts.
- Install the caliper to the caliper bracket.
- Apply Lubriplate® Lubricant, GM P/N 12346293, or an equivalent lubricant meeting the requirements of NLGI #2 Category LB or GC-LB, to the caliper pin bolts.
- Install the 2 caliper guide pin bolts (1).
- Install the ABS wheel speed sensor (1) and the bolt (2) to the knuckle.
- Install the tire and wheel assembly. Refer to Tire and Wheel Removal and Installation in Tires and Wheels.
- Lower the vehicle.
Notice: Use the correct fastener in the correct location. Replacement fasteners must be the correct part number for that application. Fasteners requiring replacement or fasteners requiring the use of thread locking compound or sealant are identified in the service procedure. Do not use paints, lubricants, or corrosion inhibitors on fasteners or fastener joint surfaces unless specified. These coatings affect fastener torque and joint clamping force and may damage the fastener. Use the correct tightening sequence and specifications when installing fasteners in order to avoid damage to parts and systems.
Tighten
Tighten the 2 bolts to 88 N·m (65 lb ft).
Notice: Make sure the brake hose is not twisted or kinked after installation. Damage to the hose could result.

Tighten
Tighten the 2 bolts to 34 N·m (25 lb ft).

Tighten
Tighten the bolt to 7.8 N·m (69 lb in).
