Removal Procedure
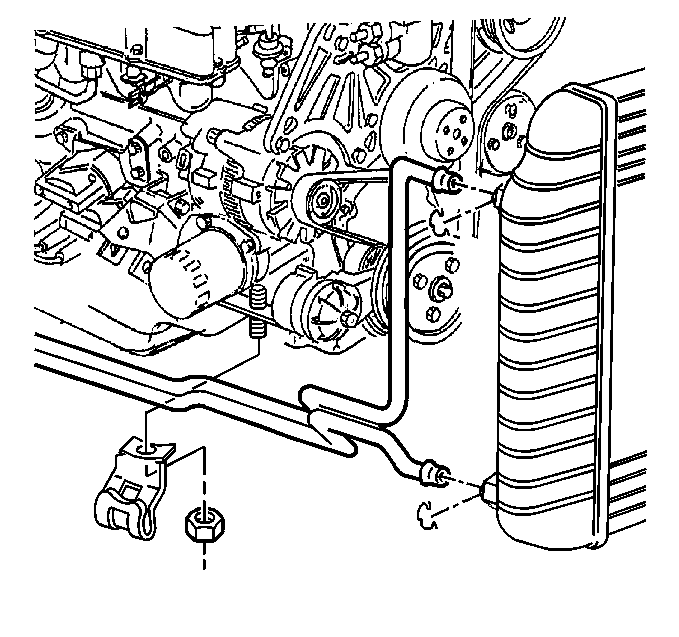
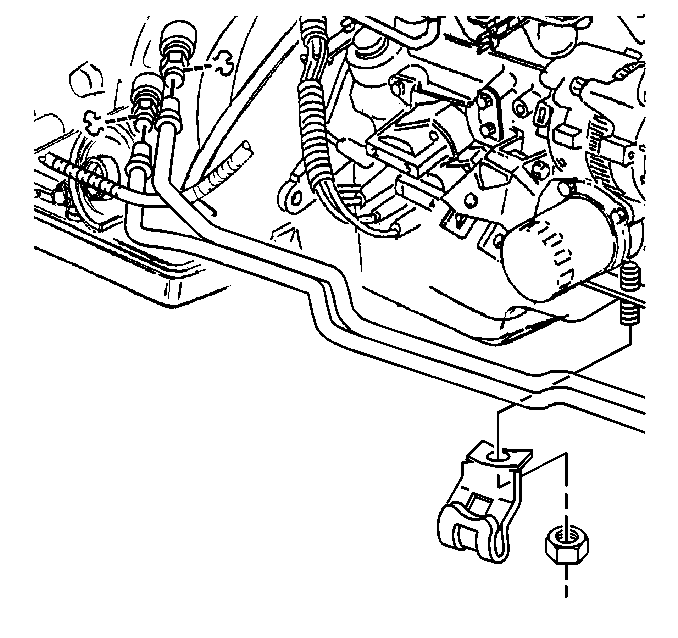
- 4.3L engine to transmission oil cooler line.

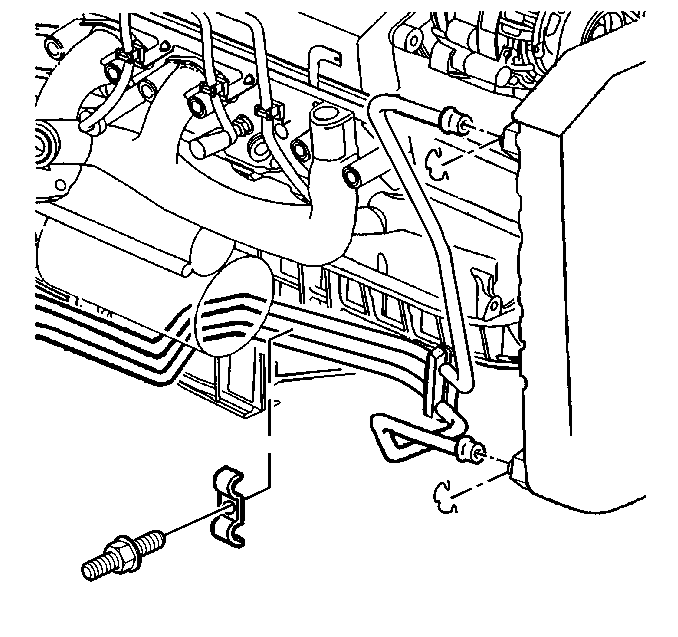
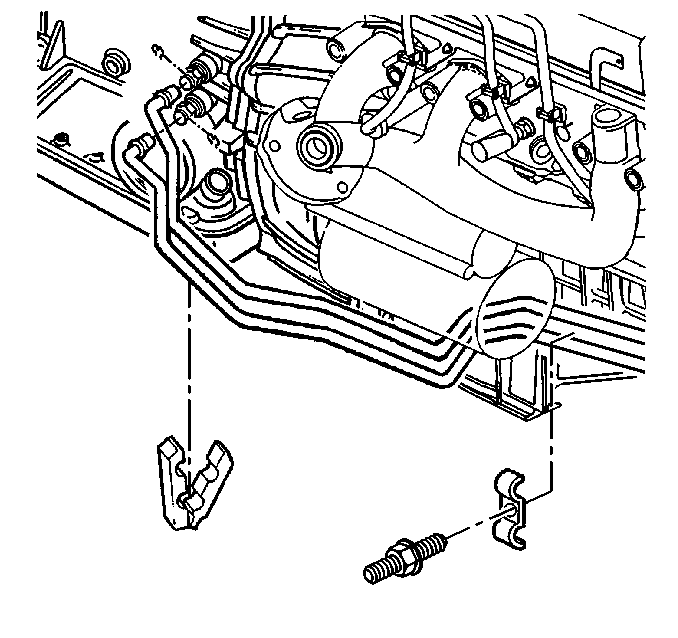
- 2.2L engine to transmission oil cooler line.

- Pull the two plastic caps back from the two cooler line fittings.
- Use a bent tip screw driver to pull the clips out and around the
fitting.
| • | Do not pull the clip stright out from the fitting during removal. |
| • | Remove the clip from the fitting by pulling an ear of the clip
out of one of the fitting holes and pulling the clip around the fitting until
the clip is free of the fitting. |
| • | Discard the removed clip. |
- 4.3L engine to transmission oil cooler line.

- 2.2L engine to transmission oil cooler line.

- Remove the nut or stud securing the oil cooler line to the engine
bracket.
- Pull the two plastic caps back from the two cooler line fittings.
- Use a bent tip screw driver to pull the clips out and around the
fitting.
| • | Do not pull the clip stright out from the fitting during removal. |
| • | Remove the clip from the fitting by pulling an ear of the clip
out of one of the fitting holes and pulling the clip around the fitting until
the clip is free of the fitting. |
| • | Discard the removed clip. |
- Remove the oil cooler lines from the vehicle.
- Plug the connectors on the transmission and raiditor with a lint
free colth.
Installation Procedure
- 4.3L engine to transmission oil cooler line.

- 2.2L engine to transmission oil cooler line.

- Position two NEW clips on and around the radiator connectors.
| • | Do not push the clip down over the connector during installation
of the clip or the clip will be damaged and the connector and cooler line
could leak. |
| • | Install the clip to the fitting by pushing an ear of the clip
into of one of the fitting holes and pulling the clip around the fitting until
the clip is installed around the fitting. |
| • | Ensure the clip is free to move after installation onto the fitting. |
| • | Ensure the three ears of the clip can be seen from inside of the
fitting. |
- Remove the plugs from the radiator.
- Secure the end of the oil cooler lines to the radiator fittings.
| • | Push the end of the oil cooler line into the fitting until a click
is ether heard or felt. |
| • | Ensure the oil cooler line is fully seated into the fitting. |
| • | Pull lightly on the oil cooler line to ensure the oil cooler line
is locked into the fitting. |
| • | Ensure the yellow band on the end of the oil cooler line is covered
by the fitting. |
- Position the plastic cap on the oil cooler line over the fitting.
| • | Ensure the plastic cap fits over the fitting with out forcing
the clip down further on the fitting. |
| • | Ensure that the plastic cap is fully seated on the fitting. |
| • | Ensure that their is no gap between the plastic cap and the fitting
horizontal flat edge. |
- 4.3L engine to transmission oil cooler line.

- 2.2L engine to transmission oil cooler line.

- Position two NEW clips on and around the two transmission connectors.
| • | Do not push the clip down over the connector during installation
of the clip or the clip will be damaged and the connector and cooler line
could leak. |
| • | Install the clip to the fitting by pushing an ear of the clip
into of one of the fitting holes and pulling the clip around the fitting until
the clip is installed around the fitting. |
| • | Ensure the clip is free to move after installation onto the fitting. |
| • | Ensure the three ears of the clip can be seen from inside of the
fitting. |
- Remove the plugs from the transmission.
- Secure the end of the oil cooler lines to the radiator fittings.
| • | Push the end of the oil cooler line into the fitting until a click
is ether heard or felt. |
| • | Ensure the oil cooler line is fully seated into the fitting. |
| • | Pull lightly on the oil cooler line to ensure the oil cooler line
is locked into the fitting. |
| • | Ensure the yellow band on the end of the oil cooler line is covered
by the fitting. |
- Position the plastic cap on the oil cooler line over the fitting.
| • | Ensure the plastic cap fits over the fitting with out forcing
the clip down further on the fitting. |
| • | Ensure that the plastic cap is fully seated on the fitting. |
| • | Ensure that their is no gap between the plastic cap and the fitting
horizontal flat edge. |
- Start the engine and check the oil the cooler lines and fittings
for leaks.


