For 1990-2009 cars only
Transfer Case Replacement With Automatic Transmission
Removal Procedure
- Raise and support the vehicle. Refer to Lifting and Jacking the Vehicle in General Information.
- Remove the transfer case shield. Refer to Shield Replacement .
- Remove the front and rear propeller shafts. Refer to Front Propeller Shaft Replacement , or to One-Piece Propeller Shaft Replacement or to Two-Piece Propeller Shaft Replacement .
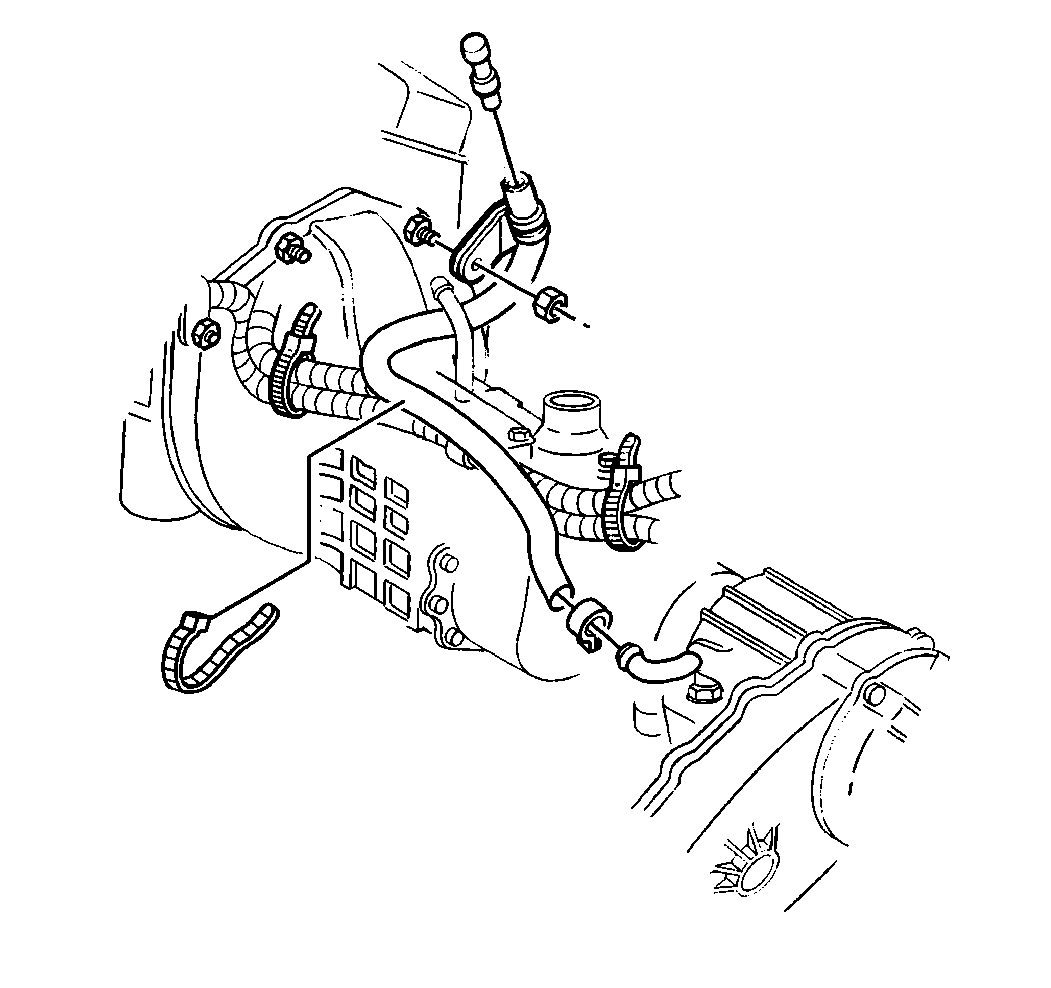
- Remove the vent hose from the transfer case vent.
- Disconnect the electrical connectors from the three speed sensors.
- Disconnect the electrical connector from the encoder/motor.
- Remove the wiring harness from the transfer case.
- Support the transfer case with a jack.
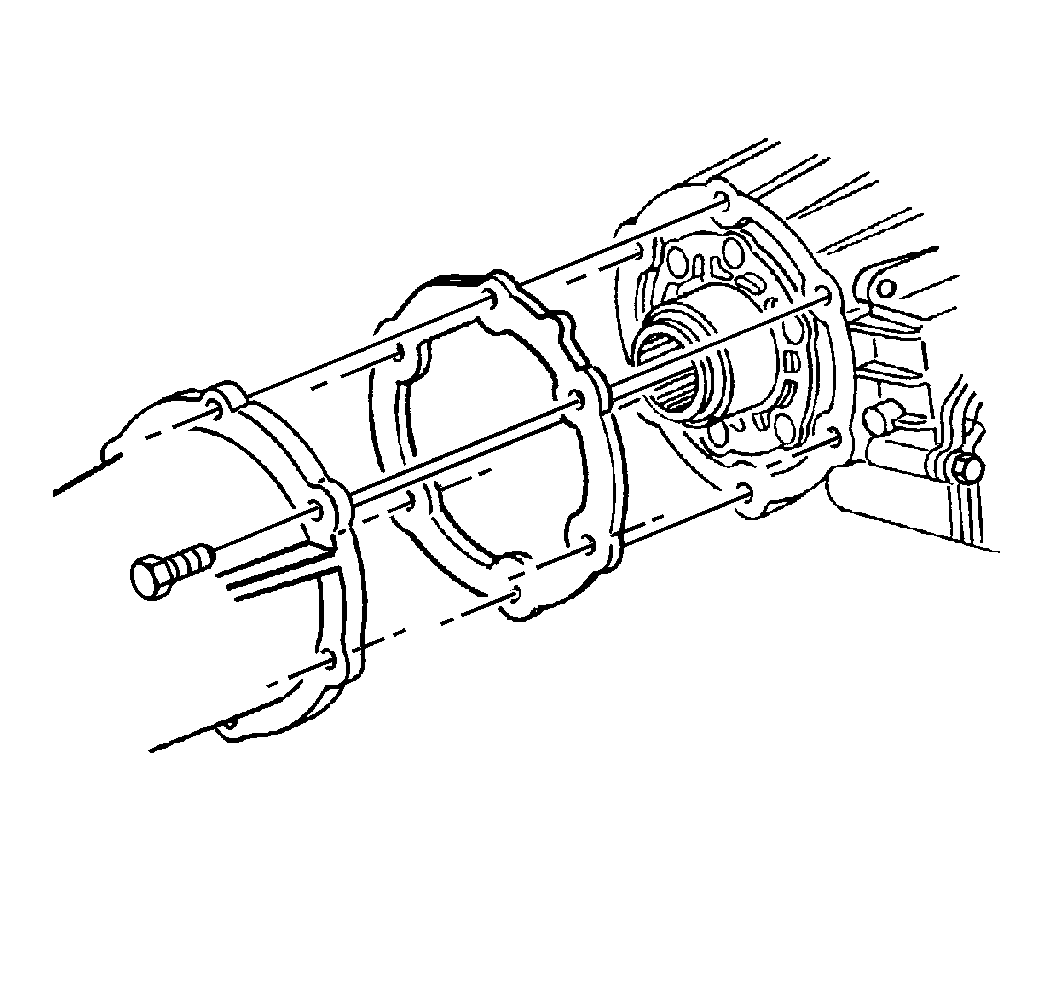
- Remove the bolts securing the transfer case to the transmission.
- Remove the transfer case from the transmission.
- Remove and discard the gasket.
Installation Procedure
- Install a new gasket to the transmission. Apply a thin coat of clear RTV in order to hold the gasket in place.
- Install the transfer case to the transmission.
- Install the bolts that secure the transfer case to the transmission.
- Remove the jack from the transfer case.
- Connect the electrical connector to the three speed sensors.
- Connect the electrical connector to the encoder/motor.
- Install the vent hose to the transfer case vent.
- Install the front and rear propeller shafts. Refer to Front Propeller Shaft Replacement , or to One-Piece Propeller Shaft Replacement or to Two-Piece Propeller Shaft Replacement .
- Install the transfer case shield. Refer toShield Replacement .
- Inspect the transfer case for normal operation.
Notice: Refer to Fastener Notice in the Preface section.

Tighten
Tighten the bolts to 45 N·m (33 lb ft).
in General Information.
| • | Check the transfer case oil level. Add oil as necessary. Refer to Approximate Fluid Capacities . |
| • | Lower the vehicle. |
Transfer Case Replacement With Manual Transmission
Removal Procedure
- Raise and support the vehicle.
- Remove the transfer case shield. Refer to Shield Replacement .
- Remove the front and rear propeller shafts. Refer to Front Propeller Shaft Replacement , or to One-Piece Propeller Shaft Replacement or to Two-Piece Propeller Shaft Replacement .
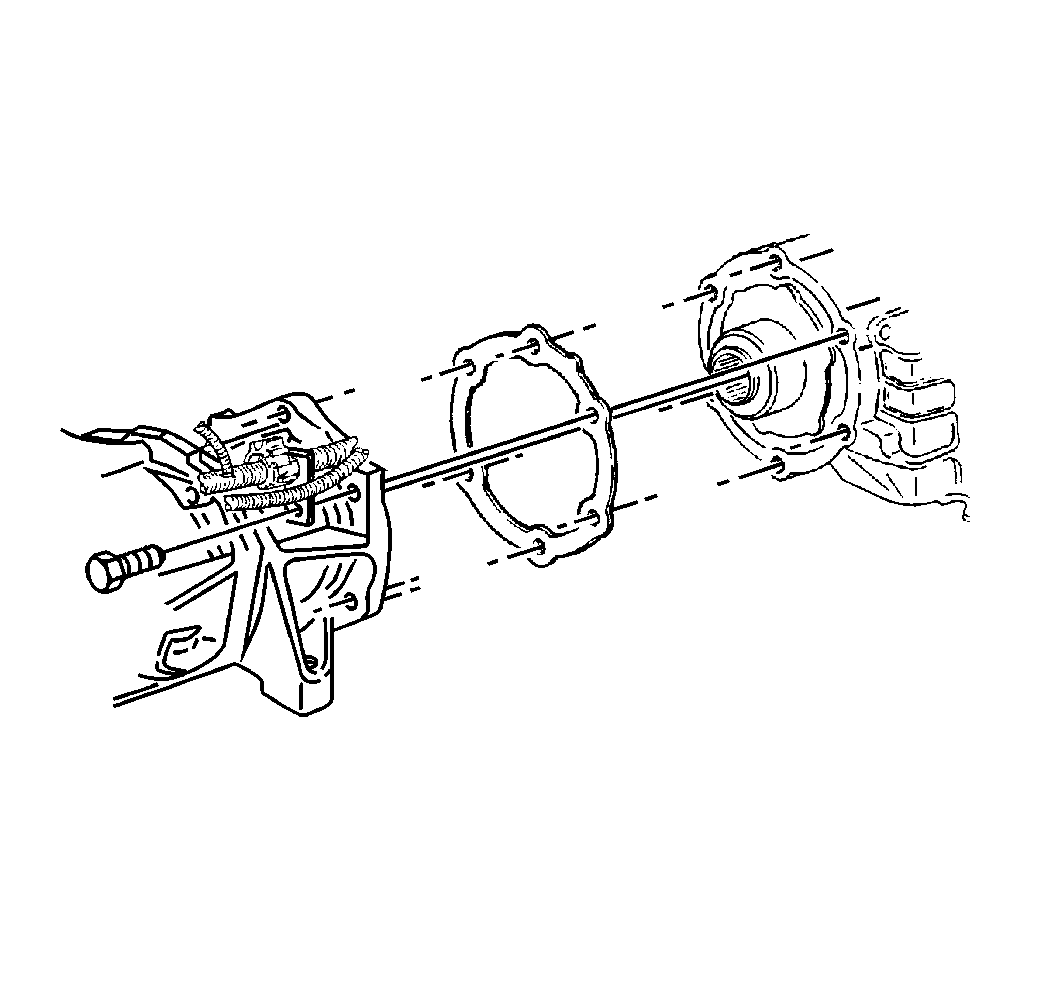
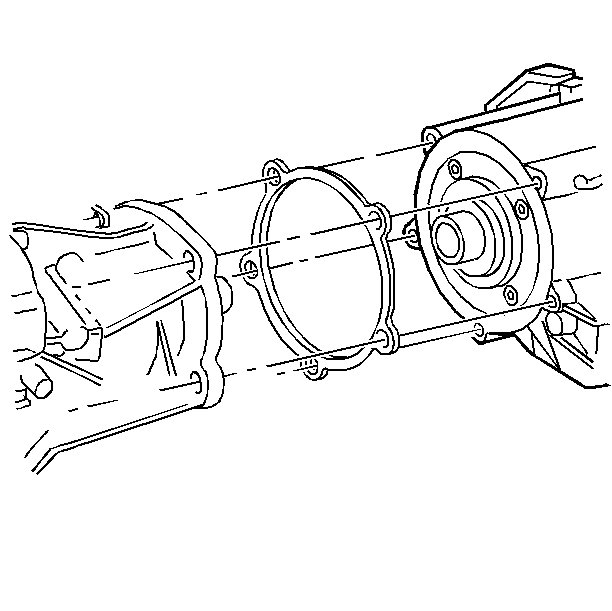
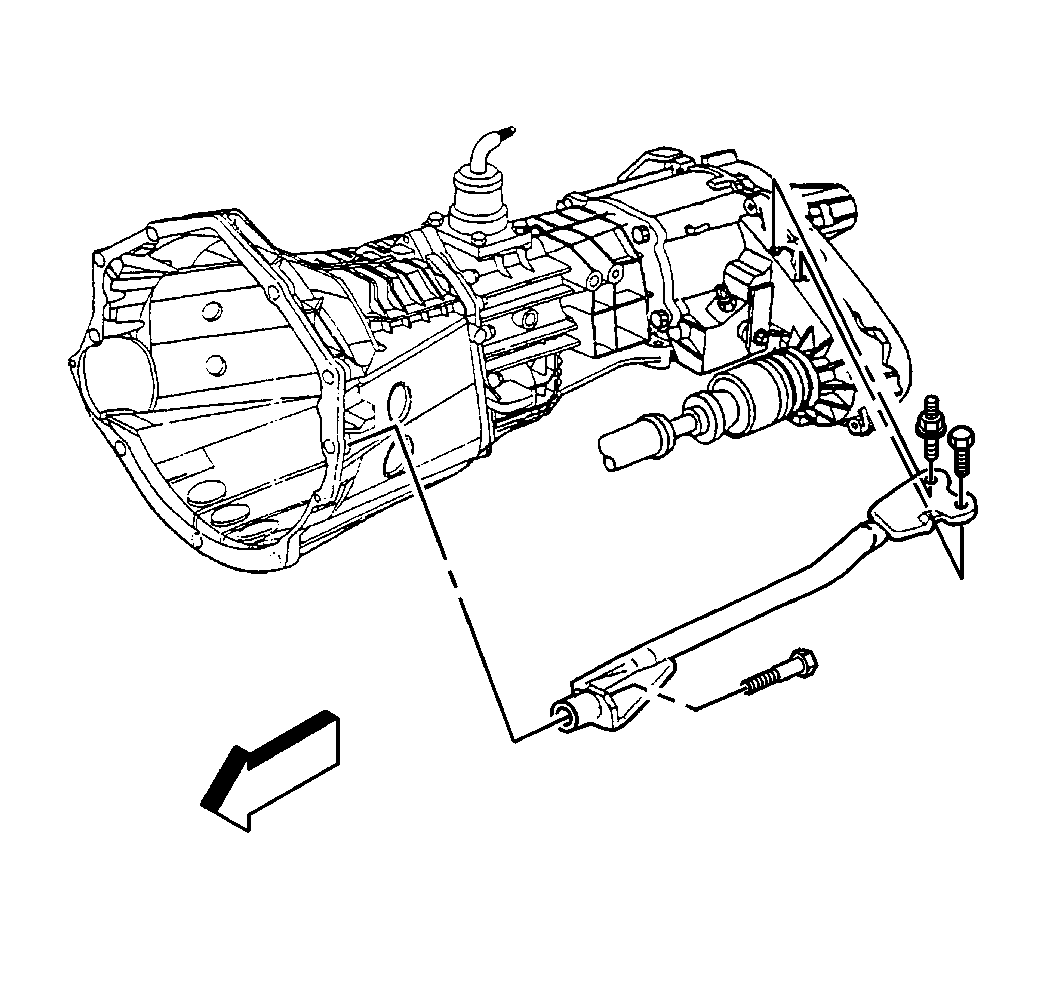
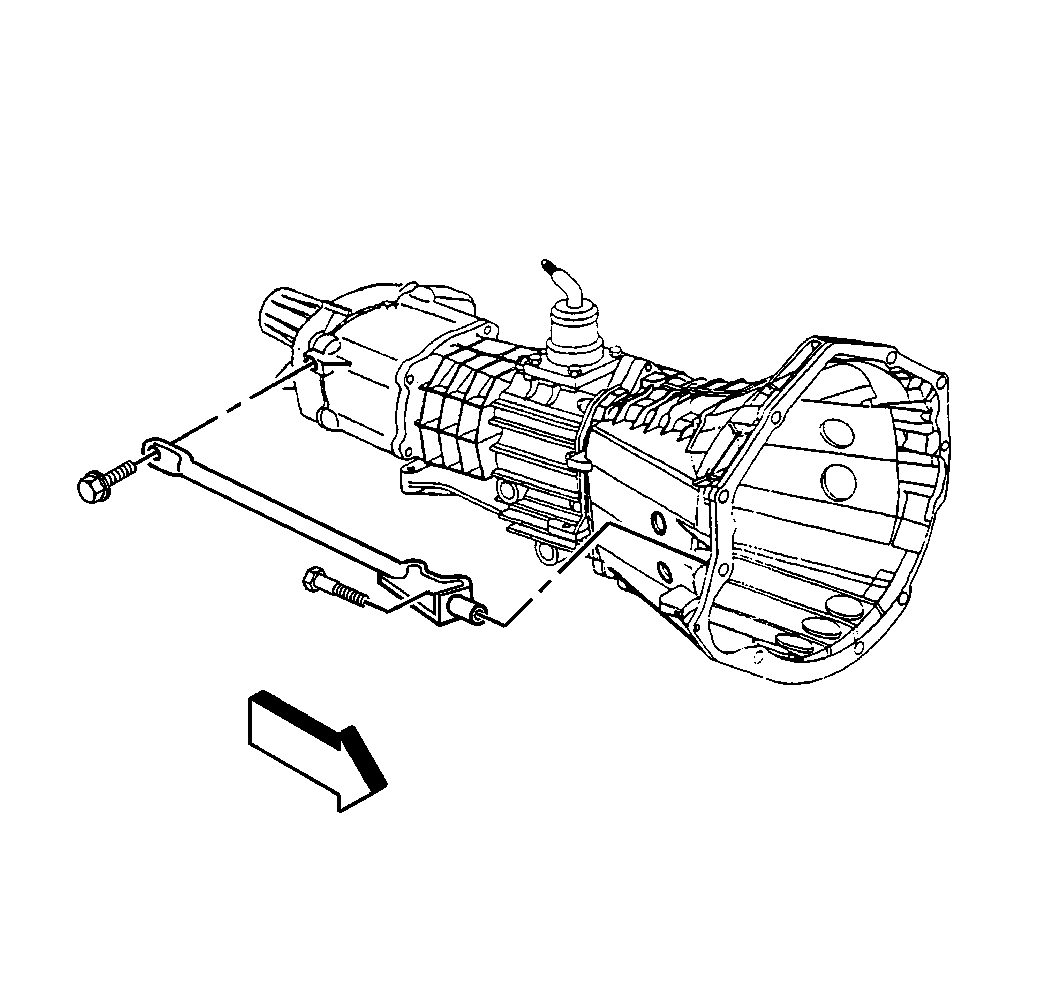
- Remove the bolts and stud securing the left side transfer case support to the transfer case and transmission.
- Remove the bolts securing the right side transfer case support to the transfer case and transmission.
- Remove the vent hose from the transfer case.
- Disconnect the electrical connector from the vehicle speed sensor .
- Disconnect the electrical connector from the Encoder/Motor.
- Remove the wiring harness from the transfer case.
- Support the transfer case with a jack.
- Remove the transfer case from the adaptor using the following procedure:
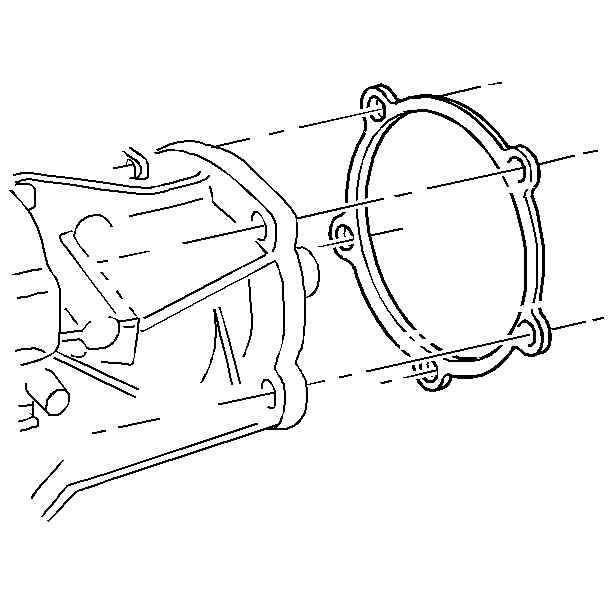
- Remove and discard the adaptor to the transfer case gasket.
| • | Remove the bolts securing the transfer case to the adapter. |
| • | Slide and twist the transfer case back from the transmission. |
| • | Lower the transfer case. |
Installation Procedure
- Install a new gasket to the transmission. Use a gasket sealer in order to hold the gasket in place.
- Install the transfer case to the transmission adapter.
- Install the bolts that secure the transfer case to the transmission adapter.
- Install the bolts and stud securing the left side transfer case support to the transfer case and transmission.
- Install the bolts securing the right side transfer case support to the transfer case and transmission.
- Remove the jack from the transfer case.
- Install the electrical connectors and the wiring harness to the transfer case with the new straps.
- Install the electrical connector to the encoder/motor.
- Install the vent hose to the transfer case.
- Install the front and rear propeller shafts. Refer to Front Propeller Shaft Replacement , or to One-Piece Propeller Shaft Replacement or to Two-Piece Propeller Shaft Replacement .
- Install the transfer case shield. Refer to Shield Replacement .
- Inspect the transfer case oil level. Add oil as necessary. Refer to Approximate Fluid Capacities .
- Lower the vehicle.
Notice: Refer to Fastener Notice in the Preface section.
Tighten
Tighten the bolts to 45 N·m (33 lb ft).
